Advertisement
Available languages
Available languages
Quick Links
Kurzanleitung
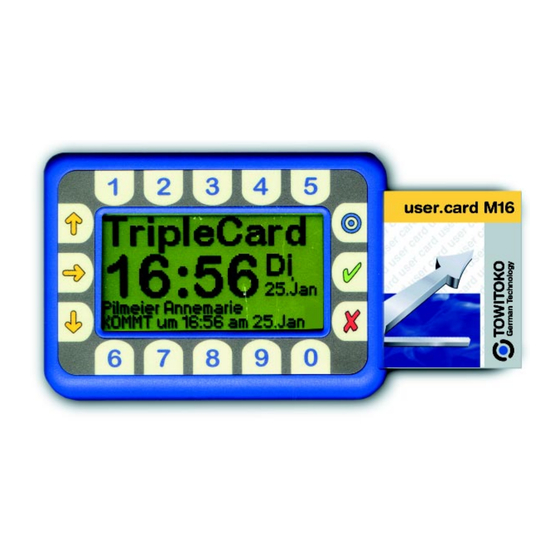
Der Einsatz des TripleCard Terminals
© 2000 Towitoko AG
TripleCard Terminal • TripleCard Terminal • TripleCard Termina
TripleCard Terminal • TripleCard Terminal • TripleCard Termina
Windows
®
3.11
®
Windows
95/98
®
Windows NT
®
Windows
2000
Advertisement

Summary of Contents for TOWITOKO CHIPDRIVE mobile
- Page 1 Kurzanleitung Der Einsatz des TripleCard Terminals Windows ® 3.11 ® Windows 95/98 ® Windows NT ® Windows 2000 © 2000 Towitoko AG TripleCard Terminal • TripleCard Terminal • TripleCard Termina TripleCard Terminal • TripleCard Terminal • TripleCard Termina...
- Page 2 So arbeitet das TripleCard Terminal... Bei der Entwicklung des TripleCard Terminals wurde besonderer Wert auf eine möglichst einfache Bedienung gelegt. So beschränkt sich die einfache Kommen- bzw. Gehen-Buchung auf das Einstecken und Wieder-Herausziehen der User Card. Das Einschalten des Geräts erfolgt automatisch beim Einstecken der Karte.
- Page 3 Starten Sie die Software TripleCard Terminal Uhr. Bereiten Sie eine ungenutzte User Card vor. Klicken Sie in den blau hinterlegten Text für Datum und Uhrzeit (oder verwenden Sie die Richtungstasten), um den Cursor auf die Uhrzeit zu stellen. TripleCard Terminal • TripleCard Terminal • TripleCard Termina...
- Page 4 Korrigieren Sie die Uhrzeit auf den Zeitpunkt, zu dem Sie die Chipkarte in das Terminal einstecken werden. Stecken Sie die User Card in das CHIPDRIVE. Schauen Sie auf eine genau gehende Uhr und stecken Sie die User Card genau zum festgelegten Zeitpunkt in das Terminal.
- Page 5 Stecken Sie die User Card in das Terminal (falls das Terminal nicht eingeschaltet ist, schaltet es sich automatisch ein). Überprüfen Sie, ob in der letzten Zeile auf dem Display [KOMMT] oder [GEHT] korrekt angezeigt wird. Entnehmen Sie die Karte. Falls die Art der Buchung ([KOMMT] oder [GEHT] ) nicht gestimmt hat, wiederholen Sie die Schritte 1 bis 2.
- Page 6 Wenn Sie mit der TripleCard Profi-Software arbeiten, können Sie beim Kommen eine 4-stellige Projektnummer eingeben. Ferner gibt es in der Profi-Version der Software den Buchungstyp "Projektwechsel", der innerhalb der Zeitspanne zwischen Kommen und Gehen gebucht werden kann. Um ein Kommen mit einer Projektnummer zu buchen, gehen Sie bitte folgendermaßen vor: Stecken Sie die User Card ein und achten Sie darauf, daß...
- Page 7 Geben Sie mit Hilfe der Nummerntasten eine 4-stellige Zahl ein (wenn Sie sich beim Eingeben der Zahl vertippt haben, können Sie die falsche Eingabe mit der Lösch-Taste löschen und die Eingabe wiederholen. Wenn Sie die Lösch-Taste 2 mal drücken, wird der gesamte Vorgang abgebrochen und es bleibt bei einer einfachen Buchung ohne Projektnummer.
- Page 8 Um eine Buchung vom Typ Projektwechsel zu stempeln, führen Sie folgende Schritte aus: Stecken Sie die User Card ein und achten Sie darauf, daß auf dem Display [GEHT] angezeigt wird (falls [KOMMT] angezeigt wird, ziehen Sie die Karte heraus und stecken Sie sie erneut ein). Führen Sie die Schritte 2 bis 4 wie beim voranstehenden Beispiels aus.
- Page 9 Stecken Sie die Transport Card in das Terminal. Warten Sie, bis die Meldung [Transfer OK!] erscheint und entnehmen Sie die Karte. Starten Sie die TripleCard Software, stecken Sie die Transport Card in das CHIPDRIVE und beantworten Sie die Frage [Möchten Sie die Daten von der Transport Card einlesen] mit [Ja].
- Page 10 Kurzanleitung Das mobile Chipkartenterminal © 2000 Towitoko AG CHIPDRIVE mobile • CHIPDRIVE mobile • CHIPDRIVE mobil...
- Page 11 Herzlichen Glückwunsch zum Erwerb des mobilen Zeiterfassungsterminals TRM500. Bitte beachten Sie die Bedienungshinweise in dieser Kurzanleitung um einen effektiven Einsatz des Gerätes zu gewährleisten. Die Bedienelemente: Grafik Display Tastatur On/Off Taste CHIPDRIVE mobile • CHIPDRIVE mobile • CHIPDRIVE mobil...
- Page 12 Das Gerät wird mit der On/Off Taste (3) oder durch Einstecken einer Chipkarte in den Kartenleser (6) eingeschaltet. Die Abschaltung erfolgt entweder manuell mit der On/Off Taste (3) oder automatisch nach einer durch die Software vorgegebenen Inaktivitätszeit. CHIPDRIVE mobile • CHIPDRIVE mobile • CHIPDRIVE mobil...
- Page 13 Zellen der Größe 'AAA - MICRO' vom gleichen Typ eingesetzt werden sollten. Zur Sicherheit sollten die Zellen spätestens einmal im Jahr erneuert werden, da austretende Chemikalien von ausgelaufenen Batterien das Gerät permanent beschädigen könnten. CHIPDRIVE mobile • CHIPDRIVE mobile • CHIPDRIVE mobil...
- Page 14 Temperaturen dunkler, und bei niedrigen Temperaturen blasser und träger wird. Das Gerät ist für den Einsatz bei Zimmertemperatur (15 - 25 °C) konzipiert und das Display ist für diesen Temperaturbereich am besten ablesbar. CHIPDRIVE mobile • CHIPDRIVE mobile • CHIPDRIVE mobil...
- Page 15 Funktionsstörungen führen - achten Sie daher darauf, die Karten sauber und trocken zu halten. Im Regelfall arbeitet der Kartenleser völlig wartungsfrei - für sehr starke Beanspruchung ist jedoch u.U. die Anschaffung eines Reinigungskartensets (im EDV-Fachhandel erhältlich) zweckmäßig. CHIPDRIVE mobile • CHIPDRIVE mobile • CHIPDRIVE mobil...
- Page 16 Das Gerät schaltet sich bei Erkennen der Karte ein und signalisiert durch einen Brummton den Programmiervorgang. Bei erfolgreichem Abschluß der Übertragung ertönt ein Signalton und das Gerät startet automatisch neu mit der neuen Software. CHIPDRIVE mobile • CHIPDRIVE mobile • CHIPDRIVE mobil...
- Page 17 Die technischen Daten... batteriebetriebener Kartenleser für Bezeichnung I²C Speicherkarten mit Display, Tastatur und integriertem Speicher Firmware über I²C Speicherkarte Programmierung Betriebsspannung 2 * 'AAA' Zelle Stromversorgung <15mA Betriebsstromaufnahme <30µA Ruhestromaufnahme 1 Jahr max. Batterienutzungsdauer CHIPDRIVE mobile • CHIPDRIVE mobile • CHIPDRIVE mobil...
- Page 18 +15°C ... +25°C Betriebstemperaturbereich +5°C ... +50°C Lagertemperaturbereich < 55% relative Luftfeuchte 128*64 Pixel Displayauflösung EEprom max. 4*64kBit Speicher Landekontakte Kontaktiereinheit goldbeschichtet 78 * 108 * 21 mm Abmessungen 145 gr Gewicht ohne Batterien CHIPDRIVE mobile • CHIPDRIVE mobile • CHIPDRIVE mobil...
- Page 19 Short description This rugged desktop terminal has become famous for its remarkable design. The ergonomically cardinsertion angle of 45° and the heavy and stable steelbase (the total mass is more than 600 grams) significantly improve the handling convenience. A three color light displays status information.
- Page 20 CHIPDRIVE extern, Shipping contents connection cable as shown, installation guide sheet 20 pcs. per cardboard box, Shipping units COM Port 50 boxes per palette (1000) © 2000 Towitoko AG Haidgraben 2 D-85521 Ottobrunn tel: +49-89-66683-0 fax: +49-89-66683-222 http://www.towitoko.de...
- Page 21 time recording V2.10 The CHIPDRIVE time recording set Time recording device, software for evaluation of the data and chip cards for data transfer – the three-part system is the ideal solution for time recording in your company. No physical installation –...
- Page 22 Saving the data to the Reading the data into the Checking, processing and Printing reports device using the User Card Transport Card PC from the Transport Card evaluating the data © 2000 Towitoko AG Haidgraben 2 D-85521 Ottobrunn phone: +49-89-66683-0 fax: +49-89-66683-222 http://www.towitoko.de...
- Page 23 PC time clock ® Windows 95/98 © 2001 Towitoko AG ® Windows NT ® Windows 2000 • Brief description • Brief description • • Brief description • Brief description •...
- Page 24 How to install the CHIPDRIVE PC time clock... Before installing: There are two ways of ensuring that the CHIPDRIVE time recording software and the PC time clock function correctly together: You install both programs in the folder suggested by the Setup program. This ensures that the programs work together automatically.
- Page 25 How to install the CHIPDRIVE PC time clock in a network... The PC time clock software allows all employees with a PC which has a CHIPDRIVE installed to clock in and out at their own workstation. To do this, you must have a license for each installation, each installation must be on the same network drive.
- Page 26 Example 2 You have installed the CHIPDRIVE time recording software in the [c:\chipdrv] folder on Computer 1 as described in the first example, but you do not wish to share the entire C drive for the network. It should also not be possible to access the time recording software from the network.
- Page 27 Assign the share of Computer 1 a drive letter on Computer 2 (Map network drive), for example, 'M'. On Computer 2, install the PC time clock in the root folder [M:\] and remember that during installation the PC time clock must be closed on all computers. To install the PC time clock on additional computers, carry out steps 4 and 5 for all affected computers.
- Page 28 To carry out clockings using the PC time clock, follow the instructions on screen [Please insert card] and insert your User Card into the CHIPDRIVE. Wait for a moment until your name appears and then check the status of your hours and check to see whether the PC time clock has suggested the correct type of clocking in the lower part of the display.
- Page 29 If necessary, change the clocking type either by pressing the keys (divided by) for project change, (minus) for out or (plus) for in, or alternatively by pressing the appropriate keys [I, O or P] or by clicking the appropriate buttons. You can also enter a project number for the clocking types "In"...
- Page 30 Complete the clocking either by clicking [OK] or by pressing one of the two Return keys on the key- board. Wait until the clocking has been confirmed and then remove the card from the CHIPDRIVE. • Brief description • Brief description •...
- Page 31 PC-Stempeluhr ® Windows 95/98 © 2001 Towitoko AG ® Windows NT ® Windows 2000 • Kurzanleitung • Kurzanleitung • • Kurzanleitung • Kurzanleitung •...
- Page 32 So installieren Sie die PC-Stempeluhr... Vor der Installation: Um die Zusammenarbeit der CHIPDRIVE Profi-Zeiterfassungs- Software und der PC-Stempeluhr zu gewährleisten, gibt es 2 Möglichkeiten: Sie installieren beide Programme in das jeweils vom Setup-Programm vorgeschlagene Verzeichnis. Damit arbeiten die Programme automatisch zusammen. Sie installieren die Programme in Verzeichnisse Ihrer Wahl.
- Page 33 So installieren Sie die PC-Stempeluhr im Netzwerk... Mit der Software PC-Stempeluhr kann jeder Mitarbeiter, dessen PC mit einem CHIPDRIVE ausgerüstet ist, an seinem eigenen Arbeitsplatz "stempeln". Voraussetzung ist, dass Sie für jede Installation eine eigene Lizenz erwerben und dass jede Installa- tion auf dem gleichen Netzlaufwerk vorgenommen wird.
- Page 34 Installieren Sie auf Computer 2 die PC-Stempeluhr in das Verzeichnis [M:\chipdrv]. Beispiel 2 Sie haben die CHIPDRIVE Zeiterfassungs-Software wie im ersten Beispiel in das Verzeichnis [C:\chipdrv] auf Computer 1 installiert, möchten aber nicht Ihr ganzes Laufwerk C für das Netzwerk freigeben. Ferner sollte es nicht möglich sein, vom Netzwerk aus auf die Zeiterfassungs-Software zuzugreifen.
- Page 35 Geben Sie auf Computer 1 nur das Verzeichnis [C:\pc_uhr] für das Netzwerk frei. Erteilen Sie der Freigabe von Computer 1 auf Com- puter 2 einen Laufwerksbuchstaben (Netzlaufwerk verbinden), z. B. 'M'. Installieren Sie auf Computer 2 die PC-Stempeluhr auf das Stammverzeichnis (Root) [M:\] und beachten Sie dabei, dass zum Zeitpunkt der Installation auf keinem beteiligten Computer die PC-Stempeluhr laufen darf.
- Page 36 Tastatur zu betreiben. Um einem versehentlichen Beenden des Programms vorzubeugen, besitzt die PC-Stempeluhr keinen entsprechenden Button. Zum Beenden des Programms benutzen Sie bitte den Close-Button in der Windows-Leiste oder das Systemmenü. Um mit der PC-Stempeluhr Buchungen auszuführen, folgen Sie der Aufforderung [Bitte Karte einstecken] und stecken Sie Ihre User Card in das CHIPDRIVE.
- Page 37 Ändern Sie falls nötig die Buchungsart, indem Sie entweder auf der Tastatur die Tasten (geteilt) für Projekt, (minus) für Gehen, (plus) für Kommen oder alternativ die Anfangsbuchstaben [K, G bzw. drücken oder auf die Buttons klicken. Bei den Buchungsarten Kommen und Projektwechsel können Sie zusätzlich eine Projektnummer eingeben.
- Page 38 Lösen Sie die Buchung aus, indem Sie entweder auf [OK] klicken, oder eine der beiden EINGABE- Tasten auf der Tastatur drücken. Warten Sie die Bestätigung der Buchung ab und entnehmen Sie dann die Karte aus dem CHIPDRIVE. • Kurzanleitung • Kurzanleitung •...
- Page 39 ® Windows 95/98 ® Windows NT ® Windows 2000 © 2001 Towitoko AG • Brief description • Brief description • • Brief description • Brief description •...
- Page 40 How to install the CHIPDRIVE PC time recording software... Put the CD into the machine and wait until the selection menu appears. Then select [START SETUP] and follow the instruc- tions in the Setup program. During the setup you will have the opportunity to either accept the suggested target folder, [C:\chipdrv] or to specify a folder of your choice.
- Page 41 How to create users... Choose [File / New Person]. Type in the last name and first name. You can fill in the fields under the Last Name and First Name, but, unlike the names, these fields are not mandatory. • Brief description • Brief description •...
- Page 42 Write the name of the user on a User Card and insert the card in the CHIPDRIVE. Click [Create User Card] and remove the card when prompted to do so by the CHIPDRIVE time recording software. How to transfer data from the time recording device to the PC...
- Page 43 Choose [Format] and only remove the card when the program prompts you to do so. You use the formatted Transport Card to fetch the data from the time recording device. Refer to the relevant instructions for details on using the time recording device. Insert the Transport Card in the CHIPDRIVE and respond to the question [Do you want to read the...
- Page 44 How to transfer data from the PC time clock to the CHIPDRIVE time recording software... If you have installed the time recording software and the PC time clock program in the folders suggested in the Setup program, the two programs will work together automatically. If you chose different folders during installation, you must tell the CHIPDRIVE time recording software where to find the PC time clock.
- Page 45 How to edit clockings... If possible, clockings should be checked for completeness every time new data is read in. The menu command [File / Incomplete Records] provides you with a tool which takes you to precisely those records where you need to complete the data manually. •...
- Page 46 To complete or correct the data for an incomplete day (shown in red in the monthly calendar), proceed as follows First take a look in the [Meaning] list. Here you will see notes such as [In last clocking], which will make it easier for you to decide what manual correction is necessary.
- Page 47 How to print reports and finalize your data... To ensure that the CHIPDRIVE time recording software continues to run at high speed and to remove the "provisional" status from the reports, you should finalize the data as soon as possible once it is complete. You do this in conjunction with the monthly evaluation at the end of the month: Choose [Reports / Several...
- Page 48 How to back up your data... The Time Recording software provides a simple and efficient way of backing up data under [File / Create Backup Copy]. Use this facility regularly and if possible, copy the entire data set onto a different computer in the network. The online Help system provides details on accessing a backup copy.
Need help?
Do you have a question about the CHIPDRIVE mobile and is the answer not in the manual?
Questions and answers