Advertisement
Available languages
Available languages
Quick Links
Advertisement

Summary of Contents for BabySafe Beagle
- Page 1 INSTRUKCJA • MANUAL...
- Page 2 Przyjaciel dziecka i rodziny INSTRUKCJA Grupa wiekowa 0–6 lat (dla dzieci 0–25 kg)
- Page 3 Uwaga • Jest to uniwersalny fotelik dziecięcy. Został certyfikowany zgodnie z Rozporządzeniem nr 44.04 z szeregiem poprawek do ogólnego użytku w pojazdach, lecz pasuje do większości, ale nie wszystkich, foteli samochodowych. • Prawidłowe dopasowanie jest możliwe, jeśli producent pojazdu zadeklarował w instrukcji pojazdu, że w pojeździe można zamontować...
- Page 4 OSTRZEŻENIE: Należy uważnie przeczytać niniejszą instrukcję. OSTRZEŻENIE: Prawidłowe zamocowanie pasa bezpieczeństwa, długi czerwony znak między skorupą i bazą fotelika ma podstawowe znaczenie dla bezpieczeństwa Twojego dziecka. Patrz rysunek 4-D i 4-G lub naklejka z boku produktu. OSTRZEŻENIE: Dla późniejszego używania fotelika ważne jest staranne przechowywanie niniejszej instrukcji.
- Page 5 • Fotelik musi być przymocowany pasem bezpieczeństwa, nawet jeśli nie jest używany. Niezamocowany fotelik może zranić innych pasażerów podczas gwałtownego hamowania. • Upewnić się, że fotelik nie został uszkodzony przez ściśnięcie między lub pod ciężkim bagażem, regulację fotela lub trzaśnięcie drzwiami samochodu, itp. •...
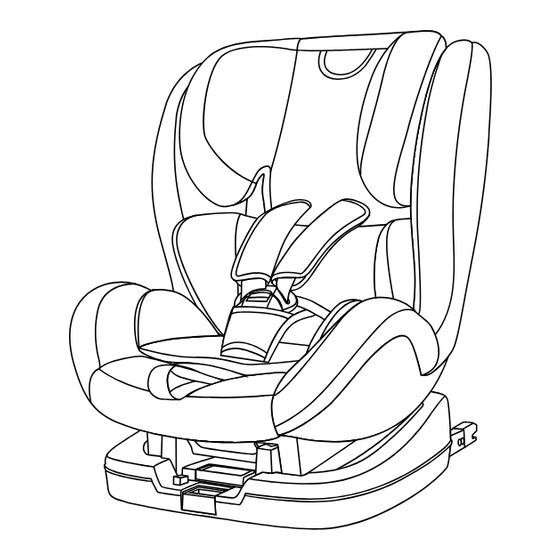
- Page 6 Tapicerka Prowadnica pasa dla grupy 0+ Skorupa Regulacja wysokości pasów barkowych Baza Przycisk odłączający bazę Uchwyt odłączający bazę Przycisk regulacji zagłówka Zagłówek Pasy barkowe Klamra Pas krokowy Przycisk regulacji nachylenia Pasek regulacji Łącznik systemu ISOFIX...
- Page 7 Przetestowany i atestowany zgodnie z ECE* R 44/04 Fotelik dziecięcy Grupa Waga ciała Beagle 0+1+2 Do 25 kg *ECE = Europejska norma dla sprzętu ochronnego Ten fotelik dziecięcy został zaprojektowany, przetestowany i atestowany zgodnie z wymaganiami europejskiej normy dla wyposażenia zabezpieczającego dzieci (ECE R 44/04).
- Page 8 Z 3-punktowym pasem bezpieczeństwa Fotelik dziecięcy może być używany następująco: w kierunku jazdy przeciwnie do kierunku jazdy z 2-punktowym pasem bezpieczeństwa nie 1. z 3-punktowym pasem bezpieczeństwa tak 2. na fotelu pasażera tak 3. na tylnym fotelu zewnętrznym na tylnym fotelu środkowym tak 4.
- Page 9 Zapięcie dziecka przy użyciu wkładki dla niemowlęcia Dla ochrony niemowlęcia • Należy zawsze zapinać dziecko przy użyciu uprzęży. • Nie wolno pozostawiać niemowlęcia w foteliku bez opieki, gdy jest na pewnej wysokości (np. na stole, przewijaku, itp.) • Nie wolno dopuścić, żeby koniec pasa został schwytany przez ruchome części (np.
- Page 10 Jak ustawić pasy, zagłówek i pozycje fotelika • WAŻNE! Prawidłowa wysokość pasa naramiennego jest wtedy, gdy pas chowa się do skorupy nieco powyżej ramion dziecka. Upewnić się, że pasy naramienne leżą prawidłowo na ramionach dziecka. Regulacja pasów Poluzować pasy uprzęży, naciskając przycisk zwalniania i wyciągnąć na wymaganą...
- Page 11 Zapięcie dziecka przy użyciu uprzęży Poluzować pasy uprzęży, naciskając przycisk zwalniania i wyciągnąć na wymaganą długość. Uwaga! Nie wyciągać nakładek naramiennych. Rozpiąć klamrę uprzęży i rozłożyć pasy. Ułożyć niemowlę w foteliku. Prawidłowa wysokość pasa naramiennego jest wtedy, gdy pas chowa się do skorupy nieco powyżej ramion dziecka.
- Page 12 Naciąganie uprzęży UWAGA! Pociągnąć koniec pasa do siebie, nie w górę ani nie w dół. Prosimy zwrócić uwagę na koniec pasa. Podczas jazdy (zwłaszcza na zewnątrz samochodu) koniec pasa powinien być zawsze przymocowany do pokrowca. Lista kontrolna dla upewnienia się, że niemowlę jest zapięte prawidłowo UWAGA! Dla bezpieczeństwa niemowlęcia, prosimy sprawdzić...
- Page 13 • Wszystkie osoby w pojeździe mają zapięte swoje pasy bezpieczeństwa. • Fotelik dziecięcy w pojeździe jest zawsze przymocowany, nawet jeśli dziecko nie jest przewożone. Aby zabezpieczyć swój pojazd Niektóre pokrycia foteli samochodowych są bardzo wrażliwe (np. welur, skóra, itp.) i mogą być zniszczone przez używanie fotelika dziecięcego. Można temu zapobiec, podkładając kocyk lub ręcznik pod fotelik dziecięcy.
- Page 14 Instalacja fotelików Grupy 0+/1 dla dzieci o wadze 0–18kg za pomocą systemu ISOFIT i górnego mocowania WAŻNE! Prosimy najpierw sprawdzić czy są 2 punkty kotwiczenia ISOFIT na granicy oparcia fotela i siedziska oraz gotowy do użytku punkt zaczepienia górnego pasa mocowania za fotelem samochodowym.
- Page 15 • Pociągnąć przycisk zwalniania i równocześnie dopchnąć mocno fotelik dziecięcy do oparcia. Potrząsnąć fotelikiem dziecięcym, żeby upewnić się, że jest mocno zamontowany i ponownie sprawdzić czy oba przyciski bezpieczeństwa są całkowicie zielone. • Wyciągnąć górny pas mocujący i nacisnąć przycisk zwalniania górnego pasa, żeby wyciągnąć...
- Page 16 UWAGA! Jeżeli górny pas mocujący jest naciągnięty prawidłowo, po drugiej stronie przycisku zwalniania pasa pojawi się zielony znak - prosimy to sprawdzić. Instalacja fotelików Grupy I dla dzieci o wadze 9–18kg za pomocą systemu ISOFIT i górnego mocowania • Pociągnąć przycisk zwalniania i równocześnie pociągnąć szary pas, żeby wyciągnąć...
- Page 17 • Wyciągnąć górny pas mocujący i nacisnąć przycisk zwalniania górnego pasa, żeby wyciągnąć go na długość wystarczającą do zaczepienia w gotowym do użytku punkcie kotwiczenia z tyłu. • Zaczepić hak górnego pasa mocującego w punkcie kotwiczenia. Dostępne są 3 punkty kotwiczenia - prosimy wybrać jeden według własnego uznania. •...
- Page 18 • Umieścić dziecko w pozycji siedzącej w foteliku. Wyciągnąć pas bezpieczeństwa i poprowadzić go przed dzieckiem do zatrzasku pasa w fotelu samochodowym. UWAGA! Nie skręcać pasa. • Włożyć zapięcie pasa do zatrzasku w fotelu, aż będzie słychać kliknięcie. • Upewnić się, że część biodrowa pasa jest możliwie jak najmniej naciągnięta na biodrach dziecka, w prowadnicach pasa po obu dolnych stronach fotelika.
- Page 19 Zdejmowanie 5–punktowej uprzęży i pokrowca • Poluzować możliwie jak najbardziej 5-punktową uprząż fotelika dziecięcego. Otworzyć kieszeń z tyłu fotelika dziecięcego. • Oddzielić pasy naramienne od części łączącej. • Wyciągnąć oś pasów naramiennych na zewnątrz, aż do pasa uprzęży i wyciągnąć pas uprzęży z gniazda uprzęży.
- Page 20 • Usunąć 5-punktową uprząż, a potem pokrowiec zagłówka i skorupy. Montaż 5–punktowej uprzęży i pokrowca • Po upraniu, założyć pokrowiec na skorupę. • Poluzować dolną część pokrowca, a następnie wyciągnąć klamrę i pasy naramienne z kieszeni fotelika. • Przełożyć koniec pasa naramiennego przez gniazdo uprzęży, włożyć do osi pasów naramiennych i przymocować...
- Page 21 • Przełożyć również koniec pasa uprzęży przez gniazdo pasa uprzęży i skorupę, przymocować do jarzma pasa i upewnić się, że pas fotelika nie może być poskręcany. • Zapiąć klamrę, a następnie zamknąć pokrowiec na całej długości. Sprawdzić czy wszystko działa! Czyszczenie Prosimy upewnić...
- Page 22 Lista kontrolna Ze względów bezpieczeństwa przed jazdą z fotelikiem należy przeczytać poniższą listę kontrolną. Sprawdzić czy system pasów uprzęży leży prawidłowo i ciasno wokół dziecka, a pasy naramienne znajdują się na prawidłowej wysokości. Regularnie sprawdzać, czy pas w foteliku dziecięcym nie jest uszkodzony. Jeżeli jest uszkodzony, w żadnym wypadku nie wolno używać...
- Page 23 The friend of your child and family USER MANUAL AGE GROUP 0–6 years (weight 0–25 kg)
- Page 24 Notice • This is a Universal child restraint. It is approved to Regulation No. 44,04 series of amendments, for general use in vehicles and it will fit most, but not all, car seats. • A current fit is likely if the vehicle manufacturer has declared in the vehicle handbook that the vehicle is capable of accepting a Universal child restraint for this age group.
- Page 25 WARNlNG: Read this instruction manual carefully. WARNING: The correct fitting of the seat belt, along the red marking between the shell and the base of the seat, is of vital importance for the safety of your child. See figure 4-D and 4-G or the sticker on the side of the product. WARNING: For the future use of the seat, it is important that you keep the instruction manual carefully.
- Page 26 • No alterations may be made to the product as this could affect part or the overall safety of the seat. • In hot weather the plastic and metal parts of the product will be hot. You should cover the seat when the car parked under the sun. In order to prevent damage to the cover, do not remove the product’s logo.
- Page 28 Tested and certified according to ECE* R 44/04 Child Safety Seat Group Body Weight Beagle 0+1+2 Up to 25 kg * ECE = European Standard for Safety Equipment The child safety seat has been designed, tested and certified according to the requirements ofthe European Standard for Child Safety Equipment (ECE R 44/04).
- Page 29 With the vehicle’s 3-point seatbelt You can use your child car seat as follows: in the direction of travel against the direction of travel with 2-point belt no 1. with 3-point belt yes 2. on front passenger seat yes 3. on outer rear seat on centre rear seat yes 4.
- Page 30 Securing your baby using the baby insert For the protection of your baby • Always secure your baby in the car seat using the harness. • Never leave your baby unattended in the car seat when placing it on elevated surfaces (e.g.
- Page 31 How to adjust the belts, headrest and seat positions • IMPORTANT! The correct belt height of the shoulder belts is attained when the belt disappears into the shell slightly above the shoulder of the child. Make sure that the shoulder belts fit properly over the shoulders of the child. Adjusting the belts Loosen the harness straps by pressing the release button and pulling the harness straps as for as you can.
- Page 32 Securing your baby using the harness Loosen the harness straps by pressing the release button and pulling the harness straps as for as you can. Note! Do not pull the Shoulder pads. Open the harness buckle, the fix the harness straps into the belt guide hand. Put the baby into the car seat.
- Page 33 Tightening the harness CAUTION! Put the strap end straight towards you, not upwards or downwards. Please pay attention to the strap end. Whilst travelling (especially outside the car) it should always be attached to the cover. Checklist to ensure that your baby is buckle up correctly IMPORTANT! For the safety of your baby, please check that: •...
- Page 34 Installation of Group 0+/1 for the children whose weight between 0–18kg with ISOFIT and Top tether IMPORTANT! First please check if there are 2 ISOFIT anchorings in the perpendicular intersection of the vehicle seat back and seat cushion, and the user-ready top tether anchoring behind the vehicle seat.
- Page 35 • Pull the Release button and meanwhile push the child seat towards the backrest firmly. Shake the child seat to make sure it is safely attached and re-check the green safety button to make sure that both of them are completely green. •...
- Page 36 CAUTION! If the Top tether is tightened favorably and correctly, a green mark will turn up on the other end of the Strap release button, please do check it. Installation in the vehicle of Group I for the children whose weight between 9–18 kg with ISOFIT and Top tether •...
- Page 37 • Pull out the Top tether and press the Tether strap release button to extend the strap until it is long enough to hook the User-ready tether anchorage behind. • Hook the Tether strap hook onto the User-ready anchorages. Check there maybe are 3 anchorages for the hook, please find one in your favor.
- Page 38 • Having your child sit down in the child seat. Pull out the vehicle seat belt and guide it in front of your child to the vehicle seat buckle. CAUTION! Do not twist the belt. • Engage the buckle tongue in the vehicle seat buckle „CLICK”. •...
- Page 39 Removing the 5 point harness system and cover • Loosen the 5-point harness of the child seat as much as possible. Open the storage box on the back side of the child seat. • Unlock the shoulder belts from the connecting piece. •...
- Page 40 • Remove 5-point harness system then remove the headrest cover and the shell cover. Refitting the 5 point harness system and cover • After washing, place the cover on the shell. • Loosen the lower part of the cover and then take out the buckle and shoulder belt from the storage compartments.
- Page 41 • Also put the end of the harness strap through the harness strap slot and shell, fix into the strap yoke, make sure the seat strap can not be twisted. • Close the buckle, then fasten the cover all around. Check that it works! Cleaning Please be sure to use only original replacement seat covers, as the seat cover is important to the proper functioning of the system.
- Page 42 Checklist For safety’s sake read through this checklist before you set off. Check that the harness belt system fits properly and tightly around your child and that the shoulder belts are at the correct height. Check regularly that the belt in the baby car seat is not damaged. If it is damaged do not use your product in any circumstances and contact your supplier or importer (see address list in the service card).
- Page 43 LOGIS S.A. ul. Mszczonowska 96-200 Rawa Mazowiecka POLAND Tel.: +48 46 814 73 13 Fax: +48 46 814 73 00 E-mail: biuro@babysafe.eu www.babysafe.eu...
Need help?
Do you have a question about the Beagle and is the answer not in the manual?
Questions and answers