Advertisement
Quick Links
Advertisement

Summary of Contents for JiGMO JVR-32
- Page 1 JVR-32 Voice Recorder JVR-32 VOICE RECORDER User Manual customer@jigmoworld.com...
- Page 2 JVR-32 Voice Recorder nk you for purchasing this product. This is your Quick Start Guide, which tells you about the basic operations of the recorder. Please read it carefully before using this product. 1.Precautions Charging Please do not use the recorder or leave it in a location accessible to children during the charging process.
- Page 3 JVR-32 Voice Recorder We recommend backing up your files regularly to prevent loss of data due to external errors or operation failure. Transfer of Data Do not disconnect the recorder from your computer during the data transfer process to prevent data loss.
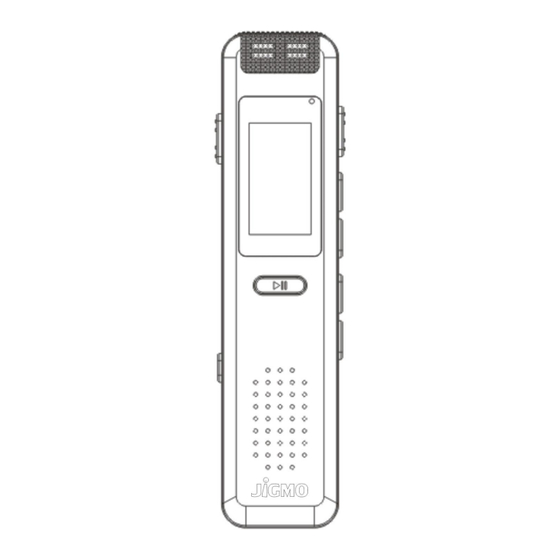
- Page 4 JVR-32 Voice Recorder 3.Rewind/Previous file button 4. Fast forward/Next file button 5.Volume up button 6.Volume down button 7.Pilot light 8.Screen 9.Pause/Play button 10.Speaker 11.USB port 12.Power switch 13.Expansion CARDS 14.Menu button 3.Charging The power switch on the recorder must be ON.
- Page 5 JVR-32 Voice Recorder to the USB port of a computer which is ON. You may also use a phone charger. When the recorder is charging, the screen will show the battery charge indicator at the top right. 4.Turning Power On Turn on the power switch and turn on the recorder.
- Page 6 JVR-32 Voice Recorder menu under “Auto Switch Off”. 6. Record/SAVE Turn recording switch to enter recording mode. Place the recorder so that the built-in microphones face the direction of the source to be recorded. The new file will be automatically...
-
Page 7: A-B Repeat Play
JVR-32 Voice Recorder switch between the Recording folder/Music folder. Press “ ” to play. ”or“ Press“ ” button to select the file you want to playback, and then press “ ” button to start playing the file. Press “ ”or “ ”button to adjust the volume. - Page 8 JVR-32 Voice Recorder mode (not playing a file), select the file you want to delete, hold down “ ”or “ ”key to enter. Press " " or " " buttons to “No”/“Yes”/“Delete select all”. Press " " to confirm your choice ...
- Page 9 JVR-32 Voice Recorder interface. Play music just like playing a recording file. Recording Settings In standby mode, hold down "M" button to enter. For scrolling through the options, press the button to select, press the “M” key to exit.
- Page 10 JVR-32 Voice Recorder d. 64KBPS e. 32KBPS Recorder Mode (VOR on/off) a. Normal Mode b. VOR Mode (Voice Activated Recording) Note In VOR mode, if the ambient noise level exceeds -40dB, the recorder will start recording. If the ambient noise level...
- Page 11 JVR-32 Voice Recorder you can set the level of noise reduction you prefer. 6) VOR Level When the sound recording is turned on, it can adjust the level of the input. 7) LED Set a. Close b. Open 8) Record Subsection...
- Page 12 JVR-32 Voice Recorder screen saver settings. 13.Time Settings You can select and press “ ” confirm, and press “M” to exit. 1) Press “ ” to select the desired position. 2) Press“+/-” to adjust the number. 14. Language Please press “...
- Page 13 JVR-32 Voice Recorder the current time zone (see time settings). Timed recording: The power switch must be Set the time at which you want to start recording: Record (On) - (sort of like setting an alarm). To adjust the time at which you would like the recording to begin, press “...
- Page 14 JVR-32 Voice Recorder Press “ ”or“ to adjust position, “+/-” to ” adjust the number. If you have set a password, when you boot with the connection PC you will need a password. Please store your password in a safe place. If you forget the password, enter 9999 and hold down the “...
- Page 15 JVR-32 Voice Recorder the USB cable. Copy files or folders to your computer. Note Copy files from the computer to the recorder. Any...
- Page 16 JVR-32 Voice Recorder music files (for mp3 playback on the recorder) must not be put inside the RECORD folder. They should be simply copied to the root directory.
- Page 17 JVR-32 Voice Recorder General Specifications: 96*64 LCD screen Display screen 8GB/16GB/32GB Disk Capacity Product size 4.03 x0.94x0.53 Inches Weight 2.40 Oz Recording Format Recording Mode Microphone Recording 16GB 32GB quality 47hrs 94hrs 188hrs PCM/384kbps 94hrs 188hrs 376hrs Rec/192kbps 139hrs 278hrs...


Need help?
Do you have a question about the JVR-32 and is the answer not in the manual?
Questions and answers