Advertisement
Quick Links
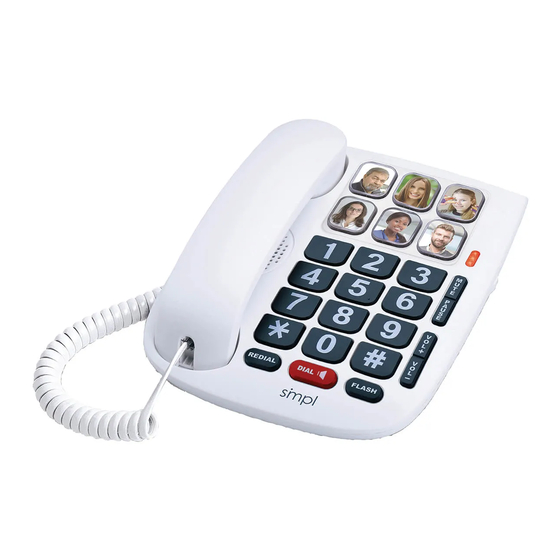
Photo phone
ENGLISH
USER'S GUIDE
10
REDIAL
9
BOX INCLUDES
1. Phone Base
4. Handset cord (spiral)
2. Phone cord
5. Foot stand
3. Handset
6. User Guide
Connecting your phone:
- Connect the handset.
- Plug the telephone line into telephone socket.
TM
1
2
3
M
U
4
T
E
P
A
5
U
S
E
V
O
6
L
+
V
7
O
L
-
8
DIAL
FLASH
Fig. 1
INSTALLING THE PHONE
Your phone should be placed on a level surface
- Plug one end of the spiral cord into the handset at (A), and the other end
into the socket on the left side of the phone (B). See Fig. 2
- Plug the telephone cord into the socket at the bottom of the set and into
the wall socket (C).
- For desktop position, always install the foot stand (D). See Fig. 3
Fig. 2
Wall socket
(C)
(B)
BASE STATION KEYS (Fig. 1)
1: 6 memory photo keys
2: Light indicator - Mute on (microphone off)/ Ringer (incoming call)
3: Ringer volume switch
4: Mute key (microphone off)
5: Pause key
6: Handset volume increase
7: Handset volume decrease
8: Flash key - Switches between two calls on the same line
9: Dial Handsfree key - press the orange key to hear a dial tone, then
dial the number
10: Last number redial key
WALL MOUNTING
- Remove the foot stand.
- Turn over the wall mounting peg (small grooved plastic part) on the base.
- Drill two 0.25 inch (6 mm) holes 4 inch (10 cm) apart.
- Fit two wall plugs and screw in wood screws (3.5 mm in diameter and 30
mm long).
- Mount the base on the 2 screws by pulling it downwards.
Fig. 3
3.25"
(8.3 cm)
INSTALL PICTURES ON THE PHOTO BUTTONS
- Remove the clear button cap by pressing inward on the vertical edge while lifting
the cap upwards.
- Cut the picture using the template shown in the Photo Cutting Guide section at
end of this guide.
- Insert the picture inside the cap and then press the cap firmly downwards on top
of the black button.
1
Handset socket
(A)
Spiral cord socket
4" (1 cm)
Horizontal (i.e table)
(no adjustment required)
(slide off tab and re-insert
so notch is protruding,
see 3 circled drawings)
(D)
Microphone
Wall Mounted
2
Advertisement

Summary of Contents for simpl PhotoPhone
- Page 1 INSTALLING THE PHONE Your phone should be placed on a level surface Photo phone - Plug one end of the spiral cord into the handset at (A), and the other end into the socket on the left side of the phone (B). See Fig. 2 - Plug the telephone cord into the socket at the bottom of the set and into the wall socket (C).
- Page 2 USING THE PHONE SAFETY Do not use your telephone to notify a gas leak or other potential explosion MAKE A CALL/ REDIAL hazard. - Pick up the handset or press 'DIAL ' orange key. - Dial the number or press one of the 6 Photo keys (with pictures). See Do not open your device to avoid risk of electrical shock.
- Page 3 TECHNICAL SUPPORT: DO NOT RETURN UNIT TO RE-SELLER. Please call 1-833-237-4675 or email support@smpltec.com. For WARRANTY SERVICE, contact us first. USA: Simpl Technology, 340 Royal Poinciana Way, Suite 317/317, Palm Beach, Florida 33480. CANADA; 200 Vinyl Ct. 2’nd Floor Woodbridge, ON L4L 4A3.
Need help?
Do you have a question about the PhotoPhone and is the answer not in the manual?
Questions and answers
How do I delete a number