Advertisement
Table of Contents
- 1 Table of Contents
- 2 Important Safety Instructions
- 3 Battery Instructions
- 4 Location of Controls
- 5 Remote Control
- 6 Switching the Radio on
- 7 Connecting to Your Wifi Network
- 8 Internet Radio
- 9 Bluetooth
- 10 Media Center
- 11 FM Radio
- 12 DAB Radio
- 13 Information Center
- 14 Configuration
- 15 Trouble Shooting
- 16 Technical Specification
- Download this manual
Advertisement
Table of Contents

Related Manuals for Ocean Digital WR-330D


Summary of Contents for Ocean Digital WR-330D
- Page 1 Wooden Internet with DAB Radio WR-330D User Manual Please read this user manual carefully before using the receiver...
-
Page 2: Table Of Contents
Contents Important Safety Instructions...........1 Battery Instructions............2 Location of Controls............3 Remote Control..............4 Switching the radio on............5 Connecting to your WiFi Network........6 Internet Radio..............7 Bluetooth ................9 Media Center..............10 FM Radio................11 DAB Radio..............12 Information Center............13 Configuration..............14 Trouble Shooting............18 Technical Specification..........20... -
Page 3: Important Safety Instructions
Important Safety Instructions Warning: To prevent fire or shock hazard, do not expose the unit to rain or moisture. To avoid electrical shock, do not dismantle. Refer all servicing to qualified service personnel. 1. Please read all of the instructions carefully and retain for future reference. 2. -
Page 4: Battery Instructions
Battery Instructions 1. Replace with batteries of the same or equivalent type as recommended. 2. Ensure correct polarity when inserting batteries. 3. Do not expose batteries to excessive heat sources such as fire and direct sunlight. 4. Remove any batteries from the remote control when it is not being used for a long period of time to avoid leakage. -
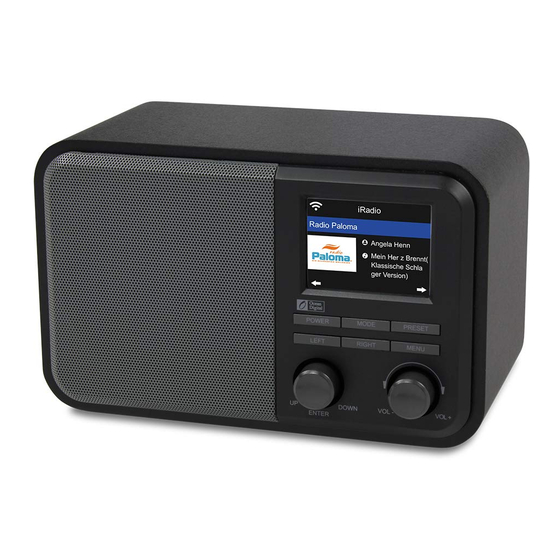
Page 5: Location Of Controls
Location of Controls 1. Power On/Standby mode 2. Mode Press to change the radio mode (Switch between Internet radio / DAB radio / FM radio/ Media Center [UPnP] / Bluetooth) 3. Preset Press and hold to enter favourite list Press briefly to recall the favourite list 4. -
Page 6: Remote Control
Remote Control The remote control uses 2 x 'AAA' batteries(batteries not included). Open the battery compartment and insert the batteries ensuring correct polarities. : Standby button : Mute 3. 0-9: Favorite station key / input letters and numbers for WiFi Encryption code :Dim the display : Favorite button, adding station to your favorite list... -
Page 7: Switching The Radio On
Switching the radio on Connect the mains adaptor to the radio unit - one end to the DC IN on the radio and the other end to the AC mains wall socket. Caution: Use only the mains adaptor supplied with the radio. Connecting a power supply with a different rating will cause permanent damage to the radio and may be hazardous. -
Page 8: Connecting To Your Wifi Network
Connecting to your WiFi Network Now you can adjust the network configuration setting. Choose <Yes> to start searching for available WiFi networks. If your router has Wi-Fi Protected Setup (WPS) function, you can select <Yes(WPS)> to proceed. After the search is done, it will display a list of the available WiFi networks. Choose your network from the list;... -
Page 9: Internet Radio
Internet Radio Choose <Internet Radio> from the menu to see several listed options. To start listening to available radio stations, select <Radio Station/Music>. You can find your favourite station by Genre or Location. My Favorite This is to show the list of your Favorite stations which have been added to the list. To preset a station: When your favourite station is playing and you want to add it to favourite list, press and hold the [Preset] button and <Add to My Favorite>... - Page 10 Internet Radio To recall a preset station: Press the [Preset] button briefly and choose your desired station. Local Radio Select this option to quickly access the radio stations located in your country. History The radio will memorise the last 10 listened stations. Service Search Stations You can find your desired radio station by inputting the name of the radio or just a...
-
Page 11: Bluetooth
Bluetooth The radio receives and plays music streamed by other Bluetooth device. Choose Bluetooth from the main menu or use the <Mode> button to switch to Bluetooth. Once it enters into Bluetooth mode, it will be discoverable from other Bluetooth devices. -
Page 12: Media Center
Media Center UPnP (Universal Plug and Play) The device supports UPnP and is DLNA-compatible. This provides the opportunity to stream music from other network devices. However, this requires you to have a compatible device in your network that can function as a server. This can be something like a network hard drive or a conventional PC for example, Windows 8 via which media sharing is permitted. -
Page 13: Fm Radio
FM Radio Use the [MODE] button to switch to FM radio. Extend the telescopic antenna to ensure good reception. Auto Scan Press and release the [Up/Down/Enter] dial , it will ask you whether to Auto Scan or not. Choose Yes to start. It will start auto scanning the local FM radio stations that can be received and stores the channels as presets automatically. -
Page 14: Dab Radio
DAB Radio You can listen to ordinary DAB/DAB+ channels. Choose the DAB option from the main menu or use the <Mode> button on the remote to switch to DAB.If this is the first time you use the DAB mode, it will scan the DAB radio stations automatically. -
Page 15: Information Center
Information Center On the main menu, navigate to <Information Center> and select to enter. You will find the options as below: Weather Information The radio supports weather display in standby mode. Navigate to Information Center> Weather Information, choose the region you want it to display the weather information. -
Page 16: Configuration
Configuration Time Display You can choose the time display in analog or digital form. Manage my mediaU You can personalise your own favorite station list through MediaYou website. Set <Enable> to enable this option. It will prompt you to sign up on www.mediayou.net before the function can be used. - Page 17 Configuration Date & Time The time is set automatically to your local area. You can choose to manually set the time if you want. Time Format setting Time format setting: 12hours / 24hours Date Format setting Date format: YYYY/MM/DD, DD/MM/YYYY and MM/DD/YYYY If manual setup is selected, you will see an added item Daylight Saving Time (DST) setting on the list.
- Page 18 Configuration Turn on You can choose to have the backlight remains ON all the time by choosing this option "Turn on". Set your desired backlight level here. Backlight in Standby The backlight in standby will be same as the backlight level you set in the Power Saving option.
- Page 19 Configuration DAB Threshold Option to adjust the scanning threshold to pick up stronger or weaker DAB/DAB+ stations. DAB/FM Information You can select to enable or disable the DAB/FM information. Local Radio Setup The radio will detect the stations in your country automatically. Choose <Local> on the radio and it will display the station list of your country.
-
Page 20: Trouble Shooting
Trouble Shooting 1. If you have trouble connecting the radio to your wireless network, these steps may help to resolve the problem: - Confirm that a Wi-Fi or Ethernet Wired connected PC can access the internet (i.e. can browse the web) using the same network. - Check that a DHCP server is available, or that you have configured a static IP address on the radio. - Page 21 Trouble Shooting 3. When you scan for PCs under UPnP function, none can be found, or the PC you are looking for does not appear in the list: - You have not connected to the wireless Access point. On the internet radio, select 'Configuration', 'Network ', 'Wireless network connection' and then select your Wireless network.
-
Page 22: Technical Specification
This system is financed by the industry and ensures environmentally responsible disposal and the recycling of valuable raw materials. Ocean Digital Technology Ltd. Flat B, 12/F., Yeung Yiu Chung (No.8) Ind. Bldg., 20 Wang Hoi Road, Kowloon Bay, Hong Kong Email: support@oceandigital.com.hk...
Need help?
Do you have a question about the WR-330D and is the answer not in the manual?
Questions and answers