Table of Contents
Advertisement
Quick Links
Download this manual
See also:
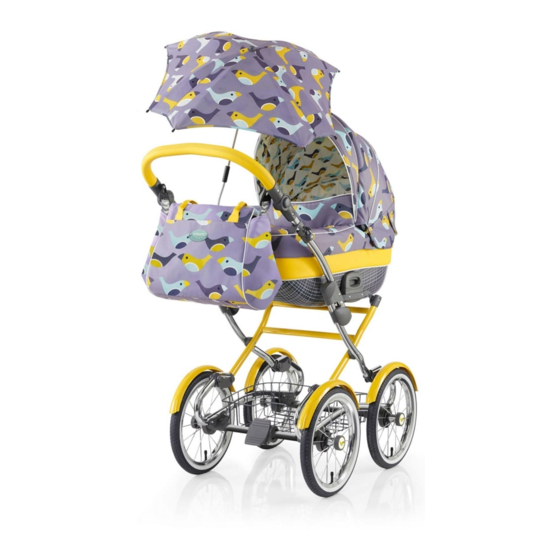
Owner's Manual
L O V E W O N D E R A N D
I T L O V E S Y O U B A C K
T R AV E L S Y S T E M
O W N E R ' S M A N U A L
Impor ta nt i nst ructio ns on
s et u p, ma i nt ena nc e an d care.
Advertisement
Table of Contents

Related Manuals for Cosatto Wonder


Summary of Contents for Cosatto Wonder
- Page 1 L O V E W O N D E R A N D I T L O V E S Y O U B A C K T R AV E L S Y S T E M O W N E R ’ S M A N U A L Impor ta nt i nst ructio ns on s et u p, ma i nt ena nc e an d care.
-
Page 2: Important Safety Information
• WARNING: This product is not suitable for running or skating. • Do not use replacement parts or accessories other than those approved by Cosatto. • A basket is provided for the carriage of 2kg of goods, evenly distributed. •... - Page 3 • WARNING: Never use this carrycot on a stand. • Be aware of the risk of open fire and other sources of strong heat, in the near vicinity of carry cot. • Carry handle and the base of the carry cot should be inspected regularly for signs of damage and wear.
- Page 4 Car seat: For use as a travel system, the chassis is only compatible with the Wonder car seat. In this mode: • This product does not replace a cot or a bed. Should your child need to sleep, then it should be placed in suitable cot, bed or carry cot.
- Page 5 Parts Chassis 1. Chassis 2. Mudguard ‘A’ x2 3. Mudguard ‘B’ x2 4. Basket Carrycot 5. Harness 6. Apron 7. Mattress Cover 8. Mattress 9. Carrycot 10. Mosquito Net (Stored in pocket under carrycot apron) 11. Raincover (stored in pocket under carry cot) Seat Unit 12.
-
Page 8: Replacement Parts
The replacement parts shown below are available for your product. For UK & Ireland customers, order through our website: http://www.cosatto.com/service-centre/spares For customer outside UK & Ireland, contact information for your local distributor can be found on http://www.cosatto.com/stockists If you require any further assistance, please contact us at cuddle@cosatto.com Chassis Mudguard ‘A’ Mudguard ‘B’... - Page 9 They should move freely at all times. Cosatto products are designed to operate with minimum maintenance, however regular lubrication of moving parts will extend the life of your travel system and make opening and folding easier.
- Page 10 Fitting & Operation information Chassis Open chassis: Lift handle (1) over the chassis (2) until hinge locks engage (3). Handle adjustment: Press down the handle release buttons on each side (1) and adjust handle (2). Release buttons when the handle is in desired position. Brake: Apply: Press down on brake lever (1).
- Page 11 Then, standing behind the handle, press down the primary lock button (2) on the right side locking lever, then simultaneously pull both side locking levers (3 + 4) back. Push the chassis handle forward (1) and down (2) until the chassis is fully closed. (3).
- Page 12 Apron: Fitting: Disconnect the fabric fastener strips (1) on each side of the carrycot hood flap. Lay the apron over the footend of the carrycot (2). Attach the apron popper (3) and fabric fastener strips (4) to each side of the carrycot. Re-connect the fabric fastener strips on hood (5).
- Page 13 Adjust Harness: To adjust the harness, slide the 3 bar sliders (1) along the webbing to suitable length. Backrest recline: Note: The backrest recline should only be used in conjunction with the carrycot harness fitted. To adjust the recline position, press in (1) and rotate (2) the adjustment knob to desired position (3).
- Page 14 Bumper bar: Remove: Press down the bumper bar release button (1) on each side of the bumper bar and pull the bumper bar away from the mount (2). Fit: Slide the bumper bar (1) onto the mounting point on both sides of the seat unit until it is clicked into position (2).
- Page 15 Hood: Open: Pull the hood forward (1) until the hood is fully open (2). Sun visor: Fold out the sun visor (1) if required. Viewing window: Lift the window flap (1) to reveal the viewing window. Remove: Unfasten the zip (1) to disconnect the hood fabric from seat unit fabric. Press down the hood release buttons (2) on each side of the hood hinge and slide the hood hinge off the mount (3).
- Page 16 Raincover: Fitting: Lay the raincover over the seat unit (1). Front access zip: Open the zip unit (2) to access your child. Storage: A storage pocket is located on the Rear of the seat unit (1). Child Car Seat Note: The car seat adaptor are handed. Fitting car seat adaptor to chassis: Align the car seat adaptor to the chassis mount (1).
- Page 17 Open: Push the slider (1) toward the top of the parasol until it clicked into position (2). Close: Press the release tab (3) to release the slider and pull the slider towards the hinge (4). Parasol position adjustment: Press down the release button (1) on the parasol hinge and adjust the parasol position (2).
- Page 45 AR191115...
- Page 46 * Calls from BT landlines are free but calls from mobiles and other networks may vary. All the design and trademarks contained herein are the property of Cosatto Limited. No part of this document may be reproduced without the permission of Cosatto Limited.
Need help?
Do you have a question about the Wonder and is the answer not in the manual?
Questions and answers