Advertisement
Quick Links
GENERAL
Installation of this above ground pool is not extremely hard
or confusing, but it is a big job. The secret to installing a
pool so that it will give you years of pleasure is to take the
time to follow instructions and do things right the first time.
Your pool warranty is void if these instructions are not
followed 100%. Read all instructions including accessories
such as filters, pumps, skimmers, decks, etc. prior to
starting. Before you start, check to see that you have the
correct number of parts. Use your parts list which is broken
down by carton. The manufacturer reserves the right to
revise, change, or modify construction of its pools.
NOTE: If a power drill is used during installation,
it should be a variable speed drill used on low
setting. Torque should not exceed 39 inch pounds.
FAILURE TO COMPLY COULD RESULT IN SCREWS STRIPPING OUT.
3 1 3 R E G I N A AV E N U E , R A H WAY, N E W J E R S E Y 0 7 0 6 5 - 4 8 9 1
Phone: (732) 574-1500 • Fax: (732) 574-1551 • www.swimnplay.com • E-mail: info@swimnplay.com
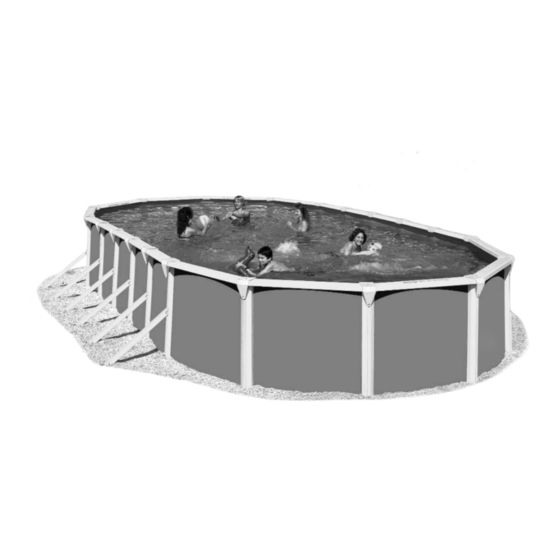
OVAL
POOL
ASSEMBLY
INSTRUCTIONS
DANGER
DO NOT DIVE OR JUMP
into your pool. Your pool is
approximately 4' deep. It is
not designed for diving
or jumping. If you dive or jump
into your pool you run the risk
of permanent injury or death.
Alert all visitors
out all warning
labels supplied.
ADULT SUPERVISION REQUIRED
Part# 420364-14
and family of
this and point
Advertisement

Related Manuals for Swim'n Play Above Ground Swimming Pool


Summary of Contents for Swim'n Play Above Ground Swimming Pool
- Page 1 GENERAL Installation of this above ground pool is not extremely hard or confusing, but it is a big job. The secret to installing a pool so that it will give you years of pleasure is to take the time to follow instructions and do things right the first time. Your pool warranty is void if these instructions are not followed 100%.
-
Page 2: Local Codes
CONTRACT INSTALLATIONS The manufacturer is in no way affiliated with any professional pool installer. Therefore the manufacturer can assume no responsibility for errors in installation by the home owner or said professional installer. If you have your POOL installed by others, please supervise them to be sure they comply with the proper installation techniques shown. Their past expe- rience or short cuts may not cover the latest improvements in our POOLS. - Page 3 • During night time pool use, artificial lighting shall be used to illuminate all safety signs, ladders, steps, deck surfaces and walks. • The installer shall follow written instructions provided for operation of the circulation system. • Decks shell meet local codes and comply with ANSI/NSPI-8 1996 “Model Barrier Code for Residential Swimming Pools, Spas and Hot Tubs”...
- Page 4 INSTALLATION • ASSEMBLY STEPS READ CAREFULLY BEFORE STARTING POOL ASSEMBLY CONSTRUCTION CLOSE-UPS Use the illustrations below as a guide for the assembly of your pool 6” 6” 4” POOLS PRINCETON DELMAR QUANTUM ELAN • OMNI ZENITH • ST. CROIX LEXINGTON POOLS POOLS OPTIONAL...
- Page 5 INSTALLATION • ASSEMBLY STEPS READ CAREFULLY BEFORE STARTING POOL ASSEMBLY CONSTRUCTION CLOSE-UPS Use the illustrations below as a guide for the assembly of your pool 6” 7” POOLS EXTRUDED 9” POOLS ALUMINUM POOLS with Box Vertical with Box Vertical Fig. E Fig.
- Page 6 INSTALLATION • ASSEMBLY STEPS READ CAREFULLY BEFORE STARTING POOL ASSEMBLY CONSTRUCTION CLOSE-UPS Use the illustrations below as a guide for the assembly of your pool 9” POOLS 7” POOLS 7” POOLS with with Column Vertical with Column & Wrap Around Covers Wrap Around Covers Vertical Fig.
- Page 7 PREPARING THE GROUND Your pool must be installed on a solid level surface. After the pool location is selected drive the two end stakes "A" into the ground and mark the center line using string. Using the proper chart below (for your pool size) measure in along the center line from the end of the pool and drive your center stakes "B"...
- Page 8 LEVELING THE GROUND Using the “CLEARANCE SIZE” chart on page 6, determine the clearance size for your pool. With the use of the leveling device shown and a shovel start leveling the ground, removing all grass and sharp objects such as sticks and stones. Level area to the lowest spot within the clearance radius.
- Page 9 ASSEMBLING THE BOTTOM STRAPS Unpack and assemble the bottom straps with the buttress bottom plates and brackets as shown using all necessary hardware and tighten securely. Using the chart below determine the quantity of strap assemblies for your pool. The screws joining the straps must be inserted from the top to prevent the screw putting a hole in the liner once the pool is filled with water.
- Page 10 BOTTOM RAIL AND STRAP LAYOUT Follow the instructions below to properly layout the rail and strap assemblies. POOL SIZE 16 x 10 STRAP ASSEMBLIES SHORT RAILS LONG RAILS BOTTOM PLATES EXAMPLE OF BASIC LAYOUT Patio Block Short Bottom Rail PRE WASHED SAND OR SIFTED EARTH RECOMMENDED REQUIREMENT CHART POOL SIZE...
- Page 11 INSERT WALL INTO BOTTOM RAILS Remove wall from carton. NOTE: the UP arrow on wall. Determine starting point as the filter inlet and outlet holes are at the beginning of the wall. Starting at the center of a bottom plate insert the bottom edge of wall into the groove on the bottom rail.
- Page 12 PROTECT YOUR LINER Once the wall is closed and screws and nuts are tightened securely, cover the screw heads on the inside of the pool with a cloth tape all the way from top to bottom of wall. If the filter inlet and outlet are not used, tape over the prescored areas on the inside of the pool wall.
- Page 13 RECHECKING YOUR WORK Measure from the last strap to the outer end of the pool. Measurements in both ends should be equal. Also make sure that the sides of the pool between the straps are straight. Confirm that the strap assemblies are "square" by measuring diagonally across from the first strap to the last strap.
- Page 14 THRU-THE-WALL SKIMMER IMPORTANT!! BEFORE CONTINUING WITH THIS STEP YOU MUST KNOW WHICH TYPE OF THROUGH THE WALL SKIMMER YOU WILL BE USING WITH YOUR POOL Your pool wall has cutouts to accomodate both standard size skimmers and deluxe wide mouth skimmers.
- Page 15 EARTH MOUND Wall guard is optional. Tape wall guard (plastic sheeting) to pool wall 12" up from ground and smooth out on ground 12" from wall. This will protect your pools metal parts from chemical reactions with the soil used in the earth mound. Several commercial products can also be used in place of earth mound.
-
Page 16: Liner Installation
LINER INSTALLATION LINER CORRECT POOL LINER STANDARD OVERHANG LINER 1. Clear all sticks and sharp objects from an area near the pool, that is as large as the pool itself. Remove the liner from its carton and unfold and open the liner. Refold the liner so that it can easily be carried to the pool and unfold from the outside of the pool. - Page 17 EZ HOOK LINER INSTALLATION ATTENTION: An 8 inch cove must be placed all around the inside of the pool 1. Clear all sticks and sharp objects from an area near the pool, that is as large as the pool itself. Remove the liner from its carton and unfold and open the liner.
- Page 18 PRE-ASSEMBLY OF TOP PLATES* * NOTE: CAGE NUTS NOT NEEDED ON ALL POOLS - CHECK YOUR PACKING LIST Before the top plates are installed it is necessary to attach the cage nuts* in their appropriate locations as shown in the figures at right. Using a pliers, squeeze together the spring sides of the cage TOP PLATE WITH CAGE NUT...
- Page 19 Insert two rails into a plate, in the same manner and using the same spacing as you have done on the bottom rail and plate assembly. Push the rails and plate assembly onto the plastic edging leaving the far end in the air. MAKE SURE THAT THE TOP PLATE IS CENTERED DIRECTLY ON TOP OF THE BOTTOM PLATE.
- Page 20 INSTALLING LEDGES AND PLACEMENT OF WARNING LABELS SCREW HOLE LOCATION GUIDE Refer to the "Construction Close-ups" at the beginning of these Instructions as indicated below: FIG. A (4" Ledge/ 4" Vertical) (6" Ext. Ledge/ 6" Old Ext. Vertical) FIG. B (6"...
- Page 21 INSTALLING TOP COVERS FOLLOW THE INSTRUCTIONS BELOW FOR THE COVERS FOR YOUR PARTICULAR POOL 4", 6" & 7" DELUXE TOP COVERS These covers don’t require cage nuts or top cover screws. For pools with the new 1-piece deluxe top covers, simply snap the cover into place, aligning the tab on the bottom of the cover with the slot in the top plate of pool (fig.A only.)
- Page 22 6" & 7" TWO-PIECE FULL CONTOURED COVER Slide inside cover (the cover which will be closest to the inside of the pool) into position and place outside cover onto top of inside cover aligning the holes together with cage nut attached to the top plate and secure using the 1/4”-20 x 3/4”...
- Page 23 7" AND 9” TWO-PIECE WRAP AROUND COVER AND PEDESTAL Slide the inside cover (the cover which will be closest to the inside of the pool) into position and align the hole in the cover with the cage nut attached to the top plate. Secure using the 1/4”-20 x 3/4”...
-
Page 24: Warning Labels
WARNING WARNING LABELS Four (4) danger labels have been provided for your safety. Apply these labels to the pool where they are easily visible to all persons using the pool. To do this, simply peel the backing off the label to expose the self stick back and firmly press to a conspicuous and plainly visible surface on the pool. - Page 25 SAFETY TIPS - RULES AND REGULATIONS This section is designed to acquaint you with some guidelines as to the safe operation and use of your pool. • Do not dive or jump into your pool. Your pool is approximately 48" or 52” deep. It is not designed for diving or jumping.
-
Page 26: Preventative Maintenance Tips
PREVENTATIVE MAINTENANCE TIPS • Use clear lacquer or clear nail polish to cover screw heads. • Use clear lacquer or nail polish to cover any scratches on ledges or verticals to prevent rust and corrosion. • Use wax to protect the pool wall and frame from the elements. •... - Page 27 HOW TO KEEP WATER CLEAR AND HEALTHFUL Your health, and maximum enjoyment is assured by keeping your pool water in sparkling clear and sanitary clean condition. In order to obtain this condition certain equipment and chemicals available at your pool dealer are necessary. Equipment, such as a filter according to the size of your pool, skimmer and a vacuum cleaner will take care of removing suspended particles, leaves and oils from the water.
- Page 28 3 1 3 R E G I N A AV E N U E R A H WAY, N E W J E R S E Y 0 7 0 6 5 - 4 8 9 1 Phone: (732) 574-1500 • Fax: (732) 574-1551 E-mail: info@swimnplay.com www.swimnplay.com...
Need help?
Do you have a question about the Above Ground Swimming Pool and is the answer not in the manual?
Questions and answers