dji MAVIC MINI User Manual
Hide thumbs
Also See for MAVIC MINI:
- Quick start manual ,
- Safety manuallines (91 pages) ,
- User manual (45 pages)
Table of Contents
Advertisement
Advertisement
Table of Contents

Related Manuals for dji MAVIC MINI


Summary of Contents for dji MAVIC MINI
- Page 1 MAVIC MINI User Manual v1.0 2019.11...
-
Page 2: Using This Manual
Video Tutorials Go to the address below or scan the QR code on the right to watch the Mavic Mini tutorial videos, which demonstrate how to use the Mavic Mini safely: http://www.dji.com/mavic-mini/info#video... -
Page 3: Table Of Contents
Contents Using this Manual Legend Read Before the First Flight Video Tutorials Download the DJI Fly App Download DJI Assistant 2 for Mavic Product Profile Introduction Feature Highlights Preparing the Aircraft Preparing the Remote Controller Aircraft Diagram Remote Controller Diagram... - Page 4 Flight Flight Environment Requirements Flight Limits and GEO Zones Pre-Flight Checklist Auto Takeoff/Landing Starting/Stopping the Motors Flight Test Appendix Specifications Calibrating the Compass Firmware Update After-sales information © 2019 DJI All Rights Reserved.
- Page 5 Product Profile This section introduces Mavic Mini and lists the components of the aircraft and remote controller. © 2019 DJI All Rights Reserved.
-
Page 6: Product Profile
29 mph (46.8 kph) and a maximum flight time of 30 minutes. Feature Highlights Mavic Mini boasts a folded design and an ultralight weight of 249 g, making it easy to transport. The Intelligent Flight Mode QuickShots provide four sub modes, which can automatically shoot and generate different styles of video. -
Page 7: Preparing The Remote Controller
Micro USB cable, and USB-C cable are included in the packaging. Connect the end of the cable with the DJI logo to the remote controller and the other end of the cable to your mobile device. Secure your mobile device by pushing both clamps inward. -
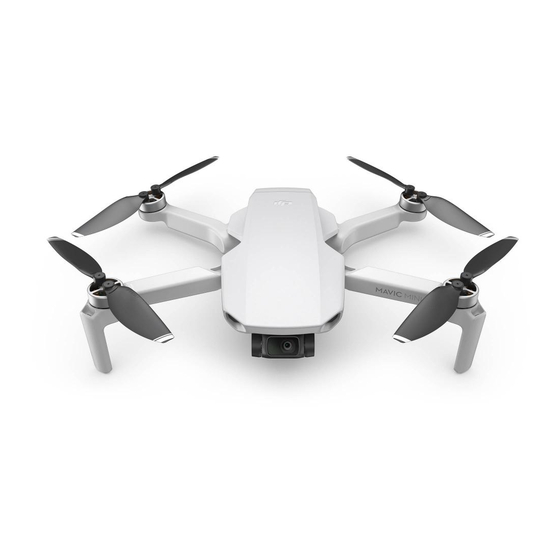
Page 8: Aircraft Diagram
3. Control Sticks aircraft is performing a QuickShot, Intelligent Use the control sticks to control the aircraft RTH, or auto landing, press once to make the movements. Set the flight control mode in DJI © 2019 DJI All Rights Reserved. -
Page 9: Activation
Activation Mavic Mini requires activation before using for the first time. After powering on the aircraft and remote controller, follow the on-screen instructions to activate Mavic Mini using DJI Fly. An internet connection is required for activation. - Page 10 Aircraft Mavic Mini contains a flight controller, video downlink system, vision system, propulsion system, and an Intelligent Flight Battery. © 2019 DJI All Rights Reserved.
-
Page 11: Aircraft
Intelligent Flight Battery. Refer to the aircraft diagram in the Product Profile section for more information. Flight Modes Mavic Mini has three flight modes, plus a fourth flight mode that the aircraft switches to in certain situations: Position Mode: Positon mode works best when the GPS signal is strong. The aircraft utilizes GPS and the Vision System to locate itself and stabilize. -
Page 12: Aircraft Status Indicator
Mavic Mini User Manual Aircraft Status Indicator The aircraft status indicator is located at the rear of the aircraft. It communicates the status of the aircraft’s flight control system. Refer to the table below for more information about the aircraft status indicator. - Page 13 Return home or land the aircraft immediately when prompted. DJI Fly displays a warning when the battery level is low. The aircraft will automatically return to the Home Point if no action is taken after a 10 second countdown.
- Page 14 It is important to set a suitable RTH altitude before each flight. Launch DJI Fly, and then set the RTH altitude. In Smart RTH and Low Battery RTH, the aircraft automatically ascends to the RTH altitude.
-
Page 15: Vision System And Infrared Sensing System
Mavic Mini User Manual Vision System and Infrared Sensing System Mavic Mini is equipped with a Downward Vision System and Infrared Sensing System. The Downward Vision System consists of one camera and the Infrared Sensing System consists of two 3D infrared modules. -
Page 16: Intelligent Flight Mode
If there is any dirt, dust, or water on the Infrared Sensing and Vision System, clean it with a soft cloth. Do not use any cleanser that contains alcohol. c. Contact DJI Support if there is any damage to the glass of the Infrared Sensing and Vision System. Intelligent Flight Mode Mavic Mini supports QuickShots Intelligent Flight Mode. - Page 17 1. Make sure that the Intelligent Flight Battery is sufficiently charged. Take off and hover at least 6.6 ft (2 m) above the ground. 2. In DJI Fly, tap to select QuickShots and follow the prompts. Make sure that the user understands how to use the shooting mode and that there are no obstacles in the surrounding area.
-
Page 18: Flight Recorder
DJI Assistant 2 for Mavic. Propellers There are two types of Mavic Mini propellers, which are designed to spin in different directions. Marks are used to indicate which propellers should be attached to which motors. The two blades attached to one motor are the same. -
Page 19: Intelligent Flight Battery
DO NOT block any of the ventilation holes on the motors or the body of the aircraft. Make sure the ESCs sound normal when powered on. Intelligent Flight Battery The Mavic Mini Intelligent Flight Battery is a 7.2 V, 2400 mAh battery with smart charging and discharging functionality. Battery Features 1. - Page 20 9. Communication: Information about the battery's voltage, capacity, and current is transmitted to the aircraft. Refer to the Mavic Mini Disclaimer and Safety Guidelines before use. Users take full responsibility for all operations and usage. The Mavic Mini Intelligent Flight Battery cannot discharge automatically. If the battery will not be used for more than 10 days, it is recommended to discharge the battery manually until the battery level is between 39% and 75%.
- Page 21 Mavic Mini User Manual 63% < battery level ≤ 75% 50% < battery level ≤ 63% 38% < battery level ≤ 50% 25% < battery level ≤ 38% 13% < battery level ≤ 25% 0% < battery level ≤ 13% Powering On/Off Press the power button once, then press again, and hold for two seconds to turn the battery on or off.
- Page 22 41° to 104° F (5° to 40° C). The ideal charging temperature is 71.6° to 82.4° F (22° to 28° C). The Battery Charging Hub (not included) can charge up to three batteries. Visit the official DJI Online Store to learn more.
-
Page 23: Gimbal And Camera
Use the gimbal dial on the remote controller to control the camera’s tilt. Alternatively, enter the camera view in DJI Fly. Press the screen until a circle appears and drag the circle up and down to control the camera’s tilt. - Page 24 Camera Profile Mavic Mini uses a 1/2.3" CMOS sensor camera, which can shoot up to 2.7K video and 12 MP photos, and supports shooting modes such as Single Shot and Interval. The aperture of the camera is f/2.8 and can focus from 1 m to infinity.
- Page 25 Remote Controller This section describes the features of the remote controller and includes instructions for controlling the aircraft and the camera. © 2019 DJI All Rights Reserved.
-
Page 26: Remote Controller
2.49 mi (4 km), and 720p video downlink from the aircraft to DJI Fly on your mobile device. The detachable control sticks make the remote controller easier to store. Refer to the remote controller diagram in the Product Profile section for more information. - Page 27 Mavic Mini User Manual Controlling the Aircraft Three pre-programmed modes (Mode 1, Mode 2, and Mode 3) are available and custom modes can be defined in the DJI Fly app. The default mode is Mode 2. Mode 1 Left Stick...
- Page 28 Mavic Mini User Manual The figure below explains how to use each control stick, using Mode 2 as an example. Remote Controller Aircraft Remarks (Mode 2) Indicates Nose Direction) Moving the left stick up or down changes the aircraft’s altitude. Push the stick up to ascend and down to descend.
-
Page 29: Optimal Transmission Zone
1. Power on the remote controller and the aircraft. 2. Launch DJI Fly. In camera view, tap the icon and select Shortcuts and Connect to Aircraft, or press and hold the power button of the remote controller for more than four seconds. The remote controller beeps continuously indicating it is ready to link. - Page 30 DJI Fly App This section introduces the main functions of the DJI Fly app. © 2019 DJI All Rights Reserved.
-
Page 31: Dji Fly App
Album Allows you to view the DJI Fly and your phone’s album. QuickShots videos can be viewed after downloading to your phone. Create contains Templates and Pro. Templates provides auto edit feature for imported footage. Pro allows you to edit the footage manually. -
Page 32: Camera View
(CSC). Stopping the motors mid-flight will cause the aircraft to crash. If accessories are mounted to Mavic Mini, it is recommended to enable Payload mode for enhanced safety. After takeoff, Payload mode is enabled automatically if a payload is detected. Note that the Max Service Ceiling above Sea Level is 1500 m and the max flight speed is limited when Payload mode is enabled. - Page 33 Mavic Mini User Manual Control Aircraft Settings: Select Flight mode and Units settings. Gimbal Settings: Switch gimbal mode and calibrate gimbal. Advanced gimbal settings include Pitch Speed, Pitch Smoothness, and Allow Upward Gimbal Rotation. Remote Controller Settings: Stick mode settings and remote controller calibration.
- Page 34 The app is designed to assist your operation. Use your discretion and DO NOT rely on the app to control your aircraft. Your use of the app is subject to DJI Fly Terms of Use and DJI's Privacy Policy. Read them carefully in the app before flying.
- Page 35 Flight This section describes safe flight practices and flight restrictions. © 2019 DJI All Rights Reserved.
-
Page 36: Flight
Once pre-flight preparation is complete, it is recommended to hone your flight skills and practice flying safely. Make sure that all flights are carried out in an open area. Refer to the Remote Controller and DJI Fly sections for information about using the remote controller and the app to control the aircraft. -
Page 37: Pre-Flight Checklist
Fly the aircraft only within your line of sight. GEO Zones All GEO zones are listed on the DJI official website at http://www.dji.com/flysafe. GEO zones are divided into different categories and include locations such as airports, flying fields where manned aircraft operate at low altitudes, borders between countries, and sensitive locations such as power plants. -
Page 38: Auto Takeoff/Landing
Mavic Mini User Manual 8. Use only genuine DJI parts or parts certified by DJI. Unauthorized parts or parts from non-DJI certified manufacturers may cause system malfunctions and compromise safety. Auto Takeoff/Landing Auto Takeoff 1. Launch DJI Fly and enter the camera view. -
Page 39: Flight Test
1. The pre-flight checklist is designed to help you fly safely and to ensure that you can shoot video during flight. Go through the full pre-flight checklist before each flight. 2. Select the desired gimbal operation mode in DJI Fly. 3. Shoot video when flying in P-mode or C-mode. - Page 40 Appendix © 2019 DJI All Rights Reserved.
-
Page 41: Appendix
Model MT1SS5: 5.725-5.850 GHz Model MT1SD25: 2.400-2.4835 GHz, 5.725-5.850 GHz Transmission Power (EIRP) Model MT1SS5 5.8 GHz: <30 dBm (FCC); <28 dBm (SRRC) Model MT1SD25 2.4 GHz: <19 dBm (MIC/CE) 5.8 GHz: <14 dBm (CE) © 2019 DJI All Rights Reserved. - Page 42 Mavic Mini User Manual Hovering Accuracy Range Vertical: ±0.1 m (with Vision Positioning), ±0.5 m (with GPS Positioning) Horizontal: ±0.3 m (with Vision Positioning), ±1.5 m (with GPS Positioning) Gimbal Mechanical Range Tilt: -110° to +35° Roll: -35° to +35°...
- Page 43 Mavic Mini User Manual Max Transmission Distance Model MR1SS5: 5.8 GHz: 4000 m (FCC); 2500 m (SRRC) (unobstructed, free of ModelMR1SD25: interference) 2.4 GHz: 2000 m (MIC/CE) 5.8 GHz: 500 m (CE) Operating Temperature 0° to 40° C (32° to 104° F)
-
Page 44: Calibrating The Compass
Choose an open area to carry out the following procedure. 1. Tap the System Settings in DJI Fly, select “Control” and then select “Calibrate”, and follow the on- screen instructions. The aircraft status indicator blinks yellow, indicating calibration has start. - Page 45 Change your location. A prompt will appear in DJI Fly if compass calibration is required before takeoff. The aircraft can take off immediately once calibration is complete. If you wait more than three minutes to take off after calibration, you may need to repeat the calibration process.
-
Page 46: Firmware Update
Use DJI Fly or DJI Assistant 2 for Mavic to update the aircraft and the remote controller firmware. Using DJI Fly When you connect the aircraft and remote controller to DJI Fly, you will be notified if a new firmware update is available. To start updating, connect your mobile device to the internet and follow the on- screen instructions. -
Page 47: After-Sales Information
Note that the update may reset various main controller settings, such as the RTH altitude and the maximum flight distance, to default settings. Before updating, take note of your preferred DJI Fly settings, and readjust them after the update. After-sales information Visit https://www.dji.com/support to learn more about after-sales service policies, repair services, and... - Page 48 This content is subject to change. Download the latest version from http://www.dji.com/mavic-mini If you have any questions about this document, please contact DJI by sending a message to DocSupport@dji.com. MAVIC is a trademark of DJI. Copyright © 2019 DJI All Rights Reserved.
Need help?
Do you have a question about the MAVIC MINI and is the answer not in the manual?
Questions and answers