Table of Contents
Advertisement
Quick Links
Advertisement
Table of Contents

Related Manuals for Spektrum ix20


Summary of Contents for Spektrum ix20
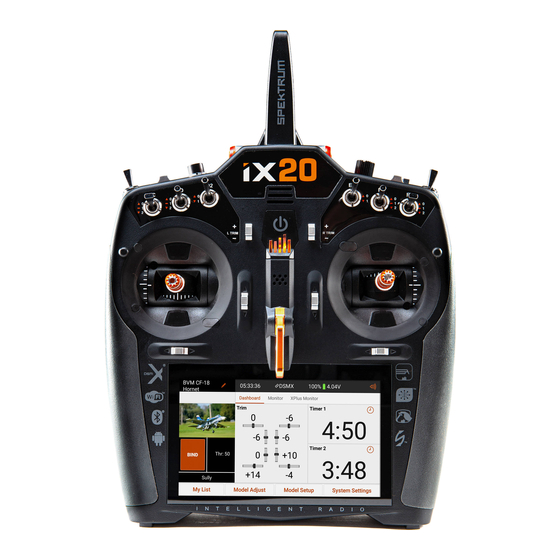
- Page 1 Instruction Manual...
- Page 2 NOTICE All instructions, warranties and other collateral documents are subject to change at the sole discretion of Horizon Hobby, LLC. For up-to-date product literature, visit www.horizonhobby.com or www.towerhobbies.com and click on the support or resources tab for this product. MEANING OF SPECIAL LANGUAGE The following terms are used throughout the product literature to indicate various levels of potential harm when operating this product: WARNING: Procedures, which if not properly followed, create the probability of property...
- Page 3 WARNING: Read the ENTIRE instruction manual to become familiar with the features of the product before operating. Failure to operate the product correctly can result in damage to the product, personal property and cause serious injury. This is a sophisticated hobby product. It must be operated with caution and common sense and requires some basic mechanical ability.
- Page 4 SAFETY PRECAUTIONS • Always ensure all batteries have been properly • Never point the transmitter antenna directly charged prior to using the model. toward the model. The radiation pattern from the tip of the antenna is inherently low. • Always check all servos and their connections prior to each run.
- Page 5 CHARGING WARNINGS CAUTION: All instructions and warnings must be followed exactly. Mishandling of Li-Po batteries can result in a fire, personal injury and/or property damage. • NEVER LEAVE CHARGING BATTERIES • Always store the battery at room temperature UNATTENDED. in a dry area for best results. •...
- Page 6 • Always constantly monitor the temperature of • Never charge batteries outside recommended the battery pack while charging. levels. • ONLY USE A CHARGER SPECIFICALLY • Never charge damaged batteries. DESIGNED TO CHARGE LI-PO BATTERIES. • Never attempt to dismantle or alter the charger. Failure to charge the battery with a compatible •...
- Page 7 WARNING AGAINST COUNTERFEIT PRODUCTS: If you ever need to replace your Spektrum receiver found in a Horizon Hobby product, always purchase from Horizon Hobby, LLC or a Horizon Hobby authorized dealer to ensure authentic high-quality Spektrum product. Horizon Hobby, LLC disclaims all support and warranty with regards, but not limited to, compatibility and performance of counterfeit products or products claiming compatibility with DSM or Spektrum technology.
- Page 8 TABLE OF CONTENTS How To Use the Manual Control Stick Length Adjustment Navigating the Pages Android Operating System Return To Spektrum AirWare App Android Navigation Icons Using the Table of Contents Android Home Screen Elements Box Contents Notification Screen Basic Operation...
- Page 9 Add A New Model Save As Template Sort Model List Model Note Import Models Binding Export Models Spektrum Failsafe Types Model Details Binding And Programming Failsafe Model Name Testing Failsafe Model Image Auto Switch Select Using the Built In Camera...
- Page 10 Absolute Travel 0.5 Mixing Values Balance Back Mixing On The Fly (OTF) Trim Functions Sailplane Pre-Configured Mixes Dual Rates and Expo Forward Programming Throttle Cut Sequencer Throttle Curve AS3X ® Adding and Deleting Curve Points Differential Heli, Sail and Multirotor Throttle Curve V-Tail Differential Throttle Hold Flap System...
- Page 11 Telemetry Sensors Single Axis Gyro Auto-Configuring Telemetry At Binding Governor Analog Switch Setup Tail Curve Sleep Mode Camber Preset Spektrum LED Indicator Digital Switch Setup Camber System Switch Status In-flight camber control Switch Assignments In-flight braking Audio Events Camber System Programming...
- Page 12 Guidelines for DSMX Installations Timer Reports Receiver Installation Channel Assign Model Start Warnings Channel Input Configuration Serial Port Setup Receiver Port Assignments Serial Port Protocol Trainer Spektrum RF Wired Trainer Serial Port Power (9.5v) Wireless Trainer Aircraft Type Trainer Alerts Swashplate Type (Helicopter)
- Page 13 Sailplane Type (Sailplane) TROUBLESHOOTING GUIDE Aircraft Type (Multirotor) FAQS Flight Mode Setup 1-Year Limited Warranty Examples of Flight Mode Applications Warranty and Service Contact Information Using Flight Mode Setup FCC Information Hold (Helicopter) IC Information Trim Setup Compliance Information for the European Cross Trims Union Menu Setup...
- Page 14 HOW TO USE THE MANUAL The manual for the iX20 is an interactive .pdf document, optimally viewed in the .pdf viewer app on the Android. To access the manual from Spektrum AirWare app: 1. Touch the System Settings button from the home screen.
- Page 15 NAVIGATING THE PAGES 1. Touch the middle of the screen once to access the reader app toolbars.
- Page 16 2. Touch the page icon ( ) to set the viewing mode. Single Page 3. Select ) for best viewing results. 4. After the viewing mode is set, touch in the center of the screen to enter full-screen mode.
- Page 17 5. Touch toward the far right side of the screen or swipe left to go the next page. Touch toward the far left side of the screen or swipe right to go to the previous page.
- Page 18 To return to the Spektrum AirWare app: 1. Swipe from the bottom of the screen to access the Android navigation tools. Overview 2. Touch the icon. 3. Touch the Spektrum AirWare app in the list of running apps. Overview icon...
- Page 19 USING THE TABLE OF CONTENTS The Table of Contents is fully interactive. Touch an entry to go directly to that page.
- Page 20 Return to the Table of Contents button to return to the Table of Contents. At the end of each manual section, touch the...
- Page 21 BOX CONTENTS The iX20 radio system is supplied with the following: • Spektrum iX20 Transmitter • 10,500mAh Li-Ion Transmitter Battery Pack (Installed) • Quick Start Guide • iX20 Neck Strap • iX20 Decal Sheet • Short and Long optional stick ends •...
- Page 22 ™ • Power On: Press and hold the power button for several seconds to power on the iX20 transmitter. The transmitter is designed to prevent inadvertently powering on from a touch to the power button. After the transmitter is on, the Android operating system will take approximately 1 minute to boot up.
- Page 23 Touch the System Configuration button to define the user name, stick mode, language and battery and inactivity alarm settings. • Sleep Modes: The iX20 may be used like similar smart devices that stay powered for long periods of time. Powering the transmitter off between flights is not necessary.
- Page 24 • The transmitter has enough battery power for approximately 6 hours of use. Fully charging the battery requires approximately 6 hours. • Any time the iX20 needs to turn off the RF transmission, it will display a warning. Press and hold PROCEED to power off the RF transmission and continue programming.
- Page 25 Out of the box, the transmitter will have one Acro model stored in the model memory. Use this default or create a new model. Tap in the upper left corner of the Spektrum AirWare app main screen to add a new airplane, helicopter, sailplane, or multirotor model.
- Page 26 With the receiver in bind mode, power on the aircraft. TIP: Remove control horns if necessary to confirm the servo center positions before you power on the aircraft to bind it. BIND button on the Spektrum AirWare dashboard or access the Bind menu Either tap the Model Setup.
- Page 27 TRANSMITTER FUNCTIONS 43 44...
- Page 28 Function Function 1 Antenna Throttle/Aileron (Mode 1) Elevator/Aileron (Mode 2) 2 LCD Touchscreen Throttle/Rudder (Mode 3) 3 Switch E2 Elevator/Rudder (Mode 4) 4 Right Knob 15 Up/Down Gimbal Stick Tension Adjustment* 5 Switch E 16 Left/Right Gimbal Stick Tension Adjustment* 6 Right Top Trim Aileron Trim (Mode 1,2) 7 Switch H...
- Page 29 Function Function 23 Left Top Trim Elevator Trim (Mode 1,3) Throttle Trim (Mode 2,4) 24 Switch A 33 Right Rear Lever 25 Switch B 34 Camera Lens 26 Switch C 35 Micro Memory Card Port 27 Up/down Gimbal Stick Tension Adjustment* 36 USB Charge Port 28 Left/Right Gimbal Stick Tension Adjustment* 37 Battery Cover...
- Page 30 * NOTICE: Always perform a stick tension test while turning the screws to ensure stick tension is not too loose or too tight. Overtightening a screw can damage the spring. Loosening a screw too far can cause a spring to fall out in the transmitter and possibly damage the circuitry within.
- Page 31 The 5-bar LED on the front of the iX20 indicates different transmitter functions. • The LED glows solid orange when the iX20 is powered on and actively transmitting. • The LED is off when either the iX20 is powered off or when the RF is in sleep mode with the screen active.
- Page 32 CHARGING For optimum charging results, the built-in charger requires a USB power supply capable of at least 2-3A output. Using a power supply with a lower output will result in very long charge times or the transmitter not charging if it is powered on while attempting to charge. The first time the transmitter is charged, the charge time may be 6-7 hours.
- Page 33 1. Connect a 2-3A USB power supply (not included) to an AC outlet. 2. Connect the included magnetic USB charging cable to the power supply. 3. Insert the included magnetic micro USB adapter in the USB port on the back of the transmitter. 4.
- Page 34 PHYSICAL TRANSMITTER ADJUSTMENTS The adjustment points for the iX20 are located around the face of each gimbal.* This arrangement allows for quick and easy adjustment without removing the back cover. Available adjustments: • Mode Change • Throttle Ratchet • Throttle Tension •...
- Page 35 TRANSMITTER MODE CHANGE Mode 2 is the default transmitter control mode for the iX20. The transmitter is capable of converting to modes 1, 3 or 4 as well. This conversion requires both a programming and mechanical adjustment. The conversion consists of the following steps: •...
- Page 36 PROGRAMMING CONVERSION See the System Setup, System Configuration section to select the control layout mode. If changing between modes 2 and 4 or 1 and 3, no physical gimbal changes are required.
- Page 37 CHANGE THE THROTTLE RATCHET 1. Locate the throttle strap adjustment screws on both gimbals. The ratchet set screw engages a serrated section on the gimbal for a ratcheted throttle, while the tension set screw engages a strap for smooth tension on the gimbal. 2.
- Page 38 ADJUST THE GIMBAL CENTERING SCREW When changing between Modes 1 and 2, or between Modes 3 and 4, the gimbal centering screw must be adjusted on both gimbals to enable the centering spring on the elevator gimbal and disable it on the throttle gimbal. 1.
- Page 39 MOVE THE THROTTLE LIMITING SWITCHES Throttle limiting is used on the throttle gimbal to limit the maximum travel. When changing between Modes 1 and 2, or between Modes 3 and 4, the limits are the throttle gimbal. 1. To disengage the throttle limiting, slide them both to the opposite side of the track. 2.
- Page 40 CALIBRATION After changing the mode, cycle the power of the iX20. When it powers on, a calibration screen will be displayed. Move every control to the extreme and return them to center. The indicator will turn green when the range of each control has been accepted; the control must be centered for...
- Page 41 STICK TENSION Turn the screws clockwise a small amount using a small Phillips screwdriver to tighten the stick tension and counterclockwise to loosen. NOTICE: Always perform a stick tension test while turning the screws to ensure stick tension is not too loose or too tight. Overtightening a screw can damage the spring. Loosening a screw too far can cause a spring to fall out in the transmitter and possibly damage the circuitry within.
- Page 42 THROTTLE STRAP ADJUSTMENT The gimbals on the iX20 can be configured for smooth tension or ratcheted throttle. SMOOTH THROTTLE TENSION 1. Locate the throttle strap adjustment screws on the throttle gimbal. 2. Adjust the throttle tension by turning the tension set screw clockwise to tighten or counterclockwise to loosen, using a small Phillips screwdriver.
- Page 43 RATCHETED THROTTLE If desired, disengage the smooth throttle strap and engage the ratcheted throttle, using a small Phillips screwdriver. 1. Back the set screw out on the smooth tension strap until the throttle moves freely. 2. Tighten the set screw on the ratchet until it engages the gimbal. 3.
- Page 44 CONTROL STICKS To Change Control Stick Ends: 1. Grasp the lower knurled portion of the stick and loosen the upper knurled portion of the stick. 2. Unscrew the stick and replace it with optional stick ends. 3. Once the new stick end is at the correct height, lock in place by holding the upper knurled portion of the stick and tightening the lower knurled portion against it.
- Page 45 CONTROL STICK LENGTH ADJUSTMENT The control sticks are composed of two machined aluminum pieces threaded onto the gimbal. To adjust the Control Stick Length: 1. Grasp the lower knurled portion of the stick and loosen the upper knurled portion of the stick. 2.
- Page 46 ANDROID OPERATING SYSTEM The iX20 transmitter is built on the Android operating system and features a large color touch screen display. Navigate the iX20 using the same actions and gestures as those used to operate any other Android device. To navigate, use your finger to tap, swipe and...
- Page 47 ANDROID NAVIGATION ICONS The Spektrum AirWare application will hide Press the circle icon to go to the Android home the Android home screen navigation icons. To screen. access the Android navigation icons at anytime, swipe up from the bottom edge of the screen as shown.
- Page 48 ANDROID HOME SCREEN ELEMENTS 1. All Apps: Contains all applications loaded in the iX20. 2. Back: Return to previous screen. 3. Home: Return to the home screen. 4. Overview: Allows switching between any active applications. Remove any of the apps from the active list by swiping left or right or pressing “X”.
- Page 49 NOTIFICATION SCREEN 1. Swipe down from the top of the screen once to exit full screen mode and bring the home screen navigation icons to the front. 2. Swipe down a second time to roll down the Notification Screen for quick access to: •...
- Page 50 SPEKTRUM AIRWARE NAVIGATION The iX20 Spektrum AirWare app has up to four main screens that can be quickly accessed by swiping left or right on the touch screen display. The Dashboard and Monitor screens are always available. Telemetry Dashboard and Telemetry Min/Max are only available when telemetry information is present.
- Page 51 The Dashboard and the other main screens contain common information and navigation options to access various functions of the iX20 transmitter. Long press to return to Dashboard Available battery from any other main screen capacity and voltage Telemetry Signal Strength: Long press...
- Page 52 • Monitor: Graphically displays all current control inputs in real time.
- Page 53 • Telemetry Dashboard*: Displays telemetry information for each sensor. User selects which items to display on this page from the Telemetry setup menu. Additional telemetry pages are available when activated in the telemetry setup menu.
- Page 54 • Telemetry Min/Max*: Logs the minimum and maximum values collected from each telemetry sensor. *Only available if telemetry is active and the transmitter is bound to a telemetry receiver.
- Page 55 ) in the top right corner of any of the main screens to access the iX20 Volume menu. • Move the slider up and down to adjust the volume. • Touch the Mute button ( ) to silence all sounds within the Spektrum AirWare app.
- Page 56 TELEMETRY RESET When the transmitter is bound to a telemetry receiver, telemetry signal strength bars appear in the main screen top bar ( ). Long press the strength bars to reset the telemetry flight data and erase the min/max data.
- Page 57 MODEL TYPE DEFAULTS When a new model is created, the iX20 assigns a baseline configuration, which includes warnings, timers, channel input configuration (switch assignments), receiver port assignments (channel assignments), flight modes, and menu options all based on the model type selected.
- Page 58 ACRO DEFAULTS • Throttle position warning at 10%. • 5:00 minute timer set to count down from throttle stick movement above 25%. Switch Assignments Channel Assignments A- Gear R Knob- Aux 3 1. Throttle 7. Aux 2 B- N/A Left Slider- Aux 4 2.
- Page 59 HELI DEFAULTS • Throttle position warning at 10%. • 5:00 minute timer set to count down from throttle output above 25%. • Flight modes are called Stunt Modes in Heli. Flight Mode 0 is Normal, Flight Mode 1 is Stunt 1 and Flight Mode 2 is Stunt 2.
- Page 60 SAIL DEFAULTS • Throttle position warning at 10% if the motor option is enabled in the Sailplane Type menu in Model Setup. • 5:00 minute timer set to activate with Switch I. • Flight modes are called Launch, Cruise and Land if flight modes are assigned, no default flight mode assignments.
- Page 61 MULTI DEFAULTS • Throttle position warning at 10%. • 5:00 minute timer set to count down from throttle stick movement above 25%. Switch Assignments Channel Assignments A- Gear R Knob- Aux 3 1. Alti 7. Aux 2 B- N/A Left Slider- Aux 4 2.
- Page 62 MODEL UTILITIES The Model Utilities menu is accessed by touching the model name at the top left corner of the home screens in the Spektrum AirWare app. If RF is on, a dialog box will appear to turn off RF. PROCEED Touch and hold to continue to the Model Utilities menu.
- Page 63 Use the Model Utilities Screen to: • Select a Different Model • Export Models • Add a New Model • Sort Model List • Import Models Expanded menu options...
- Page 64 SELECT A DIFFERENT MODEL The active model appears in the model list with an orange outline around it. To change the active model from the Model Utilities menu list: 1. Touch the model to be activated on menu list. The Model Details screen for the selected model is displayed.
- Page 65 5. The iX20 will return to the Model Utilities screen and the new model will be selected. Touch the new model to enter the Model Details screen or touch the back arrow at the top left of the screen to return to the Dashboard.
- Page 66 SORT MODEL LIST To sort the order the models appear on the models list: 1. Touch the expand icon ( ) at the top right corner of the Model Utilities screen. Sort Model List. 2. Touch 3. Either select the options to sort the entire models list alphabetically or select a model to be moved.
- Page 67 IMPORT MODELS To import models: 1. Touch the expand icon ( ) at the top right corner of the Model Utilities screen. Import Models 2. Select from the drop down menu. 3. Open the desired file(s).
- Page 68 2. Select from the drop down menu. 3. The file extension type is set to .ispm. The exported models are only compatible with other Android based, Spektrum AirWare equipped transmitters. Select All. 4. Select the model to be exported, or 5.
- Page 69 MODEL DETAILS Access the Model Details menu by touching to select a model from the Model Utilities menu list. The model selected must be the active model for the full menu to open. If it is not the active SELECT/ACTIVATE MODEL model, touch to activate it.
- Page 70 MODEL NAME The selected model must be the active model to enable the option to change the model name. To change the selected model name: 1. Touch in the model name box. The text input screen will appear. 2. Enter up to 20 characters. DONE 3.
- Page 71 MODEL IMAGE The model image can be changed on any model from the model utilities list, including models that are not active. To change the model image: 1. Touch the model image. 2. Select an image from the stock images, PICK AN IMAGE FROM THE select GALLERY...
- Page 72 USING THE BUILT IN CAMERA To take a picture with the built in camera for the model image: 1. Touch the model image. TAKE PICTURE. 2. Select 3. Point the camera at the subject and compose the image on the screen. 4.
- Page 73 MONITOR CHANNEL COUNT Select the number of channels to display on the main monitor screen.
- Page 74 MODEL CATEGORY Select the desired model category.
- Page 75 EXPANDED MODEL DETAILS Touch the expand icon ( ) at the top right corner of the Model Details screen for a scrollable list of additional options. These options affect the selected model and vary whether the model selected is active. Options in the drop down menu include: •...
- Page 76 RESET MODEL TIMER Reset Model Timer Touch to reset the timer for the selected model. DUPLICATE MODEL Duplicate Model Touch to make a copy of the selected model as a new model. RESET MODEL Reset Model Touch to return all values of the selected model to the default values. DELETE MODEL Touch Delete Model...
- Page 77 2. The file extension is selected. This file format is compatible with other Android based Spektrum AirWare equipped transmitters. This format includes all settings from the file being copied, except for the model image. 3. Touch EXPORT. A list of connectivity options appears.
- Page 78 SAVE AS TEMPLATE Save As Template Select to save the selected model as a default model template, which can be accessed any time a new model is created. TIP: Establish a default for each model type to define switch positions, text to speech features, telemetry configurations, rates and curves, or any features commonly used on a given type of model.
- Page 79 MODEL NOTE Use this option to add notes to support the model. This can include setup details, flight logs, fuel mixtures, etc. To add a model note: 1. Touch and drag up in the expanded Model Details list to scroll to the bottom. Model Note.
- Page 80 BINDING Binding is the process of linking the iX20 to an aircraft receiver. The iX20 is compatible with genuine DSM2 and DSMX Spektrum receiver products. The EU version of the iX20 does not ® ® support DSM2 receiver products. BIND Access the Bind menu from the Model Setup menu or access it directly by touching the button on the Dashboard screen.
- Page 81 SPEKTRUM FAILSAFE TYPES Spektrum receivers use two types of failsafe modes, Smartsafe with hold last command and ™ Preset. These are set on the receiver during the binding process. • SmartSafe failsafe mode keeps the receiver from powering the throttle channel in the ™...
- Page 82 2. Set all other controls to the desired failsafe position. 3. Follow the receiver instructions to power the receiver on in bind mode. BIND 4. From the iX20 transmitter Bind menu, touch and hold until the transmitter reports it is binding.
- Page 83 TESTING FAILSAFE CAUTION: Make sure the aircraft is fully restrained on the ground. If the failsafe is not set correctly, the aircraft might advance to mid or full throttle. Always remove propellers or disengage motors from drive systems when testing failsafe on electric power systems. NOTICE: Failsafe features vary according to receiver.
- Page 84 AUTO SWITCH SELECT Switches, sliders, trims and the rotary knob on the iX20 are all assignable. Switches may be assigned for various functions, for example, assigning a dual rate switch or activating throttle cut (shown below). To assign a switch to a function: 1.
- Page 85 2. Select the desired switch from the popup menu. A quicker alternative to selecting the switch from the popup menu is to toggle the actual desired switch while the popup menu is active. The switch will automatically be assigned to the selected function.
- Page 86 ACTIVE BOXES Many of the iX20 menus include Active Boxes. These boxes represent switch positions when the value or condition being shown will be active or inactive. The active box appears grey by default, indicating the curve or condition is active at this switch position.
- Page 87 ACTIVE BOX CUSTOM SETUP Select Custom Setup to customize the switch position to active curve setup. Custom Setup With Custom Setup selected, the active box for each curve is shown in orange. Custom Setup allows you to select which switch position to use for each curve/condition. Select the curve then touch the desired active button(s) to assign the switch positions to be used for the selected curve.
- Page 88 Curve Select a curve to change the curve that is displayed on the screen. Selecting the curve shows the active switch position for that curve. This may be changed by selecting or deselecting the active switch box. Change the shape of the curve by increasing or decreasing the percent values of each point along the curve, or add and delete curve points, as described in the Mixing section.
- Page 89 MY LIST My List allows the user to create a list of shortcuts to quickly navigate to the most used functions. To create a shortcut list: Model Setup, touch the Menu Setup button. 1. In 2. Activate the My List option. 3.
- Page 90 My List 4. Touch the tab on the main screen. 5. Touch the Configure button and select which functions to add to the My List. The functions will have a check mark next to the name when selected. 6. Touch the Save button to save the list. My List The selected functions are now directly available in the screen.
- Page 91 TIP: The functions in the My List tab menu can be re-ordered to suit your needs. My List 1. With the menu open, touch and hold the menu item you wish to move. 2. The transmitter vibrates to indicate the selection. 3.
- Page 92 MODEL ADJUST The Model Adjust menu contains features and adjustments that are used to finalize the settings for a model configuration. Options in the Model Adjust menu will vary depending on the model type selected during initial model configuration and the aircraft type selected in the Model Setup menu. The Model Adjust menu features common across model types include: •...
- Page 93 Model Adjust menu options specific to certain model types include, but are not limited to: Airplane Type Sailplane Type • Differential • Camber Presets • Flap System • Camber System • Pre-Configured Mixes Helicopter Type • Pitch Curve Multirotor Type •...
- Page 94 SERVO SETUP Servo Setup. From the Model Adjust menu, touch The following setup sub menus are available: • Reverse • Speed • Travel • Absolute Travel • Sub Trim • Balance Touch the desired function in the ribbon at the top of the screen to bring up the corresponding setup sub menu.
- Page 95 REVERSE Use the Reverse menu to reverse the travel direction of any channel. For example, if the elevator moves up and it should move down, reverse the elevator channel travel direction. To reverse a channel travel direction: Reverse 1. Select in the Servo Setup menu ribbon.
- Page 96 TRAVEL The Travel menu sets the travel or endpoints of the servo arm movement.
- Page 97 To adjust travel values: TRAVEL 1. Touch in the ribbon at the top of the Servo Setup menu. 2. Select the high or low side of the channel. 3. Touch the lock icon ( ) to adjust both directions at the same time, if desired, or adjust the Low and High values independently.
- Page 98 SUB TRIM The Sub Trim menu adjusts the servo travel center point. To adjust sub trim values: SUB TRIM 1. Touch in the ribbon at the top of the Servo Setup menu. 2. Touch the number to the right of the desired channel to open the channel sub trim menu. Changes can be made by sliding the highlighted circle or touching the + or –...
- Page 99 SPEED The Speed menu slows the response time on any channel, such as landing gear or flaps.
- Page 100 To adjust speed values: SPEED 1. Touch in the ribbon at the top of the Servo Setup menu. 2. Touch either the right or left side value of the desired channel to open the channel Speed menu. 3. Slow the channel response by sliding the highlighted circle or using the + or – buttons to change the time value.
- Page 101 The Absolute Travel menu limits the amount of travel on a channel, taking into account all combinations of settings: travel, trim, rates, etc. The iX20 will not drive the output past the absolute travel limit. Adjust the absolute travel value to prevent servos from binding or over...
- Page 102 To adjust the absolute travel limit: ABSOLUTE TRAVEL 1. Touch in the ribbon at the top of the Servo Setup menu. 2. Touch the low or high values to adjust the limit value in the desired channel. The low point can be adjusted from 1 to 2048, and the high point can be adjusted from 2049 to 4096.
- Page 103 BALANCE Balance is an adjustable curve on all channels to fine-tune the servo position at up to 7 points along the curve. Use Balance to: • Reduce the effects of round servo horns so movement is more linear. • Prevent binding when multiple servos are used on a single control surface. •...
- Page 104 To balance the servo output on a given channel: BALANCE 1. Touch in the ribbon at the top of the Servo Setup menu. Selected 2. Select the desired channel to adjust. channel 3. Touch one of the seven values displayed Curve below the curve.
- Page 105 ON THE FLY (OTF) TRIM FUNCTIONS Many functions of the iX20 allow for making fine adjustment using available trim switches while flying your aircraft including: • Dual Rate • Differential • Exponential • V-Tail Differential • Programmable Mixes • Camber Presets •...
- Page 106 To activate the OTF feature for a given function: 1. Navigate to the desired function screen. Dual Rate and Expo screen shown...
- Page 107 2. Touch Inhibit to activate the OTF Configuration screen.
- Page 108 3. Touch Inhibit to open the switch selection popup window. 4. Select the desired trim switch to assign to the trimmer value. Each trim button may only be assigned to a single function at a time. If a trim button is already in use elsewhere, a warning dialog appears asking to confirm the change to the new function.
- Page 109 5. Touch the Min / Max values to assign a minimum and maximum value for the trimmer. The minimum value is the lowest value the trim button will adjust to. The maximum value is the highest. Touch when the Min / Max values are set. CAUTION: Never assign a minimum or maximum value that could negate the travel of a control surface, such as with dual rates.
- Page 110 DUAL RATES AND EXPO Dual Rates and Exponentials are available on the aileron, elevator and rudder channels.
- Page 111 Dual rates are commonly used to set up models for different flight performance. Dual rates cannot increase surface travel. They only reduce travel. One rate setting for a control surface normally allows for full travel. Other rate settings for that surface reduce the travel available. For example, on an aerobatic model with large control surfaces, high rates are used to deliver full control surface travel, which is useful for extreme aerobatics.
- Page 112 To program dual rates and expo: Dual 1. From the Model Adjust menu, touch Rates and Expo to open the scrollable menu. 2. Touch the Channel button to select the desired control to adjust. 3. Scroll to the bottom of the menu and touch the Switch button to select the desired switch.
- Page 113 4. Touch the Dual Rates values to access the value sliders. 5. Adjust the travel rates for each switch position. Each rate number affects one side of the servo travel from the center. 100% results in full travel. A 50% rate results in 50% of full travel.
- Page 114 7. Adjust the expo value for each switch position. Touch the lock icon ( ) to adjust both values together or separately. Adding positive expo makes the control less sensitive around the center. Adding negative expo makes the control more sensitive around the center. 8.
- Page 115 THROTTLE CUT Program the Throttle Cut function to ensure the motor is off when the throttle cut is activated.
- Page 116 To program Throttle Cut: 1. From the Model Adjust menu, touch Throttle Cut. 2. Assign a switch to throttle cut either by choosing the switch from the popup menu or by using auto switch selection. The numbered boxes give a visual representation of which switch position throttle cut will activate.
- Page 117 3. Assign the throttle cut position. The default setting is -130. 4. Assign the Delay value. The default time is 0.00s to give an immediate throttle cutoff when activated. 5. Check the functionality of the throttle cut by watching the throttle channel in the monitor on the left side of the screen.
- Page 118 THROTTLE CURVE Creating and fine-tuning a throttle curve is one of the last steps in preparing a new aircraft for flight. Ensure all other controls are set up and functioning correctly and the model is safely secured prior to starting the engine. Some models may exhibit rapid RPM change from low to half throttle input and very little change in RPM from half to full throttle input.
- Page 119 To create a throttle curve: 1. From the Model Adjust menu, touch Throttle Curve. 2. Select a switch or to enable curve adjustments. Multiple curves can be configured on a switch to provide multiple throttle curve options. Select to select only one curve.
- Page 120 3. Touch and drag up the right side of the screen to view the value of each point on the curve. The point values do not appear until the curve is enabled in Step 2. 4. Move the throttle stick up and down. A gray bar appears to the left of the point value associated with the throttle stick position.
- Page 121 5. Touch the point value box for any point that requires adjustment. A slider and + and – appear to adjust the point position up or down on the graph. 6. Touch when the selected curve point is in the desired position. Expo 7.
- Page 122 ADDING AND DELETING CURVE POINTS A maximum of 7 points, at a minimum of 10% apart, are available on the throttle curve. To add a curve point: 1. Move the throttle stick to the desired position for the new point. 2.
- Page 123 To delete a curve point: 1. Move the throttle stick to the position of the point to be deleted. 2. Touch and drag on the right side of the screen to scroll to the bottom of the curve point list. Add Pt 3.
- Page 124 HELI, SAIL AND MULTIROTOR THROTTLE CURVE In Heli Model Type, throttle curves are tied to the various flight modes. Each flight mode has a different throttle curve which must be set up individually. Throttle curves are called Motor Curves in Sailplane and Multirotor menus. When the Sailplane Model Type, the motor must be assigned a stick or switch for the Motor Curve menu to appear in Model Adjust.
- Page 125 THROTTLE HOLD Throttle Hold must be enabled in Model Setup, Flight Mode Setup by selecting a Hold Switch. Once enabled, Hold appears as one of the flight mode options in the Throttle Curve and Pitch Curve menus. The throttle hold flight mode has two main components, the throttle curve and the pitch curve.
- Page 126 The throttle hold should be programmed for zero throttle for electric helicopters, and engine idle speed for fuel powered models. Throttle hold serves three purposes for heli pilots: 1. Model helicopters can be extremely dangerous if the throttle is inadvertently bumped.
- Page 127 TIP: Always fly with a finger on the throttle hold switch and be prepared to activate it at any moment in case of an out of control model or unexpected obstacle in the flight path. Activating throttle hold immediately eliminates power to the rotor blades. Always activate throttle hold prior to a crash to help limit damage to the aircraft components.
- Page 128 PRACTICAL THROTTLE CURVE EXAMPLE The following is a step-by-step example of creating a throttle curve for a gas-powered airplane. Use similar steps to set up any aircraft. 1. Start the engine. 2. Using a tachometer, find the RPM range. Subtract the idle RPM from the full speed RPM to get the RPM range.
- Page 129 VIDEO TX Spektrum control signals include a special command system to manage frequencies and power output on video transmitters. Compatible video transmitters can be managed from this menu by connecting a signal wire from the aircraft receiver to the video transmitter. See the video...
- Page 130 To apply changes to the video transmitter from the iX20: 1. Power on the video transmitter and ensure it is properly connect to the aircraft receiver. 2. From the Model Adjust menu, touch Video 3. Adjust the Band, Channel frequency, Power level and Mode to the desired values.
- Page 131 MIXING Use one of several pre-configured mixes or choose an open Programmable, or P-Mix, to link two control outputs to one control input. Mixing functions support: • Mixing one channel to another channel. • Assigning offset to a channel. • Mixing a channel to itself. •...
- Page 132 These pre-configured mixes are available for each model memory: • Rudder to Aileron/Elevator (ACRO) • Aileron>Rudder (SAIL)* • Aileron to Rudder (ACRO)* • Aileron>Flap (SAIL)* • Elevator to Flap (ACRO)* • Elevator>Flap (SAIL)* • Swashplate (HELI) • Flap>Elevator (SAIL) • Cyclic to Throttle (HELI) In addition to the pre-configured mixes, 24 programmable mixes are available.
- Page 133 To activate a pre-configured mix: 1. From the Mixing menu, select the desired pre-configured mix. 2. Choose a switch and active position to control the mix or choose the option to have the mix always active. 3. Touch in one of the value boxes to open the options.
- Page 134 To activate a P-Mix: 1. From the Mixing menu, select the desired available P-Mix. Normal Curved 2. Choose either mix type. Normal mix uses a rate value to define a linear, proportional mix. Curved mix is a ratio based on a flexible curve with user assigned points.
- Page 135 3. Select a channel for input and target. THR > ELE, for example, makes throttle the input and elevator the target channel. Input Target 4. Select a Switch or to activate the mix. After the switch is selected, the rate values will appear.
- Page 136 Normal 5. If using the mix type, enter the rate values (i.e., the pre-configured mixes). If using the Curved mix type, touch in each point value box to change the curve point position. 6. Slide the circle along the bar to the desired value.
- Page 137 To add more points on the curve: 1. Swipe to the bottom of the options on the right side of the screen. 2. Move the input axis until the black + on the graph is in the desired point location on the horizontal axis.
- Page 138 OFFSET Change the Offset value to move the effective center position of the target channel. Positive or negative value determines the direction of the offset. Offset is not available for curve mixes. TRIM Switch Trim on to control the target channel trim value with the input channel trim input.
- Page 139 COMBO MIXING Combination Mixing creates AND/OR mixing. AND mixing occurs where two conditions must occur to activate the mix. OR mixing occurs when the mix will activate if either of two conditions occurs. To program Combination Mixing: 1. Activate a programmable mix. Combo Sw.
- Page 140 4. Select the Relation (OR, AND) 5. Select the desired switch and active switch position for Switch 2. The mix is active when the switch position box is filled. The Status switch at the bottom of the screen gives a visual method to check the mix status with the various switch positions.
- Page 141 UNDERSTANDING MIXING 0.5% mixing values and back mixing are functions built in to the mixing programming and work seamlessly with the various types of mixing available. 0.5 MIXING VALUES IMPORTANT: This function is only available in the default RUD > AIL/ELE mix in aircraft model type. When adjusting the mix values near center (between 10 and -10), 0.5% mix values are available for fine adjustment capability.
- Page 142 BACK MIXING Back Mixing applies to all related servos in a multi servo Aileron/Flapped wing or a multi servo split elevator. Creating a mix to RAL (Right Aileron) or LAL (Left Aileron) will create different results and enable you to use fewer mixes to achieve the desired response. Example 1: Creating a mix AIL >...
- Page 143 SAILPLANE PRE-CONFIGURED MIXES When Sailplane is selected as the model type, the iX20 will pre-configure four commonly used mixes. For the following mixes, it is normal to set the offset close to or at the end point because of the geometry of sailplane flap servo linkages. It is also normal to use a significant amount of trim on the flap channels to center the control surfaces with these configurations.
- Page 144 Aileron to Flap (AIL > FLP) The Aileron to Flap mix allows the entire trailing edge of the wing (aileron and flap) to operate as ailerons. When active, as aileron is applied, the flaps also move. Always program the flaps to move in the same direction as the turn (right aileron input moves the flaps as right ailerons).
- Page 145 Flap to Elevator (FLP > ELE) Flap to Elevator mix prevents pitch up tendency that occurs when Crow or Butterfly mixing is applied. This mix is typically used only with the Camber System. The Flap to Elevator mix operates as a curve so the elevator response can be matched to specific points in the spoiler stick travel. This enables the pilot to ensure the elevator compensation is correct throughout the flap range.
- Page 146 FORWARD PROGRAMMING Forward Programming is compatible with specific Spektrum products only. Features and use are product specific. Refer to the connected device manual for programming instructions. Model Setup, Menu Setup screen. The Forward Programming menu is activated in the...
- Page 147 SEQUENCER The Sequencer can manage two independent functions activated by a single switch. For example, the gear switch could be assigned to operate the landing gear doors and retractable landing gear. Time delays can be added within a sequence to adjust both when and the speed at which each event takes place.
- Page 148 Two built-in sequencers are set up for different styles of gear doors. A third sequencer is left open for any application. • Door Cycle/Wheels: for P-51 style gear doors where the gear doors open first, the retractable landing gear cycles in or out, and the door closes. •...
- Page 149 To set a sequencer: 1. Determine the total time for the gear sequence, forward and reverse. 2. Assign a switch to activate the sequence. 3. Assign sequence times for how long the sequence should take, forward and reverse.
- Page 150 4. Swipe up and assign relevant channels. The name of the channels can be changed. These assigned names will appear in the Servo Setup and Channel Assign menus. 5. Set each channel to Proportional or Step. Proportional will allow a smooth transition between points. Step will make an instant change from one point to the next.
- Page 151 6. Swipe up to see the timeline. 7. Touch the percentage values along the top of the timeline to set the output positions along the timeline for each channel.
- Page 152 Sequencers can also be configured to manage a mix. For example, with retractable nose wheel steering applications, the steering mix can be disabled when retracted and activated when the wheels are down. During the transition when the wheels are coming down, the nose wheel steering should be disabled until the gear is fully down.
- Page 153 ® in Model Setup, and the iX20 must be bound to a compatible AS3X receiver that has been configured for remote gain. Receiver configuration is done separately from the iX20 setup. Refer to the receiver manual for more information.
- Page 154 The AS3X Gains menu displays the following for each flight mode: Axis: Roll, Pitch and Yaw Rate: Rate gain values Heading: Heading gain values Actual: The current gain value taking into account the priority gain and the stick position of that channel Gain: Represents the gain channel output position.
- Page 155 Channel: Must correspond to the channel selected in the AS3X application in the FM Channel Assignment screen Switch: Selects the switch on the transmitter that is used to select the flight modes in the AS3X system. AS3X and Flight Mode share a switch assignment. Assigning a switch in the AS3X menu will set the Flight Mode switch assignment.
- Page 156 Leaving gain settings as ABSOLUTE (ABS) during the setup will mean the gain values are fixed and will not be affected by the remote gain channel. 2. With the aircraft powered on and bound to the iX20, enter the Telemetry menu in Model Auto-Config Setup and select to set up the telemetry to work with AS3X.
- Page 157 7. Assign gain values for each flight mode switch position. 8. Confirm any changes made with the assigned switch result in gain reductions in the related fields in the telemetry feedback display. WARNING: Always confirm control surface directions and gyro response after making any changes to AS3X receivers.
- Page 158 DIFFERENTIAL The Differential menu allows for an increase or a decrease in the amount of differential travel between aileron control surfaces. By reducing the amount of aileron surface travel in one direction, differential helps eliminate adverse yaw from the application of aileron control. The Differential menu option only appears when any multi aileron servo wing type is selected in Aircraft Type in the Model Setup menu.
- Page 159 To adjust the Differential: 1. From the Model Adjust menu, touch Differential. 2. Set Switch to to use a single value for differential, or assign a switch from the popup menu. 3. Touch the value box to adjust the differential value.
- Page 160 V-TAIL DIFFERENTIAL The V-Tail Differential menu allows for increasing or decreasing the amount of differential V-Tail A V-Tail B between tail control surface throws. This menu option only appears when Model Setup, Aircraft Type. selected in...
- Page 161 To adjust the V-tail differential: V-Tail Differential. 1. From the Model Adjust menu, touch 2. Set Switch to to use a single value for differential, or assign a switch from the popup menu. 3. Touch the value box to adjust the differential value.
- Page 162 FLAP SYSTEM The Flap System menu enables flap programming as well as flap to elevator mixing. To make the Flap System menu available, choose a wing that includes flaps in Aircraft Type in the Model Setup menu. Settings include: switch input, flap position, elevator mix value, and speed of movement.
- Page 163 To program the Flap System: Flap System. 1. From Model Adjust, touch 2. Touch the Switch input box to select the desired switch or Flight Mode. TIP: If an analog input device is selected (stick, slider or knob), the flaps will not operate in direct response to moving the input.
- Page 164 4. If necessary, add any required elevator mixing for each of the switch positions by touching in the Elev value box and sliding the circle along the bar. This pre-defined mix compensates for pitch changes that occur when the flaps are deployed. The elevator compensation should be tuned so the model maintains level flight at each flap position.
- Page 165 5. Adjust the flap speed to slow the flap movement for more realistic operation or to help prevent a rapid change in flight characteristics when the flaps are deployed. Flap speed options range from 0.0 to 360 seconds. The value selected is the amount of time it will take for the flaps to move from one switch position to the next.
- Page 166 PITCH CURVE The Pitch Curve menu is available by default for helicopter model types. Pitch curves are tied to the flight modes because they are often tied to complicated mixes. The graph represents how the pitch output command will respond to the pitch stick movements. On the graph, the horizontal axis represents the movement of the throttle stick, and the vertical axis represents the pitch command.
- Page 167 To set up a pitch curve: 1. From Model Adjust, touch Pitch Curve to open the scrollable menu. 2. Touch the value box for each point to adjust the value. Increase or decrease the value to achieve the desired pitch output at that stick position. 3.
- Page 168 4. To add points to the curve, move the throttle stick to the desired position along the curve. Add Pt Touch the button at the bottom of the menu. Throttle position...
- Page 169 5. To delete points from the curve, move the throttle stick over the point to be deleted. Touch the Del Pt button at the bottom of the menu. Throttle position 6. Activate Expo, if desired, to smooth the curve to prevent abrupt change in pitch response. 7.
- Page 170 ACRO PITCH CURVE A pitch curve is also available for Acro models. The Acro pitch curve operates in the same manner as the helicopter pitch curve, but can be assigned to any stick, switch, or flight mode. To activate the Acro pitch curve: Aircraft Type.
- Page 171 4. Touch the back arrow ( ) to return to Model Setup. Channel Assign. 5. Touch 6. Touch RX PORT ASSIGNMENT in the top menu bar.
- Page 172 7. Assign the pitch output by selecting an open receiver port and choosing Pitch from the popup list. Model Adjust, touch Pitch Curve. Assign a switch and program the pitch curve using 8. From the same steps as the heli programming above.
- Page 173 SWASHPLATE The Swashplate menu applies to models that require swashplate mixing at the transmitter. Swashplate is available when the Model Type is Helicopter and the Swashplate Type is set to anything other than Normal in Model Setup. This menu manages swashplate mixes not commonly used with flybarless control systems, which handle mixing on the model.
- Page 174 Below is a common 3D swashplate setup for models using swashplate mixes: Swashplate Type 1. From Model Setup, touch to select the correct swashplate type. 2. Adjust servo horn positions so they are neutral at center stick (zero pitch). 3. Connect the linkages with the collective pitch stick centered (zero pitch).
- Page 175 6. Use servo reversing to ensure the swashplate is moving correctly for each control input. At this step, the swashplate does not have to respond in the correct direction, but it is critical it tilts correctly with pitch and roll and moves up and down with pitch. 7.
- Page 176 ELECTRONIC E-RING Electronic E-Ring prevents over driving servos by limiting servo travel if the sum of your cyclic and pitch inputs exceeds servo limits.
- Page 177 ELEVATOR COMPENSATION The Elevator Compensation setting allows for adjusting the reaction time of the aileron and pitch servos in a 120° swashplate setup. This allows for all 3 servos to reach full travel at the same time. Select a number from the popup menu to adjust the delay of the aileron and pitch channels with elevator input.
- Page 178 GYRO Gyro options for Heli and Acro model types are considerably different. HELI GYRO The Gyro menu is enabled to manage tail gyro gain when the Model Type is set to Helicopter. Touch Switch to select a switch or On. The number of gyro gain positions will correlate to the switch chosen.
- Page 179 ACRO GYRO Unlike Heli configurations, Acro Gyro menus use a curve mix to enable the pilot to achieve the expected flight response. It is common to use the gyro menu to mix gain values so deflecting the control stick reduces the gain, preventing the gyro from fighting flight commands. Gyro menus Model Setup, Aircraft Type menu under the for the acro model type must be enabled in the...
- Page 180 3-AXIS GYRO With the 3-axis gyro function activated in Model Setup, Aircraft Type, Aircraft Options touch 3-Axis Gyro in Model Adjust. Select a switch to activate the gyro.
- Page 181 Select a switch to activate the gyro. Select the percent value for each of the switch positions to adjust the gyro gain value.
- Page 182 Add a Trimmer button to enable fine tuning adjustment of the gyro gain in the air. Select an open Channel for the gyro gain adjustment. This is the channel the gyro gain lead should be connected to. Consult the instructions included with your gyro for connection information.
- Page 183 SINGLE AXIS GYRO In Model Setup, Aircraft Type, Aircraft Options select Gyro 1, 2 and/or 3 to activate the single axis gyro function. In Model Adjust touch Gyros to open the gyro menu.
- Page 184 Gyro Type defines how the curve will respond depending on gyro functionality.
- Page 185 Heli gyro type is used when a helicopter style heading hold gyro control input method is used. For these curves the numbers range from -100 to 100. This is normally used to provide two functions (rate or heading hold). Selecting a positive or negative number defines the mode as heading hold or rate mode.
- Page 186 Aircraft type is intended for use with certain rate-mode-only airplane gyros that read the full signal range of zero to 100. This selection will change how the curve is laid out CURVE in the sub menu.
- Page 187 To program an ACRO, aircraft type gyro: CURVE 1. Touch to open the custom curve mix. 2. Assign the input channel for the gyro. For example, if the gyro is installed to assist the aileron channel, select Aileron. 3. Assign the output channel for the gyro, for example, the Gear channel. The gain signal from the gyro must be plugged into the designated port to function properly;...
- Page 188 Pilots will often set the value in the center of the curve at a high gain value. The gain is usually reduced to zero with full input at both ends of the travel. As the input is moved the gain is quickly reduced.
- Page 189 GOVERNOR The Governor menu is available when the model type is set to Helicopter. Governors and rev limiters attempt to manage the rotor speed of the helicopter. How the governors function can vary greatly. Consult the governor manual for more information. •...
- Page 190 TAIL CURVE Helicopters without a heading hold gyro will experience inconsistent tail performance. When throttle is applied, the tail will swing one way and then another with reduced power. Tail curves are used to compensate for torque at various points in the throttle range. Tail curves are commonly tied to flight modes and tuned to match each mode after the pitch and throttle curves are set.
- Page 191 CAMBER PRESET The Camber Preset menu is activated when the model type is set to Sailplane and when one of the multi-servo wing types is selected in Sailplane Type in the Model Setup menu. The Camber Preset function allows for programming of the ailerons, flaps (if assigned), wing tips (if assigned) and elevator for a specific position in each flight mode.
- Page 192 The OTF settings allow for the use of one of the trim buttons to fine tune each of the aircraft camber On The Fly (OTF) Trim Function settings while in the air. See the section for more information. The Speed setting enables the control surfaces to transition over a period of time, up to 120 seconds, when the flight mode is changed.
- Page 193 CAMBER SYSTEM The Camber System menu is activated when the model type is set to Sailplane and when one of the multi-servo aileron wing types is selected in Sailplane Type in the Model Setup menu. The Camber System allows camber adjustment in flight and is used as the braking system. Each flight mode can have the camber system assigned differently and can use different input controls for each.
- Page 194 IN-FLIGHT CAMBER CONTROL Each flight mode can have an independent configuration with different offsets and travel. Some flight modes may have a small range of camber (drooped trailing edge), while others may have a small range of reflex (raised trailing edge). Common practice is to have some flight modes utilize a small amount of travel for fine trailing edge control and some flight modes to use a large amount of travel to act as flaps.
- Page 195 IN-FLIGHT BRAKING In-flight braking requires simultaneous flap and aileron deployment in order to create drag and slow the aircraft. These complicated mixing functions are often referred to as Crow or Butterfly. Crow is a flight mode where the flaps deploy and the ailerons reflex upward. The sailplane is put into a steep dive before crow is deployed, and even the fastest, most streamlined sailplanes can be landed slowly, with precision.
- Page 196 For example, a basic 3 flight mode setup on an electric sailplane with a 4 servo wing may be configured so that: • In launch mode: The spoiler stick operates the motor as a throttle stick for the motor. Camber is controlled from a slider and is mixed to ailerons so the flaps and ailerons work together as flaps.
- Page 197 • In land mode: The motor is disabled using the motor cut menu. The spoiler stick deploys crow. - At high stick the camber is neutral. - As the stick is moved down, the flaps are dropped and the ailerons are reflexed up. - A flap to elevator mix provides down elevator as the crow is applied to compensate for pitch changes.
- Page 198 CAMBER SYSTEM PROGRAMMING To program the Camber System: 1. Configure all of the flight modes before beginning the camber system programming. Camber System 2. Touch from the Model Adjust menu. 3. Select the flight mode to program. Moving the flight mode switch changes the flight mode indicated at the top of the menu.
- Page 199 6. Set the Up and Down values for the control surfaces. The up value defines the upper side of the surface travel. The down value defines the lower end of the surface travel. 7. Select the next flight mode and program it according to Steps 4–6 until all flight modes are programmed.
- Page 200 MODEL SETUP The Model Setup menu features are used for basic aircraft setup configuration. The menu list varies by model type.
- Page 201 The Model setup menu list includes: • Frame Rate • Menu Setup • Aircraft Type (ACRO, MULTI) • Sleep Mode • Swash Plate Type (HELI) • Range Test • Sailplane Type (SAILPLANE) • Timers • Telemetry • Trainer • Audio Events •...
- Page 202 BIND Binding is the process of linking the iX20 to an aircraft receiver. The iX20 is compatible with genuine DSM2 and DSMX Spektrum receiver products. ® ® BIND Access the Bind menu from the Model Setup menu or access it directly by touching the...
- Page 203 Alerts Touch to configure any alerts that occur during binding.
- Page 204 TIMERS The Timers menu offers two configurable on-screen timers and the integrated timers along the ribbon at the top of the screen. Each model type has its own default timer assignment. See the Model Type Defaults section for more information. Timers 1 and 2 are independent from each other and are freely assignable.
- Page 205 The integrated timers record the time the model has clocked as well as the total time the iX20 RESET system has clocked. Reset them by selecting the button.
- Page 206 To configure a timer: 1. From Model Setup, touch Timers. TIMER 1 2. Touch along the top ribbon. Menu options for these two timers are identical. 3. Set the Enabled button to on to enable the selected timer. 4. Name the timer if desired.
- Page 207 5. Select Stopwatch or Countdown. Stopwatch: counts up from zero at start. Countdown: counts down from a user defined time at start. 6. If Countdown is selected, the start time (Minutes and Seconds) can be changed. The default setting is 5 minutes. 7.
- Page 208 8. One Time can be selected if the timer continues counting once started, regardless of the input. Timer Alerts 9. Touch the button to set audio and vibration alerts.
- Page 209 Timer Control Alerts: Announce when the timer starts, stops, or resets. Alerts: Can be set to report at timed intervals. These alerts are pre-configured with Macros for basic text-to-speech reporting. The spoken alerts can be changed at these trigger points Audio Events by changing the text.
- Page 210 TIP: Touch one of the clock icons ( ) in the Timer displays on the Dashboard screen to directly access the Timers menu. Press and hold the Dashboard timer display to reset the timer.
- Page 211 The Frame Rate menu gives options for frame rates and DSM type. The frame rate options are 22ms or 11ms. Always use 22ms when using analog servos. 11ms settings require digital servos or direct communication with the Spektrum serial signal (e.g., a flight controller).
- Page 212 DX18 transmitter. This changes the transmitter channel mapping to the unique configuration of the DX18. XPLUS: Enabling XPLUS defaults the frame rate to 22 ms. This activates the 8 additional channels of the iX20 through the XPLUS 8 module (SPMXP8000) or the Spektrum AR20310T receiver (SPMAR20310T).
- Page 213 SPEKTRUM TELEMETRY Telemetry options on the iX20 require compatible telemetry devices. Some telemetry devices offer limited telemetry options. DSMX Ultra Micro Aircraft will report RF performance, but do not have further telemetry options.
- Page 214 USING SPEKTRUM TELEMETRY Let the iX20 automatically configure the telemetry sensors from the Telemetry menu, or set up each sensor manually. Receiver voltage always defaults to slot eleven, and flight log data to slot twelve. To configure the telemetry system: 1.
- Page 215 Remove 5. Select to delete the selected sensor from the telemetry list. Cancel 6. Select to ignore changes made in the sub-menu. Save 7. Select to keep the changes and exit back to the telemetry menu. Dashboard Setup 8. Select to define which telemetry data appear in the Dashboard telemetry display.
- Page 216 TELEMETRY SCREEN CONFIGURATION Gauge Panel Setup: Touch the Gauge Panel button at the top of the Telemetry list to modify the gauge display. 1. Touch the to add a new panel. 2. Touch the ( ) to open the panel configuration menu. 3.
- Page 217 Dashboard Setup: Touch the Dashboard Setup button at the top of the Telemetry list to modify the telemetry dashboard display. 1. Select the current panel or touch the to add a new panel. 2. Touch the ( ) to open the panel configuration menu. 3.
- Page 218 TELEMETRY SENSORS A variety of Spektrum telemetry sensors are available. These can be connected to any compatible telemetry device. X-Bus sensors can be daisy-chained to connect multiple sensors to the X-Bus port of the aircraft receiver or telemetry module.
- Page 219 Smart Battery and Smart ESC if present, pre-configure low voltage warning for the ESC and pre-configure start up warnings if an uncharged battery is connected (only available with Spektrum Smart ESCs, Batteries and compatible receivers).
- Page 220 ANALOG SWITCH SETUP The Analog Switch Setup menu allows all sticks, sliders and knobs (analog input devices using potentiometers) to be used as a kickpoint to activate functions like mixes or dual rates. Each input has two kickpoints between -100% to 100%. This range represents the full travel, with 0% being center.
- Page 221 In the default state, the kickpoint for the transition between positions 0 and 1 is at 75%. The kickpoint for the transition between positions 1 and 2 is at -75% percent. The input is in switch position 1 at neutral (0%). Moving the input above 75% will change it to position 0, and moving it below the -75% value changes it to position 2.
- Page 222 To program the switch kickpoints: 1. Touch either of the value boxes for the analog control. 2. Adjust the location of the kickpoints by dragging the highlighted circle or using the + or – buttons. Cancel Reset 3. Touch to save the values, to exit the kickpoint adjust menu or to return to the default settings.
- Page 223 SLEEP MODE The Sleep Mode menu allows the user to change RF and screen state. Access the menu either from the Model Setup menu, or double tap the power button.
- Page 224 To put the transmitter or the screen in sleep mode: 1. Either double tap the Power Button or touch Sleep Mode in the Model Setup menu. 2. Touch the OFF/ON button(s) to turn off any combination of the Spektrum RF, Screen, WiFi or Bluetooth. APPLY CANCEL 3.
- Page 225 • When the screen is in sleep mode, tap the Power Button once to wake it. • Place the RF in sleep mode for extended use of the iX20 when it is not connected to a model or during charging.
- Page 226 SPEKTRUM LED INDICATOR • A slow flashing orange Spektrum LED indicates the RF is off and the screen is in sleep mode. The operating system remains powered on and ready to wake with a single tap of the power button.
- Page 227 DIGITAL SWITCH SETUP Digital Switch Setup gives flexible output options for a channel to be driven from a switch or flight mode.
- Page 228 To program a Digital Switch Setup: 1. Channel assignments cannot be made from the Digital Switch Setup menu. Assign the switch or flight mode to the desired output channel in the Channel Assign menu. 2. In the Digital Switch Setup menu, touch the Select button to view the Switch menu.
- Page 229 SWITCH STATUS Touch the Switch Status tab in the ribbon at the top of the screen to display all available switches and their positions.
- Page 230 SWITCH ASSIGNMENTS Touch the Switch Assignments tab in the ribbon at the top of the screen to display all available switches and their assignments.
- Page 231 AUDIO EVENTS Audio Events on the iX20 can be set up to report virtually any action on the transmitter. The Audio Events menu is meant to serve as one location to find any audio report in the system. Reports can be set up based on timers, sticks, switches, telemetry data and more. The iX20 features a powerful text to speech engine in the Android operating system.
- Page 232 • Tone selections: The default Tone audio selection sounds a “beep” report. Audio (.mp3 or .wav) files loaded to the iX20 from third party sources can be used in place of the default sound. Tone 1. Select one of the options for the alert sound.
- Page 233 • MACROS: Touch the MACROS button to see a list of additional spoken-text macros. Select an option in this menu to insert a text string that vocalizes the selected data. The macros include a dollar sign ($) and description with no spaces.
- Page 234 SWITCH CHANGE REPORTS The Switch Change Reports menu creates an audio report when a switch is moved. Press the plus ( + ) to add a report. The on-screen switch will enable or disable the report. Touching the ( ) will delete the report. Touch the ( ) to open a submenu to configure the report. Select the Switch from the popup menu.
- Page 235 CUSTOM REPORTS The Custom Reports menu creates an audio event that can be set to repeat on a user-defined interval. The time selected in Frequency will determine how long the system will pause before repeating the report.
- Page 236 TOUCH SWITCH REPORTS The Touch Switch Reports menu creates audio events that are assigned to any of the toggle switches, A-H, on the transmitter. The event allows you to create an audible check of a switch position simply by touching the switch. To create a Touch Switch Report: 1.
- Page 237 7. Touch the ( ) to accept the changes and return to the report details menu. 8. Select “On Release” or “On Touch” to determine when the report will sound. On Touch is the default. 9. Touch the back arrow ( ) to return to the Touch Switch Report menu or touch and hold to return to the dashboard.
- Page 238 TRIM REPORTS The Trim Reports menu allows for changing how the system signals trim inputs. Defaulted as tones, the trim reports can be set to tone, vibration, tone and vibration, or none.
- Page 239 To change the Trim Reports: 1. Select a channel from the Trim Reports menu. 2. Touch the drop down menu button to select the report type: Tone, Vibe, Tone/Vibe, or None. 3. If either of the Tone report types are chosen, the default tone will be used, or touch the pen icon ( ) to select a third party audio file.
- Page 240 TRIM RELEASE REPORT Trim Release Reports inform the pilot the trim has been moved. Normal trim reports do not work with voice reports because they would sound a report with every trim switch movement. Trim release reports only announce when the trim switch movement stops. Only the primary flight control channels with trim adjustment available may be set up for Trim Release Reports.
- Page 241 To enable a Trim Release Report: 1. From the Trim Reports menu, select the desired channel. Swipe to the bottom of the page to access Trim Release Report. Voice Voice/Vibe 2. Select the type of report from the drop down menu. Only options are available.
- Page 242 TELEMETRY WARNINGS Telemetry features that have been activated in the Model Setup, Telemetry menu can be refined or left at the default settings.
- Page 243 STEPPING REPORTS The Stepping Reports menu allows linking multiple alerts to a single switch. A report is spoken at the chosen switch positions. The reports can be tied to any switch regardless of any other assignments. Enable Auto-Cycle? to make the reports start again at the top of the list after it has completed the last step.
- Page 244 TRAINER STATE REPORTS The Trainer State Reports menu allows for changing the audio reports that indicate current control and connection status of the trainer system. Select the reports to activate when the transmitter transfers command in trainer mode or if the instructor transmitter loses the signal from the student radio.
- Page 245 CENTER TONE The Center Tone menu allows the addition of an audio alert to indicate a given analog control input is centered. Touch the drop-down menu button in each control for the available options. If Voice is chosen, touch the text input line to add text-to-speech.
- Page 246 MODEL START ALERTS STICK INPUT, SERVO OUTPUT The Model Start Alerts menu includes three options: SWITCH, which appear in the ribbon at the top of the screen. These options can be used to warn of the state of specific modes or features that are active when RF is powered on, such as high throttle or landing gear retracted.
- Page 247 PRE-FLIGHT CHECKLIST Pilots can choose to configure a Pre-Flight Checklist to verify critical tasks are completed prior to flight. Under Execute, the pilot can choose whether to run the checklist Every Flight Session. Set Modulation to On to transmit during the checklist or off to require completing the checklist prior to transmitting.
- Page 248 SYSTEM SOUNDS The System Sounds menu allows for changing what is spoken during the Transmitter Battery Warning and Transmitter Inactivity Warning alerts.
- Page 249 SPOKEN FLIGHT MODE All desired flight modes should be set up, using the Model Setup, Flight Mode Setup menu, prior to making changes in the Spoken Flight Menu. The number of available flight modes shown will match the modes created in the Flight Mode Setup menu. Defaults report the selected flight mode with a macro.
- Page 250 BINDING ALERTS The Binding Alerts menu allows changes to the alerts given during binding. To change the Binding Alerts: 1. Select the binding alert to be edited. 2. Change the type of alert. 3. Change the spoken text. 4. Activate/deactivate each alert by touching on the on-screen switch.
- Page 251 TIMER REPORTS The Timer Reports menu allows for editing the alerts given in either of the timers. Choose one of the timers listed to access the Timer Alerts menu for that timer.
- Page 252 From the Timer Alerts menu, select any of the Timer Control Alerts to change the alert type as well as the spoken text for the functions of the chosen timer. Select any of the Alerts to change the alert type as well as the spoken text for the time interval alerts of the chosen timer.
- Page 253 CHANNEL ASSIGN The Channel Assign menu defines what stick or switch controls each function. Channel inputs and receiver port assignments are both accessed from this menu. • Channel Input Configuration: Allows each channel to be assigned to the desired stick, switch, button or slider.
- Page 254 CHANNEL INPUT CONFIGURATION In the Channel Input Configuration menu, all but the primary flight controls are available for assignment, indicated by a drop down menu button next to each channel.* 1. Touch the drop down button next to the channel to open a switch selection menu. 2.
- Page 255 RECEIVER PORT ASSIGNMENTS Channels can be re-assigned to any receiver port. Receiver ports have default assignments in a familiar order; however, this can be re-configured so any of the channels can connect to any of the receiver ports. Multiple receiver ports can be assigned to the same channel. To change the receiver port assignments: 1.
- Page 256 TRAINER All options related to programming and using the trainer functions are controlled with the Trainer menu. Three options are available in the trainer menu: • Wired Trainer • Wireless Trainer • Trainer Alerts Wired Trainer and Wireless Trainer have similar options when connecting two transmitters for the purpose of training a student pilot.
- Page 257 Wired trainer supports up to 8 input channels with PPM based trainer systems connected. If the iX20 is used with a wired connection, the correct wired trainer option must be selected in the trainer menu and the student mode started or the wired trainer connection will not work.
- Page 258 Programmable Instructor: • This training mode designates the iX20 as the instructor, and requires the student transmitter to be fully configured, including reversing, travel, mixes, etc. This mode is helpful when the student has the full model configuration complete.
- Page 259 Pilot Link Instructor: • This training mode designates the iX20 as the instructor, and requires the student transmitter to have no settings applied, all of the reverse settings to normal and all travel settings at 100%. This option is intended to make it as simple as possible to connect...
- Page 260 FPV: • This mode is available for connecting a head tracking system to the iX20 for FPV use. See the Headtracking FPV Setup section for more information. • P-Link Student: This training mode designates the iX20 as the student transmitter. Use this Start Student option if the instructor transmitter is set up with Wired Pilot Link Instructor.
- Page 261 Wired Programmable Instructor. A Start Student Mode button appears, which activates and deactivates wired trainer student capabilities. In this selection the iX20 must be fully configured to operate the aircraft.
- Page 262 The student transmitter uses the normal binding process. Wireless Trainer modes are compatible with any Spektrum DSMX or DSM2 transmitter, Spektrum Focal Headsets, and the small MLP4 ® and MLP6 transmitters from Horizon Hobby RTF models which include Spektrum technology.
- Page 263 When wireless trainer mode is selected, a drop down menu will appear with the following options: Programmable Instructor: • This training mode designates the iX20 as the instructor and requires the student transmitter to be fully configured, including reversing, travel, mixes, etc. This mode is helpful when the student has the full model configuration complete.
- Page 264 100%. This option is intended to make it as simple as possible to connect any student transmitter to any airplane. FPV: • This mode is available for connecting a head tracking system to the iX20 for FPV use. This option is covered further in the Headtracking FPV Setup section.
- Page 265 TRAINER ALERTS The Trainer State Reports menu allows the user to change the audio reports that indicate current control and connection status of the trainer system. Select the report activated when control is transferred between instructor and student or if the instructor transmitter loses the signal from the student radio.
- Page 266 INSTRUCTOR TRANSMITTER CONFIGURATION 1. Select the type of trainer mode for the application (Wired or Wireless, Programmable Instructor or Pilot Link Instructor). 2. Choose whether or not to enable Instructor Over-Ride. This setting defines how the instructor can resume control from the student. When enabled, the instructor must not move the sticks when the student is given control.
- Page 267 BINDING WIRELESS TRAINER Binding the iX20 wireless trainer feature as an instructor transmitter is not the same as binding the iX20 to an aircraft. The iX20 has a built-in receiver dedicated to the wireless trainer. The Bind wireless trainer menu screens include a button within the menu.
- Page 268 Wired FPV Mode: Enables the use of a headset with head tracking or another transmitter to control an onboard camera gimbal by physically connecting to the iX20 with a cable. The optional Spektrum wired trainer adaptor (SPMA3091, not included) and a trainer cable (SPM6805, not included) are required for wired FPV operation.
- Page 269 Spektrum Focal headset with head tracking or another DSMX or DSM2 transmitter to control an airborne camera gimbal without connecting the iX20 to a cable. Wireless FPV modes are compatible with any Spektrum DSMX or DSM2 transmitter and Spektrum Focal headsets.
- Page 270 Each individual output channel can be mapped to any input channel from the trainer signal, leaving all other controls on the instructor transmitter. Primary flight control channels default to instructor control. Leave all channels connected to flight controls set up as instructor when using a headtracker.
- Page 271 Student, select the Input Channel and scale and reverse the travel as necessary. Bind 9. For wireless connections, touch the button to put the iX20 into trainer bind mode before powering on the wireless head tracker (student transmitter). See the Binding Wireless Trainer section for more information.
- Page 272 FOCAL CHANNEL ASSIGNMENTS Channel Function Frequency control (compatible with SPMVA2500 and SPMVA2510) Tilt Roll (Focal DVR only)
- Page 273 RANGE TEST The Range Test menu is used to confirm that receiver installation is working. From Model Setup, touch Range Test. Follow the on-screen instructions to perform a range test. This test should be performed multiple times from multiple model orientations to verify the radio component installation.
- Page 274 In addition to watching if the model loses control, more specific data is available from the receiver to learn how well the installation is working. Telemetry receivers report the receiver performance directly in this menu as well as on the Spektrum Airware dashboard telemetry screen; receivers without telemetry can use the Spektrum Flight Log (SPM9540).
- Page 275 TIP: It is important to note the flight log data is reporting the reception quality of the Spektrum signal received at the model. It does not represent the telemetry link strength. The control link can take advantage of multi-link technology, while the telemetry signal cannot.
- Page 276 GUIDELINES FOR DSM2 INSTALLATIONS • It is normal to have as many as 50–100 antenna fades during a flight. • If the RF link is performing optimally, frame losses per flight should be less than 20. • Holds are unacceptable. If a hold occurs, investigate and correct the issue before next flight.
- Page 277 GUIDELINES FOR DSMX INSTALLATIONS • Use fades for comparison only. All attached receivers should have similar fades. If not, investigate poorly performing receivers (location, antenna orientation, etc) and correct. • In conventional models during a normal flight, frame losses should be less than 100 on all receivers. •...
- Page 278 RECEIVER INSTALLATION Always install receivers where the antennas are placed as far possible from metal, batteries, wires, fuel tanks and other objects. Receivers with integrated telemetry should be installed with a focus on the antennas attached to the main part of the receiver in an optimal location, as this will be the only antenna transmitting telemetry information.
- Page 279 MODEL START WARNINGS Model Start Warnings are used to warn of the state of specific modes or features that are active when RF is powered on. Three trigger options are available: • STICK INPUT: Triggers the alert based on movement of one of the analog control inputs. •...
- Page 280 By default, the system warns when attempting to power on the RF signal with the throttle stick over 10% by speaking “Throttle High.” Multiple model start warnings can be configured. When attempting to power on the RF signal, the system lists every issue encountered. The system will not power on the RF signal until all warned issues are resolved.
- Page 281 To add a stick input model start warning: Model Start Warnings. 1. From Model Setup, touch STICK INPUT 2. Select the trigger type. 3. Touch the + icon to add a new warning. Touch the ( ), if available, to remove a current warning. 4.
- Page 282 To add a servo output model start warning: Model Start Warnings. 1. From Model Setup, touch SERVO OUTPUT 2. Select the trigger type. 3. Touch the + icon to add a new warning. Touch the ( ), if available, to remove a current warning. 4.
- Page 283 To add a switch model start warning: Model Start 1. From Model Setup, touch Warnings. SWITCH 2. Select the trigger type. 3. Touch the + icon to add a new warning. Touch the ( ), if available, to remove a current warning.
- Page 284 RF devices using digital communication protocols. The iX20 includes the CRFS protocol for compatibility with the TBS Cross Fire and Cross Fire 2. In addition, the iX20 is engineered to deliver a 9.5V power supply for external devices. Any changes...
- Page 285 Cross Fire system requires the Cross Fire serial port adaptor (SPMA3090, not included). Consult the manufacturer’s manual for use of any external RF device. Horizon Hobby does not provide support for external RF devices connected to the iX20 transmitter.
- Page 286 SPEKTRUM RF The touch switch defines whether or not Spektrum RF is transmitted along with the data stream coming from the data port when other protocols are selected. The switch defaults to on when the Protocol is set to Inhibit.
- Page 287 SERIAL PORT POWER (9.5V) The Serial Port will provide 9.5V for external devices by selecting the touch switch. This power supply has been designed to support up to 1 amp of current. Battery use will be affected and the expected use time will decrease when using this option to power external devices. Set the Transmitter Battery Warning alarm in System Settings, System Configuration to 25% when powering external devices through the serial port to ensure there is ample reserve battery time to support current demands and ensure safe operation.
- Page 288 AIRCRAFT TYPE Aircraft Type defines what type of model configuration the iX20 is set up to control. Therefore, this menu should be the first step after creating a new model. The choices made in this menu define default channel assignments and enable pre-defined mixes with custom menus designed specifically for the selected application.
- Page 289 AIRCRAFT TYPE (AIRPLANE) Wing Tail Choose from eleven common airplane wing Choose from ten common configurations for control configurations. The default configuration rudder and elevator. is Normal, which is a single aileron servo Similar to the elevon options above, there are configuration.
- Page 290 Most pilots use Normal (low throttle to the bottom of transmitter). For pilots who use reverse throttle (low throttle to the top of the transmitter, high throttle to the bottom), the iX20 can be configured as such for correct operation.
- Page 291 SWASHPLATE TYPE (HELICOPTER) Collective Type When the model type is set to helicopter, this menu is called Swashplate Type. The diagram represents The Collective Type allows the throttle/pitch stick to the top down view of the swashplate. Select the operate in reverse and ensures trims, curves and appropriate mix to match the helicopter swashplate.
- Page 292 SAILPLANE TYPE (SAILPLANE) Tail The Sailplane Type menu is similar to the Acro For V-Tail applications there are two options. Try mode, but has more advanced features geared toward sailplane pilots. This menu is set up to one first and if no combination of reversing will support both powered and unpowered sailplanes.
- Page 293 Motor Select the Motor drop down menu button to assign the motor function to any control stick or switch. The Motor option in the sailplane type defaults to Inhibit. Four mixes are enabled in the Mixing menu in the Model Adjust list when the model type is set to Sailplane;...
- Page 294 The AP mode has advanced functions for aerial photography multirotors to enable pilots to use a control stick on the iX20 to fly the multirotor in one flight mode and control the camera from another. Rotor type: Select the number of rotors on the multirotor.
- Page 295 GPS technology* to hold a position and the pilot can move the pitch/roll control stick to guide the camera gimbal without affecting the multirotor. *GPS technology for position hold are not part of the features of the iX20. This function must be installed on the flight controller onboard the aircraft.
- Page 296 FLIGHT MODE SETUP Flight Modes can help a pilot manage a wide variety of switches and functions. Pilots can use flight modes to manage rates, expo, mixes, audio alerts, and other functions. By defining several flight modes, pilots can maximize the aircraft’s performance using different configurations without having to use multiple switches.
- Page 297 EXAMPLES OF FLIGHT MODE APPLICATIONS Acro: Airplane pilots can take advantage of flight modes to manage different phases of the flight, instead of having to operate different switches. For example, a scale airplane might have a flight mode for take-off with a few degrees of flaps, no elevator compensation, landing gear down, and low rates.
- Page 298 the speed the helicopter responds also changes with head speed. By putting all of the related functions in flight modes, every function can be tailored to work correctly with the other settings in that mode. Sailplane: Sailplane pilots commonly use flight modes to define a wide array of configurations, which can have a drastic impact on how a high performance sailplane flies.
- Page 299 USING FLIGHT MODE SETUP Assign a single switch for up to three modes. Swipe up the right side of the screen to scroll to the bottom of the menu and change the text-to-speech flight mode name or re-assign the currently selected switch position to a different flight mode.
- Page 300 Adding another switch will add more flight modes to the flight mode assignment table: • Switch 1 will move the flight mode selection left or right in the table. • Switch 2 will move the flight mode selection up or down in the table. •...
- Page 301 • The Priority Switch can override the table. One switch position will always be Switches. This position uses switches 1–3 to choose between the flight modes in the assignment table. The other switch positions can be assigned to specific flight modes.
- Page 302 HOLD (HELICOPTER) Hold, commonly referred to as throttle hold, is a flight mode that allows the pilot to eliminate power to the rotor blades while maintaining cyclic and blade pitch control. Hold is enabled in the Flight Mode Setup menu and is configured in the Model Adjust, Throttle Curve and Pitch Curve menus.
- Page 303 To enable the throttle hold function, touch the Hold Switch drop down menu button to select the desired switch. Select the switch position(s) to activate Hold. After the Hold mode is enabled in the Flight Mode Setup, the curves can be adjusted in the Throttle Curve and Pitch Curve menus.
- Page 304 TRIM SETUP Use the Trim Setup menu to change the size of the trim step and the trim type.
- Page 305 Trim Step: Adjusting the trim step value determines how many “clicks” of trim you input each time you press the trim button. Changing the trim step value to 0 disables the trim for the channel. To change the trim step value: 1.
- Page 306 Trim Type: The two types are Common (default) and F-Mode. Common trim type maintains the same trim values for all flight modes. F-Mode trim type enables you to save trim values for each individual flight mode. For example, if an aircraft requires aileron trim in flight mode 1 but not in flight mode 2, use F-Mode trim to add the required trim in flight mode 1 and not affect the other.
- Page 307 Trim Assignment: In some instances, such as airplane model type throttle, trim input may be reassigned to a different location.
- Page 308 CROSS TRIMS Normal and Cross trim options are available. Normal trims align with the control stick; for example, the throttle trim is next to the throttle stick. Cross trims swap the position of the trims; for example, the throttle trim is next to the elevator stick and vice versa.
- Page 309 MENU SETUP The Menu Setup option allows for customization of many of the menus in the iX20 by specifying a receiver, channel count or activating other options.
- Page 310 The My List button is configurable for each model Receiver: Touch the receiver button to select the Spektrum receiver being used from the popup menu. Specifying a receiver automatically sets the channel count and activates additional features, such as AS3X and Forward Programming, if they are available with the selected receiver.
- Page 311 SYSTEM SETTINGS The System Settings menu is accessed from any of the main screens by touching the System Settings button at the bottom of the screen.
- Page 312 SYSTEM CONFIGURATION The System Configuration menu gives the pilot several basic setup options for the iX20. User Name: Touch the pen icon ( ) to enter the user name in the text field using the on- DONE screen keyboard. Touch...
- Page 313 Mode: Mode refers to how the control stick arrangement. Four modes are available, though most pilots use Modes One or Two. Mode Two is the iX20 default and is preferred by most North American pilots. Changing to Mode One or Three requires a physical change to both transmitter sticks.
- Page 314 Audio Event FIFO on/off (Default off): Enables the audio events, first in first out feature. This setting plays every audio event in the order they are triggered without audio events ‘stepping on or over’ each other. If many audio events are active, this setting can cause the system to backlog events which may cause the system to speak for some time, depending on the number of alerts.
- Page 315 RESET SPEKTRUM AIRWARE: Press the RESET SPEKTRUM AIRWARE button to erase all stored models and load a default model. This action requires a long press to continue to the next warning screen followed by a restart of the system.
- Page 316 PRODUCT INFORMATION The Product Information menu displays the serial number, region, version of the Spektrum AirWare app, firmware version, RF PID and the library version of the transmitter. REGISTER TRANSMITTER Touch to log in and register the iX20.
- Page 317 CALIBRATION The Calibration menu allows the user to ensure the analog input devices (control sticks, sliders, and knob) are working properly. To complete the calibration procedure, move every control to the extreme and return it to center. The screen shows a graphic representation of each input. The indicator turns green when the range of movement of each control is confirmed.
- Page 318 REGULATORY INFORMATION The Regulatory screen displays all relevant regulatory information for the iX20.
- Page 319 Can’t find expected features Type settings are correct for the type settings desired aircraft Select AirWare app in the App Can’t find the Spektrum Shortcut deleted or moved from drawer, and drag it to the side to AirWare app home screen...
- Page 320 Put the device being connected discoverable mode to in discoverable mode Disconnect from other Bluetooth Bluetooth won’t connect devices first. This may require iX20 already connected to a powering off the device or different Bluetooth device FORGET selecting for that device...
- Page 321 (during binding) to transmitter correctly in the bind port bind the aircraft to the transmitter Flight battery/transmitter Replace/recharge batteries battery charge is low Transmitter is EU version and The iX20 EU version is not receiver is DSM2 compatible with DSM2 receivers...
- Page 322 Move powered transmitter a few Transmitter too near aircraft feet from aircraft, disconnect and during linking process reconnect flight battery to aircraft Aircraft or transmitter is too Move the aircraft or transmitter close to large metal object away from the large metal object Rebind transmitter to the aircraft Bind plug left installed in bind port and remove the bind plug before...
- Page 323 Receiver antenna cut Replace or contact Horizon The receiver enters failsafe or damaged Product Support mode a short distance away Main and remote receivers too Install main and remote receivers from the transmitter near each other at least 2 inches (51mm) apart Low battery voltage Completely recharge flight battery Do a check of the wires and...
- Page 324 Reposition remote receivers for Poor signal reception improved RF signal path diversity Check for and stop feedback Electronic feedback from servos or motor systems to the ESC or receiver Flight log registers high Check aircraft power draw number of fades, losses or and increase battery power holds or aircraft responds or decrease power demand...
- Page 325 Can I control Spektrum surface equipment with the iX20? no Is it okay to root the android operating system to do custom upgrades and Android configurations? no Can the iX20 use the control sticks to control WiFi or Bluetooth devices? no...
- Page 326 1-YEAR LIMITED WARRANTY What this Warranty Covers Horizon Hobby, LLC, (Horizon) warrants to the original purchaser that the product purchased (the “Product”) will be free from defects in materials and workmanship for a period of 1 years from the date of purchase. What is Not Covered This warranty is not transferable and does not cover (i) cosmetic damage, (ii) damage due to acts of God, accident, misuse, abuse, negligence, commercial use, or due to improper use,...
- Page 327 ALONE HAVE DETERMINED THAT THE PRODUCT WILL SUITABLY MEET THE REQUIREMENTS OF THE PURCHASER’S INTENDED USE. Purchaser’s Remedy Horizon’s sole obligation and purchaser’s sole and exclusive remedy shall be that Horizon will, at its option, either (i) service, (ii) repair, or (iii) replace, any Product determined by Horizon to be defective.
- Page 328 nor accepted for any resulting damage or injury. By the act of use, setup or assembly, the user accepts all resulting liability. If you as the purchaser or user are not prepared to accept the liability associated with the use of the Product, purchaser is advised to return the Product immediately in new and unused condition to the place of purchase.
- Page 329 Inspection or Services If this Product needs to be inspected or serviced and is compliant in the country you live and use the Product in, please use the Horizon Online Service Request submission process found on our website or call Horizon to obtain a Return Merchandise Authorization (RMA) number. Pack the Product securely using a shipping carton.
- Page 330 NOTICE: Do not ship lithium batteries to Horizon. If you have any issue with a lithium battery, please contact the appropriate Horizon Product Support office. Warranty Requirements For Warranty consideration, you must include your original sales receipt verifying the proof-of-purchase date. Provided warranty conditions have been met, your Product will be serviced or replaced free of charge.
- Page 331 ATTENTION: Horizon service is limited to Product compliant in the country of use and ownership. If received, a non-compliant Product will not be serviced. Further, the sender will be responsible for arranging return shipment of the un-serviced Product, through a carrier of the sender’s choice and at the sender’s expense.
- Page 332 FCC INFORMATION Contains FCC ID: BRWPLANO1T FCC ID: BRWIX20 This device complies with part 15 of the FCC rules. Operation is subject to the following two conditions: (1) This device may not cause harmful interference, and (2) this device must accept any interference received, including interference that may cause undesired operation.
- Page 333 Supplier’s Declaration of Conformity Spektrum iX20 20 Channel 2.4 GHz Aircraft System (SPMR20100) This device complies with part 15 of the FCC Rules. Operation is subject to the following two conditions: (1) This device may not cause harmful interference, and (2) this device must accept any interference received, including interference that may cause undesired operation.
- Page 334 • Reorient or relocate the receiving antenna. • Increase the separation between the equipment and receiver. • Connect the equipment into an outlet on a circuit different from that to which the receiver is connected. • Consult the dealer or an experienced radio/TV technician for help. Horizon Hobby, LLC 2904 Research Rd., Champaign, IL 61822...
- Page 335 IC INFORMATION Contains IC: 6157A-PLANO1T IC: 6157A-IX20 CAN ICES-3 (B)/NMB-3(B) This device complies with Industry Canada license-exempt RSS standard(s). Operation is subject to the following two conditions: (1) this device may not cause interference, and (2) this device must accept any interference,...
- Page 336 COMPLIANCE INFORMATION FOR THE EUROPEAN UNION EU Compliance Statement: Horizon Hobby, LLC hereby declares that this product is in compliance with the essential requirements and other relevant provisions of the RED Directive. A copy of the EU Declaration of Conformity is available online at: http://www.horizonhobby.com/content/support-render-compliance.
- Page 337 INSTRUCTIONS FOR DISPOSAL OF WEEE BY USERS IN THE EUROPEAN UNION This product must not be disposed of with other waste. Instead, it is the user’s responsibility to dispose of their waste equipment by handing it over to a designated collections point for the recycling of waste electrical and electronic equipment.
- Page 339 © 2019 Horizon Hobby, LLC. DSMX, the DSMX logo, Spektrum AirWare and the Horizon Hobby logo are trademarks or registered trademarks of Horizon Hobby, LLC. The Spektrum trademark is used with permission of Bachmann Industries, Inc. Android is a trademark of Google Inc. The Bluetooth word mark and logos are registered trademarks owned by Bluetooth SIG, Inc.
Need help?
Do you have a question about the ix20 and is the answer not in the manual?
Questions and answers