
Related Manuals for Pevino PNG46S-HHB


Summary of Contents for Pevino PNG46S-HHB
- Page 1 WINE COOLER USER GUIDE PeVino – PNG46S-HHB PeVino – PNG180S-HHB PeVino – PNG46D-HHB PeVino – PNG180D-HHB (Dansk version: side 18) www.pevino.com...
-
Page 2: Important Safety Instructions
THANK YOU FOR PURCHASING A PEVINO WINE COOLER. BEFORE USE, PLEASE READ AND FOLLOW ALL SAFETY RULES AND OPERATING INSTRUCTIONS. WARNING The information in this document is subject to modification without any prior notice. IMPORTANT SAFETY INSTRUCTIONS To reduce the risk of fire, electrical shock, or injury when using your appliance, follow these basic precautions. - Page 3 Before using your wine cooler • Remove the exterior and interior packaging. • Before connecting the wine cooler to power source, let it stand upright for approximately 6 hours. This will reduce risk of a malfunction in the cooling system from handling during transportation. •...
- Page 4 INSTALLATION INSTRUCTIONS FOR WINE COOLER: 1. Please follow the installation diagram when installing the wine cooler. No less than the minimum installation dimension. 2. The wine cooler draws air from the right side of the ventilation frame and expel through the left side of the ventilation frame under the front door.
- Page 5 This is a wine cooler for free standing or to be installed inside a cabinet. The cabinet must be with good ventilation space and no back panel, otherwise it will affect the wine cooler’s ability to function normally. Please follow the installation diagram. PNG46S-HHB & PNG46D-HHB PNG180S-HHB & PNG180D-HHB...
- Page 6 DOOR OPENING ANGLE AND DIMENSIONS PNG46S-HHB & PNG46D-HHB PNG180S-HHB & PNG180D-HHB...
-
Page 7: Operating Noises
TURNING ON YOUR WINE COOLER Plug in and switch on the unit by pressing the power button for a few seconds. When you use the wine cooler for the first time (or restart the wine cooler after having it shut off for a long period), there will be a few degrees variance between the temperature you have selected and the one indicated on the LED display. -
Page 8: Temperature Settings
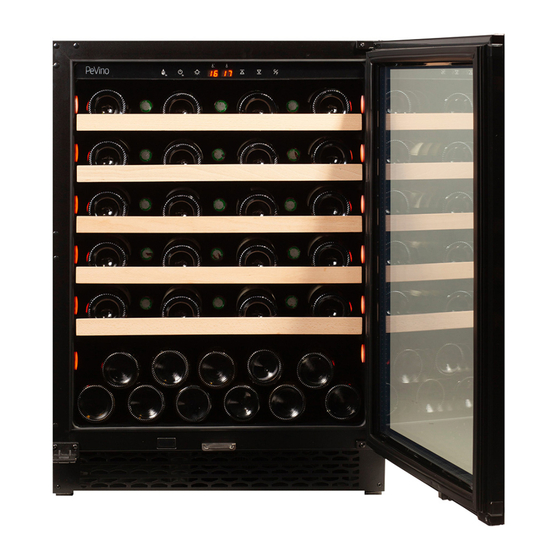
Avoid obstructing the internal fans (located inside on the back panel of the wine cooler). Avoid pulling the shelves outwards beyond the fixed position due to risk of the bottles from falling. Do not pull out more than one loaded shelf at a time as this may cause the wine cooler to tilt forward. Do not cover the wooden shelves with aluminium foil or other materials, as it will obstruct air circulation. - Page 9 DISPLAY BOARD - OPERATING INSTRUCTIONS SINGLE TEMPERTURE DISPLAY BOARD OPERATING INSTRUCTION From left to right: Ø ① Energy Saving Mode Press the button for 3 seconds into the energy-saving mode. The temperature will automatically be set at 16 degree celsius. Press ⑥⑦ out of energy-saving mode. Ø...
- Page 10 Ø ⑥ Temperature setting up button : Press one time, window ④ the set value will increase 1 degree Celsius in the original setting temperature, the setting range according to customer requirements. Ø ⑦ Temperature setting down button : Press one time, window ④ the set value will reduce 1 degree Celsius in the original setting temperature, the setting range according to customer requirements.
- Page 11 Ø ④ Window : Display upper zone temperature. Ø ⑤ Window: Display lower zone temperature Ø ⑥ Lower zone temperature setting up button: press one time, window ⑤ the set value will increase 1 degree Celsius in the original setting temperature, the setting range accordingly to customer requirements.
- Page 12 IMPORTANT ABOUT WINE STORING TEMPERATURE Your wine cooler is designed to guarantee optimum conditions for storing and/or serving your wines. Fine wines require long and gentle developments and need specific conditions in which to reach their full potential. All wines mature optimally at the same ideal-temperature, which is a constant temperature set between 12ºC to 14ºC.
- Page 13 To prevent damaging the door gasket, make sure that the door is fully opened when pulling out the shelves. VENTILATION FRAME INSTALLATION METHOD 1.Take out Ventilation frame from cabinet, then take out 4 pcs 4 * 12 screws from accessory bag. 2.
-
Page 14: Reversibility Of The Door
REVERSIBILITY OF THE DOOR Warning: To avoid accidents during the process of changing the door, we recommend that you get assistance. The glass door is heavy and may cause injury if dropped. 1. To put the cabinet on open operation place, the door opened to the maximum angle 2. - Page 15 1.Decorative nail 2. Knife 3. Drop-proof device 4. M5 six angle screws 5. M5 six angle screwdriver 6. Door spindle core 7. Upper door hinge 8. Lower door hinge 9. Decorative cover of hinge 10. Decorative cover 11.Plastic gasket of drop-proof device...
-
Page 16: Operation Anomalies
OPERATION ANOMALIES Ensure and verify that there is power to the electrical supply plug by connecting another electrical appliance. Check fuse, if any. Make sure that the door is closed properly. If your wine cooler appears to be malfunctioning, unplug it and contact your our after-sales service provider. Any intervention on the cold circuit should be performed by a certified refrigeration professional who must carry out an inspection of the circuit sealing system. -
Page 17: Troubleshooting Guide
TROUBLE SHOOTING GUIDE Common problems may easily be solved, saving you the cost of a possible service call. Please read carefully the instruction manual and revert to troubleshooting guide chart. PROBLEM POSSIBLE CAUSE Wine cooler does not Not plugged in. operate. - Page 18 VINKØLESKAB BRUGSANVISNING PeVino – PNG46S-HHB PeVino – PNG180S-HHB PeVino – PNG46D-HHB PeVino – PNG180D-HHB www.pevino.com...
- Page 19 TAK FOR DIT KØB AF ET VINKØLESKAB FRA PEVINO. VENLIGST LÆS OG FØLG ALLE SIKKERHEDSREGLER OG BETJENINGSINSTRUKTIONER FØR BRUG. BEMÆRK Ændringer i dette dokument kan ske uden forudgående varsel. VIGTIGE SIKKERHEDSINSTRUKSER For at mindske risikoen for brand, elektrisk chok eller skader, når du bruger dit apparat, bedes du følge disse basale forholdsregler.
- Page 20 INDEN TILSLUTNING OG OPFYLDNING AF VINKØLESKABET Før du bruger dit vinkøleskab • Fjern den ydre og indre emballage. • Før du tilslutter vinkøleskabet til strømkilden, skal du lade det stå lodret i cirka 6 timer. Dette vil reducere muligheden for en funktionsfejl i kølesystemet. •...
- Page 21 INSTRUKSER FOR INSTALLERING AF VINKØLESKABE: 1. Vinkøleskabe er frontventileret. 2. Følg installationsdiagrammet når vinkøleskabet skal installeres. Gå aldrig under minimumskravene for dimensioner. 3. Vinkøleskabet trækker luft ind i højre side af ventilationsristen under døren og puster ud i venstre side samme sted.
- Page 22 STØRRELSER: PNG46S-HHB & PNG46D-HHB PNG180S-HHB & PNG180D-HHB...
- Page 23 DØRÅBNING - VINKEL OG DIMENSIONER PNG46S-HHB & PNG46D-HHB PNG180S-HHB & PNG180D-HHB...
- Page 24 OPSTART AF VINKØLESKABET Tilslut og tænd for enheden ved at trykke på tænd/sluk-knappen nogle få sekunder. Når du bruger vinkøleskabet for første gang (eller genstarter vinkøleskabet efter at have været slukket i lang tid), vil der være en få graders varians mellem den valgte temperatur og den, der er angivet på LED displayet. Dette er normalt, og det skyldes længden af aktiveringstiden.
- Page 25 Overbelast ikke dit vinkøleskab. Undgå at spærre ventilatorerne (placeret inde bagerst i vinkøleskabet). Undgå at trække hylderne længere ud end den faste stilling på grund af risiko for, at tabe flaskerne. Træk ikke mere end en fuldt lastet hylde ad gangen, da dette kan få vinkøleskabet til at vippe fremover. Tildæk ikke hylderne med aluminiumsfolie eller andre materialer, da det vil forhindre luftcirkulationen.
- Page 26 DISPLAY - BRUGSVEJLEDNING 1 ZONES KONTROL PANEL BETJENINGS VEJLEDNING Fra venstre til højre: ① Energispare indstilling Hold knappen inde i 3 sekunder. Herefter vil temperaturindstillingen automatisk være 16 grader – tryk knapperne 6 og 7 for at gå tilbage til normal indstilling ②...
- Page 27 2 ZONERS KONTROL PANEL BETJENINGS VEJLEDNING Fra højre til venstre: ① Tænd / Sluk kanppen: I standby indstilling: hold knappen inde i 3 sekunder, og skabet starter – Når skabet er tændt holdes knappen inde i 3 sekunder og vindue 4 viser nedtællingen 3 2 1, og skabet slukker. ②...
- Page 28 VIGTIGT VEDRØRENDE OPBEVARINGSTEMPERATUR FOR VIN Dit vinkøleskab er designet til at sørge for optimale betingelser for opbevaring og/eller servering af dine vine. Gode vine kræver lang og stabil udvikling og har brug for særlige forhold for at nå det fulde potentiale. Alle vine modner optimalt ved den samme ideal-temperatur, som er en konstant temperatur mellem 12ºC og 14ºC.
-
Page 29: Vending Af Dør
VENTILATIONS RIST INSTALLATION 1. Tag ventilationsristen ud af posen, sammen med de 4 stk 4” 12 skruer. 2. Ẵben døren og monter risten foran de 4 huller og skru skruerne i. VENDING AF DØR Advarsel: for at undgå ulykker når døren vendes, foreslår vi at 2 personer hjælpes ad, da døren kan være tung. Ẵben døren helt op til maksimum benyt en lille kniv (2) til af fjerne hul-propperne (1) tegning 1 Brug en skruetrækker (nr. - Page 30 1. hulpropper 2. kniv 3. Dørstøtte 4. Skruer 5. Skruetrækker 6. Dør hængsel 7. Øverste dørhængsel 8. Nederste dørhængsel 9. Dørhængsel dæksel 10. dæksel 11. Plastik dæksel...
- Page 31 DRIFTSFORSTYRRELSER Sørg for, at der er strøm til stikkontakten ved at tilslutte et andet el-apparat. Kontrollér sikringen, hvis muligt. Sørg for, at døren er lukket korrekt. Hvis dit vinkøleskab synes at være defekt, skal du tage det ud af stikket og kontakte dit salgssted. Ethvert arbejde på...
- Page 32 FEJLFINDINGSGUIDE De fleste almindelige problemer kan nemt løses, hvilket sparer dig for omkostningerne ved et eventuelt serviceopkald. Læs venligst brugsanvisningen nøje, og vend tilbage til fejlfindingsguiden. PROBLEM MULIG ÅRSAG Vinkøleskab kører Ikke tilsluttet strøm. ikke. Vinkøleskabet er slukket. HFI-relæet er slået fra eller sikringen er gået. Vinkøleskab køler ikke Check temperaturindstillingen.
Need help?
Do you have a question about the PNG46S-HHB and is the answer not in the manual?
Questions and answers