Table of Contents
Advertisement
Quick Links
Advertisement
Table of Contents
Troubleshooting

Related Manuals for Phoenix Contact THERMOMARK ROLLMASTER 600


Summary of Contents for Phoenix Contact THERMOMARK ROLLMASTER 600
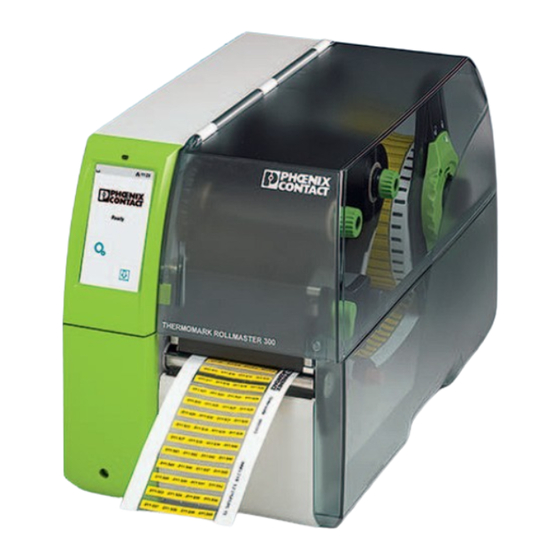
- Page 1 Operating the thermal transfer printer THERMOMARK ROLLMASTER User manual...
- Page 2 UM EN THERMOMARK ROLLMASTER, revision 00 2017-06-15 This user manual is valid for: Designation Revision Order No. THERMOMARK ROLLMASTER 300 0804501 THERMOMARK ROLLMASTER 600 0804663 PHOENIX CONTACT GmbH & Co. KG • Flachsmarktstraße 8 • 32825 Blomberg • Germany phoenixcontact.com...
-
Page 3: Table Of Contents
Start screen ..................18 Operation via the menu..................18 Configuration via the website................25 Printing via FTP ....................26 3.4.1 FTP login ....................26 3.4.2 Printing via FTP ..................26 3.4.3 FTP access to storage media ...............27 3.4.4 FTP firmware update ................27 3 / 42 107815_en_00 PHOENIX CONTACT... - Page 4 Cleaning the photoelectric barrier for labels............28 Cleaning the printhead and pressure roller ............29 Replacing the pressure roller ................30 Troubleshooting....................31 Error messages ....................32 Repairs ........................33 Storage and disposal...................33 Appendix ..........................34 Ordering data.......................34 Technical data .....................37 FCC ........................38 Index............................39 4 / 42 PHOENIX CONTACT 107815_en_00...
-
Page 5: For Your Safety
Here you will find additional information or detailed sources of information. Qualification of users This user manual is addressed to persons who are familiar with the relevant safety concepts for handling electrical machines. The persons must be able to recognize dangers. 5 / 42 107815_en_00 PHOENIX CONTACT... -
Page 6: Field Of Application
A low-quality ink ribbon can lead to premature wear on the printhead and result in a poor print image. Use only print media from Phoenix Contact. You may only use the thermal transfer printer with print media from Phoenix Contact which are intended for the THERMOMARK ROLLMASTER. The use of other media can result in damage to the unit. - Page 7 This can damage the printhead. The ink ribbon must be at least 5 mm wider than the media. Direct contact between the prin- thead and the media can lead to increased wear on the printhead. 7 / 42 107815_en_00 PHOENIX CONTACT...
-
Page 8: Starting Up The Printer
• Place the device on a level surface. Removing the transportation safeguards • Open the cover. • Remove the foam transportation safeguards near the printheads. • Retain the transportation safeguard for subsequent transport. 8 / 42 PHOENIX CONTACT 107815_en_00... -
Page 9: Overview Of The Device
Allen key, for maintenance work Take-up hub, for winding the ink ribbon Supply hub, for supplying the ink ribbon Margin stop, for fastening the media roll Photoelectric barrier, for label detection 10 Pressure roller 11 Print line 9 / 42 107815_en_00 PHOENIX CONTACT... -
Page 10: Connecting Device
Slide the appropriate adapter onto the power supply unit. • Insert the connecting cable of the power supply unit into the socket of the device. • Connect the power supply unit to a socket. 10 / 42 PHOENIX CONTACT 107815_en_00... -
Page 11: Connecting A Printer Via Usb
Open the CLIP PROJECT marking software. • Open “File, Print Setup” and under “Thermo, THERMOMARK ROLLMASTER”, create a new device. You can find instructions on CLIP PROJECT marking at phoenixcontact.net/qr/5146040. • Set up the device in CLIP PROJECT marking. 11 / 42 107815_en_00 PHOENIX CONTACT... -
Page 12: Connecting A Printer Via Wlan
Set up the Ethernet interface via the menu (see page 21). When you configure a WLAN connection via the website, do not change the "IP" and "Gateway" parameters. Otherwise the connection with the printer will be lost. 12 / 42 PHOENIX CONTACT 107815_en_00... -
Page 13: Loading Media And Printing
Turn the red knurled screw (3) until the media fits between the red guides. • Push the media toward the printing unit. • Move the guides close to the edges of the media. The print media must not get stuck, however. • Close the printhead. 13 / 42 107815_en_00 PHOENIX CONTACT... -
Page 14: Inserting Leporello Labels
Turn the red knurled screw (3) until the media fits between the red guides. • Push the media toward the printing unit. • Move the guides close to the edges of the media. The print media must not get stuck, however. • Close the printhead. 14 / 42 PHOENIX CONTACT 107815_en_00... -
Page 15: Loading Ink Ribbon
Push the ink ribbon roll onto the supply hub (1) so that the color coating of the film faces downwards during unwinding. The ink ribbon rolls for this printer from Phoenix Contact have the color coating on the outside of the winding. Observe the unwinding direction shown in Figure 2-6. If the color coating is positioned incorrectly, the film will stick to the printhead. -
Page 16: Printing
Create the print jobs using the CLIP PROJECT marking software. CLIP PROJECT marking can be used to create markings on a computer, which are tailored to the Phoenix Contact marking material. Select the THERMOMARK ROLLMASTER as the output device. You will be provided with a list of media that are suitable for this device. -
Page 17: Operating The Printer
The language is set at the initial startup of the printer. To later select a different language, proceed as follows: • Touch this symbol. • Touch this symbol. • Touch this symbol. • Touch this symbol. • Touch the desired language. 17 / 42 107815_en_00 PHOENIX CONTACT... -
Page 18: Start Screen
For other functions, all storage media can be selected but the default storage medium is offered first. USB stor- External storage media – USB storage – SD cards Internal storage media – Approx. 50 MB flash drive in the printer (IFFS) 18 / 42 PHOENIX CONTACT 107815_en_00... - Page 19 Label detection Change procedure for detection of label sensor Gap sen- If you are printing with media from Phoenix Contact, no adjustment is neces- sary. Continuous media is automatically detected Extrapolate labels This functions prevents the first labels from remaining un-printed. In the default setting, this function is on.
- Page 20 If this value is positive, the label is transported further out of the printer. Cutting settings Only visible when a cutter or perforator is present Shift cutting position (reference: rear edge of label) 0.0 mm Increase perforation degree 20 / 42 PHOENIX CONTACT 107815_en_00...
- Page 21 On: After an error message the last label is repeated Off: After an error message the next label is printed Printer goes into error status when there are problems with the network con- nection 21 / 42 107815_en_00 PHOENIX CONTACT...
- Page 22 Ethernet interface. The print output of the time is in the format set via the "Country" parameter (see page 22). Adjusting the display Adjust brightness of the display Time without activity befor the printer goes into energy-saving mode 5 min Test print Test print on EML(20x8)R – 22 / 42 PHOENIX CONTACT 107815_en_00...
- Page 23 Confirm the message "Clean printhead". Thereafter, the error message for the error that occurred is displayed. Licenses and software libraries for the third-party components used in the firm- – ware 23 / 42 107815_en_00 PHOENIX CONTACT...
- Page 24 Video on how to load the print media – Video on how to install the cutter – Video on how to change the pressure roller – Video on maintenance – Video on firmware update – 24 / 42 PHOENIX CONTACT 107815_en_00...
-
Page 25: Configuration Via The Website
Setting configuration parameters which are also accessible via the display in the „Set- tings“ menu (see page 19) – Setting passwords – Viewing lists of hardware and optional components – Viewing overview of available fonts – Opening auxiliary functions 25 / 42 107815_en_00 PHOENIX CONTACT... -
Page 26: Printing Via Ftp
Copy the label file in JScript or the ZPL format into the folder of the FTP server. The label file starts printing immediately. After the print job is complete, the associated file is automatically deleted. • End the FTP connection. 26 / 42 PHOENIX CONTACT 107815_en_00... -
Page 27: Ftp Access To Storage Media
While the firmware is being copied, a progress indicator appears on the display. After copying has been completed, the printer automatically re-starts. • End the FTP connection. You can check in the status display whether the firmware update was successful. 27 / 42 107815_en_00 PHOENIX CONTACT... -
Page 28: Maintenance And Troubleshooting
• Hold the photoelectric label barrier by the handle and push it back as far as it will go. • Retighten the screw. • Reload the print media and the ink ribbon. 28 / 42 PHOENIX CONTACT 107815_en_00... -
Page 29: Cleaning The Printhead And Pressure Roller
Clean the printhead line (1) with a cotton bud that has been soaked with alcohol. • Remove the deposits on the pressure roller (2) with a cloth that has been soaked with pure alcohol. • Let the printhead dry for 2 to 3 minutes. 29 / 42 107815_en_00 PHOENIX CONTACT... -
Page 30: Replacing The Pressure Roller
Loosen the screw on the pressure roller (3) with the supplied Allen key (1). • Remove the pressure roller (4) and replace it. • Retighten the screw. • Reload the print media and the ink ribbon. 30 / 42 PHOENIX CONTACT 107815_en_00... -
Page 31: Troubleshooting
Change format in CLIP PROJECT – label Vertical white lines in the print Printhead is dirty Clean printhead image Printhead is defective Contact Phoenix Contact – Print image lighter on one side Printhead is dirty Clean printhead 31 / 42 107815_en_00 PHOENIX CONTACT... -
Page 32: Error Messages
“Cutter blocked” No cutter function Switch printer off and on again. If – this problem occurs again, contact Phoenix Contact. “Out of paper” Label roll or shrink sleeve has been Load media (see page 13) used up. “Out of paper”... -
Page 33: Repairs
WARNING: Risk to operational reliability Incorrect operation or modifications to the device can endanger your safety or damage the device. Do not repair the device yourself. If the device is defective, please contact Phoenix Contact. Storage and disposal Transporting the device... -
Page 34: A Appendix
Ink ribbon, length: 300 m, width: 110 mm, color: black THERMOMARK-RIBBON 5145384 Ink ribbon, length: 300 m, width: 110 mm, color: blue THERMOMARK-RIBBON 0829544 110 BU Ink ribbon, length: 300 m, width: 110 mm, color: green THERMOMARK-RIBBON 0829542 110 GN 34 / 42 PHOENIX CONTACT 107815_en_00... - Page 35 Cable markers, mounting type: cable binder assembly WMTB (..X..)R Cable markers, halogen-free, mounting type: cable WMTB HF (..X..)R binder assembly Shrink sleeve WMS .. (..X..)R Shrink sleeve, halogen-free WMS-2 HF .. (..X..)R Equipment marking Labels, mounting type: adhesive EML (..X..)R 35 / 42 107815_en_00 PHOENIX CONTACT...
- Page 36 Mandatory label, mounting type: adhesive PML-M.. (..X..)R Prohibition sign, mounting type: adhesive PML-P.. (..X..)R Warning label, mounting type: adhesive PML-W.. (..X..)R Pipeline marker, mounting type: adhesive PML-T.. (..X..)R Magnetic sign, mounting type: magnetic adhesion, PMM (..X..)R 36 / 42 PHOENIX CONTACT 107815_en_00...
-
Page 37: A 2 Technical Data
1 200 to 230 400 baud/8 bit USB 2.0 High-speed slave for PC connection USB host 2 x on the back, up to 500 mA USB host 1 x on the control panel, up to 500 mA 37 / 42 107815_en_00 PHOENIX CONTACT... -
Page 38: A 3 Fcc
Operation of this equipment in a residential area is likely to cause harmful interference in which case the user may be required to correct the interference at his own expense. 38 / 42 PHOENIX CONTACT 107815_en_00... -
Page 39: B Index
Installation location............8 Intended use ..............6 Website............... 25 WLAN ................. 12 Loading label strips into printhead......13, 14 Loading labels............. 13 Loading labels from a roll ..........13 loading marker sleeve ..........13 39 / 42 107815_en_00 PHOENIX CONTACT... - Page 40 THERMOMARK ROLLMASTER 40 / 42 PHOENIX CONTACT 107815_en_00...
- Page 41 The receipt of technical documentation (in particular user documentation) does not constitute any further duty on the part of Phoenix Contact to furnish information on modifications to products and/or technical documentation. You are responsible to verify the suitability and intended use of the products in your specific application, in particular with regard to observing the applicable standards and regulations.
- Page 42 Should you have any suggestions or recommendations for improvement of the contents and layout of our manuals, please send your comments to: tecdoc@phoenixcontact.com 42 / 42 PHOENIX CONTACT GmbH & Co. KG • Flachsmarktstraße 8 • 32825 Blomberg • Germany phoenixcontact.com...
Need help?
Do you have a question about the THERMOMARK ROLLMASTER 600 and is the answer not in the manual?
Questions and answers