Table of Contents
Advertisement
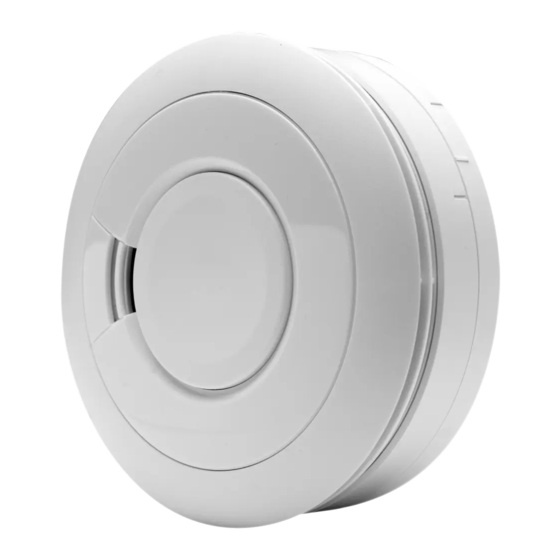
Battery Powered
Smoke Alarms
Ei650 Series
Read and retain carefully for as long as the product is being used. It contains vital information on the operation
and installation of your Smoke Alarm. The leaflet should be regarded as part of the product.
If you are just installing the unit, the leaflet must be given to the householder. The leaflet is to be given to any
subsequent user.
Advertisement
Chapters
Table of Contents
Troubleshooting

Related Manuals for Ei Electronics Ei650 Series


Summary of Contents for Ei Electronics Ei650 Series
- Page 1 Battery Powered Smoke Alarms Ei650 Series Read and retain carefully for as long as the product is being used. It contains vital information on the operation and installation of your Smoke Alarm. The leaflet should be regarded as part of the product.
- Page 2 Table 1 Standard Model Hardwired Capability Interconnect Ei650 Ei650C Ei650W Intelligent Model Hardwired Interconnect Capability Ei650i Ei650iC Ei650iW 1. See table 2 for standard features and operation 2. See table 3 for intelligent features and operation 3. Certain Alarms may be supplied (on request) with the appropriate RF module fitted...
-
Page 3: Table Of Contents
Page CONTENTS QUICK START GUIDE LOCATION & POSITIONING INSTALLATION INTERCONNECTION - HARD WIRED TESTING, MAINTENANCE & POWER SUPPLY MONITORING FIRE SAFETY ADVICE SMOKE ALARM LIMITATIONS RADIOLINK MODULES GETTING YOUR ALARM SERVICED FIVE YEAR GUARANTEE TROUBLESHOOTING Ei650 ALARM INDICATORS Ei650i ALARM INDICATORS CONTACT US... -
Page 4: Quick Start Guide
1. Quick Start Guide LOCATE CORRECT SITING POINT FIX BASEPLATE TO CEILING ALARM SHOULD BE CEILING MOUNTED AT LEAST 300MM FROM WALLS & OBSTRUCTIONS, IDEALLY CENTRALLY IN ROOM/AREA PLACE ALARM & TWIST ON TO BASE TWISTING THE UNIT ON TO THE BASE AUTOMATICALLY CONNECTS THE BATTERY... - Page 5 Quick Start Guide TEST ALARM PRESS THE TEST BUTTON TEST ALARM AT LEAST WEEKLY...
-
Page 6: Location & Positioning
2. Location & Positioning Introduction Congratulations on purchasing an Ei650 Series Alarm. You can easily install these Smoke Alarms throughout the property on escape routes, on each storey, in corridors & in closed rooms to give warning of fire. Models Ei650C and Ei650iC can be interconnected with hard wiring (or RadioLINK plug-in modules) to give the loudest alarm sound level throughout the house.For... - Page 7 Your first Smoke Alarm should be located between the sleeping area and the most likely sources of fire (living room for example), but it should not be more than 7.5 metres from the door to any room where a fire may start and block your escape from the house.
- Page 8 Recommended Protection Fire authorities recommend you put individual Smoke Alarms in or near all rooms where fire is most likely to break out (apart from the locations to avoid e.g kitchens & bathrooms - see Section 3). The living room is the most likely place for a fire to start at night, followed by the kitchen (where a Heat Alarm is recommended) and then the dining room.
- Page 9 Figure 1 For minimum protection - Smoke Alarm on each storey - every 7.5 metres of hallways and Kitchen escape routes Bedroom Bathroom - within 3 metres of all bedroom doors Living Room - all Alarms interconnected (where feature is present) Dining Room Bedroom For recommended protection...
- Page 10 (see Figure 3). Additionally, mount the alarm at least 300mm from any light fitting or decorative object which might prevent smoke entering the Smoke Alarm. We do not recommend wall mounting of Smoke Alarms. On a Sloping Ceiling With a sloping or peaked ceiling install a Smoke Alarm within 600mm of the peak (measured vertically).
- Page 11 Locations to avoid DON’T place Smoke Alarms in any of the following areas: alarm may be triggered by steam, condensation, normal smoke or fumes. Keep at least 6 metres away from sources of normal smoke/fumes. performance. It can also block the insect screen mesh and prevent smoke from entering the smoke detector chamber.
-
Page 12: Installation
fluorescent light fittings as electrical “noise” and/or flickering may affect the Alarm. 3. Installation Installation Procedure 1. Select a location complying with the advice in Section 2. 2. Remove the mounting plate from the Smoke Alarm by twisting it in an anti-clockwise direction (see Figure 5). - Page 13 picking a part of the building, say the front wall of the building and then installing all mounting plates in the same orientation with respect to this (see figure 6). 6. Carefully line up the Alarm on the base, gentle press home & twist on. Front Wall Front Wall Mounting Plate...
- Page 14 Install all the other Smoke Alarms similarly. Tamperproofing the Smoke Alarms The Alarm can be made tamperproof to prevent unauthorised removal. To remove the Alarm from the ceiling it is now necessary to use a small screwdriver. To release the Alarm, push the catch towards the ceiling and then twist off (see figure 8b).
- Page 15 If necessary, it is possible to further secure the Alarm by using a No.2 or No.4 (2 to 3 mm diameter - not supplied) self tapping screw 6 to 8mm long (see figure 8d), to firmly lock the Alarm and its mounting plate together (see figure 8c). First, attach the Alarm to the mounting plate.
-
Page 16: Interconnection - Hard Wired
4. Interconnection - Hard Wired A combined maximum of 12 Smoke Alarms and/or Heat Alarms may be wired together such that when one Alarm senses fire all other Alarms sound a warning - (see Table 1 for the Smoke Alarms with the hardwired interconnect option). This helps ensure the alarm will be heard throughout the property. - Page 17 making it insensitive. It is essential that all such ceiling openings be closed with silicone sealant or similar. 1. Run the two core cable to the Alarm locations. the ceiling) see figure 9b. 3. If you are bringing the wiring along the surface, break out the two notches (see figure 10a).
-
Page 18: Testing, Maintenance & Power Supply Monitoring
6. Twist the Alarm clockwise on to the mounting plate to lock in place. Install and connect all the other Alarms similarly. Now test the first Alarm by pressing and holding the Test button (this may take up to 5 seconds). The red indicator light will flash about once every 0.5 seconds and all Alarms should sound (note: when the test button is released the local Smoke Alarm will stop sounding but the interconnected Alarms will continue to sound for a further 3 seconds. - Page 19 - If they are interconnected using RadioLINK modules, hold down the Test button until the green light on the cover of the Alarm illuminates. Check that all other Alarms sound. - Release the Test button. The Alarm and all connected Alarms should stop sounding.
- Page 20 If you installed Smoke Alarms with RadioLINK modules and did not House Code them, you may be receiving alarm signals from a neighbouring system. This can be 1. To cancel a false alarm from a Smoke Alarm (which has its red light flashing rapidly), press the Test/Hush button.
- Page 21 If all the RadioLINK Alarms sound for 2 seconds every 4 hours, it means at least one of the Alarms in the system has a depleted battery. Locate the depleted battery(ies) as above. 5.4 Cleaning your Alarm Clean your Alarm regularly. Use a soft bristle brush or the brush attachment of your vacuum cleaner to remove dust and cobwebs from the side slots where the smoke enters.
- Page 22 The latest design, materials and manufacturing techniques have been used in the construction of Ei Electronics Alarms to minimise the effects of contamination. However it is impossible to completely eliminate the effect of dust and insect contamination, and therefore, to prolong the life of the Alarm you must ensure that it is kept clean so that excess dust does not build up.
-
Page 23: Fire Safety Advice
The Alarm should be disposed in a safe and environmentally sound manner at your local recycle centre. Contact your local authority for further advice. 6. Fire Safety Advice When using household protective devices, basic safety precautions should always be followed, including those listed below case the alarm sounds. - Page 24 environment. instruction leaflet. is not your insurer. Fire Safety Hints Store petrol and other flammable materials in proper containers. Always use a metal fireplace screen and have chimneys cleaned regularly. Replace worn or damaged sockets, switches, home wiring and cracked or frayed electrical cords and plugs.
- Page 25 This device cannot protect all persons at all times. It may not protect against the three most common causes of fatal fires: 1. Smoking in bed. 2. Leaving children at home alone. 3. Cleaning with flammable liquids, such as petrol. Planning Your Escape Route For When The Smoke Alarms Sound door.
-
Page 26: Alarm Limitations
mobile phone. Remember to give your name and address. 5. NEVER re-enter a burning house. NEVER 7. Alarm Limitations Limitations of Smoke Alarms Smoke Alarms have significantly helped to reduce the number of fire fatalities in countries where they are widely installed. However independent authorities have stated that they may be ineffective in some circumstances. -
Page 27: Radiolink Modules
recommended in this leaflet very significantly improve the probability of early detection. by furniture, renovations etc. are particularly ineffective with: fires caused by smoking in bed, escaping gas, violent explosions, poor storage of flammable rags and/or liquids, (for example petrol, paint, spirits etc), overloaded electrical circuits, arson, children playing with matches. -
Page 28: Getting Your Alarm Serviced
10. Five Year Guarantee Ei Electronics guarantees this Alarm for five years from date of purchase against any defects that are due to faulty materials or workmanship. This guarantee only applies to normal conditions of use and service, and does not include damage resulting from accident, neglect, misuse, unauthorised dismantling, or contamination howsoever caused. -
Page 29: Troubleshooting
11. Troubleshooting Smoke Alarms sound for no apparent reason can cause nuisance alarms. as described in Section 5 if necessary. be identified as the Alarm with the red light flashing rapidly) – this will silence the Smoke Alarm for 10 minutes (and also silence all other interconnected Smoke Alarms in the system). -
Page 30: Ei650 Alarm Indicators
12. Ei650 Alarm Indicators Table 2 - Ei650 INDICATOR SUMMARY Mode RED LED HORN / SOUNDER Normal 1 Flash Power Up Button Test (Weekly) Rapid Flashing (every 0.5 sec) Ramps to full sound When Fire Occurs Rapid Flashing (every 0.5 sec) Unit Sensing Fire itself Full Sound Sensing fire though interconnect... -
Page 31: Ei650I Alarm Indicators
13. Ei650i Alarm Indicators Table 3 - Ei650i INDICATOR SUMMARY Normal Operation Action Red LED Yellow LED Sounder See 12.1 Replace Alarm Power up Twist on base 1 flash 1 flash 12.1.1 Standby 12.1.2 Weekly button test Rapid flashing (0.5 sec) Ramps to full sound 12.1.3 If test fails... - Page 32 Table 3 - Ei650i INDICATOR SUMMARY (cont.) Diagnostics Modes Action Red LED Yellow LED Sounder See 12.3 Replace Alarm Predictive failures 12.3.1 Recommended Low battery Press & hold button Rapid flash (0.5 sec) Ramps to full sound Ramps to full sound See note Contaminated chamber Press &...
- Page 33 Table 3 Ei650i Indicators explained 12.1. Normal Operation 12.1.1. Power Up powered successfully and is now in standby mode. 12.1.2. Standby In standby mode there are no active visible or audible indications which can be intrusive to the householder. To confirm that the Alarm is operational perform a weekly button test.
- Page 34 12.1.5. Silence False / Nuisance alarm Occasionally Smoke Alarms can be activated by phenomena other than fire, e.g. dust, insects, cooking fumes. Once you are sure it is a nuisance alarm will then flash every 8 seconds for 10 minutes. 12.1.6.
- Page 35 If it is not convenient to replace the Alarm immediately, then press the test hours. This can be repeated as required. 12.2.2. Contaminated chamber If the Alarm sounds without any apparent smoke being present, press the test button to silence the Alarm for 10 minutes (as described in 12.1.5 above). If the Alarm sounds again it may be contaminated.
- Page 36 12.2.3. Faulty smoke chamber In the unlikely event of the smoke sensing chamber becoming defective, the Alarm must then be replaced. If it is not convenient to replace it immediately, pressing the test button will repeated as required. 12.3. Diagnostic Modes very useful diagnostic modes to investigate if there have been previous alarm conditions, identify a Alarm with a fault condition and predict fault conditions that are likely to manifest themselves before the next annual service.
- Page 37 12.3.2. Alarm Memory function twice every 16 seconds. An alarm condition outside of the previous 24 hours every 0.5 seconds and the sounder will chirp rapidly. 12.3.3. Identifying faulty Alarms To indentify a beeping Alarm in your system, press and hold the test button will flash rapidly and the Alarm will ramp to full sound.
- Page 38 The crossed out wheelie bin symbol that is on your product indicates that this product should not be disposed of via the normal household waste stream. Proper disposal will prevent possible harm to the environment or to human health. When disposing of this product please separate it from other waste streams to ensure that it can be recycled in an environmentally sound manner.
- Page 39 0786 Ei Electronics, Shannon, Co. Clare, Ireland DoP No.13-0002 EN14604:2005 + AC:2008 Smoke Alarm Devices: Ei650, Ei650C, Ei650W, Ei650RF, Ei650i, Ei650iC, Ei650iW, Ei650iRF Fire Safety Nominal activation conditions/ sensitivity, Pass Vibration resistance Pass response delay (response time) and performance under fire condition...
-
Page 40: Contact Us
14. Contact Us Aico Ltd Shropshire SY10 8NN, U.K. Tel: 01691 664100 www.aico.co.uk Ei Electronics. Shannon, Co Clare, Ireland. Tel: 061 471277 www.eielectronics.com © Ei Electronics 2014... - Page 41 RadioLINK Module Ei600MRF for Battery Powered Smoke / Heat Alarms Ei600 Series Ei600MRF Module (for use with Ei600 Series compatible Alarms only) Instructions Read and retain carefully for as long as the product is being used. It contains vital information on the operation and installation of your Module.
- Page 42 Table of Contents page Introduction ..................Compatibility Table ................Installation and House Coding ............Additional Features ................. Indicator Summary ................System Examples ................Testing the system ................Interconnected Smoke/Heat Alarms & Carbon Monoxide Alarms ... RadioLINK + Troubleshooting ............Technical Specifications ..............Guarantee ..................
-
Page 43: Introduction
Ei600MRF module attached to that alarm will transmit an RF signal that will activate the sounders in all the other Alarms in the system. The Ei600MRF module is plugged into the rear of the base of an Ei Electronics compatible Alarm (see Compatibility Table on page 4). RF communication through this module eliminates the need to install long interconnect wires between all the Alarms on different floors in different rooms. -
Page 44: Compatibility Table
Compatibility Table Standard Smoke Alarms Model Hardwired Compatible Capability Interconnect with Ei600MRF Ei605TYC Ei650 Ei650C Ei650W Intelligent Smoke Alarms Model Hardwired Compatible Interconnect Capability with Ei600MRF Ei650i Ei650iC Ei650iW Heat Alarms Model Hardwired Compatible Capability Interconnect with Ei600MRF Ei603TYC 1. Certain Alarms may be supplied (on request) with the appropriate RF module fitted 2. -
Page 45: Installation And House Coding
Immediately release the button, the blue light will flash rapidly and then stop. Now attach the Alarm to its mounting plate. (see ‘Installation’ section in the Ei650 Series booklet). The flashing will repeat every 5 seconds Figure 1 thereafter. Repeat this procedure for all RF devices in the system. - Page 46 House Code Button Red / Blue / Green LED Figure 2 N.B. We recommend, for ease of installation and RF communication, that up to 12 RF devices can be installed in any one RF coded system. Please contact us for further advise if additional RF devices are required. You can exit this mode by pressing the House Code button on one of the RF Alarms.
-
Page 47: Additional Features
Additional Features The Ei600MRF RadioLINK + Module provides additional features not available with Ei Electronics RadioLINK products. The following features will only work with RadioLINK + devices. 1. Remote House Coding (required if you want to add an Alarm to an installed system) 2. - Page 48 3. Data Extraction The Ei600MRF RadioLINK+ Module allows for the extraction of information from an Ei Electronics Compatible Alarm, using an Ei Electronics download device. Once the system has been set up, information can be accessed securely from within or outside a property if access is an issue The event log can contain very useful information about any recorded events in the history of the Alarm such as: Fire Events, Alarm Head removals, Button Tests, and so on.
-
Page 49: Indicator Summary
Ei600MRF Indicator Summary Normal Operation Blue LED Red LED Green LED Sounder Power Up 1 flash 1 flash 1 flash Standby Alarm 3.5 Sec flash followed by flash every 10 Sec Full Sound Head Removal 3.5 Sec flash every 6 mins for 4 hrs Low Battery (Ei603TYC) Flash every 60 Sec Low Battery... -
Page 50: System Examples
System Examples (RadioLINK & RadioLINK + ) RF System RadioLINK RadioLINK Smoke Alarm Smoke Alarm RadioLINK RadioLINK Heat Alarm Smoke Alarm RF Tool RadioLINK + Smoke Alarm Data Extraction RadioLINK + Heat Alarm Note: Remote House Coding / Monitoring / Data Extraction only available on RadioLINK + Alarms... - Page 51 RadioLINK + System RadioLINK + RadioLINK + RadioLINK + RadioLINK + RadioLINK + Smoke Alarm Heat Alarm Smoke Alarm Heat Alarm Smoke Alarm RF Tool Data Extraction...
-
Page 52: Testing The System
Testing the System Frequent testing of the system is a requirement to ensure its reliable operation. Guidelines and best practices for testing are as follows: 1. After the system is installed. 2. Regularly (monthly testing is recommended). 3. After prolonged absence from the dwelling (e.g. after holiday period). - Page 53 The local Alarm will stop sounding but you will hear the other Alarms still sounding in the distance. All Alarms should be checked in a similar way. Module Battery Check It is important to ensure that the batteries on both the Alarm and the module itself are in full working order.
-
Page 54: Interconnected Smoke/Heat Alarms & Carbon Monoxide Alarms
Interconnected Smoke/Heat Alarms & Carbon Monoxide Alarms Identifying source of Alarm Ei Electronics Smoke/Heat Alarms and Carbon Monoxide Alarms can be interconnected via RadioLINK or RadioLINK+ so that one device sensing danger will cause all the other Alarms to sound. -
Page 55: Radiolink + Troubleshooting
If it is a Smoke/Heat Alarm, evacuate the residence and follow the instructions in the Smoke/Heat Alarm manual. If it is a Carbon Monoxide Alarm, ventilate the residence and follow the instructions in the Carbon Monoxide Alarm manual. For added convenience we recommend that an Ei450 Alarm Controller is used with these systems. -
Page 56: Technical Specifications
It is important to check that all Alarms are communicating in their final installed positions. If Alarms are rotated, have had their antennas extended and/or re-sited, we would recommend that all the Alarms are returned to the factory settings and then House Coded again in their final positions (see above). -
Page 57: Guarantee
This guarantee excludes incidental and consequential damage. If this RF RadioLINK + Module should become defective within the guarantee period, it must be returned to Ei Electronics, with proof of purchase, carefully packaged, with the problem clearly stated. We shall at our discretion repair or replace the faulty unit. -
Page 58: Limitations Of Radio Communications
Limitations of Radio Communications Ei Electronics radio communication systems are very reliable and are tested to high standards. However, due to their low transmitting power and limited range (required by regulatory bodies) there are some limitations to be considered: (i) Receivers may be blocked by radio signals occurring on or near their operating frequencies, regardless of the House Coding. - Page 59 Hereby, Ei Electronics declares that this Ei600MRF RadioLINK + Module is in compliance with the essential requirements and other relevant provisions of Directive 2014/53/EU. The Declaration of Conformity may be consulted at www.eielectronics.com/compliance The crossed out wheelie bin symbol that is on your product indicates that this product should not be disposed of via the normal household waste stream.
- Page 60 Aico Ltd. Mile End Business Park, Maesbury Rd, Oswestry, Shropshire SY10 8NN, U.K. Tel: 01691 664100 www.aico.co.uk Ei Electronics. Shannon, Co Clare, Ireland. Tel: 061 471277 www.eielectronics.com © Ei Electronics 2016 P/N B18151 Rev2...
Need help?
Do you have a question about the Ei650 Series and is the answer not in the manual?
Questions and answers