Table of Contents
Advertisement
Advertisement
Table of Contents

Related Manuals for Fluval G3


Summary of Contents for Fluval G3
- Page 1 USER GUIDE ENTER...
- Page 2 READ AND FOLLOW ALL SAFETY INSTRUCTIONS To guard against injury, basic safety precautions should be 3. WARNING - Close supervision is necessary when any observed when handling the Fluval Canister Filter, including appliance is used by or near children. This appliance the following:...
- Page 3 CONTENTS Click on an image to link to section Introduction HydroTech Technology Installation and Set-Up General Maintenance Electrical Conductivity Filter Media Options Warning Message/ Exploded Parts View Monitoring System Trouble Shooting/FAQ’s TWO YEAR WARRANTY Replacement Parts Filter Specifications LCD Screen Flow Map Warranty/Registration w w w.
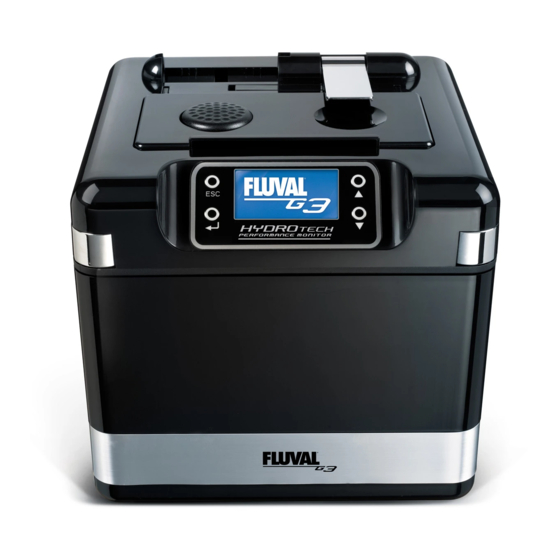
- Page 4 The Fluval G Filter is unparalleled in filtration performance, versatility and control in managing water characteristics. The G3 model has been designed for aquariums up to 300 Liters (80 US gal.), and will process 700 liters (185 US gallons) of water every hour. The G6 model will handle aquariums up to 600 Liters (160 US gal.) and processes 1000 liters (265 Gallons) of water every hour.
- Page 5 This is a closed system within the Fluval G, media the aquarium owner chooses. so all water that flows through the filter must first Regardless of chemical media type the design of pass through the pre-filter cartridge for pre-cleaning.
- Page 6 The true power of With more waste solids kept suspended in the water, the Fluval G cartridge system is the combination of fewer settle keeping the bottom surfaces and the filter design and filtration media options. The entire aquarium cleaner.
- Page 7 HydroTech Performance Monitor formance. The powerful yet compact synchronized dual drive coil is controlled by one of two Fluval G The Fluval G incorporates a distinctive and intelligent microprocessors which continuously monitor and ad-...
- Page 8 • Allow 45-60 minutes for setup and installation. black AQUASTOP release • If at any time you need more detail with the lever must be completely instruction, please visit www.fluval-g.com to pushed down in order to follow a photo slide show of these step-by-step open the lid. instructions. Remove the pre-filter cartridge, located on the left • Tools required: Utility knife or a pair of scissors...
- Page 9 If using another loose or (preferably into a bucket.). granulated chemical Maintenance Note: The mechanical cartridges media i.e. Fluval Lab should be rinsed every 14 days— sooner if the Series Nitrate or “Alert low flow” warning appears. The filter Phosphate Remover, fill cartridge included is a general usage cartridge.
- Page 10 • Align the filter head on the canister. Push down baskets. (The Fluval G3 so that all four corners of the lid are all the way has two baskets; the down. If any of the corners won’t go all the way...
- Page 11 B. Install Telescopic intake stem • Replace the mechanical and chemical cartridges back into place making sure to align them • Push the telescopic intake stem fully into the properly and then turning the knobs clockwise cross rim assembly up to the top. The intake to “ ” cartridges into place. strainer must be placed at least 3 in (7.5cm) from the bottom of the aquarium gravel.
- Page 12 STEP 5: CONNECTING HOSES B. Connect the intake hose Important: Hosing should always follow a straight path from the filter to the aquarium rim with The intake hose will con- some slack but no loops. The filter will not work nect to left side of the efficiently if the hose is too long or too short.
- Page 13 AQUASTOP (up arrow). Repeat this same When the filter is first turned on the welcome procedure used for the intake hose to connect screens will be displayed with the messages “Fluval the hose for the output hose. G3 / G6” “Language Selection” then “initializing.”...
- Page 14 8. ESCAPE KEY: Repeatedly pressing the “ESC” key “OPERATIONAL SETTINGS” MENU brings you back to the main screen. Within this menu you can set “Temperature and Conductivity Alarm Points” as well as “Mechanical, 9. ENTER KEY: This key confirms and then sets the Chemical and Biological maintenance schedules”.
- Page 15 The following options are available: BIOLOGICAL SCHEDULE Conduct: Displays the water conductivity value. Find more information on conductivity on www fluval-g.com. Salinity: Displays water salinity in PSU. Salinity only appears if water is marine Alert: Turns “ON / OFF “Alert Conductivity, out of The following options are available: range”...
- Page 16 This message appears when the aquarium water temperature is FILTER FLOW GRAPH outside the set range. shows the approximate For further instructions visit www.fluval-g.com. flow rate over the last 48 days. #4 PRIORITY Alert Conductivity. TEMPERATURE GRAPH shows the temperature...
- Page 17 GENERAL MAINTENANCE DO NOT POUR THIS WATER BACK INTO THE FILTER. 5. To avoid water spillage, place the entire assembly MECHANICAL FILTER MAINTENANCE into a bucket before proceeding. The mechanical pre-filter cartridge should be rinsed every 14 days— sooner if the “Alert low flow” warning appears. If the Mechanical Schedule has been correctly programmed, you will receive an alert when it’s time to clean the cartridge.
- Page 18 9. Debris is collected on 13. Before re-assem- the inside of the filter bling, always check that so the bottom plate the red O ring of the needs to be removed in mechanical pre-filter car- order to do a thorough tridge assembly is free cleaning.
- Page 19 20. Once the water is flowing properly, check the If the AQUASTOP lever is not fully lifted, the valve aquarium water level again and, if necessary, may still be open and cause the water to spill from restore it to adequate levels. the filter when the cartridge is removed. 21.
- Page 20 Replace cartridge cap. 13. Close the cartridge lid and pull down the Note: If using a non-Fluval brand chemical media, AQUASTOP lever and it’s important to make sure the chemical media restore power. can’t escape through the chemical media cartridge slots.
- Page 21 BIOLOGICAL FILTER MEDIA MAINTENANCE it aside so not to dam- The Fluval pre-filter system is very efficient, and age the sensors on the cleaning or replacement of the G-nodes is only re- underside of the lid.
- Page 22 Note: There is a seal ring around the inside of the impeller cover that may get stuck into position. It’s important to lubricate “O” rings and gaskets with Fluval silicone lubricant (A325) on a bi-annual basis to ensure easy removal of parts, as well as proper sealing of components.
- Page 23 • I mpeller assembly (Magnet + impeller blades) EXTERIOR CLEANING • T op rubber bushing sits in the center of the To clean the surface of the Fluval G filter, use water impeller cover and a soft cloth. Do not use detergents, cleaners or any cloth with a rough or abrasive surface since this can scratch the gloss surface.
- Page 24 How does the Fluval G EC Monitoring System measure the Electrical Conductivity in my aquarium? The Fluval G instrumentation senses water through a special conductivity probe consisting of two titanium alloy terminals, which will not age or degrade through oxidation and ageing.
- Page 25 How can I monitor my aquarium using the Fluval G Filter’s EC Monitor? Fluval’s G Filer Monitoring System has been designed to help you easily monitor the EC values. You will find that as you become more comfortable with the system, maintaining your EC levels will become quicker and more accurate.
- Page 26 Freshwater When starting a new fresh water aquarium and before introducing fish, it is good practice to measure the water hardness value (GH) and evaluate if this value is suitable for the fish you are about to introduce. In other words, by knowing the GH value of our aquarium water, you can determine which species of fish will thrive in that type of water.
- Page 27 Saltwater Here salinity is the parameter to use in order to control the conductivity measurement. Other than organisms coming from particular environments and requiring specific salinity levels, salinity should generally average at a conductivity value of 53 mS/cm (= 35 PSU or ppt = 1.0285 specific gravity). The following comparative table can help if you are more used to salinity or specific gravity than to EC (values at 25 °C;...
- Page 28 The fine mesh will trap debris 75μm or larger for (2.2 mg/L) has been treated with the Fluval G6 unparalleled mechanical filtering results. Designed as phosphate cartridge. a “no by-pass” system, debris remains caught between each pleat until it is removed and rinsed.
- Page 29 In a 300 L / 600L freshwater aquarium with a 30 solution for fresh water aquariums. With the contin- mg/L nitrate concentration, the use of G3 / G6 ued use of Tri-Ex, nitrates, phosphates and organic Nitrate cartridge will quickly remove all excess of pollutants remain under control.
- Page 30 Spare Chemical Media PHOSPHATE REMOVER Cartridge for Fluval G3 or G6 Fluval Lab Series Phosphate Fluval G re-usable Chemical Remover rapidly adsorbs large cartridges are for use with the quantities of Phosphate, silicate Fluval G advanced filters. and dissolved organics with- The mesh size of the out leaching.
- Page 31 PEAT GRANULES active absorption is maintained. Carbon should al- ways be removed when medication is being Fluval Peat Granules are the administered in aquarium water. Also, because all-natural way to soften aquar- carbon will absorb a large percentage of the...
- Page 32 WARNING MESSAGES/TROUBLESHOOTING/FAQ’s For additional Information Check the FAQ section at www.fluval-g.com PRIORITY #1 ALERT: • Unplug the filter from the electrical outlet. Water SENSING AIR IN THE may spill while cleaning the impeller. You may FILTER want to place a towel alongside the filter. This message appears • Open the cartridge lid. The silver AQUASTOP when there is no water valve lever must be completely up and the black in the filter.
- Page 33 NOTE: The FLUVAL G6 Upper Bushing consists of • T here are three parts to the impeller: a rubber element + a thrust bearing. Normally the - Ceramic impeller shaft + bottom rubber thrust bearing remains inside the rubber bushing, bushings (glued together) but if it comes off or is removed, it must be - Impeller assembly (Magnet + impeller blades) correctly re-installed before reassembling the unit.
- Page 34 PRIORITY #5 ALERT: • Wrongly installed or wrong filtration media. LOW FLOW The filter comes equipped with a filtration media, but if you choose to use another type of filtering The HydroTech system media, check when it needs to be replaced. continuously monitors Please refer to the Filter Media section for the water flow rate and further details on how to choose the correct should anything inhibit water flow, you will see Low...
- Page 35 NOTES : remove the power before performing any - In order to work efficiently the priming button maintenance procedures. must be pushed all of the way down in fast sequence; otherwise the prime may not occur. I’m not able to close the mechanical pre-filter - If the installation necessitates slack or dips in the and chemical cartridges.
- Page 36 15 l/h per day in a mature and average charged impeller chamber. By operating the priming aquarium. button, the normal operation of the unit can be restored. An early clogging could be caused by: After cleaning, max flow rate condition (fully - Anomalous production of dirt in the aquarium.
- Page 37 Wrong operations not to perform include: - Releasing, re-engaging the AQUASTOP and opening the AQUASTOP valves, the whole sequence more than 2 times without removing one of the cartridges or emptying the unit. - Closing the AQUASTOP valve, opening one of the cartridges, closing the cartridge and opening the AQUASTOP valve, the whole sequence more than 2 times consequently.
- Page 38 08. AQUASTOP release lever 09. AQUASTOP valve lever 10. AQUASTOP 11. Filter head 12. Biological basket cover 13. Biological baskets [G3 x 2/G6 x 3] 14. Filter canister gasket 15. Filter canister 16. Cross rim assembly 17. Rim attachment 18. Output nozzle + extension 19.
- Page 39 REPLACEMENT PARTS Order replacement part from your Fluval dealer or by contacting Customer Service A20250 A20251 A20252 A20253 A20254 Fluval G3 & G6 Fluval G3 & G6 Fluval G3 & G6 G3 & G6 Fluval G3 & G6 Hosing 3m (9.8’)
- Page 40 FILTER SPECIFICATIONS FLUVAL G3 FLUVAL G6 Filter Dimensions (L x W x H): Filter Dimensions (L x W x H): 249x249x247mm 249x249x326mm Aquarium Capacity: Aquarium Capacity: 150-300 l -- 40-80gal. 300-600 l -- 80-160gal. Pump Output: Pump Output: 230-240V/50Hz: 1285 l/h – 340 g/h 230-240V/50Hz: 2460 l/h –...
- Page 41 LCD SCREEN FLOW MAP R E T U R N T O C O N T E N T S PA G E w w w. f l u v a l - g . c o m H Y D R O T E C H P E R F O R M A N C E M O N I T O R A D VA N C E D F I LT R AT I O N S Y S T E M...
- Page 42 If you have a problem or question concerning the operation of the Fluval G filter, please let us try to help you before you return the product to your dealer. Most problems can be handled promptly with a phone call. Or, if you prefer, you can contact us on our web site at www.hagen.com.
Need help?
Do you have a question about the G3 and is the answer not in the manual?
Questions and answers