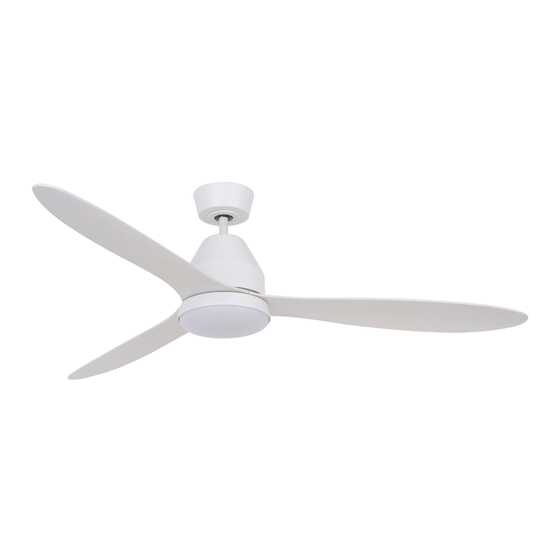
Summary of Contents for LUCCI WHITEHAVEN
- Page 1 LUCCI WHITEHAVEN DC CEILING FAN ⚫ INSTALLATION ⚫ OPERATION ⚫ MAINTENANCE ⚫ WARRANTY INFORMATION CAUTION READ INSTRUCTIONS CAREFULLY FOR SAFE INSTALLATION AND FAN OPERATION. V 1 . 1 - L E D ( 1 0 / 2 0 1 8 )...
-
Page 2: Congratulations On Your Purchase
Whitehaven Fan Installation Instructions CONGRATULATIONS ON YOUR PURCHASE Congratulations on purchasing the latest in energy saving ceiling fans. This fan runs on DC (direct current) power which gives it the benefit of being super energy efficient whilst still maintaining high volume air-movement and silent operation. - Page 3 Whitehaven Fan Installation Instructions pole safety switch at the switchboard, then this is considered to be an all-pole disconnection to the ceiling fan electrical circuit, meeting the requirements of clause 7.12.2 of AS/NZS 60335.1. A single-pole switch on the active of the receiver input of remote control must also be included in the wiring, and located the same room as the ceiling fan.
-
Page 4: Parts List
Whitehaven Fan Installation Instructions PARTS LIST Unpack your fan and check the contents. You should have the following: Fig. 1 FAN WITH LIGHT FAN WITHOUT LIGHT 1. Mounting bracket x 1 1. Mounting bracket x 1 2. Fan assembly with motor housing, down 2. - Page 5 Whitehaven Fan Installation Instructions INSTALLING THE MOUNTING BRAKCET The ceiling fan must be installed in a location so that the blades are 300mm spacing from the tip of the blade to the nearest objects or walls. Secure the hanging bracket to the ceiling joist or structure that is capable of carrying a load of at least 30kg, with two long screws provided.
-
Page 6: Installing The Fan
Whitehaven Fan Installation Instructions INSTALLING THE FAN Blade installation • Remove the ball joint (1) by loosening the set screw (2). Fig.4 • Remove the canopy (3) and the motor housing (5) from the down rod (4). • Secure the blade (7) to the blade holder (8) by tightening the 3 blade screws (6). -
Page 7: Electrical Wiring Diagram
Whitehaven Fan Installation Instructions ELECTRICAL WIRING DIAGRAM WARNING: FOR YOUR SAFETY ALL ELECTRICAL CONNECTIONS MUST BE UNDERTAKEN BY A LICENSED ELECTRICIAN. NOTE: AN ADDITIONAL ALL POLE DISCONNECTION SWITCH MUST BE INCLUDED IN THE FIXED WIRING. NOTE: IF THERE ARE TWO OR MORE DC CEILING FANS INSTALLED IN THE ONE LOCATION, AN SINGLE-POLE SWITCH IS REQUIRED FOR EACH CEILING FAN. -
Page 8: Install The Canopy
Whitehaven Fan Installation Instructions FINISHING THE INSTALLATION INSTALL THE CANOPY • Loosen the 2 screws from the bottom of the mounting bracket. • Slide the canopy up to the mounting bracket and place the key hole on the canopy over the screw on the mounting bracket. - Page 9 Whitehaven Fan Installation Instructions Transmitter / Receiver paring for Ceiling fan 2: ⚫ Turn off the mains supply to the receivers of both ceiling fans 1 and 2. ⚫ Install the 3V DC battery in the compartment. Please make sure the polarity of the battery is correct. Fig.10 ⚫...
-
Page 10: After Installation
Whitehaven Fan Installation Instructions THE RECEIVER PROVIDES THE FOLLOWING LEVEL OF PROTECTION: ⚫ Lock position: the receiver has a built in safety feature to protect against obstruction during operation. The motor will be locked from operation and will disconnect from power after 30 seconds of interruption. Please remove obstacles before re-starting. -
Page 11: Care And Cleaning
Whitehaven Fan Installation Instructions CARE AND CLEANING: • Periodic cleaning of your ceiling fan is the only maintenance required. Use a soft brush or lint free cloth to avoid scratching the paint finish. Please turn off electricity power when you do so. - Page 12 Lucci Design cannot be held responsible for any repair other than those carried out by it or one of its Authorised Service Agents. Please keep this warranty information in a safe place. This information must be produced in the event of service being required.
- Page 13 Whitehaven Fan Installation Instructions CEILING FAN WARRANTY INFORMATION LUCCI WARRANTY HOTLINE- 1800 602 243 Complete and retain this form for your personal records and warranty purposes. NAME………………………………………………………………………………… ADDRESS…………………………………………………………………………… ……………………………………………………POSTCODE…………………… MODEL NUMBER…………………………………………………………………… (PO# + DATECODE Sticker here) PO NUMBER or DATECODE ………………………………………………………...


Need help?
Do you have a question about the WHITEHAVEN and is the answer not in the manual?
Questions and answers