Table of Contents
Advertisement
Available languages
Available languages
Advertisement
Chapters
Table of Contents

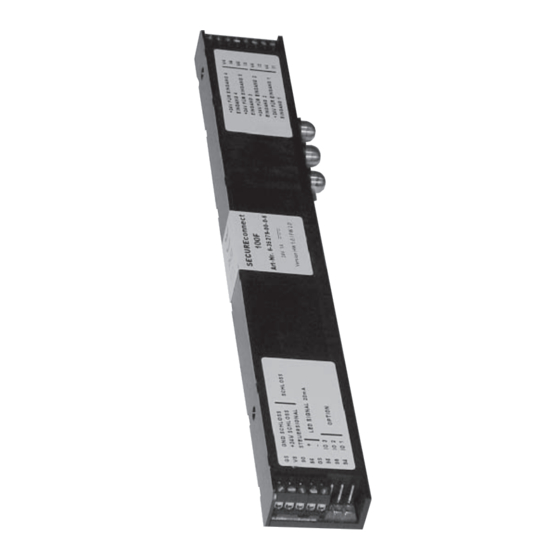
Related Manuals for G-U BKS SecureConnect 200


Summary of Contents for G-U BKS SecureConnect 200
- Page 1 TÜRTECHNIK | DOOR TECHNOLOGY SECUREconnect 200 SECUREconnect 200 Montage- und Bedienungsanleitung ....... SEITE | Strom- und Datenübertrager SECUREconnect 200 Mounting und operation instructions ..... PAGE | Power and data transmission unit...
-
Page 2: Table Of Contents
Montage- und Bedienungsanleitung SECUREconnect 200 Strom- und Datenübertrager Inhaltsverzeichnis 1. Sicherheitshinweise ........Seite 2. Information ..........Seite Hinweise zur Anleitung ..........Seite Packungsinhalt ..............Seite 3. Technische Beschreibung ......Seite Anwendungsbereich ............Seite 3.1.1 SECUREconnect 200R zum Einbau in den Türrahmen Seite 3.1.2 SECUREconnect 200F zum Einbau in den Türflügel ..Seite Technische Daten .............Seite Systemdarstellung ............Seite... - Page 3 7. Inbetriebnahme ........... Seite 18 Aufbau der Kommunikation ...........Seite 7.1.1 Pairing ................Seite 7.1.2 Repairing ................Seite LED - Signalisierung ............Seite 7.2.1 Anzeigen am SECUREconnect 200R ......Seite 7.2.2 Anzeigen am SECUREconnect 200F .......Seite Funktionen mit elektromotorischen Schlössern ..Seite 7.3.1 Kurzzeit-Auf (Kurzzeitentriegelung) ......Seite 7.3.2 Dauer-Auf (Entriegeln) .............Seite 7.3.3...
-
Page 4: Sicherheitshinweise
Montage- und Bedienungsanleitung SECUREconnect 200 Strom- und Datenübertrager Sicherheitshinweise Warnsymbole GEFAHR kennzeichnet eine gefährliche Situation, GEFAHR die, wenn sie nicht vermieden wird, zum Tod oder zu schweren Verletzungen führt. WARNUNG kennzeichnet eine gefährliche Situation, WARNUNG die, wenn sie nicht vermieden wird, zum Tod oder zu schweren Verletzungen führen kann. -
Page 5: Packungsinhalt
Die Bedienungsanleitung ist von jeder Person zu lesen und anzuwenden, die mit dem SECUREconnect 200 arbeitet, z.B. bei: „ „ Montage und Anschluss „ „ Inbetriebnahme und Wartung Die Angaben dieser Bedienungsanleitung, insbesondere die Kapitel über Sicherheitshinweise, sind unbedingt zu beachten. Die Bedienungsanleitung ist nach dem Montageabschluss dem Betreiber zu übergeben. -
Page 6: Technische Beschreibung
Montage- und Bedienungsanleitung SECUREconnect 200 Strom- und Datenübertrager Technische Beschreibung Anwendungsbereich Das SECUREconnect 200R und -F ist zum lotrechten Einbau in Türen und Tür- rahmen vorgesehen. Der Betrieb in freistehenden Toranlagen oder in Türen, deren Umgebungsbedingungen eine höhere Schutzart als IP 40 erfordern, ist nicht zulässig. -
Page 7: Secureconnect 200F Zum Einbau In Den Türflügel
3.1.2 SECUREconnect 200F zum Einbau in den Türflügel „ „ Energie- und Datenübertragungsgerät für motorische oder elektrome- chanische Verschlusssysteme der Firmen GU und BKS. „ „ Langlebige Stößelkontakte (Kabelübergang entfällt). „ „ Beliebige Türöffnungsweite. „ „ Ungehindertes Ein- und Aushängen der Tür. „... -
Page 8: Systemdarstellung
Montage- und Bedienungsanleitung SECUREconnect 200 Strom- und Datenübertrager Systemdarstellung J-Y(ST) Y2x2x0.6 IO10 IO10 potentialfreier Ansteuerkontakt z.B. Taster, Sprechan- lage, Zutrittskontrolle, Zeitschaltuhr. Ansteuermöglichkei- ten siehe Kap. 6 Anschlusskabel mit Klemmen für Eingänge Bei Metall- und Kunststofftüren zum Leitungsauslass beigefügte Kabeltülle verwenden. Ansteuer- möglichkeiten siehe Kap. -
Page 9: Sicherheitshinweise
Sicherheitshinweise Es ist zu gewährleisten, dass nur Fachkräfte (Definition siehe EN 50110-1, DIN VDE 0105 bzw. IEC 60364) mit jeglichen Arbeiten (Planung, Transport, Montage, Installation, Inbetriebnahme, Wartung, Reparatur, Demontage) an den Betriebsmitteln beauftragt werden. Dabei ist sicherzustellen, dass ihnen die Unterlagen zur Aufstellung, Inbe- triebnahme, Bedienung, Wartung und Reparatur des Betriebsmittels zur Verfügung stehen und sie diese beachten. -
Page 10: Montagevorbereitung
Montage- und Bedienungsanleitung SECUREconnect 200 Strom- und Datenübertrager fall die zurückgezogenen Fallenriegel aller mechatronischen Schlösser von G-U / BKS auch bei geöffneter Tür in eine verschlussbereite Position vorfahren. Dadurch ist ein sicheres Verschließen der Türe im Brandfall gewährleistet. „ „... -
Page 11: Montage Kontaktträger Und Kontaktplatte
Montage Kontaktträger und Kontaktplatte Nach Montage des Stulps muss am SECUREconnect 200R der Kontaktträger mit den 3 Kontaktplatten montiert werden. Die 3 Kontaktplatten sind schon im Kontaktträger montiert, so dass diese Kontakteinheit nur noch in die dafür vorgesehene Aufnahme am Stulp hineingedrückt werden muss. -
Page 12: Falzluft (Kammermaß) Einstellen
Montage- und Bedienungsanleitung SECUREconnect 200 Strom- und Datenübertrager Falzluft (Kammermaß) einstellen Im Auslieferungszustand ist das SECUREconnect 200F für eine Falzluft (Kammermaß) von 0-6 mm eingestellt. Um dieses Maß auf 6-12 mm zu erhöhen, können mittels eines kleinen Schraubendrehers die seitlich neben den Stößelkontakten befindlichen Begrenzungsklammern herausgezogen werden. -
Page 13: Vorbereitung Zum Einbau In Die Tür
Vorbereitung zum Einbau in die Tür Je nach Werkstoff der Tür (Holz-, Metall-, Kunststofftür) müssen für den Ein- bau des SECUREconnect 200 unterschiedliche und geeignete Befestigungs- schrauben verwendet werden, deren Art und Länge von den verwendeten Profilen abhängig sind. Der maximale Durchmesser der Schrauben darf jedoch 4,0 mm nicht über- schreiten. -
Page 14: Anschlusshinweise
Montage- und Bedienungsanleitung SECUREconnect 200 Strom- und Datenübertrager Anschlusshinweise Leitungsverlegung und elektrischer Anschluss Bei Installation und Leitungsverlegung sind die ACHTUNG Vorschriften und Normen für SELV Spannung einzuhalten. Bei der Leitungsverlegung ist unbedingt darauf zu achten, dass die Kabel im Schloss- bzw. Stulpbereich beim Einbau nicht gequetscht oder beschädigt werden können. -
Page 15: Anschlussklemmen Elektrische Schlösser
6.3.2 Anschlussklemmen elektrische Schlösser An die Klemmen GS, VS und 90 können mechatronische Schlösser von GU BKS angeschlossen werden (siehe jeweils An- schlussplan der verschiedenen Schlösser in Kapitel 8). 6.3.3 Anschlussklemmen LED An die Anschlussklemmen 56 und GS kann eine LED zur Signalisierung des Öffnungszustandes angeschlossen werden. -
Page 16: Beschreibung Der Anschlüsse Sc 200R Rahmenteil
Montage- und Bedienungsanleitung SECUREconnect 200 Strom- und Datenübertrager Beschreibung der Anschlüsse SC 200R Rahmenteil 6.4.1 externe DC 24 V Spannungsversorgung An die Klemmen V42 und G42 kann eine externe DC 24 V Spannungsversor- gung zum Betrieb des SECUREconnect 200 angeschlossen werden. Es dürfen nur Spannungsquellen DC 24 V nach ACHTUNG DIN EN 60950 eingesetzt werden. -
Page 17: Anschlussklemmen Steuereingänge
6.4.3 Anschlussklemmen Steuereingänge An die Anschlussklemmen V4, 91, 92, 93 werden potentialfreie Kontakte zum Öffnen/Schließen der Tür angeschlossen (Taster, Relais, Zutrittskon- trolle, etc.). 6.4.4 Anschluss AC 230 V Spannungsversorgung Das SECUREconnect 200 kann mit Wechselspannung (AC 230 V) betrieben werden. SECUREconnect 200R Ø20 für Bohrung Ø20... -
Page 18: Inbetriebnahme
Montage- und Bedienungsanleitung SECUREconnect 200 Strom- und Datenübertrager Hierzu wird das Netzkabel, nach dem sicheren Verlegen im Türrahmen, im unteren Bereich des SECUREconnect 200R eingesteckt und zwingend mittels beigelegter Kabelbinder am Gerät fixiert, so dass ein Lösen verhindert wird. Die Bohrung muss mit der beiliegenden Kabeltülle zum Schutz der Zuleitung versehen werden. -
Page 19: Aufbau Der Kommunikation
Aufbau der Kommunikation 7.1.1 Pairing Bei der Inbetriebnahme blinkt die Status LED am SECUREconnect 200R nach Anlegen der Betriebsspannung abwechselnd rot/grün. Die Status LED am SECUREconnect 200F blinkt grün, wenn die Tür einmal kurze Zeit geschlos- sen und mit Spannung versorgt wurde. Dies zeigt eine normale Funktion an. In diesem Zustand kommuniziert jedes SECUREconnect 200R mit jedem an- deren SECUREconnect 200F bei voller Funktionalität. -
Page 20: Led - Signalisierung
Montage- und Bedienungsanleitung SECUREconnect 200 Strom- und Datenübertrager LED - Signalisierung Die LED - Signalisierung am SECUREconnect 200 ist ein wichtiges Hilfs- mittel bei der Inbetriebnahme oder Fehlersuche. Sie gibt Auskunft über die verschiedenen Zustände des Gerätes. 7.2.1 Anzeigen am SECUREconnect 200R LED grün / LED rot Normalzustand, nicht gepairt, keine Kommunika- 0,5 Hz abwechselnd... -
Page 21: Funktionen Mit Elektromotorischen Schlössern
Erläuterung: 5 Hz = 5 x blinken / Sekunde 2 Hz = 2 x blinken / Sekunde 1 Hz = LED 1/2 Sekunde an, 1 x blinken / Sekunde 0,5 Hz = LED 1 Sekunde an Funktionen mit elektromotorischen Schlössern 7.3.1 Kurzzeit-Auf (Kurzzeitentriegelung) Wird ein an den Klemmen 93 / V4 angeschlossener, potentialfreier Kontakt betätigt, wird bei geschlossener Tür an SECUREconnect 200F das Signal zum... -
Page 22: Dauer-Auf (Entriegeln)
Montage- und Bedienungsanleitung SECUREconnect 200 Strom- und Datenübertrager 7.3.2 Dauer-Auf (Entriegeln) Wird ein an den Klemmen 91 / V4 angeschlossener, potentialfreier Kontakt betätigt, wird bei geschlossener Tür an SECUREconnect 200F das Signal zum Einfahren der Falle erteilt. Die Falle bleibt dauerhaft eingefahren. Es erfolgt kein automatischer Wiederverschluss des ACHTUNG angeschlossenen elektrischen Schlosses. -
Page 23: Funktionen Mit Ek-Schlössern
Funktionen mit EK-Schlössern 7.4.1 Tür Kurzzeit-Auf (Drücker einkuppeln) Wird ein an den Klemmen 93 / V4 angeschlossener, potentialfreien Kontakt betätigt, wird bei geschlossener Tür an SECUREconnect 200F das Signal zum Einkuppeln des Türdrückers erteilt. „ „ Bleibt die Tür geschlossen, wird der Türdrücker nach 20 s wieder ausge- kuppelt. - Page 24 Montage- und Bedienungsanleitung SECUREconnect 200 Strom- und Datenübertrager beiliegendes Anschlusskabel mit Klemmen braun weiß Kurzzeit AUF (Impuls) gelb Schließen (Impuls) / Drücker auskuppeln grün Dauer AUF (Impuls) Wird auf die Klemmen V4, 91-93 eine Fremd- ACHTUNG spannung angelegt, führt dies zur Zerstörung der Schalteingänge! 12.2013 | 15887EE | Printed in Germany...
-
Page 25: Elektrische Funktionsprüfung
Elektrische Funktionsprüfung Um den korrekten Anschluss der kompletten Baugruppe zu prüfen, sind folgende Arbeitschritte notwendig: „ „ manuelles Schließen der Tür. „ „ am SECUREconnect 200R die Versorgungsspannung (z.B. AC 230 V mittels EURO-Stecker) anlegen. „ „ am SECUREconnect 200R V4 und 93 brücken (braune und weiße Ader des beiligenden Anschlusskabels). -
Page 26: Anschlussplan Secury Automatik Mit A-Öffner
Montage- und Bedienungsanleitung SECUREconnect 200 Strom- und Datenübertrager Anschlussplan Secury Automatik mit A-Öffner Türöffnungszeit bei Impulsansteuerung ca. 2 s (nicht einstellbar). Türöff- nungszeit dauerhaft, solange Ansteuerungssignal ansteht. SECUREconnect 200F Anschlusskabel Signal Grau (blau) Braun + 24 V Schwarz Steuerleitung 12.2013 | 15887EE | Printed in Germany... -
Page 27: Ein- Und Ausschalten Des Tonsignals Im A-Öffner
Ein- und Ausschalten des Tonsignals im A-Öffner „ „ Anschluss des A-Öffners an SECUREconnect 200F nach Anschlussplan. „ „ SECUREconnect 200R stromlos schalten. „ „ Brücken der Klemmen V4, 93, 92, 91. SECUREconnect 200R „ „ Warten bis das SECUREconnect 200F aufhört zu blinken. „... -
Page 28: Anschlussplan Motorschloss Serie 19
Montage- und Bedienungsanleitung SECUREconnect 200 Strom- und Datenübertrager Anschlussplan Motorschloss Serie 19 Anschlusskabel Signal Blau verriegelt COM verriegelt NO Schwarz entriegelt COM Violett entriegelt NO Grau- rosa Schließbart COM Rot-blau Schließbart NO Weiß-grün Funktionsausgang COM Braun-grün Funktionsausgang NO Grün nicht belegt Gelb Funktionseingang Weiß... -
Page 29: Anschlussplan Ek-Schloss Serie 19
Anschlussplan EK-Schloss Serie 19 Anschlusskabel Signal Blau Verriegelt COM Grün Verriegelt NO Grau Verriegelt NC Schließbart COM Gelb Schließbart NO Violett Drücker Seite 1 COM Rot-blau Drücker Seite 1 NO Braun-grün Drücker Seite 1 NC Weiß-grün Drücker Seite 2 COM Grau-rosa Drücker Seite 2 NO Schwarz... -
Page 30: (Mit 14 Poligem Anschlusskabel)
Montage- und Bedienungsanleitung SECUREconnect 200 Strom- und Datenübertrager Anschlussplan EK-Schloss Serie 21 (mit 14 poligem Anschlusskabel) Anschlusskabel Signal Blau Verriegelt COM Grün Verriegelt NO Grau Verriegelt NC Schließbart COM Gelb Schließbart NO Rosa Schließbart NC Violett Drücker Seite 1 COM Rot-blau Drücker Seite 1 NO Braun-grün... -
Page 31: Anschlussplan Ek-Schloss Serie 21 (Mit 8 Poligem Anschlusskabel)
Anschlussplan EK-Schloss Serie 21 (mit 8 poligem Anschlusskabel) Anschlusskabel Signal Blau Verriegelt COM Grau Verriegelt NO Grün Verriegelt NC Schließbart COM Gelb Schließbart NO Weiß Braun + 24 V Rosa Steuerleitung... -
Page 32: Ansteuerung Über Io-Module
Montage- und Bedienungsanleitung SECUREconnect 200 Strom- und Datenübertrager Ansteuerung über IO-Module Bitte achten Sie darauf, dass sich die Adresseinstellung der IO10 Module unterscheiden. Adressjumper Geschlossen: Gerät 1 Offen: Gerät 2 61 41 51 62 42 52 63 43 53 64 44 54 61 41 51 62 42 52 63 43 53... -
Page 33: Eingänge Am Io-Modul
8.8.1 Eingänge am IO-Modul Über die Klemmen LA und LB am SECUREconnect 200R können 2 Stück IO10 oder ein IO5 angeschlossen werden. Die Parameter der Ein- und Ausgänge sind entsprechend der BKS-Net Vor- einstellungen konfiguriert. Eingang IO10 Adresse 1 Funktion Eingang 1: Klemme I1, V9 Dauer-Auf (Entriegeln) Eingang 2: Klemme I2, V9... -
Page 34: Ausgänge Am Io-Modul
Montage- und Bedienungsanleitung SECUREconnect 200 Strom- und Datenübertrager 8.8.2 Ausgänge am IO-Modul Der Status der Eingänge (SECUREconnect 200F) wird direkt an die Relais des IO-Moduls ausgegeben. Eingang Ausgang (SECUREconnect 200F) IO10 Adresse 1 Eingang 1: Klemme I1, V4 Relais 1: Klemme 41, 51, 61 Eingang 2: Klemme I2, V4 Relais 2: Klemme 42, 52, 62 Eingang 3: Klemme I3, V4... -
Page 35: Inspektions- Und Wartungsarbeiten
Inspektions- und Wartungsarbeiten Das SECUREconnect 200 darf nur mit herstellereigenen Netzteilen oder AC 230 V betrieben werden. Bei Verwendung von Fremdfabrikaten besteht keinerlei Haftungs-, Gewähr- leistungs- oder Serviceleistungsanspruch. Werden Ersatzteile oder Erweiterungen benötigt, so dürfen ausschließlich Originalteile des Herstellers verwendet werden. Wartungs- und Instandsetzungsarbeiten dürfen nur von Fachkräften ausge- führt werden, welche vom Hersteller geschult bzw. - Page 36 Mounting und operating instructions SECUREconnect 200 Power and data transmission unit Table of contents 1. Safety instructions ........Page 38 2. Information ...........Page 38 General advice ..............Page Delivery contents ............. Page 3. Technical description ........Page 40 Range of application ............Page 3.1.1 SECUREconnect 200R for installation in the door frame Page 3.1.2...
- Page 37 7. Start-up ............Page 52 Establishing communication ........... Page 7.1.1 Pairing ................Page 7.1.2 Re-pairing ................Page LED signalling ..............Page 7.2.1 LED indication on SECUREconnect 200R ...... Page 7.2.2 LED indication on SECUREconnect 200F ...... Page Functions with motor-driven locks ........ Page 7.3.1 Short-time OPEN (short-term release) ......
-
Page 38: Safety Instructions
Mounting und operating instructions SECUREconnect 200 Power and data transmission unit Safety instructions Warning symbols DANGER denotes a dangerous situation which, if DANGER ignored, could lead to death or serious injury. WARNING denotes a dangerous situation which, if WARNING ignored, could lead to death or serious injury. CAUTION denotes a dangerous situation which, if CAUTION ignored, could lead to injuries. -
Page 39: Delivery Contents
The instructions must be read carefully by every person handling SECUREconnect 200, e.g., during „ „ Installation and electrical connection „ „ Start-up and maintenance It is essential that the information given in this manual, especially the chapters concerned with safety, should be observed. After installation, the instruction manual must be handed over to the operating company/user who should read it carefully before operating the unit the first time and keep it for later service and maintenance. -
Page 40: Technical Description
Mounting und operating instructions SECUREconnect 200 Power and data transmission unit Technical description Range of application The SECUREconnect 200R and 200F components are designed for vertical installation in the the frame and the door leaf, respectively. It is not permitted to operate the unit in exterior gate or door assemblies where ambient conditions require a higher protection class than IP 40. -
Page 41: Secureconnect 200F For Installation In The Door Leaf Page
3.1.2 SECUREconnect 200F for installation in the door leaf „ „ Power and data transmission unit for motor-driven or electromechanical locking systems from GU and BKS. „ „ Long-life tappet contacts (no need of a cable duct). „ „ Any door opening angle possible „... -
Page 42: Schematic View
Mounting und operating instructions SECUREconnect 200 Power and data transmission unit Schematic view J-Y(ST) Y2x2x0.6 IO10 IO10 Potential-free control contact, e.g. pushbutton, intercom, access control, timer switch. For various control options see chapter 6. Connecting cable with input terminals For metal and PVC doors use rubber For various grommet enclosed in package. -
Page 43: Safety Advice
Safety advice It is necessary to ensure that only trained specialists (for the definition thereof see EN 50110-1, DIN VDE 0105 or IEC 60364) are charged with jobs related to the product (planning, transport, assembly, installation, start-up, maintenance, repair, dismantling). Moreover, it is necessary to ensure that the documents required for installation, start-up, operation, maintenance and repair of the product are made available to the specialists and observed by them duly. -
Page 44: Mounting Preparations
Mounting und operating instructions SECUREconnect 200 Power and data transmission unit „ „ The door leaf part of SECUREconnect has an integral energy storage ensuring that in the event of a power failure during short-time 'OPEN', the retracted latchbolts of all mechatronic GU-BKS locks will eject to be ready for locking. -
Page 45: Mounting The Contact Holder With Contact Plates
Mounting the contact holder with contact plates After having attached the faceplate, mount the contact holder with the 3 contacts to SECUREconnect 200R. The 3 contact plates are firmly attached to the contact holder, so all you have to do is press the unit through the faceplate bores into the provided jacks, you will feel the part snap in lightly. -
Page 46: Regulating The Rebate Clearance
Mounting und operating instructions SECUREconnect 200 Power and data transmission unit Regulating the rebate clearance The factory setting of SECUREconnect 200F regarding the rebate clearance is 0 - 6 mm. For increasing this value to 6 - 12 mm, it is possible to pull out the restricting brackets on the side of the tappet contacts using a small screwdriver. -
Page 47: Installation In The Door
Installation in the door Depending on the door material (timber, metal, PVC), different fastening screws must be used for the installation of SECUREconnect 200; type and length of the screws vary according to the door profile used. It is important, however, that the max. screw diametre does not exceed 4.0 mm. -
Page 48: Wiring Advice
Mounting und operating instructions SECUREconnect 200 Power and data transmission unit Wiring advice Wiring and electrical connection Observe standards and regulations for extra-low CAUTION voltage (SELV) during installation and laying of cables. The cables must be laid in such a way that they cannot be squeezed in or dammaged in the area of the lock forend during installation. -
Page 49: Connection Terminals For Electrical Locks
6.3.2 Connection terminals for electrical locks The terminals GS, VS, and 90 are provided for the connection of mechatronic locks from GU-BKS (for particular connection diagrams see chapter 8). 6.3.3 Connection terminals for LED Terminals 56 and GS are provided for the connection of an LED signalling unlocked status. -
Page 50: Connection Terminals Of Secureconnect 200R (Frame Part)
Mounting und operating instructions SECUREconnect 200 Power and data transmission unit Connection terminals of SECUREconnect 200R (frame part) 6.4.1 Terminals for external DC 24 V voltage supply The terminals V42 and G42 are provided for the connection of an external DC 24 V voltage supply to operate SECUREconnect 200 Only DC 24 V voltage sources in accordance with ATTENTION... -
Page 51: Connection Terminals For Control Inputs
6.4.3 Connection terminals for control inputs The terminals V4, 91, 92, 93 are provided for potential-free contacts required to open and close the door. (Pushbutton, relays, access control etc.) 6.4.4 Connecting a AC 230 V voltage supply SECUREconnect 200 is suited for operation with AC 230 V voltage. SECUREconnect 200R Ø20 for drill hole Ø20... -
Page 52: Start-Up
Mounting und operating instructions SECUREconnect 200 Power and data transmission unit The mains cable is plugged in at the bottom side of SECUREconnect 200R and must be fixed by all means with the attached cable tie to prevent it from coming loose. -
Page 53: Establishing Communication
Establishing communication 7.1.1 Pairing At start-up, the status LED of SECUREconnect 200 will be flashing alternately red and green as soon as the operating voltage has been applied. The status LED on SECUREconnect 200F flashes green as soon as the door has been closed once for a short time and supplied with voltage. -
Page 54: Led Signalling
Mounting und operating instructions SECUREconnect 200 Power and data transmission unit LED signalling The LED indication of SECUREconnect 200 is an important means during start-up or when it comes to trouble shooting. It provides information on the different status of the device. 7.2.1 LED indication on SECUREconnect 200R LED green / LED red Normal status, not paired, no... -
Page 55: Functions With Motor-Driven Locks
Explanation: 5 Hz = 5 flashes per second 2 Hz = 2 flashes per second 1 Hz = LED 0.5 seconds on, 1 flash per second 0.5 Hz = LED 1 second on Functions with motor-driven locks 7.3.1 Short-time OPEN (short-term release) If a potential-free contact connected to terminals 93 / V4 is actuated with the door closed, SECUREconnect 200F receives the signal to release the electrical lock and to retract the latch. -
Page 56: Permanent Open (Unlocking)
Mounting und operating instructions SECUREconnect 200 Power and data transmission unit 7.3.2 Permanent OPEN (unlocking) If a potential-free contact connected to terminals 91 / V4 is actuated with the door closed, SECUREconnect 200F receives the signal to retract the latch. The latch remains retracted permanently. -
Page 57: Function With Electromechanical Locks ('Ek')
Function with electromechanical locks (‘EK’) 7.4.1 Short-time OPEN (engaging the lever handle) If a potential-free contact connected to terminals 93 / V4 is actuated with the door closed, SECUREconnect 200F receives the signal to engage the lever handle. „ „ If the door remains closed, the lever handle will be disengaged again after 20 s. - Page 58 Mounting und operating instructions SECUREconnect 200 Power and data transmission unit Enclosed connection cable with terminals brown white Short-time OPEN (impulse) yellow Close (impulse / handle disengaging) green Permanent OPEN (impulse) If voltage from external component is applied to ATTENTION terminals V4, 91-93, this lead to the destruction of the switching inputs! 12.2013 | 15887EE | Printed in Germany...
-
Page 59: Electrical Function Test
Electrical function test In order to verify if an assembly group has been connected properly, it is necessary to carry out the following work steps: „ „ Close door manually „ „ Apply supply voltage to SECUREconnect 200R (e.g. 230 V AC by means of a Europlug) „... - Page 60 Mounting und operating instructions SECUREconnect 200 Power and data transmission unit Connection diagram Secury Automatic with A-opener Impulse-controlled door opening time approx. 2 s (cannot be adjusted). Permanent door opening time corresponds to duration of control signal SECUREconnect 200F Connecting cable Signal Grey (blue) Brown...
-
Page 61: Switching The A-Opener's Acoustic Signal On And Off
Switching the A-opener’s acoustic signal on and off „ „ Connect A-opener to SECUREconnect 200F according to connection diagram. „ „ Disconnect SECUREconnect 200R from power supply. „ „ Bridge terminals V4, 93, 92, 91. SECUREconnect 200R „ „ Wait until SECUREconnect 200F stops flashing. „... -
Page 62: Connection Diagram Of Motor-Driven Lock Series 19
Mounting und operating instructions SECUREconnect 200 Power and data transmission unit Connection diagram of motor-driven lock series 19 (with 14-wire connecting cable) Connecting Signal cable Blue Locked COM Locked NO Black Unlocked COM Purple Unlocked NO Grey-pink Cyl. locking cam COM Red-blue Cyl. -
Page 63: Connection Diagram Of 'Ek' Lock Series 19
Connection diagram of ‘EK‘ lock series 19 (with 14-wire connecting cable) Connecting Signal cable Blue Locked COM Green Locked NO Grey Locked NC Cyl. locking cam COM Yellow Cyl. locking cam NO Purple Handle side 1 COM Red-blue Handle side 1 NO Brown-green Handle side 1 NC White-green... -
Page 64: Connection Diagram Of 'Ek' Lock Series 21
Mounting und operating instructions SECUREconnect 200 Power and data transmission unit Connection diagram of ‘EK‘ lock series 21 (with 14-wire connecting cable) Connecting Signal cable Blue Locked COM Green Locked NO Grey LockedNC Cyl. locking cam COM Yellow Cyl. locking cam NO Pink Schließbart NC Purple... -
Page 65: Connection Diagram Of 'Ek' Lock Series 21 (With 8-Wire Connecting Cable)
Connection diagram of ‘EK‘ lock series 21 (with 8-wire connecting cable) Connecting Signal cable Blue Locked COM Grey Locked NO Green Locked NC Cyl. locking cam COM Yellow Cyl. locking cam NO White Brown + 24 V Pink Control line... -
Page 66: Control Via Io Modules
Mounting und operating instructions SECUREconnect 200 Power and data transmission unit Control via IO modules Please bear in mind that each IO10 module has a different address setting. Adressjumper Closed: Device 1 Open: Device 2 61 41 51 62 42 52 63 43 53 64 44 54 61 41 51... -
Page 67: Io Module Inputs
8.8.1 IO module inputs Two IO10 or IO5 modules can be connected to SECUREconnect 200R via terminals LA and LB. Input and output parameters are preset in compliance with the BKS-NET concept. Input IO10 Device 1 Function Input 1: terminal I1, V9 Permanent OPEN (unlocking) Input 2: Terminal I2, V9 Close (locking) -
Page 68: Io Module Outputs
Mounting und operating instructions SECUREconnect 200 Power and data transmission unit 8.8.2 IO module outputs The input status (SECUREconnect 200F) are put out directly to the IO modu- le relays. Input Output (SECUREconnect 200F) IO10 Adresse 1 Input 1: Terminal I1, V4 Relay 1: Terminal 41, 51, 61 Input 2: Terminal I2, V4 Relay 2: Terminal 42, 52, 62... -
Page 69: Inspection And Maintenance
Inspection and maintenance SECUREconnect 200 may only be operated with the original mains adaptor or with AC 230 V. If other than original products are used, all product liability, warranty, and service claims will expire. If replacement parts or extensions are required, orignial parts may be used exclusively. - Page 70 Produktname Notizen | Notes | Notes | Notas 12.2013 | 15887EE | Printed in Germany...
- Page 71 Notizen | Notes | Notes | Notas...
- Page 72 Herausgeber | Editor: BKS GmbH Heidestr. 71 D-42549 Velbert Tel. + 49 (0) 20 51 2 01-0 Fax + 49 (0) 20 51 2 01-97 33 www.g-u.com...
Need help?
Do you have a question about the BKS SecureConnect 200 and is the answer not in the manual?
Questions and answers