Table of Contents
Advertisement
Advertisement
Table of Contents

Related Manuals for JVC RV-NB200BT


Summary of Contents for JVC RV-NB200BT
- Page 1 Boomblaster RV-NB200BT RV-NB300DAB OPERATING INSTRUCTIONS JVCKENWOOD Corporation...
-
Page 2: Table Of Contents
Before start-up Content Before switching on the power supply Safety instructions Before Start-up Handling CDs Worth knowing about USB devices Component names and functions Basic functions Turning on the system Navigate in menus Set menu language Sleep timer Using CD and USB Preparation Playing back CDs or audio files (USB, CD) Selecting a folder (audio files only) -
Page 3: Before Switching On The Power Supply
Before switching on the power supply Safety instructions! Attention: Read this page carefully to ensure safe operation of the device. Read instructions carefully! – Follow all safety and operating instructions when using this product. Keep the instructions in a safe place! –... - Page 4 9. Penetration of foreign material and liquid – Be careful not to allow foreign material or liquid to enter this device through holes, otherwise it may come into contact with high voltage components or short circuit resulting in a fire or electric shock. Never spill liquids of any kind on this device. 10. Maintenance – Never attempt to carry out the maintenance of this device yourself, because live parts can be exposed through the openings or by removing covers, contacting which can be hazardous. Leave all maintenance work to qualified service personnel. 11. Damage requiring repair – Maintenance and repair work should only be carried out by a qualified customer service. Maintenance/repair is required if the device has been damaged if liquid has entered the device, if objects have entered the device, if the device has been exposed to rain or moisture, when it stops working properly or has fallen down. 12. Spare Parts – If replacement parts are required, make sure that the customer service technician uses spare parts specified by the manufacturer or that have the same characteristics as the original parts. Unauthori- sed parts may cause fire, electric shock or other accidents.
- Page 5 - the disposal of a battery in fire or a hot oven, or the mechanical crushing or cutting of a battery; - leaving a battery in an extremely high temperature environment that may cause an explosion or leakage of flammable liquids or gases; - extremely low air pressure, which may cause an explosion or leakage of flammable liquids or gases. EU Declaration of Conformity Hereby, JVCKENWOOD Corporation declares that the radio equipment type RV-NB200BT and RV- NB300DAB complies with Directive 2014/53/EU. The full text of the EU Declaration of Conformity is available at the following Internet address: http://www3.jvckenwood.com/ecdoc/ Manufacturer: JVCKENWOOD Corporation 3-12. Moriyacho, Kanagawa-ku, Yokohama-shi, Kanagawa 221-0022, JAPAN...
-
Page 6: Before Start-Up
Before start-up First use When switching the device to DAB +* for the first time, an automatic DAB + station search is initi- ated. Please wait until this process is completed. For more information, please refer to the section "Using the DAB + Radios". (Only* RV-NB300DAB model) Handling of CDs Precautions for handling Hold the CD so that you do not touch the signal surface. (The unprinted side is the playing side.) Precautions regarding CDs Use only use CDs with marking. In some cases, CDs with this marking may not play back pro- perly. Worth knowing about USB devices Notes on using a USB device This device is capable of playing audio files stored on a flash memory or digital audio player if these devices have a USB port (these devices are referred to as USB Devices in this document). - Page 7 Before start-up Unpacking Carefully unpack the device and make sure all accessories are present: • Operating instructions • Remote Control • Battery LR03/AAA • Power cord • Carrying strap • 2 x fastening buckle for carrying strap The remote control • Insert the battery into the remote control, observing the correct polarity (+ and -). • The supplied battery is intended for functional testing and may have a limited lifetime. • If the range of the remote control decreases, replace the old battery with a new one.
-
Page 8: Component Names And Functions
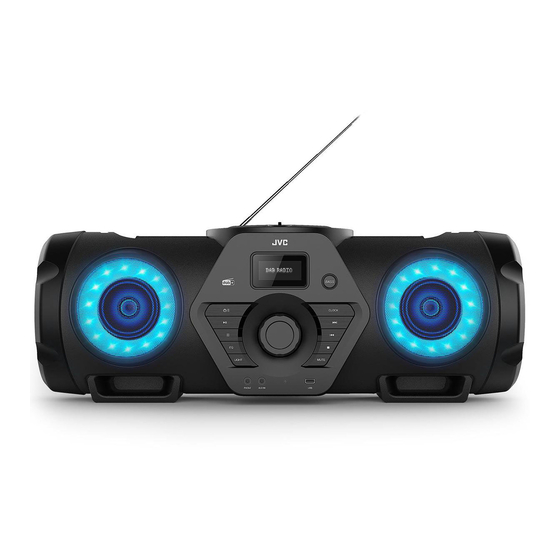
Components and functions Front side: BASS CLOCK MENU MUTE PHONES AUX IN 10 11 12 13 14 15 1 - Standby / On 9 - Display 2 - Play / Pause 10 - USB port 3 - Source Selection 11 - Menu 4 - Equalizer 12 - Stop CLOCK 5 - Speaker effect lighting 13 - Previous 6 - Headphone port 14 - Next BASS MENU 7 - AUX-In port 15 - Clock MUTE 8 - Volume 16 - Bass... - Page 9 Components and functions Open the CD compartment Turn the lock (1) slightly 90 degrees counter-clockwise to open the CD compartment. To close the lid, close it by hand until the lock engages again. Mounting the carrying strap Fig. B VX912DAB VX912V1FP-RV-NB300DAB-S 1. Take one end of the strap with the hem pointing upwards, and thread it from below into the buckle (1). Please pay attention to the correct alignment of the buckle. Insert the strap from above into the second opening of the strap buckle (2) and pull the strap out of the buckle approx. 20 cm. 面板丝印图 2. The end of the strap is now inserted into the casing holder (3) and pulled out of the second casing holder (4).
- Page 10 Components and functions Installing the optional BN-R5000 battery A rechargeable battery is available for the RV-NB200BT and RV-NB300DAB. To install the battery in, please proceed as follows: Attention: Use only the battery pack BN-R5000! Risk of explosion if the battery is replaced by an incorrect type. • Remove the battery compartment cover locking screw (indicated by arrow marking , see page 8) with a suitable Phillips screwdriver. • Press down the left and right latches of the lid and remove them.
-
Page 11: Basic Functions
Press the button on the remote control or on the device. The display will show "JVC Boomblaster". Press the button again to switch off the device. Volume control Turn the "VOL" knob on the device or press the “VOL +/-" button on the remote control to increase or decrease the volume. -
Page 12: Sleep Timer
Basic functions Setting the display illumination The display illumination can be programmed in 3 brightness levels. The following settings are possible in the "Backlight" menu: "Dim Level": Brightness of the display when the radio is switched on. Choices: "High" / "Medium" / "Low" "On Level": Brightness adjustment for operation and standby. -
Page 13: Using Cd And Usb
Basic functions Additional settings in the "Time" menu The following functions can be set in the "Time" menu: "Auto Update": Setting from which source the time is automatically retrieved. Choices: "Update all" / "Update DAB" / "Update FM" / "No update" "Set 12/24 hours": Setting the time format. -
Page 14: Playing Back Cds Or Audio Files (Usb, Cd)
Playing a CD or audio file (USB, CD) On the remote: Use the "SOURCE" button to select the source and press uII button to start the playback. " On the main device: Use the button to select the desired source and press the uII button to start playback For USB devices or CDs containing audio files (such as MP3), the number of existing folders and files is displayed as follows:... -
Page 15: Programming Tracks And Files
Programming tracks and files You can use the remote control to program tracks on an audio CD or files in a sequence of your choice. The following number of storage locations is available: Audio CD: 20 memory slots Files: 99 memory slots Procedure for audio CD 1. The source "CD" must be in stop mode, otherwise no programming is possible. 2. Press the button to start the programming mode. 3. The display now shows "P01 T--001". The second number block shows the current track, the first number block the current memory location. 4. Use the button to select the track you want to save to the current memory location. -
Page 16: Random Play And Repeat Function
Random playback and repeat function Procedure for audio CD • Press the "RANDOM" button on the remote control to start random playback. Pressing the "RANDOM" or pressing the button will cancel random playback. • Press the "REPEAT" button on the remote control to activate the repeat function. Repeated pressing switches the following functions: Repeat the current track (Display "REP-1") Repeat all tracks (display "REP-ALL") -
Page 17: Selecting A Dab + Station
Manual tuning of ensembles • Press the "MENU" button on the device to enter the DAB menu. • Press the button until "Manual tune" appears in the Display. • Pressing the uII button confirms the function and the currently set channel with the corresponding frequency is shown in the display. • Press the button to manually select another channel. -
Page 18: Expanded Dab + Information
Expanded DAB + information With DAB + additional information is transmitted in addition to the music signal. These can be retrie- ved as follows. Press the "INFO" button on the remote control to retrieve the following information in succession: • Signal level: The display shows the level using icons from left to right. The more icons displayed, the better the reception. -
Page 19: Using The Ukw Radio
Using the UKW radio " Press the"SOURCE" button on the remote control or the button on the device until "FM" appears in the display. Setting an FM station • Press the button on the remote control to increase the reception frequency. TUN+ •... -
Page 20: Menu Functions Ukw
Menu functions UKW Pressing and holding the"MENU" button opens a menu in which you can set various functions for FM. Use the buttons to scroll through the menu. The following functions are available: • Scan settings: This allows you to set which stations are to be considered when searching for automatic storage. -
Page 21: Using Line-In
Using line-in Play from external components To play music, your connect external devices such as such as MP3 players, DVD players or game consoles to the line-in port. " To select this source, press the "SOURCE" button on the remote control or the button on the device until "AUX IN" appears in the display. Guitar and microphone input This model has a guitar and microphone input on the back. Monoaural sources with 6.35 mm jack plugs can be connected to these controllable inputs. The corresponding signals are mixed into the selected audio source. -
Page 22: General Information
Maintenance and care Cleaning the housing: Use a cloth lightly moistened with a mild detergent. Do not use detergents containing alcohol, ammonia or scouring agents. Cleaning the CDs • Clean soiled discs with a special cleaning cloth. Wipe the disc in a straight line from the middle to the edge. -
Page 23: Technical Specifications
Technical data RV-NB200BT / RV-NB300DAB Power supply AC voltage 100 - 240 V 50/60 Hz Power consumption 60 watt Recording power in standby mode <0.5 watt CD mode Signal-to-noise ratio (A filter) ≥ 68 dB Dynamic Range ≥ 60 dB Tuner FM/DAB + DAB tuning range BAND III 174.928 MHz – 239.200 MHz (RV-NB300DAB only) FM tuning range 87.50 MHz – 108.00 MHz BLUETOOTH BLUETOOTH version BT Version 5.0... -
Page 24: Guarantee
Warranty Dear Customer, We would like to thank you for purchasing this JVC product. If this product is found to be defective in material or workmanship under normal operating conditions, in accordance with the provisions of the following warranty, we will rectify these faults free of charge or replace the device. Please retain this warranty card in a safe place. JVC grants a two year warranty for this device from the date of purchase according to the invoice or purchase receipt from the JVC dealer.