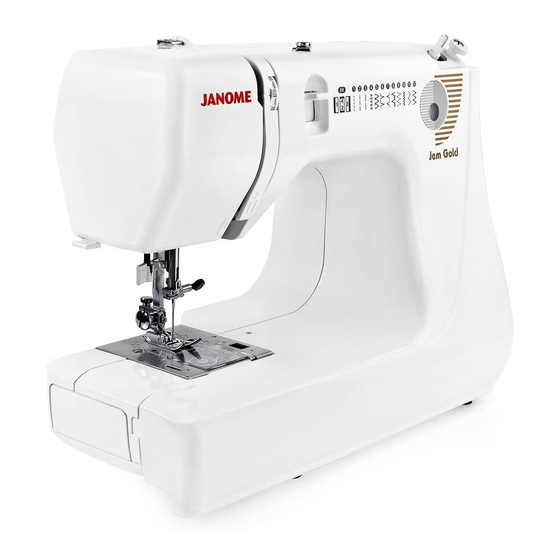
Janome Jem Gold 660 Servicing Manual
Hide thumbs
Also See for Jem Gold 660:
- Instruction book (24 pages) ,
- Instruction manual (23 pages) ,
- Instruction book (23 pages)
Table of Contents
Advertisement
Advertisement
Table of Contents

Related Manuals for Janome Jem Gold 660


Summary of Contents for Janome Jem Gold 660
- Page 1 SERVICING MANUAL JEM GOLD (660)
-
Page 2: Table Of Contents
CONTENTS SERVICE ACCESS FACE COVER......................2 BED COVER ......................3 FRONT COVER ...................... 4 REAR COVER ......................5 MECHANICAL ADJUSTMENT THREAD TENSION ....................6 PRESSER BAR HEIGHT AND ALIGNMENT ............7 DISTRIBUTION OF NEEDLE SWING ..............8 NEEDLE DROP ...................... 9 NEEDLE BAR HEIGHT .................. -
Page 3: Service Access
SERVICE ACCESS FACE COVER (To remove) 1. Remove the screw and remove the face cover as shown below. (To attach) 2. Follow the above procedure in reverse. -
Page 4: Bed Cover
SERVICE ACCESS BED COVER (To remove) 1. Loosen the 5 screws and remove the bed cover. (To attach) 2. Follow the above procedure in reverse. -
Page 5: Front Cover
SERVICE ACCESS FRONT COVER (To remove) 1. Remove the face cover and bed cover (see pages 2, 3). 2. Pull out the pattern selector dial. 3. Remove the screw (A) and rubber cushion. 4. Loosen the screws (B), (C), (D) and remove the front cover. (To attach) 5. -
Page 6: Rear Cover
SERVICE ACCESS REAR COVER (To remove) 1. Remove the face cover, bed cover and front cover (see pages 2, 3, 4). 2. Remove the screws (A), (B), (C), (D), (E) and rear cover. (To attach) 6. Follow the above procedure in reverse. -
Page 7: Mechanical Adjustment
MECHANICAL ADJUSTMENT THREAD TENSION The standard upper thread tension should be 75 - 90 g when pulling the thread (white color cotton thread #50) in the direction of the arrow with the tension dial set at 4. (Make sure the presser foot is lowered.) If the tension is out of the standard range, adjust it as follows: 1. -
Page 8: Presser Bar Height And Alignment
MECHANICAL ADJUSTMENT PRESSER BAR HEIGHT AND ALIGNMENT The standard presser bar height is 6.0 mm between the bottom surface of the presser foot and the needle plate when the presser bar lifter is in the up position. 1. Remove the face cover (see page 2). 2. -
Page 9: Distribution Of Needle Swing
MECHANICAL ADJUSTMENT DISTRIBUTION OF NEEDLE SWING If the timing of the needle swing is not correctly adjusted, the needle will move sidewise while it is in the fabric. The needle should start to swing from a position 2-3 mm above the needle plate in its right outflow. -
Page 10: Needle Drop
MECHANICAL ADJUSTMENT NEEDLE DROP When the pattern selector dial is set at “straight stitch”, the needle should be positioned at the center of the needle plate hole. When the pattern selector dial is set at “zigzag stitch”, in maximum zigzag width, the clearance between the needle and the edge of the needle plate hole should be equal, 0.2 mm or more, at the left and right needle drop positions. -
Page 11: Needle Bar Height
MECHANICAL ADJUSTMENT NEEDLE BAR HEIGHT With the pattern selector dial set at maximum zigzag width and when the point of the rotary hook exactly meets the right side of the needle in ascending travel of the needle bar from its lowest position, at the right needle drop position, the distance between the upper edge of the needle eye and the race of the rotary hook should be 3.3 ±... -
Page 12: Hooktiming
MECHANICAL ADJUSTMENT HOOK TIMING With the needle bar swung to the right at the maximum zigzag width, the amount of ascending travel of the needle bar from its lower position to the position where the tip of the rotary hook exactly meets the right side of the needle should be 1.7 ± 0.3 mm. Note: Before the adjustment, be sure to check the needle bar height. -
Page 13: Needle Clearance To Hook
MECHANICAL ADJUSTMENT NEEDLE CLEARANCE TO HOOK The clearance between needle and rotary hook should be -0.10 to + 0.05 mm. If not, make an adjustment as follows: 1. Set the pattern selector dial at maximum zigzag stitch width. 2. Remove the setscrew on the needle plate, and detach the needle plate and bobbin holder. -
Page 14: Backlash (Lower Shaft Gear)
MECHANICAL ADJUSTMENT BACKLASH (LOWER SHAFT GEAR) The lower shaft backlash play should be less than 0.8 mm when the point of rotary hook point is in a range between both outer feed dogs. If there is more than 0.8 mm between the gears, adjust as follows: 1. -
Page 15: Feed Dog Height
MECHANICAL ADJUSTMENT FEED DOG HEIGHT Lower the presser foot and turn the hand wheel toward you until the needle bar comes to the highest point of its travel. In this condition, the height of the feed dog above the needle plate should be 0.75 to 0.85 mm if not, adjust as follows: 1. -
Page 16: Stretch Stitch Balance
MECHANICAL ADJUSTMENT STRETCH STITCH BALANCE When a stretch stitch pattern ( ) is sewn with the feed balancing dial at the standard setting mark “ “, the pattern should be formed as shown in the figure below, If not, (If there is unbalance between forward feeding and reverse feeding) then make an adjustment as follows: 1. -
Page 17: Buttonhole Stitch Balance
MECHANICAL ADJUSTMENT BUTTONHOLE STITCH BALANCE When sewing buttonholes, the stitches on each side of the buttonhole should have the same stitch density, The range of 9 - 11 stitches in the right side row against 10 stitches in the left side row is considered acceptable. 1. -
Page 18: Adjusting The Line Tack Width And
ADJUSTING THE LINE TACK WIDTH AND DISENGAGEMENT CLEARANCE OF CAM FOLLOWER For the line tack width on buttonhole sewing, both right and left stitch widths should be even. In an uneven setting, the zigzag width claw will touch the cam when the pattern selector is turned.
Need help?
Do you have a question about the Jem Gold 660 and is the answer not in the manual?
Questions and answers