Advertisement
Quick Links
1.0 INTRODUCTION
The unit is a unique low energy Positive Input Ventilation (PIV) unit. Unlike con-
ventional PIV units which only draw in external air via the loft in a "cold roof",
the unit is capable of drawing in external air from a roof location via an inlet
spigot fitted with a low energy open/close damper.
It is not necessary for the home owner to program or operate the unit in any
way, as the 365 is fully automatic and intelligently decides which location the
fresh air will be supplied from.
If the loft temperature is below 24°C then the unit will take fresh air from the
loft.
If the loft temperature is above 24°C then cool fresh air will be taken from
outside the dwelling.
If the loft temperature is 19°C to 24°C and the house is cooler than this, then
the unit goes into heat recovery mode. The unit will increase in speed and supply
more air to the property.
The unit can be boosted to obtain maximum ventilation by the operation of a
boost switch.
2.0 IMPORTANT NOTES TO INSTALLERS
Successful operation of the fan depends entirely upon the unit being installed
strictly in accordance with these instructions.
Please read through this guide in its entirety before commencing installation and
follow step by step to ensure a satisfactory completion.
Whilst the installation of the DRI-365 unit may be achieved by suitable persons,
the provision of the electrical supply and the connection of the unit to the mains
must be carried out by a qualified electrician.
Warning: Isolate from power supply before removing any covers. During instal-
lation/maintenance ensure all covers are fitted before switching on the mains
supply.
This appliance can be used by children aged from 8 years and above and persons
with reduced physical, sensory or mental capabilities or lack of experience and
knowledge if they have been given supervision or instruction concerning use of
the appliance in a safe way and understand the hazards involved. Children shall
not play with the appliance. Cleaning and user maintenance shall not be made
by children without supervision.
Precautions must be taken to avoid the back-flow of gases into the room from
the open flue of gas or other fuel-burning appliances.
Means for disconnection must be incorporated in the fixed wiring as shown in
the wiring diagram in accordance with IEE wiring or national wiring rules.
CAUTION: In order to avoid a hazard due to inadvertent resetting of the thermal
cut-out, this appliance must not be supplied through an external switching
device, such as a timer, or connected to a circuit that is regularly switched on
and off by the utility.
3.0 LOFT INSPECTION
Check to ensure that the loft has adequate ventilation. There may be occasions
where a loft is so well sealed that additional ventilation may have to be provided
by the owner/occupier.
Ensure that all water tanks are covered and sealed.
Check that all water pipes are lagged.
Ensure that any extract fans are discharging to outside and not into the loft.
Check that the loft hatch is tightly sealed.
nuaire.co.uk
029 2085 8400
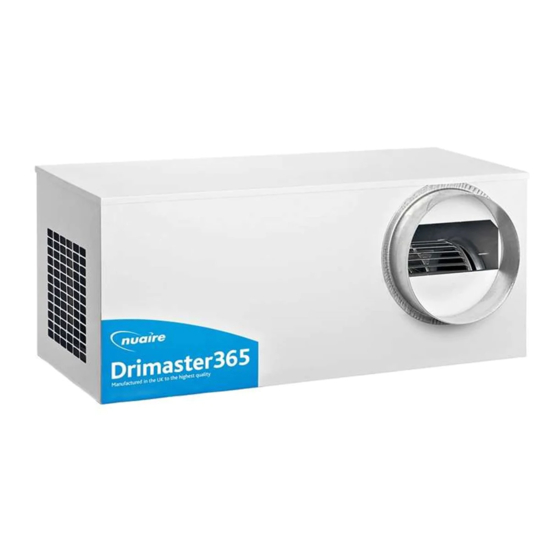
DRI-365
Anti-Condensation and Whole House Positive Input Ventilation Unit
Installation and Maintenance
Ensure that all holes in the ceilings are sealed i.e. ceiling light fittings etc.
A visual inspection of any flues or chimneys for leakage in the loft should be
carried out by the installer.
If any leakage points are found, or if there is any doubt at all, then the installer
should advise the house owner/provider as soon as possible and seek instruction
from them before proceeding with the installation.
4.0 DIFFUSER INSTALLATION
4.1 Siting the Diffuser Position
The diffuser has a unique air throw pattern and it is essential that it is located
correctly in the central hallway in single storey properties or in the ceiling of the
top floor landing on 2 or more storey dwellings.
The diffuser discharges air evenly in all directions along the underside of the
ceiling.
Speed Setting
Minimum distance of diffuser from wall
1
2
3
4
5
6
Note: SMOKE ALARMS -It is also important to ensure that the diffuser is
NOT placed within 1 metre of a smoke alarm.
If the diffuser cannot be repositioned, two sides of the diffuser must be closed
off using the air dams supplied to encourage the air through the remaining open
sides that faces at least 1.5 metres of unobstructed area away from the smoke
alarm sensor.
4.2 Fitting the Air Dams
Air dams should be fitted as needed, to alter the direction of airflow required.
2 air dams are supplied and will fit on any of the diffuser sides to guide airflow
away from a smoke detector and/or obstructions.
Ceiling Vent
Two Air Dams (supplied) can t on any of the di user sides to guide
air ow away from a smoke detector and/or obstructions as required.
30. 08. 18. Leaflet Number 671771
The EMC Directive
2014/30/EU
The Low Voltage
Directive
2014/35/EU
100mm
155mm
400mm
625mm
850mm
1000mm
Air ow
Air ow
Di user Cap
1
Advertisement

Related Manuals for NuAire DRI-365


Summary of Contents for NuAire DRI-365
- Page 1 Please read through this guide in its entirety before commencing installation and follow step by step to ensure a satisfactory completion. 400mm Whilst the installation of the DRI-365 unit may be achieved by suitable persons, 625mm the provision of the electrical supply and the connection of the unit to the mains must be carried out by a qualified electrician.
- Page 2 4 M5 screws provided. 6.0 THE REMOTE SENSOR 5.0 DRI-365 INSTALLATION DRI-365 units are supplied with 15 metres of 2 core cable prewired and ready to 5.1 Fitting the unit (Standard Configuration) connect to the Remote Sensor. The Remote Sensor is used in conjunction with the units internal sensor to allow Connect the two ‘L’...
- Page 3 DRI-365 - Installation and Maintenance 7.0 SITING THE REMOTE SENSOR 15m sensor connection wire The Remote Temperature Sensor incorporates a clip-in fixing bracket which can (pre-wired be removed for easy fitting to a suitable surface. to unit). Allow approx a) Select a suitable location for the sensor e.g. close to ceiling height in a bed- 75mm of wire room or hallway BUT NOT WITHIN 3 METRES of the diffuser.
- Page 4 150mm duct connector for connecting 222 x 90 RDC150 flexible duct to 150mm duct The following installation materials, not supplied with the unit, can be purchased separately, direct from Nuaire. 777483 2m length insulated flexible ducting Tel: 02920 858500 Fax: 02920 858555...
-
Page 5: Wall Installation
DRI-365 - Installation and Maintenance Already connected WALL INSTALLATION Already to sensor connected To remote To be connected 230V A.C. To be connected sensor to remote sensor Supply to 230V mains 199 x 215 x 20mm To Boost To be connected... - Page 6 13.0 AFTER SALES ENQUIRIES 12.0 MAINTENANCE A QR code linking directly to the Nuaire Ltd. website is located behind The unit does not require any maintenance other than a filter change and a the diffuser plate and can be used to order spare parts and replacement check of electrical connections every 5 years.
Need help?
Do you have a question about the DRI-365 and is the answer not in the manual?
Questions and answers