Advertisement
Advertisement

Related Manuals for Elenco Electronics Snap Circuits Beginner


Summary of Contents for Elenco Electronics Snap Circuits Beginner
-
Page 2: Table Of Contents
WARNING: Always check your wiring before turn- experiments are suitable and safe (the Table of Contents ing on a circuit. Never leave a circuit instructions should enable supervising Warnings unattended while the batteries are in- adults to establish the experiment’s stalled. -
Page 3: Parts List
Parts List (Colors and styles may vary) Symbols and Numbers Important: If any parts are missing or damaged, DO NOT RETURN TO RETAILER. Call customer service toll-free at (800) 533-2441 or e-mail us at: help@elenco.com. Qty. Name Symbol Part # Qty. -
Page 4: How To Use It
How To Use It For each project, follow the drawings to place all STEP 1 parts on the mini base grid, then place all STEP 2 parts, then place any additional parts indicated by STEPS 3 or 4. Step 1 Step 2 How to add or replace batteries Activate the circuit using the slide switch (S1) or press switch (S2) as in- dicated in the final step. -
Page 5: Basic Troubleshooting
Troubleshooting Basic Troubleshooting: 1. Most circuit problems are due to incorrect assembly, always double-check that your circuit exactly matches the drawing for it. 2. Be sure that the light motor (M7), red/yellow LED (D10, and horn (W1) have their “+” marking positioned as per the drawing. 3. -
Page 6: Project Listings
Project Listings Project # Description Page # Project # Description Page # Light Motor Super Dim Lights 2-Switch Light Lamp Either Switch Lamp Red Light Press Light Control Yellow Light Sound or Motion Horn 2-Color Light & Sound Light & Sound Fun with Sound &... - Page 7 Project 1 : Light Motor Step 2 Step 1 Step 3 WARNING: MOVING PARTS Do not touch the light motor (M7) during operation.
- Page 8 Project 2 : Fan Step 1 Step 2 Step 3 WARNING: MOVING PARTS Do not touch the light motor (M7) during operation.
- Page 9 Project 3 : Lamp Step 1 Step 2 Step 3...
- Page 10 Project 4 : Red Light Step 2 Step 1 Step 3 Optional...
- Page 11 Project 5 : Yellow Light YELLOW Step 1 Step 2 Step 3 Optional -10-...
- Page 12 Project 6 : Horn Step 1 Step 2 Step 3 -11-...
- Page 13 Project 7 : Light & Sound Step 1 Step 2 Step 3 Step 4 RED or YELLOW WARNING: MOVING PARTS -12- Do not touch the light motor (M7) during operation.
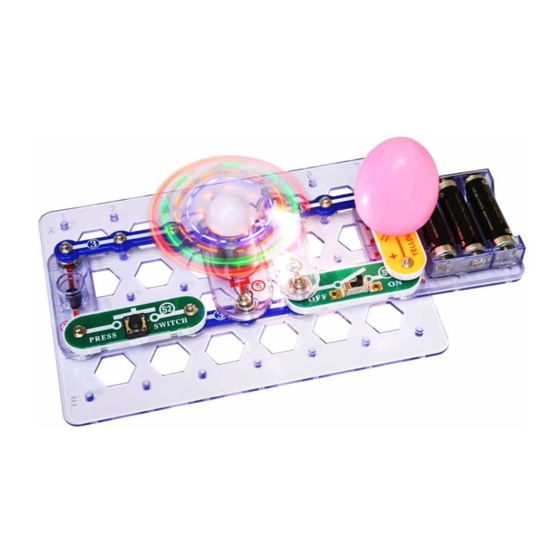
- Page 14 Project 8 : Lights & Sound with Egg Step 2 Step 1 Step 4 Step 3 RED or YELLOW WARNING: MOVING PARTS -13- Do not touch the light motor (M7) during operation.
- Page 15 WARNING: MOVING PARTS Project 9 : 2-Speed Fan Do not touch the light motor (M7) during operation. Step 1 Step 2 Step 3 -14-...
- Page 16 WARNING: MOVING PARTS Project 10 : 2-Switch Everything Do not touch the light motor (M7) during operation. Step 1 Step 2 Step 3 RED or Step 4 YELLOW Optional -15-...
- Page 17 WARNING: MOVING PARTS Project 11 : Dim Lights Do not touch the light motor (M7) during operation. Step 1 Step 2 Step 3 -16-...
- Page 18 WARNING: MOVING PARTS Project 12 : Super Dim Lights Do not touch the light motor (M7) during operation. Step 2 Step 1 Step 4 Step 3 RED or YELLOW -17-...
- Page 19 Project 13 : 2-Switch Light Step 2 Step 1 RED or YELLOW Step 3 -18-...
- Page 20 Project 14 : Either Switch Lamp Step 1 Step 2 Step 3 -19-...
- Page 21 Project 15 : Press Light Control RED or Step 1 Step 2 YELLOW Step 4 Step 3 -20-...
- Page 22 Project 16 : Sound or Motion Step 2 Step 1 Step 3 WARNING: MOVING PARTS -21- Do not touch the light motor (M7) during operation.
- Page 23 WARNING: MOVING PARTS Project 17 : 2-Color Light & Sound Do not touch the light motor (M7) during operation. Step 2 Step 1 RED or Step 3 Step 4 YELLOW -22-...
- Page 24 Project 18 : Fun with Sound & Lights Step 1 Step 2 Step 3 Step 4 WARNING: MOVING PARTS -23- Do not touch the light motor (M7) during operation.
- Page 25 WARNING: MOVING PARTS Project 19 : Fun with Switches Do not touch the light motor (M7) during operation. Step 1 Step 2 Step 3 Step 4 RED or YELLOW -24-...
- Page 26 WARNING: MOVING PARTS Project 20 : Lots of Lights Do not touch the light motor (M7) during operation. Step 2 Step 1 Step 4 Step 3 RED or YELLOW -25-...
- Page 27 Project 21 : Egg Horn RED or Step 1 Step 2 YELLOW Step 3 -26-...
Need help?
Do you have a question about the Snap Circuits Beginner and is the answer not in the manual?
Questions and answers