Table of Contents
Advertisement
Available languages
Available languages
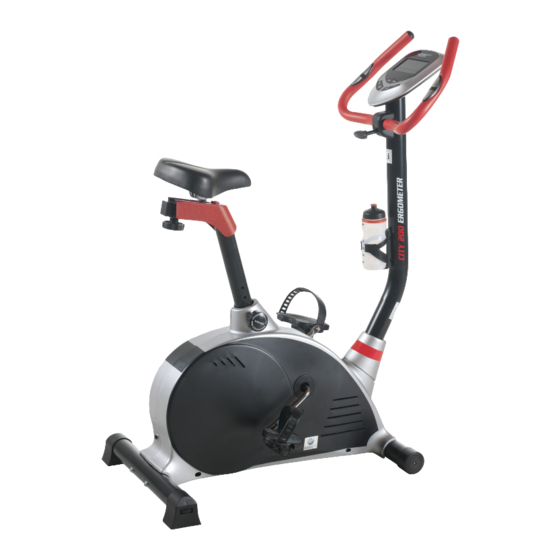
ERGOMETER
CITY
Montage-, Bedienungs-
und Trainingsanleitung
Assembly, use, and training
instructions
Bei kommerzieller Nutzung des Gerätes schließt der Hersteller jegliche Garantie- und Gewährleistungsansprüche seitens des Kunden aus!
35316_Ergometer City_BDA.indd 1
Art.-Nr.: 35316
Ausgabe: 06/2014
10.02.15 12:30
Advertisement
Table of Contents

Summary of Contents for Royalbeach RBSports ERGOMETER CITY 200
- Page 1 ERGOMETER CITY Montage-, Bedienungs- und Trainingsanleitung Assembly, use, and training instructions Art.-Nr.: 35316 Ausgabe: 06/2014 Bei kommerzieller Nutzung des Gerätes schließt der Hersteller jegliche Garantie- und Gewährleistungsansprüche seitens des Kunden aus! 35316_Ergometer City_BDA.indd 1 10.02.15 12:30...
-
Page 2: Verpackung
VERPACKUNG ENTSORGUNG Umweltfreundliche, wiederverwertbare Materialien: Bitte achten Sie auf eine umweltgerechte Entsorgung – Außenverpackung aus Pappe der Verpackung nach lokalen Vorschriften! – Formteile aus geschäumten, FCKW-freiem Polystyrol (PS) – Folien und Beutel aus Polyethylen (PE) – Spannbänder aus Polypropylen (PP) ERGOMETER CITY 200 35316_Ergometer City_BDA.indd 2 10.02.15 12:30... -
Page 3: Table Of Contents
INHALT Allgemeines Verpackung ............2 Entsorgung . -
Page 4: Sicherheitshinweise
SICHERHEITSHINWEISE Statische und dynamische Belastung nach ISO DIN EN 20957-1 DIN EN 957-5 Das Gerät ist nach dieser Norm für ein Körpergewicht von 150 kg Dauerbelastung geprüft worden. Wir bitten Sie, zur Vermeidung von Unfällen folgende Hinweise zu beachten: ➞ Dieses Gerät ist ein drehzahlabhängiges Trainingsgerät der Klasse HA und ist für therapeutische Zwecke nicht geeignet. Das Gerät soll in unkontrolliert zugänglichen Bereichen nicht aufgestellt werden. -
Page 5: Ausstattung
Watzmannstr. 1 • D-83417 Kirchanschöring Telefon: +43/(0)662/45 20 34 - 485 Telefon: +49/(0)8685/98 89 480 Fax: +49/8685/98 89 78 Fax: +49/8685/98 89 78 E-Mail: office@royalbeach.de E-Mail: info@royalbeach.de ➞ Ersatzteilbestellung: Genaue Gerätebezeichnung, Ausgabenummer der BDA (siehe Titelseite) und Bestellnummer unbedingt angeben! Gerätebezeichnung: Ergometer, City 200... -
Page 6: Montage
MONTAGE 1 Überprüfen des Lieferumfanges ➞ Packen Sie alle Einzelteile sorgfältig aus und legen Sie diese nebeneinander auf den Boden. Um ein Zerkratzen des Bodens zu vermeiden, benutzen Sie eine geeignete Unterlage. ➞ Stellen Sie den Hauptrahmen auf einen standsicheren Untergrund und achten Sie auf eine waagrechte Aufstellung. ➞... -
Page 7: Montage Der Vorderer Und Hinterer Standfuß
MONTAGE 2 Montage vorderer und hinterer Standfuß Fixerien Sie den vorderen Standfuß (8), mit zwei Schrauben (43) und zwei Unterlegscheiben (46) am Hauptrahmen (1) Fixieren Sie den hinteren Standfuß (9) mit zwei Schrauben (43) und zwei Unterlegscheiben (46) am Hauptrahmen (1) 18 R 18 L 3 Montage der Pedale... -
Page 8: Montage Des Sattels Und Der Sattelstutze
MONTAGE 4 Montage des Sattels und der Sattelstütze Entfernen Sie die Schraube (41), die an der Stattelverstellschiene (3) vorgespannt ist, und setzen Sie die Sattelstützenverkleidung (27) auf die Sattelschiene (3), schrauben Sie die Warnung Verkleidung mit der Schraube fest (41). Fixieren Sie den Sattel (22) auf der Sattelstütze (2). -
Page 9: Montage Des Lenkers Und Computers
MONTAGE 6 Montage des Lenkers und Computers Fixieren Sie den Lenker (7) mit der Lenkerverkleidung (33), einer Unterlegscheibe (45) und der T-Schraube (37) an der Lenkersäule (6). Lösen Sie die 4 Schrauben (48) aus der Rückseite des Computers (10). Verbinden Sie das Computerkabel (51) mit dem Computer (10). - Page 10 COMPUTER COMPUTERANLEITUNG Grundfunktionen START/STOP: zum Starten oder stoppen der Programme Start Berechnung des BMI/BMR und Beendigung des Programms. Zum zurück stellen der Anzeigen auf null einfach die STOP Taste einige Sekunden gedrückt halten. Down: zur Verstellung der diversen Einstellungen am Computer wie Zeit, Distanz etc.
-
Page 11: Der Computer
COMPUTER Es gibt neun voreingestellte Programme. Alle Profile sind auf 24 Stufen Wiederstand verstellbar. EINSTELLUNG DER ANZEIGE BEI PROGRAMMEN (P2-P9) ... - Page 12 COMPUTER PULSPROGRAMME (P13-P15) Es gibt 3 verschiedene Pulsprogramme: P13 – 60 % vom maximal Puls (= 220 – Alter) P14 – 75% vom maximal Puls (= 220 – Alter) P15 – 85 % vom maximal Puls (= 220 – Alter) Wählen sie eines der Pulsprogramme (P13 –...
- Page 13 TRAININGSHINWEISE Allgemeines: Dehnübungen: Grundsätzlich kann jeder gesunde Mensch mit einem Fitnesstraining 1. Dehnung der Brustmuskulatur beginnen. Bedenken Sie aber, dass sich lange Ver säumnisse nicht in Ellbogen und Unterarm an die Wand legen, Ober- und kurzer Zeit beseitigen lassen. Körperliche Fitness, Ausdauer und Wohl- Unterarm bilden einen rechten Winkel.
- Page 14 TRAININGSHINWEISE Gesundheitszone: 7. Dehnung der Oberschenkel-Innenseite Im Stand das Körpergewicht auf eine Bein seite verla- Die Regenerationszone steht für langsame, lange Ausdauer- gern, Beine sind weit gegrätscht. Das Standbein dabei belastung. Die Belastung sollte leicht und entspannt sein. gebeugt halten, das andere Bein ist lang gestreckt und Diese Zone stellt die Basis für die Steigerung Ihrer Leistungsfähigkeit der Fuß...
-
Page 15: Transport/Bewegen Des Gerätes
TRANSPORT/BEWEGEN DES GERÄTES Transport / Bewegen des Gerätes Bevor Sie das Gerät bewegen, versichern Sie sich, dass Sie das Gerät ordnungsgemäß vom Stromnetz getrennt haben. Entfernen Sie das Netz- kabel vom Gerät, um es beim Transport nicht zu beschädigen. Fassen Sie das Gerät am Lenker (48). Mit dem linken Fuß fixieren Sie das untere Ende des vorderen Standfußes (51). Kippen Sie nun das Gerät soweit in Ihre Richtung, bis es mit Hilfe der Rollen (56) bewegt werden kann. -
Page 16: Kalibrierung
KALIBRIERUNG/PFLEGE UND WARTUNG/FEHLERSUCHE Kalibrierung Grundsätzlich ist eine Re-Kalibrierung des Ergometers nicht nötig. Sollten Sie dennoch das Gerät neu kalibrieren wollen, wenden Sie sich bitte an einen akkreditierten Kalibrierdienst (Diese Dienstleistung ist kostenpflichtig und ist weder durch Garantie noch durch die Gewährleistung abgedeckt). -
Page 17: Explosionszeichnung/Teileliste
EXPLOSIONSZEICHNUNG/ TEILELISTE 18 R 24 R 57 41 18 L 24 L Nr. Bezeichnung Anzahl Nr. Bezeichnung Anzahl 1 Hauptrahmen ..................1 30 Hülse Sattelstütze ................1 2 Sattelstütze ...................1 31 Endkappe Lenker ................2 3 Sattelverstellschiene .................1 32 Endkappe Sattelverstellung ............1 4 Halterung Sattelverschiene ............1 33 Lenkerverkleidung................1 5 Keilriemenspanner ................1 34 Plastikkappe Pulskabel ..............1... -
Page 18: Garantie
Der Hersteller garantiert die kostenfreie Behebung von Mängeln, die auf Material- oder Fabrikationsfehler zurückzuführen sind. Bei Feststellung eines Mangels sind Sie verpflichtet, diesen unverzüglich dem Royalbeach Service zu melden. Schäden infolge unsachgemäßer Handhabung, Nichtbeachtung der Bedienungsanleitung, unsachgemäßer Montage, unzureichender Pflege, Gewaltanwendung oder normaler Abnutzung (Keilriemen, Lager, Sattel, Lenkergriffe) fallen nicht unter diese Garantie. - Page 19 INHALT ERGOMETER CITY 200 35316_Ergometer City_BDA.indd 19 10.02.15 12:30...
- Page 20 PACKAGING DISPOSAL Environmentally friendly, reusable materials: Please ensure environmentally sound disposal of packaging in – Cardboard exterior packing accordance with local regulations. – Molded parts made of foamed, CFC-free polystyrene (PS) – Foil and bags made of Polyethylene (PE) – Stretch bands made of Polypropylene (PP) ERGOMETER CITY 200 35316_Ergometer City_BDA.indd 20 10.02.15 12:30...
-
Page 21: The Computer
CONTENTS Packaging ............20 Disposal . - Page 22 SAFETY FACTS Static and dynamic loads in accordance with ISO DIN EN 20957-1 DIN EN 957-5. This equipment has been tested according to the standard for a body weight of 150 kg. continuous load. We ask you to observe the following procedures in order to avoid an accident. ➞...
- Page 23 Telefon: +49/(0)8685/98 89 480 Fax: +49/8685/98 89 78 Fax: +49/8685/98 89 78 E-Mail: office@royalbeach.de E-Mail: info@royalbeach.de ➞ Ordering spare parts: Exact machine serial number, issue number of the BDA (look at the title page), and order number are required without exception!
- Page 24 ASSEMBLY 1 Look over the included parts ➞ Carefully unpack all parts and lay them next to each other on the floor. In order to avoid scratching the floor, use an appropriate cover. ➞ Place the main frame on a secure base and check for a level installation. ➞...
- Page 25 ASSEMBLY 2 Assembly of forward and rear braces Make the forward brace (8) fast with two screws (43) and two washers (46) on the main frame (1). Make the rear brace (9) fast with two screws (43) and two washers (46) on the main frame (1). 18 R 18 L 3 Pedal Assembly...
- Page 26 ASSEMBLY 4 Assembly of the seat and the seat post Remove the screw(41) which is preloaded on seat slider(3), and put the seat slider cover(27) on seat slider(3), lock it with screw(41). Warnung Assemble the seat (22) to the seat post (2) Achtung Loosen the quick adjust button (36) and screw the seat post (2) into the mainframe (1).
- Page 27 MONTAGE 6 Assembly of the handlebars and Computer Make fast the handlebar (7) with the handlebar covering (33), a washer (45), and the T-screw (37) on the handlebar column (6). Loosen the 4 screws (48) from the backside of the computer (10).Insert the upper computer cable (51) into the cabel on the back side of the computer (10).
-
Page 28: Program Operation
COMPUTER INSTRUCTION MANUAL Key Functions START/STOP: 1. Start & Pauses workouts. 2. Start body fat measurement and quit the body fat program. 3. Operates only when in stop mode. Holding key for 3 seconds will reset all function value to be zero. DOWN: Decrease value of selected workout parameter: TIME, DISTANCE, etc. - Page 29 COMPUTER PRE-PROGRAMS (P2-P9) There are 8 program profiles ready for use All program profiles have 24 level of resistance Setting Parameters for Pre-programs Selecting one of pre-programs using UP OR DOWN KEY then pressing ENTER KEY . 1St parameter “Time” will flash so value can be adjusted using UP OR DOWN KEY.
- Page 30 COMPUTER TARGET HEART RATE Program (P12) Setting Parameters for TARGET H R Selecting “TARGET H.R. ” using UP OR DOWN KEY then pressing ENTER KEY . 1St parameter “Time” will flash so value can be adjusted using UP OR DOWN KEY .Press ENTER KEY to save value & move to next parameter to be adjusted. Continue through all desired parameters, pressing START/STOP to start workout.
- Page 31 TRAINING NOTES Training Notes: Flexibility exercises: Fundamentally each healthy person can begin with fitness exercises. 1. Stretch the breast muscle. But consider that one can not overcome long neglect in a short time. Lay elbows and underarms against the wall. Over and Body fitness, outlook, and well-being are reached through an appro- underarms form a right angle.
- Page 32 TRAINING NOTES Health zone: 7. Stretch the inner thigh: While standing shift the body weight one side of a leg, The regeneration zone stands for slow, long-lasting burden. The legs are wide apart. The standing leg is bent, the other burden should be light and relaxed.
- Page 33 TRANSPORT/MOVE THE MACHINE Transport/Move the Machine Secure the machine before you move it, so that you can move it in an orderly manner. Remove the net cable from the machine, in order not to harm it during transport. Grasp the machine by the handlebars (48). Put your left foot on the end of the forward brace. (51) Tip the machine in your direction until it can move with the help of the roller.
-
Page 34: Care And Maintenance
CALIBRATION/CARE AND MAINTENANCE/ TROUBLESHOOTING Calibration Basically a recalibration of the Ergometer is not necessary. If you want to recalibrate the Ergometer, please turn to an accredited calibration service (This service is costly and is covered neither through the guarantee nor through the machine instructions). You can receive other information from our service. - Page 35 CROSS SECTION DRAWING/ PARTS LIST 18 R 24 R 57 41 18 L 24 L No. Part name Q‘ty No. Part name Q‘ty 1 Main frame ....................1 30 Hollow bushing...................1 2 Seat post ....................1 31 Handle bar end cap ................2 3 Seat slider ....................1 32 Seat slider end cap ................1 4 U-shape part ...................1...
-
Page 36: Warranty Card
The manufacturer guarantees free repair of defects that are returned due to material or manufacturing mistakes. With a statement of deficien- cies you are obliged to report this to RoyalBeach Service without delay. Damages due to unauthorized hand repairs, failure to observe service instructions, inappropriate assembly, insufficient care, forceful use or normal wear and tear (fan belt, stock, seat, handlebar grips) do not fall under this warranty. - Page 37 INHALT ERGOMETER CITY 200 35316_Ergometer City_BDA.indd 37 10.02.15 12:30...
- Page 38 NOTES ___________________________________________________________________________________________________________________ ___________________________________________________________________________________________________________________ ___________________________________________________________________________________________________________________ ___________________________________________________________________________________________________________________ ___________________________________________________________________________________________________________________ ___________________________________________________________________________________________________________________ ___________________________________________________________________________________________________________________ ___________________________________________________________________________________________________________________ ___________________________________________________________________________________________________________________ ___________________________________________________________________________________________________________________ ___________________________________________________________________________________________________________________ ___________________________________________________________________________________________________________________ ___________________________________________________________________________________________________________________ ___________________________________________________________________________________________________________________ ___________________________________________________________________________________________________________________ ___________________________________________________________________________________________________________________ ___________________________________________________________________________________________________________________ ___________________________________________________________________________________________________________________ ___________________________________________________________________________________________________________________ ___________________________________________________________________________________________________________________ ___________________________________________________________________________________________________________________ ___________________________________________________________________________________________________________________ ___________________________________________________________________________________________________________________ ___________________________________________________________________________________________________________________ ___________________________________________________________________________________________________________________ ___________________________________________________________________________________________________________________ ___________________________________________________________________________________________________________________ ___________________________________________________________________________________________________________________ ___________________________________________________________________________________________________________________ ___________________________________________________________________________________________________________________ ___________________________________________________________________________________________________________________ ___________________________________________________________________________________________________________________ ___________________________________________________________________________________________________________________ ___________________________________________________________________________________________________________________ ___________________________________________________________________________________________________________________ ___________________________________________________________________________________________________________________ ___________________________________________________________________________________________________________________ ___________________________________________________________________________________________________________________ ___________________________________________________________________________________________________________________ ___________________________________________________________________________________________________________________ ___________________________________________________________________________________________________________________ ___________________________________________________________________________________________________________________...
- Page 39 NOTES ___________________________________________________________________________________________________________________ ___________________________________________________________________________________________________________________ ___________________________________________________________________________________________________________________ ___________________________________________________________________________________________________________________ ___________________________________________________________________________________________________________________ ___________________________________________________________________________________________________________________ ___________________________________________________________________________________________________________________ ___________________________________________________________________________________________________________________ ___________________________________________________________________________________________________________________ ___________________________________________________________________________________________________________________ ___________________________________________________________________________________________________________________ ___________________________________________________________________________________________________________________ ___________________________________________________________________________________________________________________ ___________________________________________________________________________________________________________________ ___________________________________________________________________________________________________________________ ___________________________________________________________________________________________________________________ ___________________________________________________________________________________________________________________ ___________________________________________________________________________________________________________________ ___________________________________________________________________________________________________________________ ___________________________________________________________________________________________________________________ ___________________________________________________________________________________________________________________ ___________________________________________________________________________________________________________________ ___________________________________________________________________________________________________________________ ___________________________________________________________________________________________________________________ ___________________________________________________________________________________________________________________ ___________________________________________________________________________________________________________________ ___________________________________________________________________________________________________________________ ___________________________________________________________________________________________________________________ ___________________________________________________________________________________________________________________ ___________________________________________________________________________________________________________________ ___________________________________________________________________________________________________________________ ___________________________________________________________________________________________________________________ ___________________________________________________________________________________________________________________ ___________________________________________________________________________________________________________________ ___________________________________________________________________________________________________________________ ___________________________________________________________________________________________________________________ ___________________________________________________________________________________________________________________ ___________________________________________________________________________________________________________________ ___________________________________________________________________________________________________________________ ___________________________________________________________________________________________________________________ ___________________________________________________________________________________________________________________ ___________________________________________________________________________________________________________________...
- Page 40 35316_Ergometer City_BDA.indd 40 10.02.15 12:30...
Need help?
Do you have a question about the RBSports ERGOMETER CITY 200 and is the answer not in the manual?
Questions and answers
Ersatzteile (Stromversorgung)fuer rbs ergometer city 200 wo zu bekommen
To buy a replacement power supply for the Royalbeach RBSports ERGOMETER CITY 200, contact the service center using the provided contact details. You must provide the exact machine serial number, the issue number of the manual (BDA), and the order number.
Contact options:
- Email: office@royalbeach.de or info@royalbeach.de
- Phone (Austria): +43/(0)662/452034-485
- Phone (Germany/Europe): +49/(0)8685/98 89 480
Only use the original power supply provided by the manufacturer.
This answer is automatically generated