Advertisement
Table of Contents
- 1 Table of Contents
- 2 Safety Information
- 3 Safety Instructions
- 4 Installation
- 5 Product Description
- 6 Control Panel
- 7 Before First Use
- 8 Daily Use
- 9 Clock Functions
- 10 Using the Accessories
- 11 Additional Functions
- 12 Hints and Tips
- 13 Care and Cleaning
- 14 Troubleshooting
- 15 Energy Efficiency
- Download this manual
Advertisement
Table of Contents

Related Manuals for Electrolux KODGC70TX


Summary of Contents for Electrolux KODGC70TX
- Page 1 KODGC70TX EOD5C70X EOD3C70TK Oven User Manual Get the most out of your appliance For quick access to manuals, how-to guides, support and more through our photo registration visit electrolux.com/register...
-
Page 2: Table Of Contents
14. ENERGY EFFICIENCY.................. 32 WE’RE THINKING OF YOU Thank you for purchasing an Electrolux appliance. You’ve chosen a product that brings with it decades of professional experience and innovation. Ingenious and stylish, it has been designed with you in mind. So whenever you use it, you can be safe in the knowledge that you’ll get great results every time. -
Page 3: Safety Information
ENGLISH SAFETY INFORMATION Before the installation and use of the appliance, carefully read the supplied instructions. The manufacturer is not responsible for any injuries or damage that are the result of incorrect installation or usage. Always keep the instructions in a safe and accessible location for future reference. -
Page 4: Safety Instructions
WARNING: The appliance and its accessible parts • become hot during use. Care should be taken to avoid touching heating elements. Always use oven gloves to remove or put in • accessories or ovenware. Before carrying out any maintenance, disconnect the •... - Page 5 ENGLISH • Do not use multi-plug adapters and extension cables. Cabinet minimum 590 (600) mm • Make sure not to cause damage to height (Cabinet un‐ the mains plug and to the mains der the worktop cable. Should the mains cable need to minimum height) be replaced, this must be carried out Cabinet width...
- Page 6 – do not put aluminium foil directly on the bottom of cavity of the Total power (W) Section of the ca‐ appliance. ble (mm²) – do not put water directly into the maximum 3680 3 x 1.5 hot appliance.
-
Page 7: Installation
ENGLISH 2.6 Service abrasive cleaning pads, solvents or metal objects. • To repair the appliance contact the • If you use an oven spray, follow the Authorised Service Centre. safety instruction on it's packaging. • Use original spare parts only. •... - Page 8 550 min. 560 3.2 Securing the oven to the cabinet...
-
Page 9: Product Description
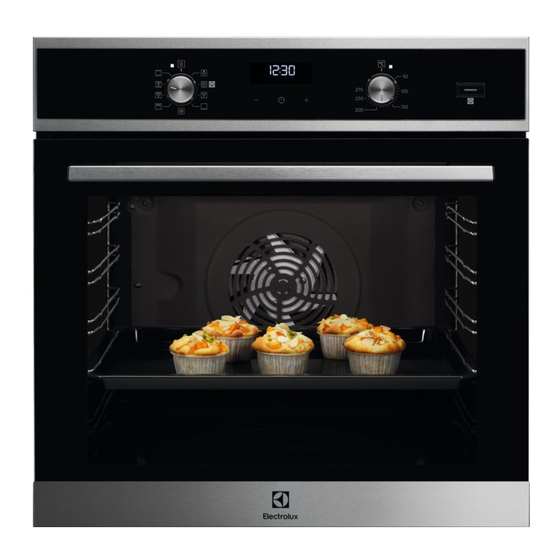
ENGLISH 4. PRODUCT DESCRIPTION 4.1 General overview Control panel Knob for the heating functions Power lamp / symbol Display Control knob (for the temperature) Temperature indicator / symbol Plus Steam Heating element Lamp Cavity embossment Shelf support, removable Shelf positions 4.2 Accessories •... -
Page 10: Before First Use
5.2 Display A. Clock functions B. Timer C. Clock function 6. BEFORE FIRST USE 1. Set the function .Set the maximum WARNING! temperature. Refer to Safety chapters. 2. Let the oven operate for 1 hour. To set the Time of day refer 3. - Page 11 ENGLISH 7.3 Heating functions Oven func‐ Application tion Oven func‐ Application tion To bake cakes with crispy bottom and to The oven is off. preserve food. Bottom Heat Off position To defrost food (vegeta‐ bles and fruit). The de‐ To turn on the lamp frosting time depends without a cooking func‐...
-
Page 12: Clock Functions
The indicator turns on. 4. Turn the control knob to set temperature. 5. Preheat the empty oven for 10 minutes to create humidity. 6. Put food in the oven. Refer to "Hints and tips" chapter. Do not open the oven door during The maximum capacity of the cavity cooking. -
Page 13: Using The Accessories
ENGLISH 3. Press to set the DURATION 6. Press to confirm. time. Appliance turns on automatically later on, works for the set DURATION time and The display shows stops at the set END time. At the set time 4. When the time ends, flashes and an acoustic signal sounds. - Page 14 9.2 Telescopic Runners Keep the installation instructions for the telescopic runners for future use. With telescopic runners you can put in and remove the shelves more easily. CAUTION! Do not clean the telescopic runners in the dishwasher. Baking tray/ Deep pan: Do not lubricate the telescopic runners.
-
Page 15: Additional Functions
ENGLISH 10. ADDITIONAL FUNCTIONS 10.1 Cooling fan dangerous overheating. To prevent this, the oven has a safety thermostat which When the oven operates, the cooling fan interrupts the power supply. The oven turns on automatically to keep the turns on again automatically when the surfaces of the oven cool. - Page 16 CAKES / PASTRIES / BREADS (ml) (°C) (min) Cookies / Scones / Croissants 150 - 180 10 - 20 Focaccia 200 - 210 10 - 20 Pizza 10 - 20 Bread rolls 20 - 25 Bread 35 - 40...
- Page 17 ENGLISH 11.3 Baking and roasting CAKES Conventional True Fan Cooking Cooking (min) (°C) (°C) Whisked rec‐ 3 (2 and 4) 45 - 60 Cake ipes mould Shortbread 3 (2 and 4) 20 - 30 Cake dough mould Buttermilk 60 - 80 Cake cheesecake mould, Ø...
- Page 18 CAKES Conventional True Fan Cooking Cooking (min) (°C) (°C) Meringues, 2 and 4 80 - 100 Baking tray two levels, preheat the empty oven Buns, preheat 12 - 20 Baking tray the empty oven Eclairs 25 - 35 Baking tray...
- Page 19 ENGLISH BREAD AND PIZZA Conventional True Fan Cooking Cooking (min) (°C) (°C) Pizza 230 - 250 230 - 250 10 - 20 Enamelled tray Scones 10 - 20 Baking tray Preheat the empty oven. Use the cake mould. FLANS Conventional Cook‐ True Fan Cooking (min) (°C)
- Page 20 MEAT Conventional True Fan Cooking Cooking (min) (°C) (°C) Beef 50 - 70 Pork 90 - 120 Veal 90 - 120 English roast beef, rare 50 - 60 English roast beef, medium 60 - 70 English roast beef, well done...
- Page 21 ENGLISH FISH Conventional True Fan Cook‐ Cooking (min) (°C) (°C) Trout / Sea bream, 3 - 4 fish 40 - 55 Tuna / Salmon, 4 - 6 fillets 35 - 60 11.4 Grill Preheat the empty oven. Use the fourth shelf position. Grill with the maximum temperature setting.
- Page 22 BEEF LAMB (°C) (min) (°C) (min) Roast beef or fil‐ 190 - 200 5 - 6 Lamb leg / Roast 150 - 170 100 - 120 let, rare lamb, 1 - 1.5 kg Roast beef or fil‐ 180 - 190 6 - 8...
- Page 23 ENGLISH 11.6 Defrost (kg) Defrosting Further defrost‐ time (min) ing time (min) Chicken 100 - 140 20 - 30 Place chicken on an upturned saucer placed on a large plate. Turn halfway through. Meat 100 - 140 20 - 30 Turn halfway through.
- Page 24 11.8 Moist Fan Baking - recommended accessories FRUIT Use the dark and non-reflective tins and containers. They have better heat absorption than the light colour and reflective dishes. Apple slices 6 - 8 Pears 6 - 9 Ramekins Pizza pan...
- Page 25 ENGLISH (°C) (min) Victoria sand‐ baking dish on wire 35 - 50 wich shelf Poached fish, baking tray or dripping 35 - 45 0.3 kg Whole fish, 0.2 baking tray or dripping 25 - 35 Fish fillet, 0.3 kg pizza pan on wire shelf 170 30 - 40 Poached meat, baking tray or dripping...
- Page 26 (°C) (min) Small Conven‐ Baking 20 - 30 cakes, tional Cook‐ tray 20 per tray Small True Fan Baking 150 - 20 - 35 cakes, Cooking tray 20 per tray Small True Fan Baking 2 and 150 - 20 - 35...
-
Page 27: Care And Cleaning
ENGLISH (°C) (min) Toast, 4 Grill Wire max. 2 - 3 minutes Preheat the oven shelf first side; 2 - 3 for 3 minutes. pieces minutes sec‐ ond side Beef bur‐ Grill Wire max. 20 - 30 Put the wire shelf ger, 6 shelf and on the fourth lev‐... - Page 28 12.2 Stainless steel or CAUTION! aluminium ovens Be careful when you remove the shelf supports. The Clean the oven door with a damp cloth or catalytic panels are not sponge only. Dry it with a soft cloth. attached to the oven walls...
- Page 29 ENGLISH Spots or discolouration of the catalytic coating have no effect on Catalytic cleaning. 12.7 Removing and installing door The oven door has two glass panels. You can remove the oven door and the internal glass panel to clean it. Read the whole "Removing and installing door"...
-
Page 30: Troubleshooting
7. Hold the door trim (B) on the top When installed correctly the door trim edge of the door at the two sides and clicks. push inwards to release the clip seal. Make sure that you install the internal glass panel in the seats correctly. - Page 31 ENGLISH Problem Possible cause Remedy The oven does not heat The necessary settings are Make sure that the settings not set. are correct. The oven does not heat The fuse is blown. Make sure that the fuse is the cause of the malfunc‐ tion.
-
Page 32: Energy Efficiency
Serial number (S.N.) ......... 14. ENERGY EFFICIENCY 14.1 Product Information Sheet Product information according to EU 65-66/2014 Supplier's name Electrolux KODGC70TX 949499308 Model identification EOD5C70X 949499310 EOD3C70TK 949499312 Energy Efficiency Index 95.3 Energy efficiency class Energy consumption with a standard load, con‐... - Page 33 ENGLISH EN 60350-1 - Household electric cooking Cooking with fan appliances - Part 1: Ranges, ovens, When possible, use the cooking steam ovens and grills - Methods for functions with fan to save energy. measuring performance. Residual heat When the cooking duration is longer than 14.2 Energy saving 30 minutes, reduce the oven temperature to minimum 3 - 10 minutes before the...
- Page 34 www.electrolux.com...
- Page 35 ENGLISH...
- Page 36 www.electrolux.com/shop...
Need help?
Do you have a question about the KODGC70TX and is the answer not in the manual?
Questions and answers