Table of Contents
Advertisement
Advertisement
Table of Contents

Related Manuals for Spydro Spydro

Summary of Contents for Spydro Spydro
- Page 1 Advanced User's Manual...
-
Page 2: Introduction
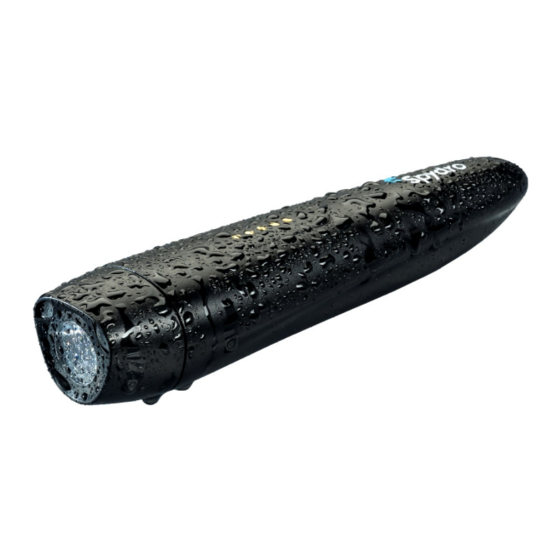
Introduction Congratulations on purchasing Spydro® - Smart Fishing Camera. To get the most from your new Spydro®, please be sure to read through all the instructions in this user manual thoroughly. We also recommend visiting our Support page where many short video tutorials can be found covering various common usage and troubleshooting aspects. -
Page 3: What's In The Box (Spydro® Premium Kit)
What's in the Box (Spydro® Premium Kit) Before starting, check that all the following items are included with your Spydro® premium kit. If anything is missing, contact your dealer. 1. Spydro® 16GB or 32GB Camera 2. USB Magnetic Cable 3. Weight's Holder 4. -
Page 4: What's In The Box (Spydro® Kit)
What's in the Box (Spydro® Kit) Before starting, check that all the following items are included with your Spydro® kit. If anything is missing, contact your dealer. 1. Spydro® 16GB or 32GB Camera 2. USB Magnetic Cable 3. Spydro® Quick Start Guide... -
Page 5: Safety Precautions
• Do not drop Spydro® or subject it to physical shock. • Do not leave Spydro® in excessive heat (such as in a car in direct sunlight) as this may lead to malfunction. • Spydro® contains precision electronic circuitry. Never attempt to disassemble yourself. -
Page 6: Table Of Contents
Table of Contents Introduction ............................2 What's in the Box (Spydro® Premium Kit) ..................... 3 What's in the Box (Spydro® Kit) ......................4 Safety Precautions ..........................5 Handling Precautions ..........................5 Get to Know Spydro® ..........................8 Getting Started and Basic Operation ..................... 9 Charging Spydro®... - Page 7 Figure 2: Spydro® Side View ........................8 Figure 3: Spydro® Front View........................8 Figure 4: Charging Spydro® with the Magnetic USB Cable ..............9 Figure 5: Available on App Store and Google Play .................. 9 Figure 6: Turning Spydro® ON Manually ....................10 Figure 7: Turning Spydro®...
-
Page 8: Get To Know Spydro
Figure 1: Spydro® Top View 1. Water detector, Temperature and Salinity sensors as well as Magnetic connectors for charging the battery. 2. WiFi module (located inside Spydro® tail). Figure 2: Spydro® Side View 3. Front mounting hole for swivel. 4. Back mounting hole for swivel. -
Page 9: Getting Started And Basic Operation
Getting Started and Basic Operation This chapter describes the required steps before you can start using Spydro®. IMPORTANT NOTICE: Before each use, and before performing firmware upgrade, Spydro® must be fully charged. Charging Spydro® 1. Unbox Spydro® and the magnetic USB charger cable. -
Page 10: Turning Spydro® On
1. Wet your finger. 2. Gently pass the wet finger on the two front contacts located on its top cover. 3. Once Spydro® beeps and its LED start Figure 6: Turning Spydro® ON Manually blinking, you know it's turned ON. Turning Spydro® OFF... -
Page 11: Connecting Spydro® To Mobile App
IMPORTANT NOTICE: You can connect to numerous Spydro® devices using the same mobile app, but not simultaneously. In this scenario, each Spydro® must have a unique SSID. In order to change the device SSID, please refer to [Figure 25 on page 27]. -
Page 12: Logging Into Spydro® Mobile App
Logging into Spydro® Mobile App The first time you launch Spydro® mobile application, you will be asked to either create an account or to sign in using an existing account. Creating a New Account 1. Select whether you want to create a... -
Page 13: Sign In Using An Existing Account
Sign in Using an Existing Account 1. Type your email and password. 2. Click the "Login" button. 3. If "Continue with Facebook" is selected, please follow the Facebook's onscreen instructions. 4. Congratulations! You have successfully logged-in your Spydro® account. Figure 10: Signing into your Account... -
Page 14: Upgrading Spydro® Firmware
It is recommended to check Spydro® firmware and upgrade it to the latest release. IMPORTANT NOTICE: Before performing a firmware upgrade, you must fully charge your Spydro®. IMPORTANT NOTICE: Following the above notice, it is also most recommended to empty Spydro® SD card (refer to Figure 26 on page 28). -
Page 15: Spydro® Moblie Application
Spydro® Moblie Application This chapter covers all the aspects, features and operations that can be performed via Spydro® mobile application. Main Screen From the main screen you can browse the map (by dragging it with your finger), zoom- in/out (by pinching in/out), record your route, share your location, get to the configuration menu and more…... -
Page 16: Spydro® Status Bar
Spydro® Status Bar When Spydro® is connected to your mobile device, its status bar appears at the top of the map. When it's disconnected, the bar won't show. Measured Temperature Figure 13: Spydro® Info Bar Battery Charge Recording Mode SD Card Free Space... -
Page 17: Record Your Route
Record your Route Spydro® can record your route and all its related events; and store it in the Fishing Diary library. To record your route, follow those simple steps (fishing diary***): 1. Click the "Record Route" button. 2. The following will occur: •... -
Page 18: Share Your Route (As A Screenshot)
Share your Route (as a screenshot) 1. Click the "Share Route" button. 2. Select the application by which you want to share your route (e.g. email, WhatsApp, etc.) 3. Please follow your mobile device onscreen instructions to complete the share operation. Figure 16: Sharing your Route... -
Page 19: Controlling The Map
Controlling the Map The map on the main screen can be controlled easily with the following simple gestures: Scroll (Pan): You can scroll (pan) around the map by dragging the map with your finger. Zoom There are several gestures that can change the zoom level of the map: •... -
Page 20: Fishing Diary Library
The fishing diary library consists of all the route recordings with the corresponding video footage and ambient data collected at each point of interest; like, when and where Spydro® was casted and reeled back, when and where bite triggered events occurred. The fishing diary library can be used to review the entire route and its corresponding events either on and/or off site. -
Page 21: Figure 19: The Recorded Route
Figure 19: The Recorded Route 1. Select the point of interest you want to review by clicking on it. 2. Download the corresponding video from your Spydro® to your mobile device by clicking the download button. 3. Depending on the video duration, it might take couple of minutes to fully download. Please allow the download operation to be completed. -
Page 22: Video Gallery
Figure 20: Accessing the Video Gallery Downloading Videos from Spydro® to Mobile: Before you can watch the video clips, you must first download it from Spydro® to your mobile. Depends on your video duration settings and the number of videos you selected to download simultaneously;... -
Page 23: Figure 21: The Recorded Route
Device: Videos that are currently available for download (from Spydro®) Video Video Recording Mode Figure 21: The Recorded Route 1. Make sure the "Device" folder is selected. 2. Initiate download of the selected video simply by clicking it. -
Page 24: Figure 22: The Recorded Route
Watching and Sharing Videos from your Mobile: Select Button Local: Videos that have been already downloaded to mobile Video Video Recording Mode Figure 22: The Recorded Route 1. To watch a video, simply click on it. 2. To share a video, click the "Select" button, mark the video/s you want to share and click the "Share"... -
Page 25: Figure 23: Sharing, Deleting And Marking Videos As Favorites
3. To delete a video, click the "Select" button, mark the video/s you want to delete and click the "Delete" button (see next figure). 4. To mark a video as favorite, click the "Select" button, mark the video/s you want to make favorite and click the "Star"... -
Page 26: Live Stream
IMPORTANT NOTICE: Spydro® must be connected to your mobile device via WiFi. IMPORTANT NOTICE: Spydro® tail must be held above water surface level. Once fully submerged, the WiFi signal cannot be transferred. This is achieved by using Spydro® branded float which comes in the Premium kit (and can be ordered separately). -
Page 27: Settings Menu
Settings Menu Your Spydro® is a versatile tool that have many configurable options: Personal 1. WiFi: You can edit Spydro® SSID and its password by clicking the "Edit" button. 2. Power Off: You can manually turn Spydro® OFF. Recording Settings 1. -
Page 28: Device Settings
LEDs. 2. Squid Light: You can enable/disable a light sequence to attract squid. 3. Auto Power Off: If enabled, Spydro® will be automatically turned OFF after being 5 minutes outside the water. 4. Auto WiFi Off – Water: If enabled, Spydro®... -
Page 29: Spydro® Limited Warranty
Spydro® Limited Warranty If you're not 100% satisfied with your Spydro® purchase, we consider it as our failure and would like to hear where we can improve. If you are experiencing any problem with your Spydro®, we ask you to follow the below procedure: 1. -
Page 30: Appendix A: Rigging Spydro® On The Fishing Line
IMPORTANT NOTICE: The optimal distance between the Spydro® and the lure/bait, should be somewhere between 2-6ft. (1-2m). IMPORTANT NOTICE: In order to minimize the chance of losing a Spydro®, it is recommended to create a "weak link" somewhere between Spydro® and the lure/bait; so in case something happens, the weak link will snap, leaving Spydro®...
Need help?
Do you have a question about the Spydro and is the answer not in the manual?
Questions and answers