
Related Manuals for Kuppersbusch CBD6550.0


Summary of Contents for Kuppersbusch CBD6550.0
- Page 1 INSTRUCTIONS FOR USE CBD6550.0 Please read the users instructions carefully before installation of the appliance and before starting to use it. Please, store these instructions carefully. Service and Customer Service...
-
Page 2: Table Of Contents
Contents 11. Operating the oven ........46 11.1. Symbols ..............46 11.2. Turning the oven on and off ........47 1. Explanation for symbols and indications 6 11.3. Sleep Mode ............47 2. Safety Instructions and Warnings ..8 11.4. Putting the appliance into operation 2.1. - Page 3 User's guide...
- Page 4 our own discretion repair faulty parts free-of- Guarantee Terms and Conditions charge or replace such parts with parts which are in a perfect condition. Repairs are carried In addition to the warranty claims specifi ed in sales contracts out on-site whenever possible. Appliances re- concluded with dealers, we also provide ultimate consumers quiring repairs are to be made accessible in with a direct guarantee on Küppersbusch home appliances.
- Page 5 guarantee also apply for appliances purchased abroad, Completeness provided that they have the technical requirements, e.g. This document has altogether pages. voltage, frequency and type of gas for the respective Your document is complete if all the pages you have country and are suitable for the respective climatic and are numbered consecutively.
-
Page 6: Explanation For Symbols And Indications
Explanation for symbols and indications Dear new Küpperbusch appliance user... Don't worry, it's not going to be that complicated. We have made every effort structure this information briefl y and succinctly, clearly and explicitly, and above all, logically. In addition to the instructions given by our Customer Service, these instructions aim at enabling you to be able to operate this appliance quickly. - Page 7 Explanation for symbols and indications CAUTION Note indicating an imminent threat which may result in death or very serious injury. DANGER Note indicating a dangerous situation which may result in minor injury or damage to the appliance. HINT Note to be observed in order to make handling the appliance easier. The following danger symbols are used at some points: WARNING OF ELECTRICAL ENERGY RISK OF FATAL INJURY!
-
Page 8: Safety Instructions And Warnings
Safety Instructions and Warnings Check consignment Transport the appliance to a suitable place and remove it from its packaging there. The oven may only be assembled and installed by an electrician who complies with the respective specifi cations. Check to ensure that the consignment is complete. □... -
Page 9: Switching On And Operating
Safety Instructions and Warnings □ Multiple sockets and extension cables do not sufficiently guarantee safety (risk of fire). Do not use them to connect the appliance to the mains electricity supply. □ Only use the appliance when it has been installed in order to guarantee that it functions safely. -
Page 10: Appliance
Safety Instructions and Warnings 2.3. Appliance □ Unplug your appliance if it malfunctions. □ If the glass is broken, split or cracked: switch the appliance off immediately, disconnect it from the power supply and contact our Customer Service or your specialised dealer. □... -
Page 11: Before Using The Fi Rst Time
Safety Instructions and Warnings □ These appliances may be used by children aged 8 years and over and by persons with physical, sensory or mental impairments or by persons who lack experience and/or know-how, provided they are supervised or have been instructed in the safe used of the appliance and have understood the risks relating to the appliance. -
Page 12: Environmental Protection
Safety Instructions and Warnings 2.6. Environmental Protection □ Remove packaging and the old appliance □ Remove packaging and recycle in an environmentally-friendly way. □ In Europe, the transport packaging is returned to the store where the appliance has been purchased. By returning the packaging material, raw materials are saved and also fewer waste products are generated. - Page 13 Safety Instructions and Warnings □ The steam cooker may only be used if it has been installed in a suitable unit. Only use the steam cooker as described in these instructions for use. Any other use is not considered to be intended and may result in damage to material or even injury to persons.
-
Page 14: Cleaning And Care
Cleaning and care 3. Cleaning and care Lesen Sie dieses Kapitel bitte vollständig durch, bevor Sie das Gerät zum ersten Mal einschalten. If cleaned correctly and looked after regularly the appliance will remain beautiful and clean for many years. The following tips will help you to clean and care for your oven's various surfaces gently but thoroughly. - Page 15 Cleaning and care NEVER CLEAN WITH □ aggressive or bleach-based cleaning agents that contain active oxygen, chlorine or other caustic substances. □ abrasive cleaning or scouring agents, such as steel wool, soap- impregnated steel wool, stiff brushes, metal or plastic sponges or any similar cleaners with an abrasive surface.
- Page 16 Cleaning and care Chromium-plated panels Door front and handle with chromium-plated, black trimming □ Limescaling, grease and starch deposits must be removed immediately; stains will result if they are not. □ These models are very sensitive to scratches and oven spray will damage them. Do not using cleaning scrapers, pot scourers or hard-fibre sponges.
-
Page 17: Cleaning The Door
Cleaning and care 3.2. Cleaning the door (*not possible for ovens with a microwave function) Do not use any metal pot scourers, wire brushes, scouring powder or abrasives to clean the oven door, since this may result in the surface becoming scratched or the glass breaking. Clean the outside of the door and its accessories with lukewarm soapy water or a mild detergent. -
Page 18: Pyrolytic Self-Cleaning Of The Oven
Before using the fi rst time 3.3. Pyrolytic self-cleaning of the oven (depending on the model) This function involves a pyrolytic cleaning process which applies high temperatures in the oven interior to trigger a process of oxidation and carbonisation process on the grease contamination. After the pyrolytic cleaning process has been completed, all you need to do is remove the ash generated during the process with a damp cloth. -
Page 19: Important Instructions
Before using the fi rst time 4.1. Important instructions □ Do not cover the rear side of the appliance with aluminium foil as this may affect cooking performance and damage the enamel inside the appliance and the interior of your kitchen unit. □... -
Page 20: Cleaning The Accessories
Maintenance work 4.2. Cleaning the accessories Some models have a glide-out shelves kit accessory. Water tank • The water tank is situated behind the panel • Capacity 0.8 litres • Minimum capacity for the steaming process 0.25 litres Clean the outside of the appliance and accessories with warm soapy water or with a mild detergent. Take care with rust-free and varnished surfaces and only use sponges or cloths that do not scratch. - Page 21 Maintenance work 5.1.1 Changing the side bulb □ Remove the chrome-plated runners and/or glide-out shelves by removing the screw nuts (A). □ Use a tool to take out the glass cover of the lamp mounting. □ Replace the lamp. □ Attach the glass cover again, making sure it is properly positioned.
-
Page 22: Dismantling The Door
Maintenance work 5.2. Dismantling the door For easy cleaning, the door can be dismantled. Follow the instructions for the type of door your appliance has. 5.2.1 Door with hinge on body Dismantling the door □ Open the door as far as it will go. □... - Page 23 Maintenance work CAUTION! Make sure the door is inserted complete- ly by turning the latches, because other- wise it could block. If the latches are hard to turn, use a fl at tool to turn them. 5.2.2 Door with hinge on door Dismantling the door □...
-
Page 24: Dismantling/Assembling The Interior Door Glass
Maintenance work Assembling the door □ Hold the door with both hands at the lower part of the sides, insert the hinge arms into their housings and let the door fall as far as it will go. □ Open the door fully. □... - Page 25 Maintenance work □ Using your fingers, press the buttons located at the top of both sides of the door. □ Keep them pressed and pull on the plastic seal above the door. □ Remove the glass panes from the door. Clean them with a glass cleaner or soap and water and a soft cloth.
-
Page 26: Dismantling/Assembling The Shelf Runners
Maintenance work 5.4. Dismantling/assembling the shelf runners 12 rack levels are available in the side racks. Rack levels are counted from the top to the bottom from 1 to 12. Rack level 1 is the lowest rack level. Dismantling □ Open the door as far as it will go. □... - Page 27 Maintenance work ATTENTION! For your own safety: Never use the oven without the rear wall! Ovens with a folding grill To clean the top part of the oven. □ Take the accessories out of the appliance. □ Wait until the oven is cold. □...
-
Page 28: Overview Of Your Oven
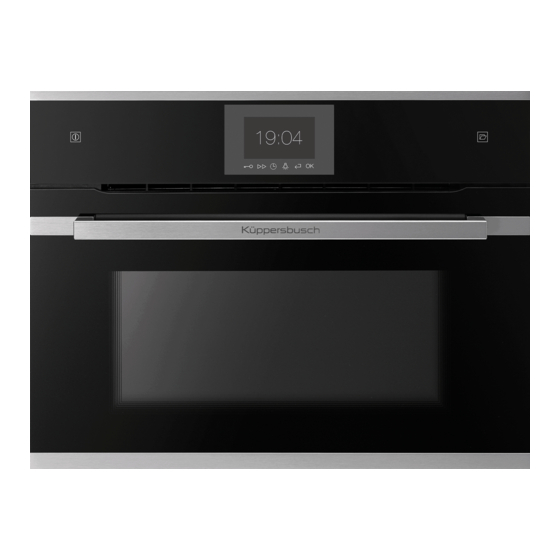
Overview of your oven 7. Overview of your oven Control panel open Control panel Optional Standard accessories: accessories: Water tank position Profession+ CookingSet 1 Universal/Enamel drip pan Grill element (Acc. N. ZB 8030) 1 grilling grid Rack levels Pizza stone with handle 1 cooking pan, not perforated, Gridiron (Acc N. -
Page 29: Control Panel - Sensor Keys And Displays
Overview of your oven 7.1. Control panel - sensor keys and displays ON/OFF Time settings / Timer You can switch off an on your With this sensor you have access to the appliance. menu Time setting. Functions Light With this sensor you can se- To activate permanent lightning, press lect the cooking functions. -
Page 30: Roasting And Baking Charts
Roasting and baking charts 8. Roasting and baking charts 8.1. Guidelines for baking □ The material of your baking tins also plays a role in baking. Dark baking tins, which transmit heat direct to food being cooked, are ideal. □ Baking times may differ slightly due to differences in the type of ingredients used. Testing your cake towards the end of the cooking time with a wooden skewer is ideal. - Page 31 Roasting and baking charts Small biscuits 180-200 15-30 Flat cakes with a dry topping 160-170 180-190 25-35 with a moist topping 160-170 170-180 160-170 30-50 Yeast dough Gugelhupf 150-160 175-180 40-65 Yeast cake 150-160 175-180 40-50 Rich sweet bread 150-160 175-180 50-70 (preheated)
-
Page 32: Guidelines For Roasting
Roasting and baking charts Bread and pizza Sour dough 50-70 (preheat: 230°C prebake: 10 min. -230°C) Bread made with yeast/white bread 1 or 2 30-60 (preheat) Pretzels 15-20 (preheat: 230°C) Pizza (preheat: 8-12 250°C) 8.2. Guidelines for roasting □ Meat that has been well hung is best suited for roasting. □... - Page 33 Roasting and baking charts Guidelines for roasting Operating mode Hot air Top/Bottom heat Hot air convection bottom heat Preferred settings Rack Temper- Rack Temp. Rack Temper- Weight Baking have a grey level ature in level in °C level ature in of meat time background...
-
Page 34: Guidelines For Grilling
Roasting and baking charts Poultry 180- Chicken 180-200 1,000 170- Duck 170-190 1,500 170- Goose 1 or 2 1 or 2 1 or 2 170-190 3,000 170- Turkey 1 or 2 1 or 2 1 or 2 170-190 5,000 Fish 200- Whole fi... - Page 35 Roasting and baking charts Guidelines for grilling Operating mode Grill Large-surface grill Rack level 1 side 2 side 1 side 2 side Type of meat Pork Pork chop 10-12 8-10 14-15 8-10 Belly 12-15 8-10 16-18 10-12 Pork fi llet 10-12 8-10 14-16...
-
Page 36: Recommended Food Probe Temperatures
Roasting and baking charts 8.4. Recommended food probe temperatures Recommended food probe temperatures Core temperatures in °C Rare Medium well done Type of meat Pork Pork fi llet Roast pork / jam 68-70 Knuckle 80-85 Cutlet on the bone 75-80 Shoulder Gammon 55-62... - Page 37 Roasting and baking charts Saddle of lamb 60-62 Rack of lamb Game Wild boar fi llet 60-63 Roast wild boar 75-78 Leg of wild boar Saddle of roe venison 50-60 Roast roe venison Saddle of deer venison 54-60 Roast deer venison Toast with a topping Poultry Chicken...
-
Page 38: Low-Temperature Cooking Guidelines
Roasting and baking charts 8.5. Low-temperature cooking guidelines Low-temperature cooking guidelines Cooking time Cooking Browning Weight in minutes temperature time in g (core temperature in °C in minutes as an alternative) (oven setting) Type of meat Pork Pork fi llet 400-600 60-90 Roast pork / jam... -
Page 39: Oven Functions
Oven functions 9. Oven functions The functions all depend on the model in question. 9.1. Cooking functions Top / bottom heat Heat from the top and the bottom ensures even baking results for food placed on one level. Ideal for baking delicate cakes and gateaus, such as yeast dough, cheesecake, etc. - Page 40 Oven functions Ökotherm intensive hot air The top heat switched on in addition to heating the oven up with hot air ensures a delicious crust and intensive browning. Ideal for oven- baked potatoes, roasts and for gratinating dishes. Grill / bottom heat Bottom heat in combination with the grill from the top.
-
Page 41: Special Functions
Oven functions 9.2. Special functions Defrosting This function serves to gently defrost frozen food. Low-temperature cooking Food is cooked very gently at low temperatures, which also keep it very juicy. Ideal for beef, pork, lamb, veal and poultry. Keeping food warm Food is kept warm at low temperatures, without continuing to be cooked. -
Page 42: Steam Cooker Functions
Overview of the steam cooker functions Dehydrating With the dehydrating mode water is extracted from food to extend its shelf life. Most vitamins and minerals are preserved. Dehydrating is ideal in the production of dried fruit, dried meat, fruit purees and dried cod. -
Page 43: Special Functions
Overview of the steam cooker functions Vario steam cooking This function combines 75% hot air with 25% steam and is ideal for cooking bread and cakes and pastries, as well as meat and poultry. Sous vide cooking You can cook like the pros using the sous vide steam cooking program. - Page 44 Overview of the steam cooker functions Keeping warm with steam This function can be used for keeping food warm with steam. Steam cleaning This program is used to clean the appliance interior. Manual steam ejection You can set a steam ejection while the process is running, changing intensity and time.
- Page 45 Overview of the steam cooker functions Disinfecting objects Disassemble the object into its pieces and place them in a perforated cooking container. You can set the duration for the boiling yourself. Caning jars, for example, can be boiled for 15 minutes. Preparing dough (letting leavened dough rise) To do this, place the bowl with the prepared dough onto the grate or the perforated cooking container and set the temperature and...
-
Page 46: Operating The Oven
Operating the oven 11. Operating the oven The fan is switched on and off in the case of some programmes, but this is not an indication of a fault. 11.1. Symbols The opening sensor has been activated and the panel opens. The dis- play remains active until the fi... -
Page 47: Turning The Oven On And Off
Operating the oven 11.2. Turning the oven on and off In order to be able to use your oven for cooking food, you will need to press on the symbol. If no function or no automatic programme is selected, the oven switches back off after a few seconds and shows the current time or switches to Sleep mode if the manual confi... - Page 48 Operating the oven Setting date and time □ Press the symbol (up) or (down) to select the year. □ Confirm with □ Repeat these steps to select month and day. □ Always confirm with □ Press the symbol (up) or (down) to select the hour tile.
-
Page 49: Selecting A Cooking Function
Operating the oven 11.5. Selecting a cooking function □ Switch the oven on by touching symbol □ Select the tile on the home screen. □ Press the symbol (up) or (down) to select the cooking functions. □ Press to confirm your setting. □... -
Page 50: Changing A Setting During The Cooking Process
Operating the oven □ Press the symbol (up) or (down) to set the temperature. This step can be omitted depending on the function. □ Select the operation duration with (up) or (down). This step can be omitted depending on the function. □... - Page 51 Operating the oven □ Press the symbol (up) or (down) to select the automatic programme and confirm by pressing Then set weight and cooking setting in the same way. Cooking times are automatically calculated. You can also set the fi nish time (see End of cooking time setting) or modify the cooking time.
-
Page 52: Changing Weight And Temperature
Operating the oven 11.9. Changing weight and temperature 11.9.1 Changing the weight of the food If you wish to change the weight of the dish to be cooked, you can automatically change the duration and temperature corresponding to the selected programme. Proceed as follows to change the weight: □... -
Page 53: Time Settings
Operating the oven 11.9.2 Changing the cooking temperature A cooking temperature has been pre-set for all of the programmes. The temperature can only be changed within a specifi ed range of cooking programmes with weight settings. For the functions, the temperature can be selected for a specifi c function within a range of 30°C (no temperature setting) and 300°C. - Page 54 Operating the oven □ Press the symbol (up) or (down) to set the cooking time and confirm by pressing Now it will be possible for you to set the end of cooking time. (See chapter Selecting the end of cooking time.) This step is skipped if you set the fi...
- Page 55 Operating the oven You go back to the setting overview or to the running cooking process. □ Confirm by pressing The oven carries out the cooking process with the new settings. INFO! Once the programmed time has expired, the oven will switch off and an acoustic signal will sound.
- Page 56 Operating the oven 11.10.4 Setting the fi nal cooking time The end of cooking time is the time at which the appliance switches off. , it will be possible for you to set the end of Once you have set the cooking time and confi rmed it with cooking time.
- Page 57 Operating the oven INFO! Once the programmed time has expired, the appliance will switch off and an acoustic signal will sound. Press any key to stop the acoustic signal. The display shows the current time of day. The appliance is switched off. 11.10.6 Deleting the end of cooking time □...
-
Page 58: Rapid Heating
Operating the oven 11.10.8 Changing the timer □ Touch the symbol □ Press the symbol (up) or (down) to set the desired time. Confirm by pressing You will go to the Settings view. If you set or change the timer during operation, you will be shown the process display. -
Page 59: Favourites
Favourites 12. Favourites The oven is fi tted with a memory function which makes it possible to save up to 20 programmes and cooking settings you have created yourself as a favourite. 12.1. Calling up a favourite □ Touch the symbol (Favourites) □... -
Page 60: Deleting Favourites
Settings 12.3. Deleting favourites □ In the Home display, hold the symbol pressed for more than 3 seconds and you will go to the overview for deleting favourites. □ Press the symbol (up) or (down) to select the favourite. □ To confirm the delete procedure, press The settings overview appears. -
Page 61: Eco
Settings 13.2. ECO □ Press the symbol (up) or (down) to select the menu ECO and confirm by pressing □ Activate the Eco mode with and deactivate with INFO! Some functions are deactivated in the Eco mode, in order to reduce energy consumption. During the activation time, the indication “Eco”... -
Page 62: Setting Date And Time
Settings 13.5. Setting date and time □ Press the symbol (up) or (down) to select the date/time tile. □ Confirm with □ Press the symbol (up) or (down) to select the year. □ Confirm with □ Repeat these steps to select month and day. □... -
Page 63: Descaling
Settings 13.7. Descaling The appliance automatically checks the degree of calcifi cation in the appliance and informs you when descaling must be carried out. The appliance fi rst reports to you when a descaling process has to be carried out in in the near future. For the second message, a descaling process is absolutely necessary. -
Page 64: Other Functions
Other functions As soon as this procedure is complete, new information will be displayed to you on the appliance. □ Fill the water tank with 500 ml of water. The second flushing cycle starts as soon as the tank is inserted and the panel is closed! After the last fl... -
Page 65: Factory Settings
Roasting thermometer 14.3. Factory settings □ Now keep the symbols pressed for 3 seconds until the screen shown adjacent appears. □ Press the symbol (up) or (down) to select □ Confirm by pressing Disconnect the appliance from the power supply and then reconnect it to the power supply. The appliance starts again. -
Page 66: Roasting Thermometer For Cooking Functions
Roasting thermometer The roasting thermometer can be used with all of the heating modes. When the roasting thermometer is pulled, the appliance returns to stand-by mode. Correctly inserting the roasting thermometer When the roasting thermometer is pulled, the appliance returns to stand-by mode. □... -
Page 67: Roasting Thermometer For Automatic Programmes
Roasting thermometer As soon as the interior of the food item has reached the temperature you selected, the oven switches off. If you wish to change the set temperature or the recommended temperature of the roast thermometer, press the symbol. Then following the instructions above. 15.2. -
Page 68: Steam Cooking
Steam cooking 16. Steam cooking Steam cooking is a particularly gentle preparation of food. The suitable steam function depends on the food to be cooked. □ we recommend 100% steam cooking for fish, rice and vegetable dishes. □ for puddings, soufflés and casseroles we recommend 50% combination steam cooking. □... -
Page 69: Atomatic Steam Ejection
Steam cooking INFO Do not remove the water tank during the process! As soon as the residual water has been completely pumped back, the water tank indicator appears in the display. □ Now remove the water tank to pour out the remaining water. □... - Page 70 Steam cooking The appliance now automatically adds a steam boost at certain intervals. Adjust/deactivate automatic steam boost: □ In order to change again the automatic boost, press the symbol again. Select the desired steam ejection intensity with (up) or (down). Confi...
-
Page 71: Steam Cleaning
Steam cleaning 17. Steam cleaning The appliance has an additional steam cleaning function. You will fi nd this function in the Special functions menu. INFO For preparation, fi ll the bottom tray in the cavity half with water and the other half with conventional vinegar. -
Page 72: What To Do If
What to do if … 18.What to do if … Repairs may only be carried out by qualifi ed staff members! If your appliance is faulty, please check whether you can rectify the problem yourself by consulting these instructions for use. You may be able to rectify some problems yourself. They are described below. What to do? If ... - Page 73 What to do if … What to do? If ... Replace the door sealing See «Replacing the door sealing». Do not use the oven when the door ... the door sealing is damaged? sealing is damaged! The oven can still be used. Replace the halogen lamp as quickly ...
- Page 76 K02-180190/01 Kontaktformular Küppersbusch Hausgeräte GmbH Küppersbuschstraße 16, D-45883 Gelsenkirchen www.kueppersbusch.de 1632271...
Need help?
Do you have a question about the CBD6550.0 and is the answer not in the manual?
Questions and answers