Table of Contents
Advertisement
Quick Links
Advertisement
Table of Contents

Related Manuals for Sony SDT-S9000/BM


Summary of Contents for Sony SDT-S9000/BM
- Page 1 3-860-267-12(1) SDT-S9000/BM DDS Drive Unit User’s Guide...
- Page 2 SDT-S9000/BM DDS Drive Unit User's Guide Sony Corporation Printed in Japan 1997...
-
Page 3: Safety Regulations
Safety Regulations Owner's Record The model and serial numbers are located on the bottom. Record the serial number in the space provided below. Refer to them whenever you call upon your Sony dealer regarding this product. Model No. Information WARNING To prevent fire or shock hazard, do not expose the unit to rain or moisture. - Page 4 NOTICE THIS NOTICE IS APPLICABLE FOR USA AND CANADA ONLY. If shipped to USA, use the UL LISTED power cord specified below for 220-240 V operation. If shipped to CANADA, use the CSA CERTIFIED power cord specified below for 220-240 V operation. DO NOT USE ANY OTHER POWER CORD Plug Cap Tandem blade with ground pin.
-
Page 5: Table Of Contents
Taking Care of the Drive ... 17 Part 4 Care and Maintenance Taking Care of Cartridges... 19 Head Cleaning ... 20 Specifications(SDT-S9000/BM) ... 21 Appendix Third Party Support Contact (In the USA) ... 22 Features ... 6 Usable Cartridges ... 7 System Components ... 7 Front Panel ... -
Page 6: How To Use This Guide
How to Use this Guide This Guide describes the DDS Drive Unit SDT-S9000/BM , and how to take care of it. Please read it carefully before using the unit, and keep it handy for future reference. The Guide consists of four parts, plus the specifications. Refer to the parts that relate to your use of the drive. -
Page 7: About Dds Drives
Part 1. Introduction About DDS Drives The SDT-S9000/BM is an external DDS drive unit that uses data cartridges conforming to the DDS-3 format and DDS-2 format. The SDT-S9000/BM supports DDS-1, DDS-2 and DDS-3 formats. Features The DDS Drive Unit SDT-S9000/BM has the following features: •... -
Page 8: Usable Cartridges
Useable Cartridges Data cartridges used with the SDT-S9000/BM must be marked with the DDS-1, DDS-2 or DDS-3 logo. CAUTION: Be sure to use only the cartridges designed specifically for DDS (do not use DAT cartridges for music). System Components The SDT-S9000/BM connects to the host computer via a SCSI-2 interface. -
Page 9: Part Names And Functions
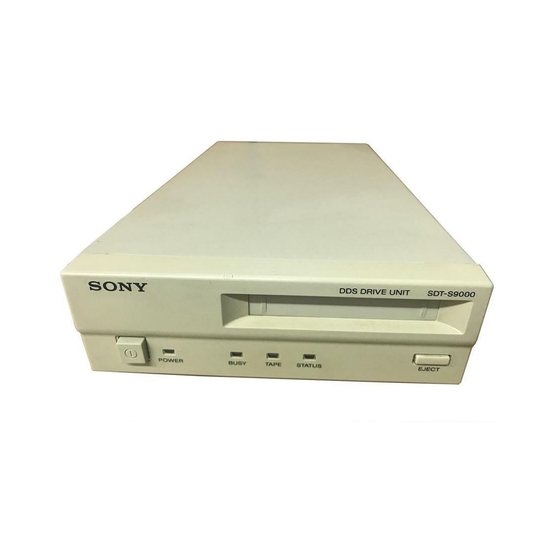
Part Names and Functions Front panel 4 TAPE Indicator Part 1. Introduction POWER BUSY DDS Data Cartridge Receptacle See page 15 for information on inserting and removing a DDS data cartridge. EJECT Button Push to remove a data cartridge from the drive. STATUS Indicator Lights when an inserted cartridge is write-protected. - Page 10 BUSY Indicator Lights when data is being transferred through the SCSI interface. This indicator also lights under the following conditions: Drive is reading or writing normally: POWER Indicator Lights while the drive is on. POWER Switch Press to turn the drive on or off. repeated blinking (same on-off interval).
-
Page 11: Rear Panel
Rear Panel Part 1. Introduction SCSI CONNECTOR AC IN Connector Connect the supplied power cable here. GND (Ground) Terminal Connect the ground terminals of other devices to the unit's frame ground. Rotary Selector Switch SCSI ID selector. Cooling Fan SCSI Connector Connects to the SCSI bus connector of the host computer or another SCSI peripheral. -
Page 12: Supplied Items
Part 2. Preparation After you confirm that you have all of the required accessories for your installation, connect the drive to the host computer, and select the SCSI ID with the rotary switch on the rear panel. Supplied Items When you first open the box, make sure it contains the following items. Contact your supplier if anything is missing or broken. -
Page 13: Interconnections
• The total length of the SCSI cable(s) between the host computer and the last device should be less than 6 meters. When using high-speed data transfer with the SDT-S9000/BM, it is recommended that total length of the SCSI cable not exceed 3m. -
Page 14: Scsi Id Setting
POWER switch on the front panel. Configuration Switches Setting Sony SDT-S9000/BM has a set of configuration switches located on its bottom side. These drives can be made ready to run in major workstations by setting the configuration switches as shown in the following table. - Page 15 SDT-S9000/BM Configuration Switch Settings for Unix * PC-based WS Digital WS Sun WS Sun WS IBM RS/6000 WS IBM RS/6000 WS HP WS SGI WS * To be supported by the firmware ver.1260 or higher. Part 2. Preparation System Host...
-
Page 16: Part 3. Operation
Part 3. Operation This section describes how to use the DDS drive, and how to handle data cartridges. How to use the DDS Drive Press the POWER switch on the front panel. The POWER indicator should light, and the STATUS, BUSY and TAPE indicators should blink as the self-test is performed. -
Page 17: Cartridge Removal
Cartridge Removal Press the EJECT button. The cartridge ejects automatically. Caution Do not push the EJECT button while the BUSY indicator is blinking: to do so may destroy data on the tape. Part 3. Operation... -
Page 18: Care And Maintenance
Part 4. Care and Maintenance Taking Care of the Drive Safety Considerations Power • Be sure to use only 100-240 V AC. • Avoid plugging into the same outlet as high-current equipment like copiers or shredders. Power Cable Precautions • Do not crush the cable or place heavy items on it. If the cable insulation appears worn or broken, do not use the cable. - Page 19 Abnormal occurrences If the drive behaves abnormally, or if it begins to smell or smoke, immediately unplug it from the wall outlet and contact your supplier for assistance. Cabinet cleaning Wipe the cabinet with a soft dry cloth. For heavy dirt, wipe with a soft cloth moistened with a gentle liquid soap, then wipe again with a soft dry cloth.
-
Page 20: Taking Care Of Cartridges
Taking Care of Cartridges Use Precautions • Avoid heavy vibration and dropping. • The shutter on the face of the cartridge is opened automatically when it is inserted into the drive. Do not open the shutter by hand, as touching the tape may damage it. -
Page 21: Head Cleaning
Head Cleaning To keep the DDS drive in top condition, clean the head as needed, using the proper head cleaning cartridge (sold separately). When the head needs cleaning, the STATUS indicator will blink. How to Clean Notice: Do not rewind the cleaning cartridge and reuse it. When you reach the end of the cartridge, dispose of it and buy a new one. -
Page 22: Appendix
Appendix Specifications (SDT-S9000/BM) Performance Storage Capacity Bit Error Rate Data Transfer Rate (TAPE) Burst Data Transfer Rate (SCSI) Initialize Time Load Time Unload Time Rewind Time Operating Environment Operating Non-Operating Power Supply & Miscellaneous Power Supply Case Dimensions Weight Accessories Specifications may be subject to change, in the interest of technological improvement, without notice or obligation. -
Page 23: Third Party Support Contact (In The Usa)
Third Party Support Contact (In the USA) Host Adapter Vendors Adaptec ATTO Bus Logic Future Domain Initio Qlogic Ultera Systems Inc. Operating Systems Arcada Cheyenne Columbia Data Products Corel NovaStor Palindrome ST. Bernard Sofware Sytron Tapedisk Macintosh Cheyenne Corel Dantz NovaStor OS/2 Cheyenne... - Page 24 Operating Systems SUN Unix Legato NovaStor Software Moguls Sun Soft Work Station Solutions Solaris Unix Cheyenne Legato NovaStor Software Moguls Sun Soft Work Station Solutions SCO Unix Cheyenne Legato Software Moguls Work Station Solutions NCR Unix NovaStor Work Station Solutions HP Unix Cheyenne NovaStor...
Need help?
Do you have a question about the SDT-S9000/BM and is the answer not in the manual?
Questions and answers