Table of Contents
Advertisement
Advertisement
Table of Contents

Related Manuals for Navatics Mito

Summary of Contents for Navatics Mito
- Page 1 Underwater Drone Owner’s Guide...
- Page 2 NOTE: Product markings are located on the bottom and inside battery chamber of the product. This product contains no user serviceable parts. Contact Navatics Customer Service for all servicing concerns.
- Page 3 Declaration of Conformity Object of the Declaration: Product: Underwater drone Model: Navatics MITO, Navatics Wireless Communication Buoy Company Name: Navatics Technology (Shenzhen) Limited Address: Room 209, Bldg.17, 1201 Liuxian Ave., Shenzhen, Guang Dong Province, China The object of the declaration is in conformity with the following directives:...
- Page 4 Changes or modifications not expressly approved by Navatics Technology Ltd could void the user's authority to operate the equipment. This equipment has been tested and found to comply with the limits for a Class B digital device, pursuant to part 15 of the FCC Rules.
-
Page 5: Table Of Contents
Contents Introduction About Navatics MITO……………………..………………………………………..….…………………...…… 1 Unpacking the System……………………………………………………………………………..…………….. 2 Navatics App……………………………………………………….…………………….……………..….………… 9 Quick Start ……………………………………………………………………………….…….………..…….…..… 12 Preparing for Dive Evaluating Conditions and Safety….…………………………………………….……………………...… 14 Power On and Connect……………………………………………………………………………..………..… 16 Sensor Calibration………………………………………………………………………………...…………...… 19 Preparing for Launch…………………………………………………………………………….…..……….…. 20 Diving …………………………………………………………………………………………………….…..………... 21 After Diving Cleaning…………………………..………………………………………………….……………….…..……………. -
Page 6: Introduction
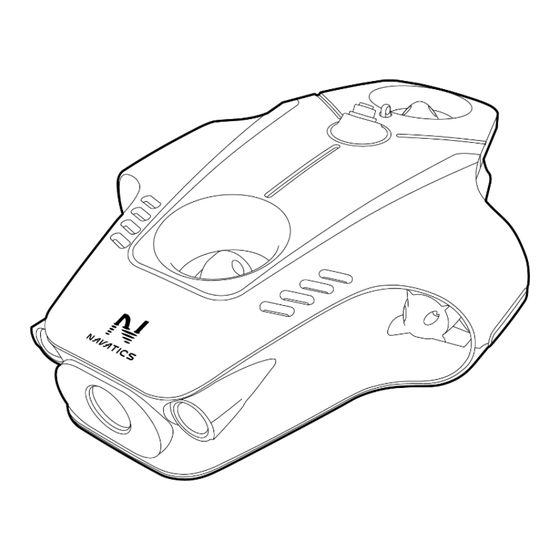
Introduction About Navatics MITO Navatics MITO is an underwater vehicle that can be used to explore depths. It uses four highly efficient thrusters to stabilize and maneuver itself underwater. It captures 4K videos and 12 megapixel photos, and is capable of carrying extra payload without deterioration in performance. -
Page 7: Unpacking The System
USB Data Cable Transport foam box May ship with multiple AC power adapters. Use the AC power adapter for your region. NOTE: If part of the system is damaged, do not use it. Contact your authorized Navatics dealer or Navatics customer service. - Page 8 1000 lumen LED Light x 2 Lens protector connector NOTE: Use it on land to protect the lens from scratches and static discharge. Remove the protector when MITO is in water for the best visuals. Right thruster 4K Camera Left thruster...
- Page 9 The mount can hold up to 17.6 ounces (500g) accessory without extra flotation. NOTE: With extra weight MITO might not be able to keep positive buoyancy. It means MITO might sink instead of float when the motor is off. WARNING:...
- Page 10 Introduction Battery Battery power indicator Battery holders Connection point Battery power switch Press and hold the red switch button, then check the status of the battery indicator Each light indicates 25% of the battery. On: Turned on Off: Need to charge Blinking: Charging Charger for battery Plug the power cord into the connector on the smart battery...
- Page 11 On: Establishing connection On: Turned on / Charged Blinking: MITO Connected Blinking: Charging Off: MITO not connected Flashing: Low battery Charger for wireless communication buoy and remote controller Plug the Type C charging cable into the charging port on the buoy and...
- Page 12 Introduction Remote controller (Senseplay Race) Smart device connection port Smart device mount port iOS/Android switch Antennae Light indicator Left touch pad Right touch pad Y: Motor switch Pitch lock stick X: Flatten out B: LED light switch Charging port Power Switch Default control scheme Forward Right touch pad...
- Page 13 Introduction Smart device mount Assemble Smart device mount A&B together Insert the mount to the back of the remote controller to hold your smart device OTG and lightning cables You need to use an OTG cable to connect your smart device to the remote controller Micro USB and Type C OTG Cables and a lightning cable are provided.
-
Page 14: Navatics App
Introduction Navatics App The Navatics App turns your smartphone or tablet into a monitor and set-up tool for the MITO underwater drone. It enhances MITO’s performance and eases the way of conducting command. The Navatics app features visual live streaming, photo and video capture and color correction functions. - Page 15 Binding devices Bind the remote control and the wireless communication buoy to your account according to the page prompt that popped up on the Navatics App. Use the given 6 digits code on the label to bind. After bind, the APP will automatically connect to the remote controller, once connected, users can start streaming and controlling Navatics MITO.
- Page 16 Introduction Monitor Battery status Parameters setting Camera parameters setting Photo/video Motor State Motor state button Photo/video switch Heading The media file indicator Depth and target depth Light intensity Temperature Pitch NOTE: Once bound to an account, the remote and wireless communication buoy can only be used by that account.
-
Page 17: Quick Start
Quick Start... - Page 18 Install the Battery, turn on MITO, and check the light indicator for MITO’s status Turn on the wireless communication buoy, connect it to MITO, and check both of their light indicators Turn on the remote controller and select the right mode...
-
Page 19: Preparing For Dive
Preparing for Dive Evaluating Conditions and Safety Do your first few dives in line of sight in calm waters to get accustomed to the controls and the behavior of the vehicle. Recommended conditions Dive down to 40 m The drone can handle Dive in open water rain and snowy weather Avoid... - Page 20 Preparing for Dive Warning Do NOT dive when Do NOT put wireless Do NOT use MITO when current speed is greater communication buoy visibility is under 1m than 1.2m/s into water when wave is higher 0.5m Do NOT look directly...
-
Page 21: Power On And Connect
Switch on the battery to turn it on and close the chamber When started, MITO is going to check for the states of its sensor. In the process, it will turn on the LED lights as an indicator, as well as changing the color of LED ring to indicate the process. - Page 22 Hook the tether on the tether hook On: Establishing connection On: Turned on / Charged Blinking: MITO Connected Blinking: Charging Off: MITO not connected Flashing: Low battery charge NOTE: It is strongly recommended to cover the Type-C charging port with the provided rubber cover attached to the charging port and it is a MUST when putting the wireless communication buoy in water.
- Page 23 Once connected, users can start streaming and controlling Navatics MITO NOTE: If users have not bound the controller with Navatics account, please check page 9-10 for account registration and device binding...
-
Page 24: Sensor Calibration
Go to Camera View and click on the parameters settings icon to open the dialog box. Go to the calibration page in the app Place MITO on a flat ground, allow it to stay still, and press calibrate gyroscope. MITO will be restarted and the LED light will flash. -
Page 25: Preparing For Launch
Preparing for Dive Preparing for Launch Battery check Please check the battery level of each parts Make sure the batteries on the drone, surface unit, controller and mobile device are at least 75% charged before you go diving. When the battery in the drone reaches 25% when diving, go back to shore. Using tether To avoid tangle on the tether, do not unroll it all at once. -
Page 26: Diving
Press again to turn off the motor and the drone will automatically float to the surface of water when the motors are off Control MITO • Control MITO using the remote controller Forward Down Right touch pad Left touch pad... -
Page 27: After Diving
Dive logs are taken in the App every time a user used MITO to dive. It will start recording the data when MITO dives deep enough, and stop recording when MITO is floating on the surface and the thrusters are turned off, or when it is running out of battery. -
Page 28: Download Image
After Diving Download Image To transfer full size videos and images to your devices, you need to use the USB data cable provided to connect MITO directly to your device. NOTE: Please turn off MITO before downloading files from MITO... -
Page 29: Care And Maintenance
Logging in and logging out • If connection failed, check your internet connection Connecting wireless communication buoy with Navatics MITO If the communication buoy fails to connect with Navatics MITO, check and make sure: • Navatics MITO is turned on •... -
Page 30: Changing Propellers
Care and Maintenance Changing Propellers Spare propellers are provided in case of any damage on the original propellers. 1. Remove the screws from the propeller 2. Take off the propellers from the thrusters’ rotor 3. Make sure that you are picking the right propeller (R or L) 4. -
Page 31: Cleaning Thrusters
Make sure all batteries are sufficiently charged before updating Keep your devices connected to internet Keep your devices connected to MITO Please do not shut down the system while you are updating Reboot the devices after the update has been completed... -
Page 32: Technical Information
Care and Maintenance Technical Information Specification Details Dimension 400mm x 300 mm x 135 mm Weight 3.45 kg /7.6 lbs. (including 0.8 kg battery) 0.1kg positively buoyant in the water Battery: Capacity 5500mAh Voltage 14.8V Energy 80Wh Type LiPo Operating time 4 hours (Normal Use) 2 hours (Intensive Use, High Speed) Charging time... - Page 33 Codec h.264 Shutter Speed 1 - 1/1000 100 - 6400 Aperture F2.0 120° diagonal SD card 64GB Maximum Speed 2m/s / 3.8 knot Maximum Depth 40 m / 130 ft. Tether Length 50m / 165 ft. Tether Roller Wireless Communication Range 500 m Operating Time 4 hours Charging Time...
- Page 34 Charging Port USB Type-C Input Voltage DC 5.0V / 2.0A 11. Application Support Android and IOS 12. LED 2x 1000 lumen 10W Color Temperature 5700K Intensity 4 Levels : 100%, 66%, 33%, 0% 13. Operating Condition Salinity Fresh water and salt water Temperature -5℃...
- Page 35 Learn more at www.navatics.com...
Need help?
Do you have a question about the Mito and is the answer not in the manual?
Questions and answers