
Related Manuals for Automation Technology C5 Series


Summary of Contents for Automation Technology C5 Series
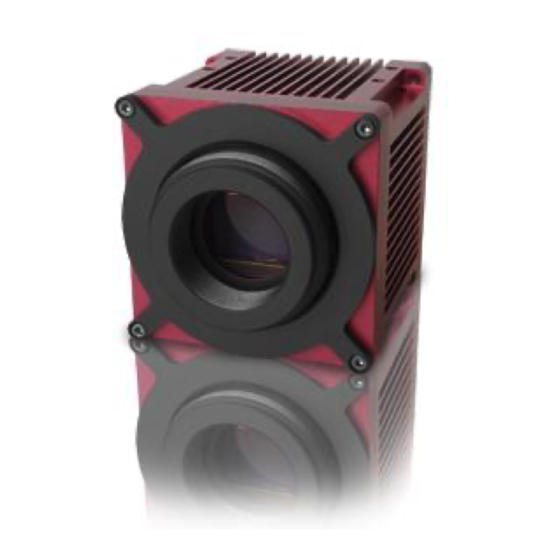
- Page 1 C5 Series User Manual for High Speed 3D Cameras Rev 1.4 AT - Automation Technology GmbH...
- Page 2 © 2019 Automation Technology GmbH All rights reserved. No part of this document shall be reproduced, stored in a retrieval system, or transmitted by any means, electronic, mechanical, photocopying, recording, or otherwise without consent in writing from the owners, AT-Automation Technology GmbH. Disclaimer While care has been exercised in the preparation of this document to ensure that it is fully correct and comprehensive, the owners assume no responsibility for errors or omissions.
-
Page 3: Table Of Contents
C5-3360/4090-GigE with integrated Scheimpflug Adapter (Option) ..............19 Part Number for Scheimpflug Adapter Option ....................20 Lens Protection Tubes for the C5 Series........................21 C-Mount Lens Protection Tube with Ø 44mm ....................21 C-Mount Lens Protection Tube with Ø 55mm ....................21 Part Number for Lens Protection Tubes ...................... - Page 4 Description of Profile Trigger Modes ........................43 Trigger Control – RS422 Resolver ..........................44 Description of Modes for Triggering of Sequencer/Frame and Profile Acquisition ..........46 The C5 Series Chunk Data Mode ........................... 48 General Description ..............................48 Payload Layout in Chunk Data Mode ........................49 XML Descriptors and ID’s ............................
- Page 5 Wire Assignment of M12 17 pin Pigtail Cable ......................69 Cables for GigE Interface ............................70 Orientation of Angled Adapter Cable ........................72 The C5 Series GenICam Features ........................... 73 Device Control ................................. 73 Image Format Control ............................. 73 Acquisition Control ..............................73 Camera Control ...............................
- Page 6 Product Information and Updates ........................86 Warranty Conditions............................. 87 Warranty Period ..............................87 Extended Warranty ..............................87 Return Policy ................................ 87 Document Revision ............................... 88 4 C5 Series User Manual Rev. 1.4...
-
Page 7: C5 Series Overview
C5 Series Overview Introduction The C5 series is a revolutionary product family of intelligent high speed sensors. It is optimised for 3D profile measurement by means of laser triangulation technique. The 3D profile extraction is performed in the camera by using high performance Field Programmable Gate Array processors. -
Page 8: The C5 Series General Specifications
Adapter for Nikon F-Mount lens With flange focal distance 46.50 mm with Bayonet mount* Adapter for Scheimpflug* For C-Mount lens * Must be ordered separately. See section Part Number for Scheimpflug Adapter Option 6 C5 Series User Manual Rev. 1.4... - Page 9 Mechanical Stress Specification Vibration (sinusoidal each axis) 1 g, 10…2000Hz IEC 60068-2-6 Vibration (random each axis) 5 g, 5…1000Hz IEC 60068-2-64 Shock (each axis) 50 g IEC 60068-2-27 Enclosure rating IP67 IEC 600529 C5 Series User Manual Rev. 1.4 7...
-
Page 10: The Sensor Specifications
1280 Pixel 688 Pixel 94700 155000 56000 95700 30840 54200 16240 29000 8340 15000 4230 7660 2130 3870 1024 1070 1940 C5-1280-GigE can reduce the sensor width to increase the profile rate 8 C5 Series User Manual Rev. 1.4... -
Page 11: C5-2040-Gige
50 fps Mode (limited due to GigE bandwidth) Effective Profile Rate (Hz) at Max. Row Number of Effective Frame / Profile Rate Width Rows (Hz) 25000 16000 9540 5240 2700 1400 1088 C5 Series User Manual Rev. 1.4 9... -
Page 12: C5-2040-4M-Gige
Image Mode (limited due to GigE bandwidth) Effective Profile Rate (Hz) at Max. Number of Rows Effective Frame / Profile Rate (Hz) Row Width 25000 16000 9540 5240 2700 1400 1088 2048 10 C5 Series User Manual Rev. 1.4... -
Page 13: C5-3360-Gige
Effective Profile Rate (Hz) at Max. Number of Rows Effective Frame / Profile Rate (Hz) Row Width 10100 7750 5300 3230 1815 1024 2496 With a FOT (Frame Overhead Time) = 16 C5 Series User Manual Rev. 1.4 11... -
Page 14: C5-4090-Gige
Image Mode (limited due to GigE bandwidth) Effective Profile Rate (Hz) at Max. Number of Rows Effective Frame / Profile Rate (Hz) Row Width 14500 9700 5800 3200 1700 1024 2048 3072 12 C5 Series User Manual Rev. 1.4... -
Page 15: The Sensors Spectral Response
The Sensors Spectral Response SPECTRAL RESPONSE C5-1280-GigE C5-2040-GigE / C5-2040-4M-GigE C5-3360-GigE C5-4090-GigE 1000 WAVELENGTH [nm] C5 Series User Manual Rev. 1.4 13... -
Page 16: Temperature Range (Operation/Storage)
All 3D cameras of the C5 series feature high-speed CMOS sensor chips. A typical property of a CMOS sensor is that it provides best image quality by low temperatures. High temperatures will lead to an increase of dark current, noise and hence to a reduction of signal-to-noise ratio (SNR). -
Page 17: Using The C5 Heat Sink
AT provide a specially designed heat sink to improve the cooling of C5 cameras in applications lacking sufficient thermal dissipation. Absolute thermal resistance for camera housing: = 5 [K / W] Absolute thermal resistance for heat sink: = 3.75 [K / W] C5 Series User Manual Rev. 1.4 15... -
Page 18: Mechanical Drawings
C5-3360-GigE, lens mount M42x1 202 203 002 C5-4090-GigE, lens mount M42x1 202 203 003 C5-2040-GigE, lens mount M42x1 202 203 004 C5-2040-4M-GigE, lens mount M42x1 202 203 005 C5-1280-GigE, lens mount M42x1 16 C5 Series User Manual Rev. 1.4... -
Page 19: C5-1280/2040/2040-4M-Gige With C-Mount Adapter (Option)
202 188 001 C-Mount type lens, for C5-3360-GigE/C5-4090-GigE C5 C-Mount: M42x1 adapter with thread for lens protective cover to use with 202 188 002 C-Mount type lens, for C5-1280-GigE / C5-2040-GigE / C5-2040-4M-GigE C5 Series User Manual Rev. 1.4 17... -
Page 20: C5-1280/2040/2040-4M/3360-Gige With F-Mount Adapter (Option)
C5-1280/2040/2040-4M/3360-GigE with F-Mount Adapter (Option) C5-4090-GigE with F-Mount Adapter (Option) Part Number for F-Mount Adapter Option Part Number # Product Name 202 182 011 C4/C5 F-Mount: M42x1 adapter to use with Nikon-F Bayonet type lens 18 C5 Series User Manual Rev. 1.4... -
Page 21: C5-1280/2040/2040-4M-Gige With Integrated Scheimpflug Adapter (Option)
C5-1280/2040/2040-4M-GigE with integrated Scheimpflug Adapter (Option) C5-3360/4090-GigE with integrated Scheimpflug Adapter (Option) C5 Series User Manual Rev. 1.4 19... -
Page 22: Part Number For Scheimpflug Adapter Option
C5 Scheimpflug-Adapter 25° with C-Mount, for C5-3360-GigE 202 186 026 C5 Scheimpflug-Adapter 0° with C-Mount, for C5-4090-GigE 202 186 011 C5 Scheimpflug-Adapter 10° with C-Mount, for C5-4090-GigE 202 186 010 C5 Scheimpflug-Adapter 25° with C-Mount, for C5-4090-GigE 20 C5 Series User Manual Rev. 1.4... -
Page 23: Lens Protection Tubes For The C5 Series
Lens Protection Tubes for the C5 Series The C5 series offers a high IP67 protection class. Therefore a wide range of C-mount lens protection tubes are available for C-mount lenses with different sizes. C-Mount Lens Protection Tube with Ø 44mm C-Mount Lens Protection Tube with Ø... -
Page 24: Subpixel Limitations
That happen easy, when the pixel values go over the 8 Bit (2^8 - 1 = 255) range. More details regarding the operation of the C5-1280-GigE camera can be found in a separate application note. 22 C5 Series User Manual Rev. 1.4... -
Page 25: C5 Series Operational Reference
The laser line is projected perpendicular to the object surface, while the camera views the object under the triangulation angle α. The height resolution can be approximated: ΔZ ≈ ΔX / sin(α) α Scan direction C5 Series User Manual Rev. 1.4 23... -
Page 26: Geometry 2
The height resolution can be approximated: ΔZ ≈ ΔX * cos(β) / sin(α + β), in case α= β (direct reflex) : ΔZ ≈ ΔX / 2* sin(α) α β Scan direction 24 C5 Series User Manual Rev. 1.4... -
Page 27: Geometry 4
The camera views the object under an angle α, while the laser line is projected under a different angle β at the camera side. The height resolution can be approximated: ΔZ ≈ ΔX * cos(β) / sin(α) β α Scan direction C5 Series User Manual Rev. 1.4 25... -
Page 28: The C5 Sensor Algorithms
The C5 Sensor Algorithms The C5 series can be operated both in a variety of 3D profile modes and in image mode. The current operation mode can be chosen by setting the following parameter: Camera Controls→ ModeAndAlgorithmControls→CameraMode. The frame rate can be increased in all camera modes by reducing the AOI size. In the image mode the frame rate is limited by the output rate of the camera interface (GigE). -
Page 29: The Maximum Intensity Profile Mode (Max)
In order to avoid intensity saturation, it is recommended to activate the Multiple Slope Mode of the camera. The detection of the maximum intensity position can be improved by enabling the smoothing mode of the FIR filter of the camera. C5 Series User Manual Rev. 1.4 27... -
Page 30: The Threshold Mode (Trsh)
) and the line width (P ). Moreover, the maximum intensity value can be optionally output. The precision of the position calculation can be improved by enabling the smoothing mode of the FIR filter of the camera. 28 C5 Series User Manual Rev. 1.4... -
Page 31: The Center Of Gravity Mode (Cog)
I with the line width. The precision of the COG calculation can be improved by enabling the smoothing mode of the FIR filter of the camera. C5 Series User Manual Rev. 1.4 29... -
Page 32: The Fir Peak Mode (Fir Peak)
Valid values of AOI_TRSH range from 513 to 1023 (Mono16). More details regarding the operation of the FIR Peak mode can be found in a separate application note. 30 C5 Series User Manual Rev. 1.4... -
Page 33: The Fir Filter Function
Pre-defined templates with 5, 7 or 9 coefficients let the FIR filter to be customized to the Gauss size and shape of the application. More details regarding the operation of the FIR filter function can be found in a separate application note. C5 Series User Manual Rev. 1.4 31... -
Page 34: The High Dynamic Range 3D Feature (Hdr-3D)
The High Dynamic Range 3D Feature (HDR-3D) One of the most powerful features of the C5 series is the HDR-3D (High Dynamic Range) functionality, which allows scanning materials and surfaces with inhomogeneous reflection properties. Using HDR-3D the dynamic range of image intensity is extended up to 90dB, thus avoiding intensity saturation. -
Page 35: Single Slope Mode (Default Mode)
Weld Seam Triple Slope Mode (2 Knee Points) Intensity Knee Point 1 Knee Point 2 Saturation 100% Saturation Threshold 2 Saturation Threshold 1 Exposure Exposure Limit 1 Limit 2 Exposure Time Weld Seam C5 Series User Manual Rev. 1.4 33... -
Page 36: Comparison Of Slope Modes
1100 1100 1100 1000 1000 1000 Sensor row # Sensor row # Sensor row # More details regarding the operation of the MultipleSlope function can be found in a separate application note. 34 C5 Series User Manual Rev. 1.4... -
Page 37: Multi-Frame Readout Mode (Ndr)
NDR frame of sensor image 1 has been readout. Trigger Sensor Trigger Sensor Frame 1 Frame 2 Frame 1 Frame 2 : Exposure Time 1 : Exposure Time 2 : Readout Frame It1 : Readout Frame It2 C5 Series User Manual Rev. 1.4 35... -
Page 38: The Data Output Format
Gauss width (PosR-PosL) Position of Gauss with 1/2 pixel resolution (PosL+PosR) True Smoothing Maximum intensity Position of rising edge of Position of falling edge of Gauss detected Gauss (PosL) Gauss (PosR) smoothed sensor image 36 C5 Series User Manual Rev. 1.4... - Page 39 Index of next sensor row to Position of Gauss peak with (Absolute value) the left of zero-crossing 1/(2 ) pixel resolution, where N=number of subpixel bits (0-6) maximum value of intensity first derivative C5 Series User Manual Rev. 1.4 37...
-
Page 40: The Output Frame Structure
2) NDR mode enabled (NDRMode=”On”) for (profile_idx=1; profile_idx <=ProfilesPerFrame/2; profile_idx ++) for(AOI_idx=1; AOI_idx<=NumAOIs; AOI_idx++) for(NDR_idx=1: NDR_idx <= NumberOfNDRFrames; NDR_idx ++) if(EnableDC0==true) write_data_of_DC0(AOI_idx,NDR_idx); if(EnableDC1==true) write_data_of_DC1(AOI_idx,NDR_idx); if(EnableDC2==true) write_data_of_DC2(AOI_idx,NDR_idx); 38 C5 Series User Manual Rev. 1.4... -
Page 41: Index Definition
Data of DC2 readout from AOI1 Data of DC2 readout from AOI1 Data of DC2 readout from AOI1 Data of DC2 readout from AOI1 Data of DC2 readout from AOI1 Data of DC2 readout from AOI1 C5 Series User Manual Rev. 1.4 39... - Page 42 Data of DC0 readout from AOI2 Data of DC2 readout from AOI2 Data of DC0 readout from AOI1 Data of DC2 readout from AOI1 Data of DC0 readout from AOI2 Data of DC2 readout from AOI2 40 C5 Series User Manual Rev. 1.4...
- Page 43 Data of DC2 extracted from NDR1, readout from AOI1 Data of DC2 extracted from NDR2, readout from AOI1 Data of DC2 extracted from NDR1, readout from AOI1 Data of DC2 extracted from NDR2, readout from AOI1 C5 Series User Manual Rev. 1.4 41...
-
Page 44: The Advanced Aoi Functions
The Advanced AOI Functions The C5 series features an area CMOS sensor, whose frame rate depends on the number of pixels to readout. By defining a sensor Area of Interest (AOI) the frame rate and hence the profile speed will be significantly increased due to the smaller number of pixels to readout. -
Page 45: The C5 Series Triggering Mode
Acquisition 2 Acquisition 3 Acquisition 4 Encoder/Resolver Interface (PTM3) RS422 ENC_A ENC_B Example: Trigger after number of steps = 4 Counter Profile Profile Profile Acquisition 1 Acquisition 2 Acquisition 3 Internal Trigger C5 Series User Manual Rev. 1.4 43... -
Page 46: Trigger Control - Rs422 Resolver
Beginner Load trigger divider upon start trigger LoadTriggerDivider ICommand Beginner Load trigger divider ClearTriggerCoord ICommand Beginner Reset trigger coordinate ResetTriggerCoordZeroPos IEnumeration Beginner Reset the Trigger Coordinate/Counter at Zero Position (Index, Z- Channel) 44 C5 Series User Manual Rev. 1.4... - Page 47 TriggerCoordinateCountAlways IBoolean Guru TRUE: Count trigger coordinate always, FALSE: Count trigger coordinate during image acquisition only UseAlternateResolverInputs IBoolean Guru Use IN1/IN2 instead of A/B as inputs UseAlternateResolverInputsInverted IBoolean Guru Use inverted IN1/IN2 C5 Series User Manual Rev. 1.4 45...
-
Page 48: Description Of Modes For Triggering Of Sequencer/Frame And Profile Acquisition
Trigger one frame over camera input 1 PTM0 (free-run) Single frame acquisition is triggered over the rising edge of camera input 1 (IN1) PTM2 (IN2) PTM3 (RS422) trigger start of sequencer (frame trigger) 46 C5 Series User Manual Rev. 1.4... - Page 49 The above table (except AutoStart) applies also to acquisition in image mode. In this case the camera delivers a gray scale sensor image for every profile trigger. A detailed description of the AutoStart function can be found in a separate application note. C5 Series User Manual Rev. 1.4 47...
-
Page 50: The C5 Series Chunk Data Mode
The C5 Series Chunk Data Mode General Description The C5 series features a Chunk Data mode for providing additional information to the acquired image data. The implementation of XML nodes is performed according to SFNC 1.4: Category ChunkDataControl ... -
Page 51: Payload Layout In Chunk Data Mode
An endian converter for ChunkData is not supported. Payload Layout in Chunk Data Mode Chunk Image Data GV_ChunkDescriptorData for Image Data N x GV_ChunkAcqInfo GV_ChunkDescriptorData for ChunkAcqInfo GV_ChunkImageInfo GV_ChunkDescriptorData for ChunkImageInfo C5 Series User Manual Rev. 1.4 49... -
Page 52: Xml Descriptors And Id's
XML Descriptors and ID’s ChunkImageInfo <Port Name="FrameInfoPort"> <ChunkID>11119999</ChunkID> </Port> ChunkAcqInfo <Port Name="CameraChunkPort"> <ChunkID>66669999</ChunkID> </Port> ChunkImage <Port Name="ImageInfoPort"> <ChunkID>A5A5A5A5</ChunkID> </Port> 50 C5 Series User Manual Rev. 1.4... -
Page 53: Chunk Data Structure
CHUNKIMAGEINFO_FLAG_BIT_STOP_FRAME 0x02 #define CHUNKIMAGEINFO_FLAG_BIT_BUFFER_OVERRUN 0x04 typedef struct _GV_ChunkImageInfo unsigned int mSizeYReal; unsigned int numChunkAcqInfo; unsigned int flag; } GV_ChunkImageInfo; typedef struct _GV_ChunkDescriptor unsigned int descriptor; unsigned int length; } GV_ChunkDescriptorData; #pragma pack(pop) C5 Series User Manual Rev. 1.4 51... -
Page 54: The Gige-Vision Events
The GigE-Vision Events The C5 series supports a number of events that can be monitored by a software application by means of a callback function. Events provide real time notification on various stages of the acquisition sequence and data transfer. -
Page 55: The Web Interface
The “Memory Statistics” have an overview of used memory for each component displaying current usage, memory size, maximum usage and error. The “System Log” shows the complete serial log of the device. C5 Series User Manual Rev. 1.4 53... - Page 56 54 C5 Series User Manual Rev. 1.4...
-
Page 57: The External C5-Io-Panel (Breakout Board)
2A (two ampere) micro-fuse. Fuse Specification Current Dimension 5 x 20mm Characteristic Operating Temperature -50°C…+125°C Mechanical Drawings Don´t connect C5 cameras to the CS-IO-Panel. Wrong wiring can cause damage to the camera. C5 Series User Manual Rev. 1.4 55... -
Page 58: Clamp Configuration
Output for analog modulation of illumination device (0–5 V DC) The analog output ground is directly connected to the internal camera ground. The analog output is NOT electrically isolated from the device ground! Please take care for a correct operation. 56 C5 Series User Manual Rev. 1.4... -
Page 59: Mechanical Dimension
Mechanical Dimension All dimensions in mm Mount for DIN rail assembly C5 Series User Manual Rev. 1.4 57... -
Page 60: The C5 Series I/O Schematics
The C5 Series I/O Schematics I/O and Encoder with Differential TTL-Mode for RS422 (Standard) 58 C5 Series User Manual Rev. 1.4... -
Page 61: I/O And Encoder With Differential Htl-Mode For Rs422 (Option)
I/O and Encoder with Differential HTL-Mode for RS422 (Option) C5 Series User Manual Rev. 1.4 59... -
Page 62: I/O And Encoder With Single Ended Htl Or Ttl Mode For Rs422 (Option)
I/O and Encoder with Single Ended HTL or TTL Mode for RS422 (Option) 60 C5 Series User Manual Rev. 1.4... -
Page 63: Part Number For I/O And Encoder Option
Single-Ended TTL Max. input voltage +5V DC (TTL level) Max. frequency: 400 kHz Min. pulse width: 1.2µs Single-Ended HTL Max. input voltage +24V DC Max. frequency: 400 kHz Min. pulse width: 1.2µs C5 Series User Manual Rev. 1.4 61... -
Page 64: Laser Connection With Analog And Digital Modulation
- Connect the analog modulation wire of the laser to AOUT of the camera. - Connect the digital modulation wire of the laser to OUT1 or OUT2 of the camera. - If the laser requires modulation voltage >5V, connect higher voltage to OUT_Supply. 62 C5 Series User Manual Rev. 1.4... -
Page 65: Master/Slave Connection
Output2Invert = true Slave: SLAVE Frame Period 400µs ProfileTriggerMode = CameraInput1 f=2500 Hz The falling edge Triggered after of Master OUT2 Exposure exposure of generate a slave max 200µs Master Sensor profile trigger C5 Series User Manual Rev. 1.4 63... -
Page 66: The Digital Outputs
The Digital Outputs The C5 series features the possibility to output various digital signals. Those signals can be used to handle further machines or to check the internal signals. A list of all digital outputs can be found below. Name... -
Page 67: The C5-Gige Interface
The C5-GigE Interface The GigE Interface M12 GigE Female Connector Pin Assignment Pin No. GigE Signal Name BI_DC- BI_DD+ BI_DD- BI_DA- BI_DB+ BI_DA+ BI_DC+ BI_DB- Shield Shield C5 Series User Manual Rev. 1.4 65... -
Page 68: The I/O & Power Interface
Is connected to camera case The analog output ground is directly connected to the internal camera ground. The analog output is NOT electrically isolated from the device ground! Please take care for a correct operation. 66 C5 Series User Manual Rev. 1.4... -
Page 69: Description Of Leds
Green blink = Indication of network activity 5 (LNK) Green On = Linkspeed 1 Gbit Amber On = Linkspeed 100 Mbit Off = Linkspeed 10 Mbit or wait for end of autonegotiation C5 Series User Manual Rev. 1.4 67... -
Page 70: The C5 Series Cables
M12 17 pin angled adapter cable for power, I/O and laser control, 90° angled M12 female connector (IP64) on camera plug to straight M12 male (IP64), 202 201 511 angled connector configuration “UP”, length 0.2m, standard 68 C5 Series User Manual Rev. 1.4... -
Page 71: Wire Assignment Of M12 17 Pin Pigtail Cable
(OUT1, 2) The analog output ground is directly connected to the internal camera ground. The analog output is NOT electrically isolated from the device ground! Please take care for a correct operation. C5 Series User Manual Rev. 1.4 69... -
Page 72: Cables For Gige Interface
“DOWN”, length 0.2m, standard M12 GigE angled adapter cable for GigE, 90° angled M12 male connector (IP64) on camera plug to straight M12 female (IP64), angled connector 202 201 512 configuration “UP”, length 0.2m, standard 70 C5 Series User Manual Rev. 1.4... - Page 73 RJ45 Male Plug Male Plug GigE Signal Pin No. Pin No. Name RJ45 BI_DC- BI_DD+ BI_DD- BI_DA- BI_DB+ BI_DA+ BI_DC+ BI_DB- Shield Shield Shield C5 Series User Manual Rev. 1.4 71...
-
Page 74: Orientation Of Angled Adapter Cable
Part Number # Description 202 201 501 Power & I/O “DOWN” 202 201 502 GigE “DOWN” 202 201 511 Power & I/O “UP” 202 201 512 GigE “UP” DOWN 72 C5 Series User Manual Rev. 1.4... -
Page 75: The C5 Series Genicam Features
Feature relating to actual frame acquisition Camera Control Features relating to camera control AOIs Features relating to area of interest FIR Control Features relating to FIR Mode and Algorithm Control Features relating to camera mode and algorithm C5 Series User Manual Rev. 1.4 73... -
Page 76: Sensor Control
Features relating to advanced sensor settings Data Output Channels Features relating to data output Commands Commands for camera Light Control Features relating to Light Control Camera IO Features relating to camera input and output 74 C5 Series User Manual Rev. 1.4... -
Page 77: Trigger Control
Features relating to chunk data control Event Control Features required to control the generation of event notifications sent to host application File Access Control Category that contains the file access control features C5 Series User Manual Rev. 1.4 75... -
Page 78: Additional Features For Scatter Firmware
Left Scatter Position / Right Scatter Position to state how far away from the PEAK the intensities are summed. The direct scatter can determine the width (Direct Scatter Width) of the sum of intensities at the peak point. 76 C5 Series User Manual Rev. 1.4... - Page 79 3. “Direct Scatter Width” = 1 -> “Left / Right Scatter Position” min. = 1 4. “Direct Scatter Width” = 3 -> “Left / Right Scatter Position” min. = 2 5. “Direct Scatter Width” = 5 -> “Left / Right Scatter Position” min. = 3 C5 Series User Manual Rev. 1.4 77...
- Page 80 For left and right scatter there are three possibilities to define which information should be transmitted over the data output channel 0. DC0 = Left Scatter DC0 = Left and Right Scatter DC0 = Right Scatter XML view of the scatter functions 78 C5 Series User Manual Rev. 1.4...
- Page 81 HIS FEATURE CAN BE TEMPORARILY LOCKED DEPENDING ON AMERASTATUS **: T HIS FEATURE CAN BE TEMPORARILY NOT AVAILABLE DEPENDING ON AMERASTATUS ***: T HIS FEATURE CAN BE NOT IMPLEMENTED AT ALL DEPENDING ON ENSORTYPE OR OFTWAREVERSION C5 Series User Manual Rev. 1.4 79...
-
Page 82: Cxexplorer Overview
Configuration of a C5 camera can be easily done with the cxExplorer, which is a graphical user interface provided by AT - Automation Technology. With the help of the cxExplorer a camera can be simply adjusted to the required settings. Furthermore, the cxExplorer gives the opportunity to display various information like the 2D image, 3D height image and many more. -
Page 83: Cxexplorer Features
The Image Wizard is the easy way to set the camera manually to the 2D greyscale image mode. Select the image format, set the integration time and enable or disable the FIR filter. C5 Series User Manual Rev. 1.4 81... -
Page 84: Image Mode
3D algorithm, set the integration time and select the number of subpixel. Enable the required Output Channels and select the trigger mode to finish the wizard. 82 C5 Series User Manual Rev. 1.4... -
Page 85: 3D Mode
Furthermore, the intensity image can be also displayed. (3D greyscale height image) A detailed description of the operation of the cxExplorer can be found in a separate application note. C5 Series User Manual Rev. 1.4 83... -
Page 86: Quickstart A C5 Camera
By default the camera starts in the factory mode. For the C5 camera the factory mode is the 2D image mode. Start the continuous image grab over or do a snapshot over The first images were acquired. 84 C5 Series User Manual Rev. 1.4... -
Page 87: Cxsoftware Development Kit
Development Kit Automation Technology´s Software Development Kit (cxSDK) is free of charge and allows the programmatically access and control of C5 cameras and further the possibility of a 3D calibration. The cxSDK provides a C-based application-programming interface (API) with language wrappers for C++, Python, Matlab and Octave. -
Page 88: Service Information
In order to process your support inquiries immediately, we always need the serial number of the camera, the firmware version, the device version, the camera configuration file (*.cfg), a snapshot and a precise problem description. Product Inquiries and Price Quotations info@AutomationTechnology.de 86 C5 Series User Manual Rev. 1.4... -
Page 89: Warranty Conditions
Warranty Period 2-year warranty for C5 series sold inside of the European Union (EU) 1-year warranty for all C5 series sold outside of the European Union (EU) Extended Warranty The warranty period can be extend to maximum 36 months. -
Page 90: Document Revision
Add digital input and encoder input information Add information for Laser Connection Correct mechanical drawing image of C5-IO-Panel Change part number and description for C5 series cables Correct color wire assignment for M12 17 pin pigtail cable Modify cxExplorer overview...
Need help?
Do you have a question about the C5 Series and is the answer not in the manual?
Questions and answers