Table of Contents
Advertisement
Quick Links
Advertisement
Table of Contents

Summary of Contents for KitchenAid 5KSB6060
- Page 1 5KSB6060...
-
Page 2: Table Of Contents
TABLE OF CONTENTS PARTS AND FEATURES ....................6 Parts and accessories ..................6 BLENDER SAFETY ....................7 Important safeguards ..................7 Electrical requirements ..................10 Motor horsepower ...................10 Electrical equipment waste disposal ...............11 Declaration of conformity ................11 USING THE BLENDER ....................12 Blender function guide ..................12 Preparing the Blender for use .................13 Assembling and running the Blender ..............14 CARE AND CLEANING ..................16... -
Page 3: Parts And Features
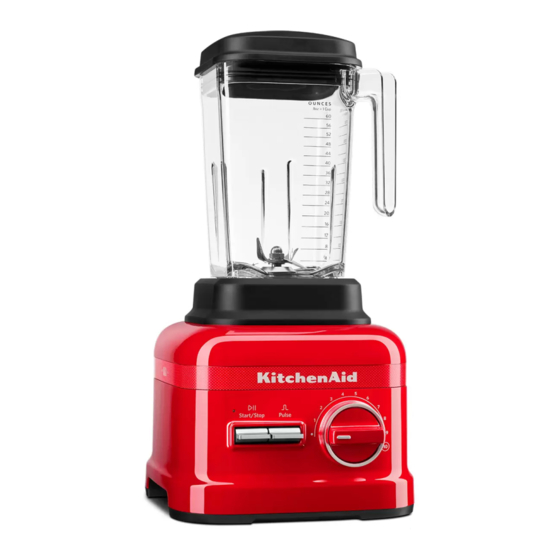
PARTS AND FEATURES PARTS AND ACCESSORIES Ingredient-measuring cap Tamper Blender jar Blade Power cord (not shown) Removable blender jar pad Control dial Base Pulse toggle switch Start/Stop toggle switch Status indicator light 6 | PARTS AND FEATURES... -
Page 4: Blender Safety
BLENDER SAFETY IMPORTANT SAFEGUARDS When using electrical appliances, basic safety precautions should always be followed, including the following: 1. Read all instructions. Misuse of appliance may result in personal injury. 2. To protect against risk of electrical shock, do not put Blender in water or other liquid. - Page 5 BLENDER SAFETY 4. This appliance is not intended for use by persons (including children) with reduced physical, sensory, or mental capabilities, or lack of experience and knowledge, unless they have been given supervision or instruction concerning use of the appliance by a person responsible for their safety.
- Page 6 17. Always operate Blender with lid in place. 18. The use of attachments not recommended or sold by KitchenAid may cause fire, electric shock, or injury. 19. This appliance is intended to be used in household and similar applications such as: - staff kitchen areas in shops, offices or other working environments;...
-
Page 7: Electrical Requirements
BLENDER SAFETY ELECTRICAL REQUIREMENTS Voltage: 220-240 V Frequency: 50-60 HZ Power (Wattage): 1800 watts NOTE: If the plug does not fit in the outlet, contact a qualified electrician. Do not modify the plug in any way. Do not use an adapter. Do not use an extension cord. -
Page 8: Electrical Equipment Waste Disposal
BLENDER SAFETY ELECTRICAL EQUIPMENT WASTE DISPOSAL Disposal of packing material The packing material is 100% recyclable - The symbol on the product or and is marked with the recycle symbol on the accompanying documentation . The various parts of the packing indicates that it should not be treated must therefore be disposed of as domestic waste but must be taken... -
Page 9: Using The Blender
USING THE BLENDER BLENDER FUNCTION GUIDE The Blender features Variable Speed and Pulse functions that allow you to customise your blending for any recipe you make. You might find that not all recipes are exactly the same, and sometimes a recipe might blend more to your preference on a speed that is not obvious. -
Page 10: Preparing The Blender For Use
USING THE BLENDER PREPARING THE BLENDER FOR USE Before first use Before using your Blender for the first time, wipe the blender base with a warm, damp cloth, then wipe clean with a damp cloth. Dry with a soft cloth. Wash the blender jar, lid, tamper, and ingredient-measuring cap in warm, sudsy water (see the “Care and cleaning”... -
Page 11: Assembling And Running The Blender
USING THE BLENDER ASSEMBLING AND RUNNING THE BLENDER Put the items to blend into the Make sure that the lid is fully secured blender jar. Add liquids first, then on the blender jar. Next, place the soft foods, then leafy greens, and blender jar on the base, making sure ice or frozen items last. - Page 12 USING THE BLENDER Use the tamper accessory as needed for optimal blending performance. Remove the ingredient-measuring The Pulse function may also cap only, and leave the lid in place. be used on its own as a separate Stir or press contents down towards blending function while the Blender the blade.
-
Page 13: Care And Cleaning
CARE AND CLEANING CLEANING THE BLENDER AND ACCESSORIES Clean the Blender thoroughly after every use. NOTE: To avoid damaging the Blender, do not immerse the blender base or cord in water. To avoid scratching the Blender, do not use abrasive cleansers or scouring pads. Make sure to clean the blender jar, lid, and ingredient-measuring cap after each use. - Page 14 CARE AND CLEANING Rotate the control dial to speed 10. Flip the START/STOP toggle switch The blender jar, lid, tamper, and up or down. Run the Blender on ingredient-measuring cap are speed 10 for 35 seconds. Flip the dishwasher-safe; the tamper, lid, and START/STOP toggle switch up or ingredient-measuring cap should down to stop the Blender.
-
Page 15: Troubleshooting
TROUBLESHOOTING 3. If the Blender stops while blending: • After 6 minutes of run time, the Blender will automatically shut off and go into Sleep mode, and the LED light will turn off. You can wake the Blender back up using the toggle switches (Start/Stop or Pulse High/Pulse Low). -
Page 16: Warranty And Service
Contact number for Ireland: Tollfree number +44 (0) 20 8616 5148 E-mail contact for U.K. and Ireland: Go to www.kitchenaid.co.uk, and click on the link “Contact Us” at the bottom of the page. Address for U.K. and Ireland: KitchenAid Europa, Inc. - Page 17 ©2017 All rights reserved. W11122478A 10/17...


