Table of Contents
Advertisement
Advertisement
Table of Contents

Related Manuals for STOROpack AIRmove2

Summary of Contents for STOROpack AIRmove2
- Page 1 AIRmove² - Perfect Protective Packaging User Manual...
- Page 2 AIRmove - Perfect Protective Packaging...
- Page 3 STOROpack GmbH + Co. KG cannot be held responsible for any damages caused by improper use of the machine or void air cushions. STOROpack GmbH + Co. KG cannot be held responsible for any involuntary errors in this manual. Please, don’t hesitate to forward us any proposals to improve this user manual.
-
Page 4: Table Of Contents
Contents Introduction ............................4 Safety Instructions ..........................4 Declaration of Conformity ........................6 Description of AIRmove ........................6 4.1 Technical Specifications ........................6 Box Contents ............................7 Machine Overview ..........................7 6.1 Keypad Functions ..........................8 Setting Up the Device for Use ......................8 7.1 Assembly of the Film Roll Holder ...................... -
Page 5: Introduction
1. Introduction This user manual has been compiled by STOROpack with all due care to enable safe and fault-free production of air pillows with the AIRmove machine. Before operating AIRmove , familiarize yourself with the contents of this user manual to guarantee safe operation. When the AIRmove... - Page 6 Prevent accidental starting. Ensure the switch is in the off position before plugging in. Avoid loose clothing, jewellery, long hair, etc. from contact between the drive wheels. Do not place anything between the drive wheels other than STOROpack film. This includes paper, metal, tools, etc.
-
Page 7: Declaration Of Conformity
3. Declaration of Conformity Declaration of Conformity We declare under our sole responsibility that the product described as AIRmove machine is in conformity with the following standards or standardization documents: 2006/42/EEC, amended by 91/368/EEC, 93/44/EEC and 93/68/EEC. Standards; EN ISO 12100:2010 Safety of machinery. M. -
Page 8: Box Contents
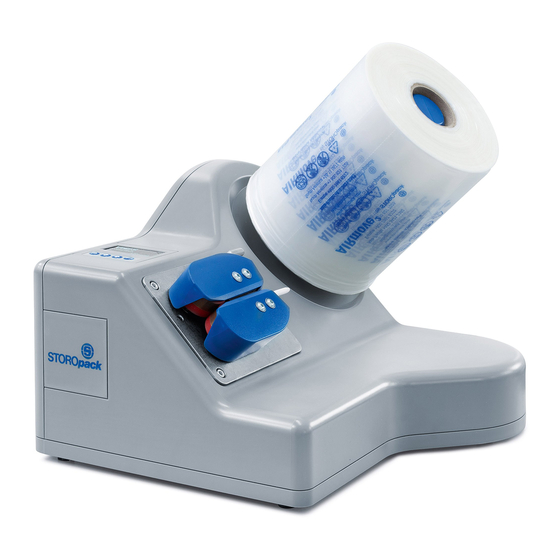
5. Box Contents 6. Machine Overview The AIRmove consists of the following components: Control panel Film roll holder Sealing unit Unlock knob External input Injector connection Main power USB-B connector switch and power socket The film roll holder of the AIRmove will be delivered disassembled. -
Page 9: Keypad Functions
Keypad Functions Position Name Function Start/Stop Button Starts or stops the machine Increases the value Arrow up Scrolls up Decreases the value Arrow down Scrolls down Confirms Enter Button Enter menu Enter menu item 7. Setting Up the Device for Use Assembly of the Film Roll Holder Remove the AIRmove machine and the blue film roll shaft from the box. -
Page 10: Display And Keypad Location
herefore you must choose between two film roll holder positions. By loosening the screw in the cover on the right side of the machine, you can adjust the film roll holder. You will hear and feel a “click” when the shaft arrives at each position. Alternatively you can use the spacing gauge to find the right setting. -
Page 11: Fitting A New Film Roll
Fitting a New Film Roll Make sure the machine is not running while changing rolls! If there is an empty roll on the machine, remove it from the film roll holder. To fit a new film roll, please proceed as follows: Slide the new film roll onto the film roll holder. Ensure that the film is oriented to unwind from the underside of the roll. -
Page 12: Power Switch And Connections
Power Switch and Connections After checking the power supply, the system can be switched on. The main switch is on position “I”. Power switch, fuse and Circular DIN connector, USB B type connector main power entry 8 pins First Parameter Set-Up To ensure the best quality Air pillows, Airmove operates using three different film type menus. -
Page 13: Menu Structure
There are three different film type menus available when you turn on the machine the first time. Void S Bubble M Cushion M Void S is already highlighted Press for Bubble M Press 2 x for Cushion M press to confirm choice for press to confirm choice for... -
Page 14: How To Adjust Air Settings
How to Adjust Air Settings The chosen AIRmove² film type menus automatically run on the correct air and temperature settings. You do not need to adjust machine settings manually, but if the automatic settings are not optimal for some reason, the keypad allows you to change the following settings: Display Void S Display Air Settings... -
Page 15: How To Adjust Runtime
How to Adjust Runtime To produce a desired amount of air pillows, a specific Runtime can be set. Runtime is indicated in seconds and its factory settings are 180 sec. The set Runtime will run down to “0” and production will stop. Display Void S Change Runtime settings Press 3 x... -
Page 16: External Input Mode 1
External Input Mode 1 Ready to start Press to set Press 4 x to change Extern IN Mode 1 Extern IN mode You can choose between manual and device control options (foot pedal or hand-buzzer). Manually Start: push Stop: push Ext. -
Page 17: Mode 2 Stop Delay
Mode 2 Stop Delay Display Void S Change Mode 2 Stop Delay Stop delay is indicated in ready to start seconds Press 5 x to change stop delay Press to decrease stop delay Press to increase stop delay 8.10 How to Change Film Type Changing the menu to a new film type when loading a different kind of film. -
Page 18: Factory Settings
Selection Void S Selection Cushion M Cushion M Press Press 2 x to change to Cushion M will be set Cushion M 8.11 Factory settings The ex-works setting enables resetting all choices, parameters, adjustments and changes back to the factory settings. Machine off Power switch on Power switch [ 0 ]... -
Page 19: External Start And Stop Devices
9. External Start and Stop Devices External start and stop devices enable an ergonomic operation of the machine. A foot pedal allows hand- free production of air cushions, a push button allows easy operation when the machine is out of reach. Foot controls allow the worker to activate the film production manually by pressing down on a foot switch or pedal, leaving the hands free during the production process. -
Page 20: Troubleshooting Airmove²
10. Troubleshooting AIRmove² AIRmove - Perfect Protective Packaging... -
Page 21: How To Change Wear Parts
11. How to Change Wear Parts We recommend regular maintenance of the machine to ensure the ideal workings of your STOROpack AIRmove². With your care and maintenance, you can ensure that the best possible packaging process is provided. Only about 10 minutes are required for maintenance and no prior technical knowledge. - Page 22 7. First push the top sealing unit to 8. Remove the teflon band while the left. holding up the top sealing unit a little bit and replace the teflon band the same way. 9. Secondly push the bottom part 10. Remove the bottom teflon band to the left.
- Page 23 AIRmove - Perfect Protective Packaging...
- Page 24 Asia-Pacific +852 3421 2392 Europe +800 78 67 67 22 North America +1 800 827 7225 South America +55 11 5677 4699 www.STOROpack.com packaging@STOROpack.com Copyright © 2016 STOROpack GmbH + Co. KG. All Rights reserved. AIRmove - Perfect Protective Packaging...
Need help?
Do you have a question about the AIRmove2 and is the answer not in the manual?
Questions and answers