Table of Contents
Advertisement
Advertisement
Table of Contents

Related Manuals for RockJam RJ461AX


Summary of Contents for RockJam RJ461AX
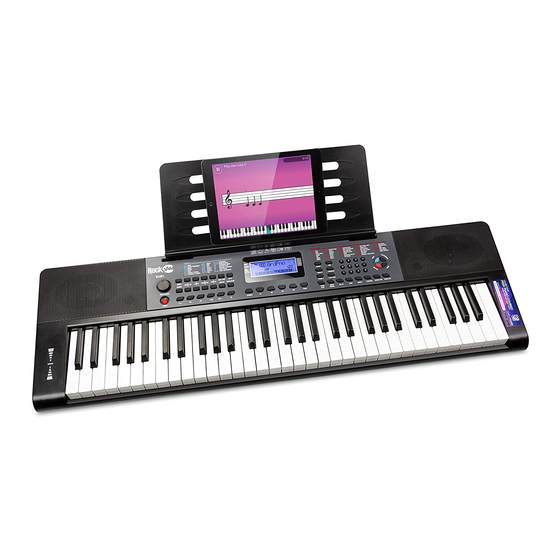
- Page 1 RJ461AX 61 KEY MUSIC KEYBOARD WITH ALEXA User Guide...
-
Page 2: Important Information
Important Information Besureto obey the following information so as not to harm yourself or others or damage this instrument or other external equipment. Power adapter: Please use only the specified AC adapter supplied with the product. An incorrect or faulty adapter can cause damage to the electronic keyboard. -
Page 3: Table Of Contents
Setup for Amazon Alexa Operation ........................ 11 Prerequisites for Setup ..........................11 Overview ..............................11 Essential Setup Steps in Detail (RockJam APP and WiFi Setup) ............. 11 Optional Setup Steps in Detail (Amazon Alexa APP and Piano Teacher Skill) ......... 15 Keyboard Operation ............................17 Power and Volume ............................ - Page 4 Appendix I. Percussion Instruments ....................... 31 Appendix VI. Chord Tables ..........................38 Single Finger Chords..........................38 Fingered Chords............................39 Appendix VII. RockJam Keyboard APP ......................40 Appendix VIII. Technical Specification ......................41 FCC & IC Statement ............................42 FCC Statement ............................ 42 Product Disposal Instructions (European Union) ...................
-
Page 5: Controls, Indicators And External Connections
Controls, Indicators and External Connections Front Panel 1. Speaker 17. Music Volume - 33. Intro / Ending 2. Power Switch 18. Music Volume + 34. Fill In 3. Main Volume 19. EQ 35. Sync 4. Tempo +/- 20. Memory 36. Single 5. -
Page 6: External Connections
External Connections 1. TF Card Slot 2. USBMP3 Input 3. MIDI Input/Output 4. Sustain Pedal Input 5. MIC Input 6. AUX IN 7. Headphone Output 8. DC IN LCD Display 1. Playing chord indication 2. Volume level display 3. TONE, RHYTHM or DEMO song 4. -
Page 7: Preparation Before First Use
Preparation Before First Use Power Use of AC/DC power adapter: Please use the AC/DC power adapter that came with the electronic keyboard or a power adapter with DC 12V output voltage and 1,000mA output current with a centre positive plug. Connect the DC plug of the power adapter into the DC12V power socket on the rear of the keyboard and then connect the other end into the mains wall socket and switch on. -
Page 8: Connecting An Amplifier Or Hi-Fi Equipment
Connecting an Amplifier or Hi-Fi Equipment: This electronic keyboard has a built in speaker system but it can be connected to an external amplifier or other hi-fi equipment. First turn off thepower to the keyboard and any external equipment you are looking to connect. -
Page 9: Connecting A Laptop Or Pc
This keyboard has a built-in speaker system that can be used to play music from your phone or mobile device. Insert one end of a stereo audio cable into the AUX IN socket on the back of the keyboard and connect the other end into your phone or audio device. -
Page 10: Connecting A Microphone
Connecting a Microphone: Connect the 3.5mm microphone plug into the [MIC] jack on the rear of the keyboard. Connecting USB Flash-drive or TF card: To play MP3s through the Keyboard Speakers, place files onto either a USB flash-drive or TF card. Insert the card into the input slot at the rear of the Keyboard.The first song will play. -
Page 11: Setup For Amazon Alexa Operation
Search for and enable the „Piano Teacher‟ skill Essential Setup Steps in Detail (RockJam APP and WiFi Setup) Download and install the Alexa companion APP „RockJam Keyboard‟ on your smartphone or tablet device from the Google Play store (Android) or the Apple App Store (iPhone, iPad). - Page 12 Press and hold the blue Alexa button as shown for over 5 seconds to enter network connection mode. The keyboard will respond with, “Entering Network Connection Mode” Open the WiFi setings on your smart device Open the „RockJam Keyboard‟ APP on your and connect to the keyboard WiFi network, smart device and you will be prompted to RockJam_RJ461AX_XXXX.
- Page 13 You will then be asked to select your home Your smart device will then connect back to WiFi network and enter the WiFi passcode. your home WiFi network. At this point, both Note that only a 2.4 GHz WiFi connection can your keyboard and smart device will be be used.
- Page 14 You can test the succesful registration of the keyboard by asking Alexa a simple question. Press the blue Alexa button on the keyboard and say something like, “What‟s the time?”. Alexa should respond with the current time. For full details of additional functionality offered by the „RockJam Keyboard‟ companion APP refer to Appendix VII. Page | 14...
-
Page 15: Optional Setup Steps In Detail (Amazon Alexa App And Piano Teacher Skill)
Download and install the Amazon Alexa APP on your smartphone or tablet device from the Google Play store (Android) or the Apple App Store (iPhone, iPad).Once you have signed in make sure you have the RockJam keyboard added as a device, open the menu in the Alexa APP and access Skills and Games. - Page 16 Search for and enable the Once enabled, press the blue Alexa button on the keyboard and Piano Teacher skill. say, “Open Piano Teacher”. The Piano Teacher skill should then start. To exit the Piano Teacher skill, press the blue Alexa button on the keyboard and then say, “Exit”.
-
Page 17: Keyboard Operation
Keyboard Operation Power and Volume Power control: Press the [POWER] button to turn the power on and again to turn the power off.The LED screen will light up to indicate power on. (Wi-Fi is activated) Adjustment of the Master Volume: To change the volume, turn the MAIN VOLUME dial. -
Page 18: Tone
Tone Tone Selection: When the keyboard is switched on the default TONE is „‟00‟‟Grand Piano.To change the tone, press theTONE button first and then punch in a number code on the keypad by pressing the corresponding digits0-9. Tones can also be changed by using the [+ / -] buttons on the key pad.Refer toAppendix III for afull list of the available tones and codes. -
Page 19: Split Keyboard
Split Keyboard: To switch on Split Keyboard mode press the [SPLIT] button. The keyboard will split into two keyboards at the 24th key from the left.In Split Keyboard mode the pitch of the left hand keys are raised by one octave. Press the [SPLIT] button again to exit Split Keyboard mode. -
Page 20: Vibrato
Vibrato: Press the [VIBRATO] button to enter Vibrato mode. The LCD display will display that [VIBRATO] is on. Once this mode is selected each time a note is played a trembling effect is added to the end of the note. Pressing the [VIBRATO] button again will turn the Vibrato feature off and exit this mode. -
Page 21: Metronome
Metronome: Press the [METRONOME] button to start the tick-tock beat.There are four beats to choose from. Depending on what the performance needs, you can touch the [TEMPO] buttons tospeed up or slow down the beat. Press the [METRONOME] button repeatedly to cycle through to the available beat patterns.The LCD display will indicate the beat you have chosen.The metronome effect is added to the music once you start playing.To exit this mode touch the [START/STOP] or[METRONOME] button again. -
Page 22: Rhythm
Rhythm Selecting the rhythm: You can choose from any of the 200 built in rhythms. Please refer to the Appendix II. for the detailed rhythm table. Press the [RHYTHM] button to enter the rhythm selection function. The LCD display will show the current rhythm number. -
Page 23: Sync
Sync: Touch the [SYNC] button to select the synchronised accompaniment function.Then press any of the first 19 keys on the left hand side of the keyboard to start the selected rhythm playing.Touch the [START/STOP] button to stop the rhythm and exit the sync function. Fill in: While playing a rhythm you can add a rhythmic fill if you touch the [FILLIN] button during playback.After the fill-in, the rhythm will continue playing as normal. -
Page 24: Accompaniment Volume Adjustment
Accompaniment Volume Adjustment: TheAccompaniment Volume can be adjusted by pressing the [ACCOMPVOLUME] buttons.The LCD display will show the volume as it is adjusted.The adjustment range has 10 levels which are displayed as a bar graph on the LCD display. Pressing both the [ACCOMPVOLUME ] buttons at the same time will return theAccompaniment Volume to the default level (level 006). -
Page 25: Chord Accompaniment
Chord Accompaniment Single Finger Chords: Press the [SINGLE] button to activate the single finger chord function.The LCD screen will flag which function is activated. With a rhythm playing, chords are played by pressing a key in the chord area on the left hand side of the keyboard (keys 1-19).The finger patterns required are shown inAppendix VI.The played chord is displayed in the top left corner of the LCD display.Touch the [START/ STOP] button to start or stop the chord accompaniment.
Need help?
Do you have a question about the RJ461AX and is the answer not in the manual?
Questions and answers
Does this keyboard have a soft touch setting