Advertisement
Table of Contents
- 1 Table of Contents
- 2 QUICK 3 Features
- 3 QUICK 3 Main Parts
- 4 QUICK 3 Main Parts
- 5 Warnings & General Information
- 6 Warnings & General Information
- 7 Serial Number
- 8 Operation
- 9 Charging & Battery
- 10 Throttle
- 11 Throttle
- 12 Safety / Tires Air Pressure
- 13 Driving Technique
- 14 New App
- 15 Plastic Covers Assembly
- Download this manual
Advertisement
Table of Contents

Related Manuals for INOKIM QUICK 3


Summary of Contents for INOKIM QUICK 3
- Page 1 MODEL : QUICK 3 USER GUIDE MANUAL...
- Page 2 EN 6100-6-3:2007 + A1 EN 6100-6-1:2007...
-
Page 3: Table Of Contents
Table of Contents: QUICK 3 Features ..…..…………..….……………………………….………3 QUICK 3 Main Parts ..................4-5 Warnings & General information ..………..……….…..………..…6-7 Serial Number ……………………….……..…………………..…………………...8 Opening & Folding QUICK 3 ...………………………..……..…..………….9-15 Operation ..………………………………………………………………………..…16 Charging & Battery ..……………………………………………….….…..………17 Throttle ......................18-21 Safety / Tires air pressure …..……………...….…………………………..…..22 Driving Technique ..……….....…………...……...…......23... - Page 4 QUICK 3 APPEARANCE...
-
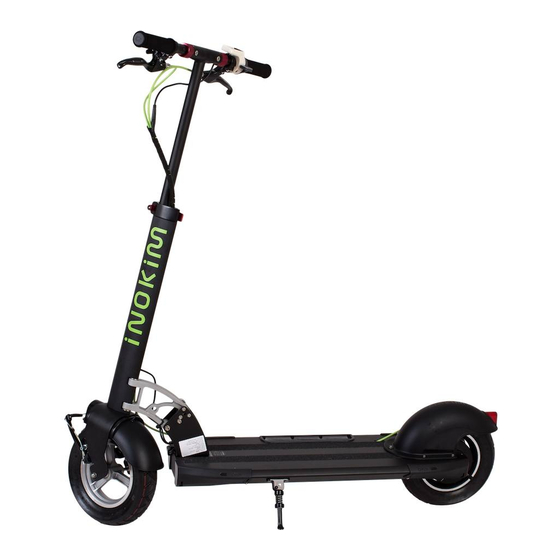
Page 5: Quick 3 Features
QUICK 3 FEATURES NEW SMARTPHONE APP NEW FOLDING BAR SYSTEM Throttle with LCD display and functions REAR DISC BRAKE LEVER QUICK FOLDING MECHANISM EVA GRIPS FRONT BRAKE LEVER SELF LOCKING / RELEASE BUTTON HEIGHT ADJUSTABLE HANDLEBARS LITHIUM ION QUICK RELEASE... -
Page 6: Quick 3 Main Parts
QUICK 3 MAIN PARTS QUICK FOLDING MECHANISM INOKIM WHEEL MOTOR SELF LOCKING / RELEASE M BUTTON ALUMINIUM DECK WITH CARRY HANDLE + ANTI SKID GRIPS REAR DISC BRAKE BATTERY CHARGER CONNECTOR... -
Page 7: Quick 3 Main Parts
QUICK 3 MAIN PARTS MAINTENANCE PLASTIC COVER SPEED CONTROL THROTTLE WITH LCD DISPLAY FRONT BRAKE LEVER / REAR DISC BRAKE LEVER QUICK RELEASE KICKSTAND... -
Page 8: Warnings & General Information
WHY IS IT NECESSARY TO READ THIS USER MANUAL ? This Manual was written to help you understand the proper use and maintenance of INOKIM. It is important for you to understand your new INOKIM; its features every ride. remote location, without any obstacles. -
Page 9: Warnings & General Information
WARNINGS & GENERAL INFORMATION PLEASE NOTICE INOKIM is not liable for incidental damages or consequential damages due directly or indirectly to the use of this product. BEFORE RIDING: Ensure that the M button is inserted all the way in to the middle folding mechanism/bridge. -
Page 10: Serial Number
SERIAL NUMBER RECORD SERIAL NUMBERS: Write down the serial number of your INOKIM. Keep this information separately and in a safe place. Each INOKIM has a unique serial number. These numbers can provide information that may be useful later on for insurance claims and in case of loss or theft. - Page 11 OP ENIN G AND FOLDING INOKIM...
- Page 12 At the right point of no pressure the mechanism will be released and the M button will come out easily. That will enable the folding of the handlebar. INOKIM's patent for quick and steady locking is based on exact pressures.
- Page 13 OPENING INOKIM STEP 2 the folding mechanism B. Visually check that M BUTTON is inserted all the way in CLICK STEP 3 Unfold T-Bar NOTICE: Before driving you must ensure that the M button is inserted all the way in to the central folding mechanism. Otherwise you risk...
- Page 14 OPENING INOKIM STEP 4 Unfold handlebars and lock them with the RED side rings...
- Page 15 OPENING INOKIM STEP 5 A. Open Quick Release B. Pull Handle bar up to adjust height C. Lock Quick Release...
- Page 16 FOLDING QUICK 3 STEP 1 The telescopic steering rod: Start by opening the quick release, slide the top steering rod into the main steering rod (where the INOKIM logo is written) and lock the Quick Release. A. Open Quick Release B.
- Page 17 A. Push Steering pole Forward B. Pull Out M Button C. Fold back the Steering Part until it's locked in it's place You may fold INOKIM more compact by folding T-bar as well at any stage of the folding process.
-
Page 18: Operation
• knowledge (full /empty) and does not give a precise indication to the battery status. Do not store INOKIM for long terms (more than two months) with fully • charged battery. From time to time discharge and fully charge the battery. -
Page 19: Charging & Battery
OPERATION CHARGING AND BATTERY: Your INOKIM has an external charger. Connect the charging cable to INOKIM's charging socket under the footboard, on the right side at the rear. Than connect the chargers electric cable to an electrical outlet. Charging Light Red - Battery is charging. -
Page 20: Throttle
THROTTLE OPERATION LCD DISPLAY THROTTLE FUNCTIONS • travel speed • cruise control • distance • battery status • speed mode • Total trip • background light • automatic power-off • ODO THROTTLE BUTTONS INTRODUCTION button ON/OFF button button ACCELERATE thumb button... -
Page 21: Throttle
THROTTLE OPERATION THROTTLE POWER ON Pressing to power the scooter on. THROTTLE POWER OFF Press for three seconds to shut down the system. AUTO OFF automatically shut down. DRIVE / SPEED CONTROL Start twisting the thumb throttle with your thumb for accelerating. Max twisting angle 60 °... - Page 22 THROTTLE OPERATION SPEED MODE When power on SPEED the default display is mode (appear at top right). You may change it using the buttons. Speed mode: this function is to limit the maximum speed of the scooter, either for a beginner user or for more accurate riding in a crowded surrounding: •...
- Page 23 DISPLAY MODES • CRUISE CONTROL (third mode) The default setting is Cruise Control off (letter "n" to indicate). Press to choose enable Cruise Control (Letter "Y" to indicate). Long touch to save setting. Short touch to enter forth mode. SET KM OR MILE(forth mode) The default setting is km/h(letter “0”...
- Page 24 THROTTLE OPERATION CRUISE CONTROL Wile riding at full speed for more then Ten (10) seconds, the Cruise Control will safety reasons). When Cruise Control is operated, you can release your thumb from the throttle and the scooter will continue to ride at full speed. To slow down, simply apply pressure on one of the brake levers or press the throttle again, the Cruise Control will be turned off.
-
Page 25: Safety / Tires Air Pressure
Helmet: most serious injuries that occur while riding are head injuries. This could have been prevented if a helmet had been worn. You must wear a helmet while riding your QUICK 3 . The helmet must be worn according to its instructions. -
Page 26: Driving Technique
DRIVING TECHNIQUE SAFE DRIVING: obstacles to disturb you so you can get to know your QUICK 3 before driving it. DRIVING TECHNIQUE: Foot Position - before riding out your foot as close as possible to the front section of the scooter and your other foot on the ground. Make sure that your driving route is clear. -
Page 27: New App
NEW APP DOW NL OA D IN OKIM A P P LIC ATION search for our app on your smartphone : INOKIM... - Page 28 INOKIM QUICK MAINTENAN CE...
- Page 29 INOKIM QUICK MAINTENANCE INOKIM was assembled by professional people. Any attempt to cause damage to the INOKIM "Quick" E-Scooter, and will cancel the manufacturer warranty given upon delivery. REQUIRED TOOLS 3 mm Allen key 19 mm ring key Professional spoons...
- Page 30 INOKIM REAR FLAT TIRE REPAIR 1. Make sure the INOKIM is unplugged and powered off. 2. Place INOKIM on a high stable surface where it's placed only on its body, so that rear and front wheels will be in the air.
- Page 31 INOKIM REAR FLAT TIRE REPAIR OPEN BOTH REAR PLASTIC COVERS Use 3 mm Allen key Always slide plastic cover aligned with QUICK 3 body lines as shown with blue arrow. Do not pull the covers as shown with the red arrow.
- Page 32 INOKIM REAR FLAT TIRE REPAIR IMPORTANT NOTE When assembling the motor back, note the arrows on both plugs, make sure they are aligned or you may damage the connector Gently, unplug the motor connector...
- Page 33 INOKIM REAR FLAT TIRE REPAIR DISASSEMBLE MOTOR WHEEL Use 19mm ring key to open nuts Remove the washer Disassemble nuts and washers from both sides...
- Page 34 INOKIM REAR FLAT TIRE REPAIR DISASSEMBLE MOTOR WHEEL Carefully slide out the Motor wheel DON'T PLACE MOTOR ON THE FLOOR WITH ROTOR (DISC BRAKE) TOUCHING THE GROUND, TO PREVENT IT FROM BENDING! IT F...
- Page 35 INOKIM REAR FLAT TIRE REPAIR REPLACING A TUBE Start next to the air valve. Use professional levers to dismount Motor Rim Be careful not to damage the motor! Slowly open about VENT 1/4 of the Tire using the levers Use hand to help...
- Page 36 INOKIM REAR FLAT TIRE REPAIR REPLACING A TUBE replace it if needed Place tire back on rim using your hands only (You can use lubricant such as soap to ease this operation) DO NOT USE ANY TOOLS FOR PLACING BACK...
- Page 37 INOKIM REAR FLAT TIRE REPAIR PLACING THE MOTOR WHEEL BACK Slide back Motor. Check right order of washers at both sides! Note inner washers are in place Note external washer with lug is in correct slot! Safety extension lock of the washer must...
-
Page 38: Plastic Covers Assembly
INOKIM REAR FLAT TIRE REPAIR PLASTIC COVER ASSEMBLY Align plastic cover lines to INOKIM body lines Slide in plastic cover Both corners of Aluminium and plastic should be aligned The body construction rail is showing through the slot of the plastic... - Page 39 In order to remain the market leaders, we constantly work on improving our user We hope you like the Quick 3 with its new features and smartphone app. Enjoy, ride carefully, and return safely back home. Riccardo Nimrod Sapir...
- Page 40 Ningbo Myway Intelligent Technology Co.,Ltd (Head Quarter, Marketing Center, R&D center) 7F#Putuoshan Road,Beilun,Ningbo, ZheJiang Province, China 315806 Tel:0086-574-86133933 WWW.INOKIM.COM | EMAIL: oversea@inokim.com...
Need help?
Do you have a question about the QUICK 3 and is the answer not in the manual?
Questions and answers