Table of Contents
Advertisement
Advertisement
Table of Contents

Related Manuals for CareFusion Infant Flow


Summary of Contents for CareFusion Infant Flow
- Page 1 Infant Flow ® SiPAP comprehensive quick guide...
-
Page 2: Table Of Contents
Disable oxygen sensor ........9 Monitored Parameter screen ......22 Startup menu and leak test .....10-11 Alarm management ........23 Section 2: Operation ........12 Final check and routine inspection ....24 Infant Flow SiPAP front panel ....... 12 Troubleshooting ........... 25... -
Page 3: Section 1: Circuit Setup
Section 1: Circut setup WARNING: • Do not attach generator to patient until verification and Infant Flow SiPAP NCPAP/ Pres High initial setup are complete Pres Low L/min L/min CAUTION: XDCR PROX • Follow manufacturer’s instructions for setup and operation of humidifier OPTIONAL: •... -
Page 4: Open Bed And Isolette
Open bed or crib Isolette Use extension tube with isolette. Remove extension tube if excessive condensation occurs. -
Page 5: Abdominal Sensor
Abdominal sensor 1. Connect transducer to driver. 2. Connect respiratory sensor to transducer. 3. Compress the sensor gently; LED on the transducer illuminates. 4. Apply the sensor to the infant: a. Pressure line perpendicular to tape. b. Place between the umbilicus and xiphisternum. -
Page 6: Pressure Nomogram For Infant Flow Lp Generator
Pressure Nomogram for Infant Flow System The Infant Flow SiPAP system is subject to a direct relationship between the controlled gas flow and airway pressure. For example, 8 to 9 LPM gas flow provides approximately 5 cmH 15.0 13.0 11.0 (cmH 10.0... -
Page 7: Alarm Test
> 30 psig (2.1 bar) Verification testing and calibration procedures are supply > 30 psig (2.1 bar) successfully completed. User Verification testing and Infant Flow LP generator/circuit calibration procedures must be done off patient. nCPAP/press low 9 LPM 1. Connect air and O gas supply. - Page 8 Alarm test (continued) 4. Adjust the nCPAP/pres low flow meter to 11 LPM. The high airway pressure alarm activates. Decrease flow to 8 LPM. Reset the alarms. 5. Adjust the %O control to 35%. The High %O alarm activates. Return the O setting to 30%.
-
Page 9: Two Point Oxygen Calibration
Two point oxygen calibration 1. Adjust flow meters and turn on driver. 2. Press the Tool button in the Setup screen. 3. Adjust the Oxygen Control to 21%: a. Press the flashing button to confirm. b. Allow reading to stabilize. c. -
Page 10: Two Point Oxygen Calibration
Two point oxygen calibration (continued) NOTE: • If calibration fails, a red “X” is displayed, the alarm sounds and an Error code is displayed; repeat the calibration procedure • Two point calibrations are required with initial setup and circuit changes... -
Page 11: Disable Oxygen Sensor
Disable oxygen sensor Disable O button 1. From Setup screen, press the calibration (CAL) button. 2. Press the O Disable button: a. Oxygen monitoring and the audible oxygen alarms are disabled. b. Error Code 55 is displayed. 3. Use an external oxygen analyzer to monitor FiO WARNING •... -
Page 12: Startup Menu And Leak Test
Startup menu and leak test 1. Connect prong or mask to generator; occlude opening to patient. 2. Set nCPAP flow to 9 LPM and press high flow to 3 LPM. 3. Switch on the driver. 4. Verify measured pressure is 5 ± 1% if less than 5 cmH O is displayed. - Page 13 Startup menu and leak test (continued) 9. Touch flashing icon to confirm. 10. Connect transducer assembly to the traducer interface connector on the front of the Infant Flow SiPAP, if desired. Touch flashing icon to confirm. A red “X” indicates the transducer assembly is not connected.
-
Page 14: Section 2: Operation
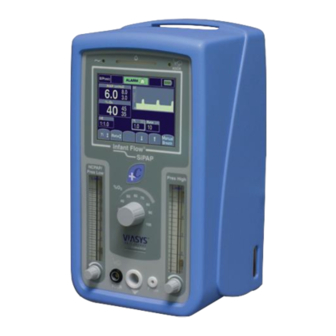
Section 2: Operation Infant Flow SiPAP front panel Power LED XDCR Alarm warning bar Transducer interface LED LCD touch screen control Infant Flow® SiPAP Press high flow meter NCPAP/ Press High Press Low Connection proximal pressure line L/min L/min 50 60 70... -
Page 15: Soft Key Operation
Soft key operation Description Example A button that is enabled. A button that is inhibited due to non-availability of the designated feature or pending acknowledgement of an active alarm condition. A selected mode or control pending confirmation is visually highlighted and intermittently flashes between yellow and white text. - Page 16 Soft key operation (continued) Description Example When there is an active alarm associated with a measured value, the measured value concerned is displayed with RED FLASHING text. The associated limit value (if any) is displayed in RED. When an alarm that is associated with a measured value is resolved, the device remains in a LOW priority alarm state, with the measured value displayed in YELLOW FLASHING text and the associated limit displayed in YELLOW, until the alarms are cleared by the operator.
-
Page 17: Operational Modes
Operational modes CPAP is a constant single level of positive pressure to the infant’s airway, facilitating the restoration of functional residual capacity and correction of hypoxemia. BiPhasic is two levels of pressures, delivered based on set Time High (T-High) criteria, rate and pressure settings. - Page 18 Operational modes (continued) BiPhasic tr enables patient-triggered pressure assists via a respiratory abdominal sensor, with breath rate monitoring, adjustable apnea time interval, apnea alarm and adjustable apnea back up rate. This enables respiratory support without the need of an endotracheal tube. Apnea detection is via a respiratory abdominal sensor.
-
Page 19: Alarm Set/Confirm Screen
Alarm set/confirm screen 1. Touch the nCPAP or Alarm button for 3 seconds to set the alarm limits. If neither button is touched within 2 minutes, the alarm limits will automatically be set. 2. The Mode Select screen will display with the driver operating in nCPAP mode. -
Page 20: Mode Select Screen
Mode Select screen 1. Press the desired mode button. The display will change to the Parameter Adjust screen. NOTE: • Only the available modes will be displayed on the menu bar • For Apnea and Biphasic trigger (tr)* modes, attach the transducer assembly and respiratory abdominal sensor... -
Page 21: Parameter Adjust Screen
Parameter Adjust screen 1. Press the desired parameter button to change. Only the relevant controls are visible. The selected parameter and associated numeric display are highlighted in yellow. 2. Use the up and down arrow buttons to adjust the setting. 3. -
Page 22: Incompatible Settings
Incompatible settings • When one parameter (A) change is incompatible with another parameter (B), the software will automatically make an adjustment to that parameter (B) • If the adjusted parameter (A) is restored in less than 15 seconds, the parameter (B) change is reversed •... -
Page 23: Main Screen
Main screen • The Main screen displays current mode of operation alarm status, battery charge status, monitored parameters and pressure time graphic display • Only the active parameters for the selected mode are available for adjustment • With breath monitoring active, spontaneous breaths are indicated in yellow below delivered airway pressure graph •... -
Page 24: Monitored Parameter Screen
Monitored Parameter screen 1. The Monitored Parameter screen displays measured values and parameter settings for all BiPhasic modes. 2. Active parameters are available for adjustment. 3. Press the Change Screen button to return to the Main screen. -
Page 25: Alarm Management
Alarm management Audible alarm priority • High priority: A series of 10 tones every 10 seconds, flashing red • Medium priority: Three audible tones every 15 seconds, flashing yellow • Low priority: Two audible tones every 30 seconds, solid yellow Silencing audible alarms Pressing the Alarm Reset button will silence active alarms for up to 30 seconds. -
Page 26: Final Check And Routine Inspection
Final check and routine inspection Inspect the system at least every 3 to 4 hours to: • Ensure the patient is receiving the prescribed level of CPAP • Ensure the generator is stable, secure and not pulling upward on the nose •... -
Page 27: Troubleshooting
Troubleshooting Alarm Priority Possible cause Potential actions < 18% High CAL required Reset FiO above limit, O < 104% High CAL required Reset FiO below limit, O High %O High setting changed, supply gas Correct FiO , reset alarm limits failure, water trap overflow Low %O High... - Page 28 714.283.8493 fax carefusion.com © 2012 CareFusion Corporation or one of its subsidiaries. All rights reserved. Infant Flow, CareFusion and the CareFusion logo are trademarks or registered trademarks of CareFusion Corporation or one of its subsidiaries. RC766 (0912/2000) L3416 Rev. B...
Need help?
Do you have a question about the Infant Flow and is the answer not in the manual?
Questions and answers