Zline DW7714-18 Installation Manual And User's Manual
Hide thumbs
Also See for DW7714-18:
- Manual (32 pages) ,
- Installation manual (30 pages) ,
- Installation manual and user's manual (28 pages)
Table of Contents
Advertisement
Advertisement
Table of Contents

Related Manuals for Zline DW7714-18


Summary of Contents for Zline DW7714-18
-
Page 2: Table Of Contents
CONTENTS Installation Guide SAFETY INSTRUCTIONS Important Safety Instructions Grounding Instructions BEFORE INSTALLING Electric Shock Hazard PREPARING THE DISHWASHER ENCLOSURE Product Dimensions Enclosure Dimensions INSTALLING THE DISHWASHER Step 1: Check the Parts and Tools Step 2: Select the Best Location for the Dishwasher Step 3: Check Water Supply Requirements and Cautions Step 4: Check the Electrical Requirements and Cautions Step 5: Unpacking and Inspecting the Dishwasher... - Page 3 CONTENTS Users Manual SAFETY INSTRUCTIONS Proper Installation Basic Precaution Before Use FEATURES OF YOUR NEW DISHWASHER Specification Filter System Smart Wash System OPERATING INSTRUCTIONS Control Panel Cycle Chart PREPARING AND LOADING DISHES Loading the Lower Basket Loading the Upper Basket Loading the Silverware Basket Adding a Dish Filling the Detergent Dispenser...
- Page 4 Installation Guide...
-
Page 5: Safety Instructions
It’s your responsibility to use common sense, caution, and care when installing, maintaining, and operating the dishwasher. Zline is not liable for damages resulting from improper use. These warning signs are here to prevent injury to you and others. Please follow them explicitly. -
Page 6: Grounding Instructions
SAFETY INSTRUCTIONS Prior to removal of original dishwasher and the installation of your new unit, make sure to switch off your circuit breaker. Do not connect the dishwasher until you have completed the installation. Connecting the power cable is the last step when installing the dishwasher. -
Page 7: Before Installing
before installing Do not use the dishwasher until it is correctly installed. Do not push down on the door when it is open. Do not place excessive weight on the open door. WARNING Electric Shock Hazard Failure to follow these instructions can result in death, fire, or electric shock: Electrically ground the dishwasher. -
Page 8: Preparing The Dishwasher Enclosure
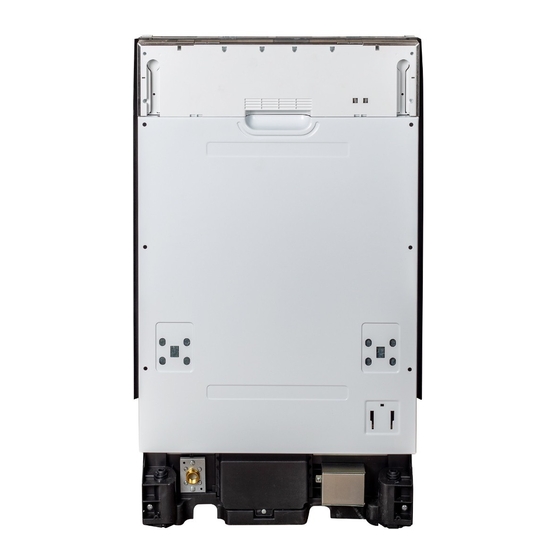
preparing the dishwasher enclosure Product Dimensions The water supply line, power cable, and drain hose should go through the space behind the dishwasher. The power cable runs in channels under the dishwasher to connections in the front. Enclosure Dimensions This dishwasher is designed to be enclosed on the top and on both sides by a standard residential kitchen cabinet unit. -
Page 9: Installing The Dishwasher
installing the dishwasher Be sure that you or your installer follow these instructions closely so that the new dishwasher works properly and that you’re not at risk of injury when washing dishes. Step 1: Check the Parts and Tools Before starting on the installation, prepare all the necessary tools and parts required to install the dishwasher. - Page 10 installing the dishwasher Not Provided: Electrical tape & standard Twist on wire connector Strain relief duct tape Hot water supply line 90° Elbow Tube fittings Air gap Rubber connector Hose clamp Power cable Teflon tape or sealing Decorative door compound Do not use plastic tubing.
- Page 11 installing the dishwasher Tools Required (Not Provided): Electric drill Safety glasses Gloves Adjustable wrench Wire stripper Pliers Tape measure Pencil Phillips screwdriver Tubing cutter Cutting knife Hole saw Torx t20 Hex L-wrench Flashlight Nipper Flat screwdriver Level...
-
Page 12: Step 2: Select The Best Location For The Dishwasher
installing the dishwasher If the dishwasher is a new installation, most of the installation work must be done before the dishwasher is moved into place. If the dishwasher is replacing an old dishwasher, you must check the exising dishwasher connections for compatibility with the new dishwasher. -
Page 13: Step 3: Check Water Supply Requirements And Cautions
installing the dishwasher Step 3: Check Water Supply Requirements and Cautions The hot water supply line pressure must be between 0.04-1MPa. Adjust the water heater to deliver water between 120°F ~149°F. The dishwasher must be connected to a hot water supply between 120°F~149 °F. -
Page 14: Step 4: Check The Electrical Requirements And Cautions
installing the dishwasher Step 4: Check the Electrical Requirements and Cautions The electrical requirements for the dishwasher are as follows: In the United States, install in accordance with the National Electric Code/State and Municipal codes and/or local codes. For cable direct connections. Use flexible, armored or non-metallic sheathed, copper wire with a grounding wire that meets the wiring requirements for your local codes and ordinances. -
Page 15: Step 5: Unpacking And Inspecting The Dishwasher
installing the dishwasher Step 5: Unpacking and Inspecting the Dishwasher Unbox the dishwasher in an open area free of obstruction both around the carton and overhead. We recommend that you retain the carton and all of the packing materials until the dishwasher is fully installed and operational to ensure you have removed all the product’s components from the carton prior to disposal. - Page 16 installing the dishwasher Step 5: Unpacking and Inspecting the Dishwasher Continued Plumbing Inspection 1. Check the hot water connection on the front left side of the base of the dishwasher. The mounting plate should be secured to the front of the base, the threads inside the connection should be smooth and shiny, and the area should be clean and free of any debris.
-
Page 17: Step 6: Preparing The Dishwasher
installing the dishwasher Step 6: Preparing the Dishwasher Ensure that the circuit breaker and water supply valve are turned off before proceeding with the following steps. Before you move or lay down the dishwasher for installation, make sure to adjust the height of the legs so the legs are as short as possible. - Page 18 installing the dishwasher Step 7: Placing the Dishwasher and Connecting the Hot Water Supply Line 1. Adjust the three leveling legs at the bottom of the dishwasher after measuring the height of the cabinet opening from under the countertop to the floor. (See Step 8, Leveling the Dishwasher.) 2.
-
Page 19: Step 8: Leveling The Dishwasher
installing the dishwasher Step 8: Leveling the Dishwasher 1. Open the door and place the level against the top of the tub on the inside and check if the dishwasher is level. If it is not level, rotate the leveling legs at the at the bottom front of the dishwasher until the dishwasher is level. -
Page 20: Step 9: Securing The Dishwasher
installing the dishwasher Step 9: Securing the Dishwasher You must fix the dishwasher to the countertop or cabinet side walls for additional stability. If the countertop is made of wood or the material will not be damaged by drilling, follow the instructions in 1 below. If the countertop is made of granite, marble, or any other material that can be damaged by drilling, follow the Instructions in 2 below. - Page 21 installing the dishwasher Step 9: Securing the Dishwasher Continued The screws or tub spacer cap may fall into the dishwasher while you are working with the door open. Cover the interior of the dishwasher with a towel to prevent any screws from falling into the dishwasher.
-
Page 22: Step 10: Connecting The Drain Hose
installing the dishwasher Step 10: Connecting the Drain Hose 1. Check the parts on the sink to which the drain hose will be connected. 2. There are several ways to insert the drain hose into the drain hose connector of the sink, as shown in the following figure. - Page 23 installing the dishwasher Step 10: Connecting the Drain Hose Continued To prevent leaks or drainage problems, make sure the drain hose is not damaged, kinked, or twisted. 8. Do not cut the wrinkled area of the drain hose to fit the size. When arranging the drain hose, take caution to avoid contact with sharp edges of the cabinet or under- sink.
-
Page 24: Step 1 1: Wiring Connections
installing the dishwasher Step 1 1: Wiring Connections 1. Before connecting the power cable to the dishwasher, make sure the circuit breaker is completely turned off. 2. In the junction box located at the front bottom right of the dishwasher, find the three power wires from the dishwasher including the grounding line. -
Page 25: Step 12: Completing The Installation
installing the dishwasher Step 12: Completing the Installation 1. Open the door and remove all foam, paper packaging, and unnecessary parts. 2. Turn on the circuit breaker you turned off before you began the installation. 3. Open the water supply valve to supply water to the dishwasher. 4. - Page 26 installing the dishwasher Step 12: Completing the Installation Continued 6. Install the decoration door to the outer door of the dishwasher. Install the hook and brackets on the decoration door, see figure 17. Put the hook into the slot of the outer door, see figure 18. Fix the decoration door onto the outer door with the correct screws and bolts, see figure 19.
-
Page 27: Specifications
Specifications Specifications are subject to change without any notice for quality improvement purposes. The actual appearance of the dishwasher may differ from the illustrations in this manual. Specifications for Model DW7714-18 Power Supply 120 Volts, 60 Hz Water Pressure 0.04 - 1 MPa Dimensions 17.7”... - Page 28 Users Manual...
-
Page 29: Safety Instructions
Safety Instructions Proper Installation Please install your dishwasher properly by following the installation guide. Water supply inlet temperature should be between 120° and 149°. Dispose of the discarded appliance and packing material properly. The dishwasher must be properly grounded, or it can result in a risk of electric shock. PERMANENTLY CONNECTED is allowed. - Page 30 Safety Instructions Basic Precaution Before Use Continued Do not let children abuse, sit, or stand on door or racks of the dishwasher. Under certain conditions, hydrogen gas may be produced in a hot water system that has not been used for two weeks or more. HYDROGEN GAS IS EXPLOSIVE. If the hot water system has not been used for such a period, before using dishwasher, turn on all hot water faucets and let water flow from each for several minutes.
-
Page 31: Features Of Your New Dishwasher
Features of your New Dishwasher Specifications for Model DW7714-18 Capacity 8 place settings Dimensions 17.6" x 22.6" x 32.4" (W x D x H) Power Supply 120 Volts, 60 Hz Rated Power Usage Wash motor 100W Heater 700W Water Feed Pressure 5.8 ~ 145 psi (0.04 ~ 1MPa) - Page 32 Features of your New Dishwasher Specifications for Model DW7713 - 24 Capacity 10 place settings Dimensions 23.5" x 22.6" x 32.4" (W x D x H) Power Supply 120 Volts, 60 Hz Rated Power Usage Wash motor 100W Heater 700W Water Feed Pressure 5.8 ~ 145 psi (0.04 ~ 1MPa) 1 Lock...
-
Page 33: Filter System
Features of your New Dishwasher Filter System Your dishwasher has a multiple filter system. In the system, there are three mesh filters. It can separate soiled water and clean water in different chambers. The multiple filter system helps your dishwasher to get better performance with less water and less energy. - Page 34 Features of your New Dishwasher How Your Dishwasher Cleans Your dishwasher cleans by spraying a mixture of hot water and detergent through the spray arms against soiled surfaces. The dishwasher fills with water covering the filter area. Water is then pumped through the multiple filter and spray arms.
-
Page 35: Operating Instructions
Operating Instructions Control Panel 1. Start/Cancel Open the door to select the desired cycle and options, touch the Start/ Cancel button and close the door within 4 seconds to start the cycle or begin the delay countdown. To cancel and reset the program during the cycle, open the door, and touch Start/Cancel for 3 seconds. - Page 36 Operating Instructions 3. Delay To delay the start of a selected cycle, press the delay start pad until the desired delay time shows in the LED display. You can delay the start for 1 to 24 hours. To cancel the delay start option before the delay period is over, press the start/cancel pad for 3-5 seconds.
- Page 37 Operating Instructions E - Energy Save When the energy save function is selected, energy consumption will be reduced during the washing process. Note: The energy save option is available with heavy and normal cycles. Status Window H:01- H:24 If the delay start option is selected, the number of delay start hours shows in the status window.
-
Page 38: Cycle Chart
Operating Instructions Cycle Chart Program Description of Cycle Water (L or G) Cycle Time (min) Heavy Pre Wash 19.7 or 5.2 Main Wash (140°F) Rinse (149°F) Rinse with Sanitize (156.2°F) Drying Normal Pre Wash 105-135 9.5-18.5 or 2.5-4.9 Main Wash (122-131°F) Rinse (136.4-140°F) Rinse with Sanitize (156.2°F) Drying... -
Page 39: Preparing And Loading Dishes
Preparing and Loading Dishes Dish Preparation Scrape away large pieces of food, bones, pits, toothpicks, etc. The continuously filtered wash system will remove the remaining food particles. Burned-on foods should be loosened before loading. Empty liquids from glasses and cups. Foods such as mustard, mayonnaise, vinegar, lemon juice and tomato based products may cause discoloration of stainless steel and plastics if allowed to sit for a long period of time. - Page 40 Load large items such as pans and pots into the dishwasher so their open sides face downwards. We recommend loading cups, stemware, and small plates into the upper basket. Model DW7714-18 Model DW7713-24 8 place settings 10 place settings...
-
Page 41: Loading The Silverware Basket
The silverware basket can be divided into three separate modules that can be used in both upper and lower racks. 1. Spoons 4. Forks Model DW7714-18 2. Knives 5. Large Spoons 8 place settings 3. Salad Forks 6. Large Forks... -
Page 42: Filling The Detergent Dispenser
Preparing and Loading Dishes Filling the Rinse Aid Dispenser Your dishwasher is designed to use a liquid rinse aid. The use of rinse greatly improves drying performance after the final rinse. Do not use a solid or bar-type rinse aid. Under normal conditions, the rinse aid will last approximately one month. -
Page 43: User Maintenance
User Maintenance Keeping your dishwasher clean improves its performance, reduces unnecessary repairs, and lengthens it’s life. Cleaning the Exterior It’s best to clean spills on the outside of your dishwasher as they occur. Use a soft, damp cloth on the control panel to gently wipe away spills and dust. Do not use benzene, wax, thinner, chlorine bleach, or alcohol. -
Page 44: Troubleshooting
Troubleshooting Problem Possible Cause Solution Dishwasher won't start Power supply or power Check and connect power supply line is not connected Delay start option has Refer to delay start been selected section in this manual Deactivate the child Child lock activated (selected models) lock LED screen show "LSb"... - Page 45 Troubleshooting Problem Possible Cause Solution Detergent left in dispenser Detergent may be too Use fresh detergent Spray arm is blocked Unblock spray arms Improper operation of Add detergent and rise Detergent dispenser won't the detergent cover aid as indicated close Water remains in the Previous cycle has not Select the proper cycle...
- Page 46 Troubleshooting Error Codes When some malfunctions come on, the appliance will display error codes to warm you. Error Message Symptom Possible Reason during the water inlet step, if the flow 1. check the water supply meter can't detect the defined water 2.
- Page 47 At ZLINE Kitchen & Bath, we’re dedicated to serving our customers, which is why we’ve worked tirelessly to create products that meet EPA guidelines to save you money and protect the environment.
- Page 48 Kitchen and Bath Two Locations: 916 Delaware Avenue Marysville, Ohio 43040 350 Parr Circle Reno, NV 89512 www.zlinekitchen.com 1-614-777-5004...
Need help?
Do you have a question about the DW7714-18 and is the answer not in the manual?
Questions and answers