
Related Manuals for Abilia Lightwriter SL50


Summary of Contents for Abilia Lightwriter SL50
- Page 1 Lightwriter SL50 User Manual www.sentient-healthcare.ie +353 1 832 6509 +353 1 832 6509 www.sen0ent-healthcare.ie www.sen0ent-healthcare.ie...
-
Page 2: Table Of Contents
Contents 2 SCANNING CONTENTS WELCOME TO YOUR LIGHTWRITER ACCESS METHODS YOUR LIGHTWRITER CHOOSING A SCAN PATTERN 5 YOUR KEYBOARD WHAT’S IN THE BOX CHARGING CHANGING YOUR KEYGUARD TURNING ON YOUR LIGHTWRITER CLEANING YOUR KEYBOARD FITTING YOUR IN-USE BAG KEYBOARD LAYOUTS TALK CHANGING YOUR KEYBOARD LAYOUT INTRODUCTION TO TYPE AND TALK... -
Page 3: Welcome To Your Lightwriter
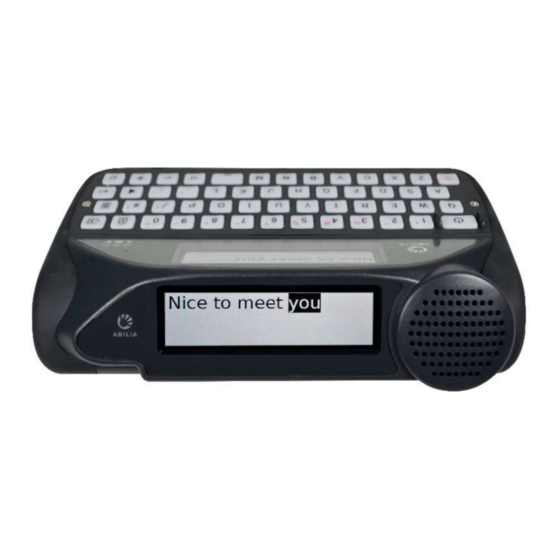
WEL COME TO YOUR L IGHTWRITER The Lightwriter SL50 is a fast, simple way to communicate. Designed specifically for communication, there are lots of useful features aimed at you delivering your speech as effectively as possible: • Fast start-up and simple to use menu interface. - Page 4 Companion Display Loudspeaker USB stick port Charging socket Ethernet port Charging light Headphone socket Switch port 1 Switch port 2 Mounting points Technical Serial number support Service panel information QUICK TIP – Your Lightwriter may arrive with protective films on the displays. You should remove them before using your Lightwriter.
-
Page 5: What's In The Box
WHAT’S IN THE BOX Please check everything is included when you open the box: Lightwriter SL50 – Spare Keys – Which you may need if you want to change the language of your Lightwriter (contents vary). Ethernet cable – This... - Page 6 AD D ITIONAL ACCESSORIES AVAIL ABL E In-car charger – when Strap set – A simple effective way to attach you’re out and about different straps to your Lightwriter. Allowing you may not be able to you to carry your Lightwriter by hand or get to a plug socket, so around your neck, with ease.
-
Page 7: Charging
CHARGING Your Lightwriter should be regularly charged for 3-4 hours to get a full day’s use. The best time to do this is overnight. Plug in the charger into the charging socket on the left side of the Lightwriter. Only use the chargers provided with the Lightwriter. The charging light next to the charging socket indicates that the power is connected: Green –... -
Page 8: Turning On Your Lightwriter
TURNING ON YOUR L IGHTWRITER To turn on your Lightwriter press the Power key Your Lightwriter will take a few moments to first start up. If you do not use your Lightwriter or press any keys for a short time, the displays will turn off and it will go into Suspend Mode. -
Page 9: Talk
TALK When you turn on your Lightwriter the first screen you will see will be the Talk Screen. Date and Status icons time Type and Predictions bar talk area You may notice that the brightness of the displays will automatically change in different environments. They should become brighter in a sunny outdoor setting, and duller in a dark room. - Page 10 You can press the Left Arrow key to recall the last sentence spoken back onto the Talk Screen. You can then repeat or edit the sentence as required. QUICK TIP – if you need to quickly silence your Lightwriter in the middle of talking, just press the Sound key to mute it.
-
Page 11: What The Keys Do
WHAT THE KEYS D O As well as the usual keys for typing and talking, your Lightwriter has a few other useful keys. For information on changing your Keyboard Layout, or adjusting the Key Delay times, see Settings. POWER – This key will immediately wake up your Lightwriter if it is in Suspend Mode, or boot up if it is completely turned off. - Page 12 SHIFT KEY – To type a capital letter, press Shift and then press the Letter you would like to be capitalised. You can hold down Shift if you want to type several capital letters. If you need to use Caps Lock, simply press Shift twice. Everything you type will be in capital letters until you press Shift twice again.
- Page 13 UNION KEY (AL ARM ) - This is a ‘sticky key’ which is useful if you are unable to hold down more than one key at a time. After pressing Union, the following key pressed is considered ‘held down’, until after you press the next key.
-
Page 14: Status Icons
STATUS ICONS When you switch certain features on and off (such as Number Lock), a large image of the icon will appear in the centre of your screen for a few seconds to confirm the action: The icons in the top right corner of your screen always indicate the current status: Number Lock on/off Shift Caps Lock on/off... -
Page 15: Menus
MENUS Additional functions and settings are accessible through the Menus. See Settings for further information on how to change your Lightwriter setup and preferences. USER M ENU Press Menu to see the User Menu screen: The menu is displayed on the right-hand side of the screen. A brief description of the currently highlighted menu option is displayed in the left-hand screen. -
Page 16: Advanced Typing Features
ADVANCED TYPING FEATURES As well as simply typing the text you want to speak, your Lightwriter has some additional ways to help you speed up your communication. USER D ICTIONARY NEW WORD S If you have some unusual names and words that are missing from the main dictionary, your Lightwriter will soon learn them for you. -
Page 17: Speech Exceptions
SPEECH EXCEPTIONS You may want to change the way your Lightwriter pronounces some words. To do this, you need to create a Speech Exception: Go to Shift-Menu > Dictionary > Speech Exceptions > Add word. In the top right box, type in the word that your Lightwriter is pronouncing incorrectly. In the bottom right box, type in the word as you would like it to sound. -
Page 18: Notes
After you have selected your prediction, the word will appear in bold italic on your screen: Predictions only work on the last word in the sentence you are writing. So if you go back and edit text in the sentence, the predictions will not work mid-sentence. You can delete the whole predicted word by pressing Delete when your cursor is anywhere in or on the end of the word. - Page 19 ED ITING YOUR NOTE (OR M AKING A NEW NOTE) To edit (or make a new) note on your Lightwriter, go to Shift-Menu > Dictionaries > Notes > Browse. Highlight your chosen file to edit (or select New) and press Enter. >...
-
Page 20: Fast Phrases
Press Enter to continue to speak. If your speech doesn’t quite go as planned and you need to adapt to your audience, you can use the Left and Right Arrow keys to move between the different parts your Note. This way you can repeat or skip different parts of your speech. -
Page 21: Abbreviations
Press Enter, then type in (or edit) your phrase and press Enter to save. QUICK TIP - A useful way to remember assigned phrases is to choose a letter most relevant to your phrase. For example “Please can I have a coffee” could be saved under ‘c’ for coffee. TO USE A FAST PHRASE Make sure your Talk Screen is blank and press Enter followed by the assigned Letter key. -
Page 22: Vocal 'Smileys
Simply press the corresponding Number key as you would do to select a regular Prediction. QUICK TIP – Try to avoid making your abbreviation the same as the start of a word. For example, if your abbreviation was not, your abbreviation may push out other important Predictions that you need to type such as notice, nothing, notes, etc. -
Page 23: Mobile Phone
MOBIL E PHONE You can communicate with friends and family through your own mobile phone, using your Lightwriter. You can make phone calls, read and send text messages all through your Lightwriter. QUICK TIP - Before you start, make sure your phone has sufficient signal, credit and battery life. BL UETOOTH ICONS KEY: Bluetooth on, but not connected Bluetooth incoming... -
Page 24: Access Your Contacts
ACCESS YOUR CONTACTS Once you are paired with your phone you will be able to browse through your contacts. Go to Shift-Menu > Mobile Phone > Phone Call or Send SMS. In the top box, press Left and Right Arrow keys to browse through your contacts, or simply type in the phone number from scratch. - Page 25 M AKE A PHONE CAL L To make a phone call from your Lightwriter, simply go to Shift-Menu > Mobile Phone > Phone call. Start typing a name to browse your phone book (or you can type in a new number from scratch). Use the Left and Right Arrow keys to scroll through your contacts.
-
Page 26: Text Messages
To finis h the call To hang up from your Lightwriter, press Menu > Hang up. You can also choose to hang up from your phone - just end the call as you normally would. QUICK TIP - If you move too far from your phone, your Lightwriter will lose Bluetooth connectivity and the call will divert back to your phone handset. - Page 27 REPL Y TO A TEXT M ESSAGE After you have read your text message, you may want to reply straight away. Press Enter to select ‘Reply’. You will then see a screen with the phone number already inserted. Use the keyboard to type your message, and press Enter to send. SEND A NEW TEXT M ESSAGE To send a text message, simply go to Shift-Menu >...
-
Page 28: Scanning
SCANNING To start scanning, simply plug in two switches and you are ready to go (more details below). The keys will light up in a looped pattern, and can be selected by pressing a switch or keyboard key. Switches can be activated by a variety of methods including pressing a switch by hand, foot or head, or operating a sip/puff switch by mouth. -
Page 29: Choosing A Scan Pattern
There are 3 access modes available: ONE SWITCH TWO SWITCH ANY KEY SCANNING SCANNING SCANNING You will need to activate Any Key Scanning (see Plug your two switches into Plug one switch into Port 1. Settings). Once it’s Ports 1 and 2. Press the switch. -
Page 30: Your Keyboard
YOUR KEYBOARD It is important that you feel comfortable when you are using your keyboard, as this is how you control your Lightwriter. You can use a different keyguard, or even select a different keyboard layout to make it easier to use. It is also important that you keep the keyboard clean, otherwise the keys may become sticky or unresponsive over time. - Page 31 REM OVING A KEYGUARD 1. Place your Lightwriter on a table or flat 3. Repeat step 2 with the left-hand and central surface, and turn it off by pressing Shift then leverage points until the front of your Power. Using the screwdriver supplied with keyguard is free from the Lightwriter.
- Page 32 REPL ACING A KEYGUARD 5. Select a new keyguard and line it up with your Lightwriter’s keyboard. You can see which way around your keyguard goes as the wider Power key slot is on the top-left of your keyboard. Holding the bottom of the keyguard, gently push the top of the keyguard in underneath the Main Display.
-
Page 33: Cleaning Your Keyboard
CL EANING YOUR KEYBOARD If your keys become sticky or unresponsive, it may be that your keyboard needs cleaning. This is easy to do and should only take a few minutes. Before removing keys, make sure you have checked which keyboard layout you have. The Keyboard Layouts are on the following page, and make a handy guide when you are putting all your keys back! 1. -
Page 34: Keyboard Layouts
5. Once the keys are all seated, replace the keyguard by following steps 5 to 7 in Changing Your Keyguard. Your new keyboard is now ready to use. KEYBOARD L AYOUTS English QWERTY: English ABC: Other keyboard layout images are available to view on our website: www.abilia.com www.sentient-healthcare.ie... -
Page 35: Changing Your Keyboard Layout
CHANGING YOUR KEYBOARD L AYOUT To change the layout of your keys, you first need to change the keyboard layout in Shift-Menu > Keyboard. You can choose from several different language layouts. Once you have chosen a layout, your Lightwriter will need a reboot. You will also need to move the keys around on your keyboard immediately: 1. -
Page 36: Remote Updates
REMOTE UPDATES It is important to keep your Lightwriter software up to date to keep it running smoothly and securely. Updates can contain important bug fixes, security upgrades and improved features. You can update your software any time you like, providing that you have an internet connection. 1. -
Page 37: Settings
SETTINGS There are several settings which let you personalise your Lightwriter. To make it easier, only the simple settings appear in the User Menu. Press the Menu key to view the User Menu. NAVIGATING THROUGH SETTINGS Use the Left and Right Arrow keys to explore the menu options. Press Enter to select a menu option. Use the Arrow keys to adjust values such as Volume up and down, then press Enter to save your choice. - Page 38 Res et your L ightwriter s ettings You can revert the entire machine to factory settings (Default) in: Shift-Menu > System > Reset To Default. Tip – You may want to back-up some of your settings before doing a full reset. See Importing and Exporting Data.
-
Page 39: Settings In Detail
SETTINGS IN D ETAIL Default values are in BOLD in the following tables. Different Menu settings are visible depending on the User Level that you are using: User Level Key Press Colour code User Menu Menu User Menu Advanced User Menu Shift-Menu Advanced QUICK TIP –... - Page 40 SOUND Here you can set up the volumes, sound effects and announcements for all functions of your Lightwriter. QUICK TIP – You can adjust the volume up and down from any screen: press and hold Sound combined with Left and Right Arrow keys to change the volume level. Volume Setting Description...
- Page 41 Keyboard Sounds Here you can set the sound made by the keyboard when keys are pressed. Setting Description Values User Level Keyboard Sounds Choose the sound made for every Announce, Beep, Advanced key press. Click, None Announcements Here you can turn the announcement voice on or off for menus, typed sentences, words and letters. Announcements are the ‘voice’...
- Page 42 KEYBOARD It is important that you feel comfortable using your Lightwriter keyboard. These settings let you adjust how the keys are arranged, what keys you have, and how they work. Keyboard L ayout Setting Description Values User Level Norwegian QWERTY, Norwegian ABC, Spanish Advanced Keyboard Select a pre-set...
- Page 43 D ISPL AY These settings help you change how the individual screens are shown on the two Lightwriter displays. M ain D is play This is the main user display that you view when using your Lightwriter. Setting Description Values User Level Show Clock Show or hide the date and time...
- Page 44 Companion D is play This is the display that your conversation partner views. You can change the size and brightness of text to fit more on the screen, or to make it easier for your companion to read your typed speech. Setting Description Values...
- Page 45 Sus pend Timeout During Suspend Mode the Lightwriter turns the displays off and goes into a lower power consumption mode to preserve battery life. You can press Power to wake the Lightwriter from Suspend Mode. Setting Description Values User Level Suspend Timeout Set the time the Lightwriter is idle 15s, 30s, 1 min, 2 min,...
- Page 46 SCANNING Here you can configure the way your scanning keyboard works. Setting Description Values User Level Scan Pattern Configure the sequence used to scan Row / Column, Key by Key, Advanced the keyboard (see Scanning for more Half and Half (split) details).
- Page 47 L ANGUAGE Setting Description Values User Level Language Set the language for your Lightwriter. Nederlands, English Advanced (AUS) English (UK), When setting the language, the following English (USA), Deutsch, will automatically change: Norsk (Bokmål), • Menu language. Svenska, Dansk, Suomi, •...
-
Page 48: Importing And Exporting Data
IMPORTING AND EXPORTING DATA You can insert a USB stick into your Lightwriter to import and export data such as your own dictionary, keyboard layout, and backups. You can use the USB stick provided in the box with your Lightwriter, or you can use your own. -
Page 49: Backup And Restore Individual Settings
ED IT YOUR EXPORTED FIL E Exported files can be edited in most text editing software (Notepad is a good choice). Open the file and you will see the list of settings with the current value against each one. Simply type in your new values, using the existing text as a template. Save your file onto the USB stick as a plain text file (.txt). -
Page 50: Importing Acapela Voices
IM PORTING ACAPEL A VOICES Your Lightwriter comes pre-installed with a selection of male and female voices. It is also possible to upload an alternative Acapela voice using a USB memory stick. This could be a purchased voice, or even a banked voice if you have one prepared. IM PORT THE VOICE FIL E To import the new voice, copy the entire voice folder (for example, “hqm-ref-British-Graham-22khz”) from your computer to your USB memory stick. -
Page 51: Troubleshooting
TROUBLESHOOTING If you have any problems with your Lightwriter, this Troubleshooting guide may be able to help you. If you still have a problem, please contact your supplier or the Abilia service department. GENERAL PROBL EM S Problem Cause Solution Lightwriter is frozen or does Possible system error. - Page 52 PROBL EM S WITH M OBIL E PHONE Problem Cause Solution I can't send or Phone is not working. Check your mobile phone is working and that you can receive texts or make calls and send texts. This could be due to many make phone factors such as battery, network outage or credit.
-
Page 53: Problems With Usb Sticks
PROBL EM S WITH USB STICKS Problem Cause Solution USB stick won’t fit into USB stick casing is Try using a slimmer USB stick. Use the USB stick the port. too big. supplied with your Lightwriter. You can buy an extension cable for your USB stick. My USB stick won’t work USB stick is full. -
Page 54: Shortcuts
SHORTCUTS Press Shift then Power Press Power SUSPEND (sleep) Hold down the Power key for 2 seconds. You can press any key to wake it up again. SELECT MENU ITEM Press Enter EXIT MENU SCREEN Press Power CANCEL TEXT When you are typing text, the Power key will clear the entire line of text. -
Page 55: Technical Information
Electronic goods and batteries are disposed of according to local regulations in force. REGUL ATORY INFORM ATION This product meets the requirements of the EU directive for medical devices 93/42/EEC as well as the standards EN 12182-2012 and EN 14971 ® Lightwriter is a registered trademark of Abilia Ltd. www.sentient-healthcare.ie... - Page 56 To learn more about the Lightwriter SL50, visit: hkps://sen^ent-healthcare.ie/product/lightwriter-sl50/ Sen0ent Healthcare Ltd Unit 106 Baldoyle Industrial Estate, Baldoyle, Dublin, Ireland. Contact us Phone: +353 1 832 6509 Email: sales@sen^ent-healthcare.ie www.sentient-healthcare.ie +353 1 832 6509...
Need help?
Do you have a question about the Lightwriter SL50 and is the answer not in the manual?
Questions and answers