
Related Manuals for BIO RAD ChemiDoc Touch


Summary of Contents for BIO RAD ChemiDoc Touch
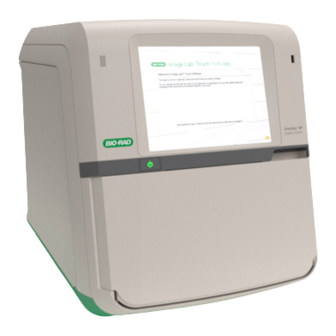
- Page 1 ChemiDoc Touch Imaging System ™ with Image Lab Touch Software ™ User Guide Version 1.2...
- Page 3 ChemiDoc™ Touch Imaging System with Image Lab™ Touch Software User Guide Version 1.2...
- Page 4 Bio-Rad. Bio-Rad reserves the right to modify its products and services at any time. This user guide is subject to change without notice. Although prepared to ensure accuracy, Bio-Rad assumes no liability for errors or omissions, or for any damage resulting from the application or use of this information.
-
Page 5: Table Of Contents
Table of Contents Safety and Regulatory Compliance Important Safety Information Warranty General Precautions Regulatory Notices Alert Icons Instrument Safety Warnings Notice Power Safety Information Voltage Setting Information Fuses Chapter 1 Introduction Product Features Front Panel Components Rear Panel Components CCD Camera and Lenses Introduction to Image Lab Touch Software Emission Filters Optional Accessories... - Page 6 Using the On-Screen Keypad Using the On-Screen Keyboard Editing the Welcome Screen Setting the Sound Volume Chapter 3 Acquiring an Image About Sample Trays Workflow for Acquiring a Chemiluminescent Image Specifying the Image Size Choosing the Application iv | ChemiDoc Touch Imaging System...
- Page 7 Table of Contents About Exposure Times for Chemiluminescent Images The Image Resolution/Sensitivity Scale Specifying the Region of Interest for Auto Exposure Setting the Exposure Time for a Chemiluminescent Image Setting the Exposure Automatically Setting the Exposure Manually Signal Accumulation Mode Configuring Signal Accumulation Mode Acquiring Images Workflow for Acquiring Gel and Blot Images...
- Page 8 Updating Image Lab Touch Software Reinstalling Image Lab Touch About the UV Transilluminator Bulbs When Transilluminator Bulbs Fail Replacing the UV Transilluminator Bulbs Replacing the Fuses Appendix B Ordering Information Appendix C Exporting to a Shared Folder vi | ChemiDoc Touch Imaging System...
-
Page 9: Safety And Regulatory Compliance
Safety and Regulatory Compliance Important Safety Information Please read these instructions before operating the ChemiDoc™ imager. This instrument is suitable for research use only. Therefore, it must be used only by specialized personnel who know the health risks associated with the reagents that are normally used with this instrument. -
Page 10: Warranty
The ChemiDoc Touch imaging system is warranted against defects in materials and workmanship for one year. If any defect occurs in the instrument during this warranty period, Bio-Rad Laboratories, Inc. will repair or replace the defective parts at its discretion without charge. The following defects, however, are specifically excluded: Defects caused by improper operation Repair or modification done by anyone other than Bio-Rad Laboratories, Inc. -
Page 11: General Precautions
Clean the sample tray after use. Regulatory Notices The ChemiDoc Touch imaging system is designed and certified to meet EN 61010, the internationally accepted electrical safety standard, EMC regulations, and TUV requirements. Certified products are safe to use when operated in accordance with this user guide. -
Page 12: Alert Icons
A caution alerts you to take or avoid a specific action that could result in loss of data or damage to the instrument. A caution can also indicate that, if the precaution against a potential hazard is not taken, minor or moderate injury might occur. 10 | ChemiDoc Touch Imaging System... -
Page 13: Instrument Safety Warnings
Instrument Safety Warnings Example Caution: With the exception of cleaning or replacing light bulbs, refer all servicing to qualified Bio-Rad personnel or their agents. Warnings A warning precedes an action that, if not followed correctly, could cause serious injury or death to the operator, serious or total loss of data, or serious damage to the instrument. -
Page 14: Notice
Notice The ChemiDoc Touch instrument is intended for laboratory use only. This device is meant for use by specialized personnel who know the health risks associated with reagents used in electrophoresis. The UV light source is computer controlled, and proper interlocks are implemented to avoid users’... -
Page 15: Power Safety Information
Power Safety Information Power Safety Information Voltage Setting Information The ChemiDoc Touch imager has a universal power supply that automatically chooses the correct voltage for your country or region. Fuses The imager has two user-serviceable fuses, F1 and F2, which are located on the rear panel and are a part of the power entry module. - Page 16 Safety and Regulatory Compliance 14 | ChemiDoc Touch Imaging System...
-
Page 17: Chapter 1 Introduction
ChemiDoc Touch instrument. Product Features The ChemiDoc Touch instrument supports the acquisition of images from a wide range of laboratory gels and blots. The instrument uses a supersensitive camera with a charge- coupled device (CCD) and a large maximum-aperture lens that provides high chemiluminescent sensitivity. - Page 18 Smart, tray-based imaging that identifies the correct applications and presents appropriate filter and illumination sources for each Support for imaging applications that require high sensitivity (chemiluminescent western blots) Dynamic range of >4 orders of magnitude 16 | ChemiDoc Touch Imaging System...
-
Page 19: Front Panel Components
Product Features Front Panel Components USB port Transilluminator drawer Touch screen Front door (open position) System on/off button Imaging stage Sample tray Front door open handle Transilluminator drawer handle User Guide | 17... -
Page 20: Rear Panel Components
Rear Panel Components CCD Camera and Lenses The ChemiDoc Touch camera is installed within a lighttight enclosure. Based on acquisition settings you select, Image Lab Touch uses a patented* algorithm to adjust the camera zoom and lens focus automatically. See Technical Specifications on page 21 more information. -
Page 21: Emission Filters
Optional Accessories Emission Filters The ChemiDoc Touch instrument has a motorized emission filter for fluorescent and white light applications. When no filter is required to image chemiluminescent samples, the filter automatically moves out of the way of the lens. Optional Accessories... -
Page 22: Supported Tray Types
Chapter 1 Introduction Supported Tray Types The ChemiDoc Touch imager can be used with the Chemi/UV/Stain-Free, white, and blue trays. Table 3 lists each tray type and the application it supports. Table 3. Sample Trays Tray Type Supported Applications Chemi/UV/Stain-Free... -
Page 23: Technical Specifications
Technical Specifications Technical Specifications Supported Applications Chemiluminescence Fluorescence Important: Using the optional Blue Tray (cat. #1708373) is highly recommended for SYBR® Safe DNA applications because the conversion to blue light makes DNA samples visible while protecting them from UV damage. Colorimetry Gel documentation Hardware Specifications... - Page 24 Height: 53 cm (21") Instrument weight 32 kg (78 lb) Operating Ranges Operating voltage 100–240 VAC, 50–60 Hz Operating temperature 10–28°C Operating humidity 10–80% relative humidity (noncondensing) Automation Capabilities Workflow automated Application-driven, tray-based imaging selection 22 | ChemiDoc Touch Imaging System...
-
Page 25: Environmental Requirements
Environmental Requirements The ChemiDoc Touch imager requires a space 52 x 56 x 62 cm (W x H x D) and a clearance of at least 8 cm from the back for instrument ventilation and for connecting or disconnecting the AC power cord. - Page 26 Chapter 1 Introduction 24 | ChemiDoc Touch Imaging System...
-
Page 27: Chapter 2 Image Lab Touch Software Overview
Chapter 2 Image Lab Touch Software Overview This chapter describes the touch screen interface and presents an overview of the software. Starting Image Lab Touch To start Image Lab™ Touch Software To turn on the imager, press the On button on the front. The instrument starts Image Lab Touch software and the Welcome screen appears. -
Page 28: Setting The System Date And Time
The system date and time are determined by a combination of the time zone and the current time settings. The date and time appear in the default name assigned to acquired images. 26 | ChemiDoc Touch Imaging System... - Page 29 Setting the System Date and Time To set the system date and time Tap Settings. Then tap Set Time Zone. Scroll through the list until the time zone for your locale appears. Tap the time zone to select it. Tap OK. User Guide | 27...
- Page 30 Scroll through the Hour and the Minutes lists until the current time appears in the blue band. Scroll the AM/PM list until the correct setting appears in the blue band. 10. Tap OK. The date and time you selected appear at the top of the screen. 28 | ChemiDoc Touch Imaging System...
-
Page 31: Touch Screen Actions
Touch Screen Actions Touch Screen Actions Touch Screen Actions Use the following actions to interact with the imager. Action Definition Briefly touch the screen surface. Double-tap Tap twice quickly. Touch and then move your finger left or right. Scroll Touch and hold, and then move your finger up or down. Stretch Place a thumb and one or two fingers together on the screen, and then move them apart. - Page 32 Alternatively, you can use a USB mouse to click on tabs and icons or click in text boxes and enter data with a USB keyboard. Note: If you are using a USB mouse, replace any instruction to tap with click. 30 | ChemiDoc Touch Imaging System...
-
Page 33: About The Live View Screen
About the Live View Screen About the Live View Screen The Live View screen appears when you start Image Lab Touch. In Live View you specify the image size, select an application, and set the exposure. Once these parameters have been set, the system is ready to acquire the image. -
Page 34: The Image Lab Touch Main Toolbar
Date and Time — displays the current date and time of the imaging system. Go to Settings > Set Date and Time to change this setting. Settings — displays system settings and accesses software updates. 32 | ChemiDoc Touch Imaging System... -
Page 35: Tabs
About the Live View Screen Icon or Text Description — displays information about Help Image Lab Touch screens. Logout Logout — logs you out and returns to the Welcome screen. Tabs IMAGE SIZE, APPLICATION, and EXPOSURE tabs display image settings. Tapping a tab opens a dialog box. -
Page 36: About The Image View Screen
You can fine tune the image display, view information about the image, delete the image, or save it to a USB flash drive or network drive. Tip: To compare images, you can select up to four images in the Gallery and then view them in Image View. 34 | ChemiDoc Touch Imaging System... - Page 37 About the Image View Screen Main toolbar — accesses the Live View, Gallery, and Help screens, the Settings menu, and the Logout icon. For more information about toolbar icons, see The Image Lab Touch Main Toolbar on page Workspace — displays the acquired image. Image View toolbar —...
-
Page 38: The Image View Toolbar
In this view, you can open an image in Image View, delete selected images, and save selected images to a USB flash drive or network drive. 36 | ChemiDoc Touch Imaging System... - Page 39 The Gallery Note: To compare images, you can select up to four images in the Gallery to view in Image View. For more information, see Comparing Images on page By default, each thumbnail image is named with the date and time of acquisition. You can change the name in the Image Info box.
-
Page 40: Gallery Screen Components
Scroll to display longer topics and to access links to related topics. Tap the X in the upper right corner to close the help screen. Access a list of all help topics by tapping Help Topics at the bottom of the screen. 38 | ChemiDoc Touch Imaging System... -
Page 41: Entering Text On Screen
Entering Text on Screen Entering Text on Screen In text boxes you can enter or edit text with an on-screen keyboard or keypad. When you tap a box, the appropriate input object appears. Tap keys to enter your input. Alternatively, you can type text on a USB keyboard. -
Page 42: Using The On-Screen Keyboard
Welcome screen appears. You can add custom text for your organization in the two boxes on the screen. For example, you can enter the name of your business or laboratory in the upper box and add a warning message or other helpful information in the lower box. 40 | ChemiDoc Touch Imaging System... - Page 43 Editing the Welcome Screen You can enter one line of text in the upper box and up to three lines of text in the lower box. To edit the Welcome screen Tap in a box. The touch screen keyboard appears. For more information, see Entering Text on Screen on page Triple-tap to select the text.
-
Page 44: Setting The Sound Volume
You can change the system sound level or turn the sound off. To set the sound volume Tap Settings. Then tap Set Sound Volume. Tap a volume level. Tap X to close the dialog box. 42 | ChemiDoc Touch Imaging System... -
Page 45: Chapter 3 Acquiring An Image
Chapter 3 Acquiring an Image This chapter describes the steps to acquire an image using the following workflows: Workflow for Acquiring a Chemiluminescent Image on page 46 Workflow for Acquiring Gel and Blot Images on page 62 Note: This chapter focuses on chemiluminescent blots. It explains how to specify the area of focus to shorten the exposure time required and how to use the different exposure options to get the result you want. - Page 46 You must use the correct tray with the application you select. The ChemiDoc Touch imager detects the type of sample tray on the imaging stage. If the tray in the transilluminator drawer does not support the application, an error message appears and the imager does not acquire the image.
- Page 47 About Sample Trays To prepare a sample tray Place the gel or blot on the appropriate sample tray. Open the imager main door and pull out the transilluminator drawer for easier access to the imaging stage. Place the sample tray on the imaging stage. Push the transilluminator drawer in and close the main door.
-
Page 48: Workflow For Acquiring A Chemiluminescent Image
You can select a preset image size or specify a custom size. To specify the image size for a chemiluminescent image In Live View, tap IMAGE SIZE. To choose a standard size, tap Small, Medium, or Large. 46 | ChemiDoc Touch Imaging System... - Page 49 Workflow for Acquiring a Chemiluminescent Image To specify a custom size, tap the W (width) or L (length) box. The on-screen keypad appears. Enter the width or length of the image (in cm) using the keypad. The valid width values are 9.0 to 21.0 cm. The valid length values are 7.2 to 16.8 cm.
-
Page 50: Choosing The Application
Image Lab Touch automatically determines the optimal setting required to achieve publication-quality images. Images acquired at the optimal setting have a resolution of 175 microns or better per pixel. Selecting a setting to the left of this default setting increases the 48 | ChemiDoc Touch Imaging System... -
Page 51: The Image Resolution/Sensitivity Scale
Selecting a setting to the right of the default setting might reduce the resolution below that required for publication; however, the exposure time is reduced. Bio-Rad recommends that you start with the optimal binning setting, examine the result, and then adjust subsequent images. The Image Resolution/Sensitivity Scale The Image Resolution/Sensitivity scale has five pixel binning settings: 2x2, 3x3, 4x4, 6x6, and 8x8. - Page 52 Chapter 3 Acquiring an Image The optimal binning setting required to achieve publication-quality images is indicated on the Image Resolution Sensitivity scale. In the example screen, the selected binning level displays under the Exposure tab. 50 | ChemiDoc Touch Imaging System...
- Page 53 About Exposure Times for Chemiluminescent Images How Binning Settings Affect Image Quality Pixel binning refers to the process of combining data from adjacent CCD pixels to form a single larger pixel. As a result, this provides faster acquisition speeds and, in most images, improved light sensitivity.
- Page 54 Tip: Zooming in on the area to be imaged increases the resolution and might increase the optimal binning. The loss in resolution with a higher binning setting can be offset by the increase in resolution and shorter exposure time. 52 | ChemiDoc Touch Imaging System...
- Page 55 About Exposure Times for Chemiluminescent Images In general, a 2x2 binning level produces images that are relatively higher in resolution, lower in sensitivity, and require longer exposure times. An 8x8 binning level produces images that are relatively lower in resolution and, generally, higher in sensitivity (faint bands are optimized), and are acquired in shorter exposure times.
-
Page 56: Specifying The Region Of Interest For Auto Exposure
Note: Opening the door at any time during this process returns the imager to Live View. Close the door and repeat the procedure that follows to return to a preview of the image. 54 | ChemiDoc Touch Imaging System... - Page 57 About Exposure Times for Chemiluminescent Images To specify the region of interest in a chemiluminescent image In Live View, tap EXPOSURE. Tap Show Preview. The imager generates a low-resolution image of the blot. A red rectangle surrounds the preview image. Move the rectangle to specify the area of interest: To resize the rectangle, touch and drag any of its corners.
-
Page 58: Setting The Exposure Time For A Chemiluminescent Image
To set the exposure for a chemiluminescent image automatically In Live View, tap EXPOSURE. Default exposure settings appear on the Auto tab. Review the recommended setting on the Image Resolution/Sensitivity scale and change the setting if necessary. 56 | ChemiDoc Touch Imaging System... - Page 59 Tap one of the following: Optimal Auto-exposure for an image that uses the full dynamic range but does not exceed saturation. ChemiDoc Touch optimizes the image for the brightest region within the selected area. Rapid Auto-exposure for an image that is usable but that might not detect fainter bands.
-
Page 60: Setting The Exposure Manually
In Live View, tap EXPOSURE. Tap Manual. Review the recommended setting on the Image Resolution/Sensitivity scale and change the setting if necessary. Tap Set Manual Exposure Time. Tap the sec (seconds) box to display the keypad. 58 | ChemiDoc Touch Imaging System... -
Page 61: Signal Accumulation Mode
Signal Accumulation Mode Enter the exposure time in seconds. Note: You can use the exposure time from a Rapid Auto-exposure image to estimate this exposure time. Tap Done. For more information, see The Image Resolution/Sensitivity Scale on page Signal Accumulation Mode Signal Accumulation Mode (SAM) makes it easier to acquire high-quality chemiluminescent images. -
Page 62: Configuring Signal Accumulation Mode
Note: When you take a series of SAM images, the main door must remain closed until all images are acquired. If the door opens during the acquisition process, an error 60 | ChemiDoc Touch Imaging System... - Page 63 Acquiring Images message appears and the acquisition is canceled. Only images acquired before the door opened are saved. To acquire the chemiluminescent image Tap the Camera icon. A progress bar monitors the image acquisition. When the image is acquired, it appears in Image View.
-
Page 64: Workflow For Acquiring Gel And Blot Images
The settings persist until you change them. The basic steps to acquiring a gel or blot image are Specify the size of the image. Choose the application type. 62 | ChemiDoc Touch Imaging System... -
Page 65: Specifying The Image Size
To specify the image size for a gel or blot image In Live View, tap IMAGE SIZE. To choose a standard size, tap Small, Medium, or Large. The preset sizes correspond to these Bio-Rad gels: Small — Mini-PROTEAN® Medium — Criterion™... -
Page 66: Setting The Exposure Time
5 min — use this setting to detect proteins in low concentrations. This duration provides an optimal signal-to-noise ratio because the gel activation is close to completion at the end of 5 minutes. Tap Set Exposure Automatically to have the software determine the exposure time. 64 | ChemiDoc Touch Imaging System... -
Page 67: Acquiring An Image
Acquiring an Image Choose the bands you want optimized in the image and tap Intense Bands or Faint Bands. Note: To set a specific exposure time, tap Set Manual Exposure Time and enter the time in the text box. Acquiring an Image After you specify the settings for the image, you can acquire the image. -
Page 68: Deleting Images
You can discard unnecessary images as they are acquired. To delete an image in Image View In Image View, tap Delete. The software prompts you to confirm the deletion. Tap OK to delete the image. 66 | ChemiDoc Touch Imaging System... -
Page 69: Chapter 4 Viewing Images
Chapter 4 Viewing Images You can view images in Image View or the Gallery. In Image View you can view an image several ways. The Gallery is a view of all images acquired using the ChemiDoc™ Touch imager. The images are displayed as thumbnails organized by the date they were acquired, with the most recent acquisition date shown first. - Page 70 The image name appears below each thumbnail image. By default, each name consists of the date and time of acquisition, for example: 2014-02-18 18hr 30min 51sec.scn. You can change the default name in the Image Info box. For more information, see Renaming Images on page 68 | ChemiDoc Touch Imaging System...
-
Page 71: About Image View
About Image View To open an image in the Gallery Double-tap a thumbnail image. The image opens in Image View. About Image View In Image View, you can do the following: Focus on a smaller area by zooming in or focus on a larger area by zooming out. Pan across the image from left to right or up and down. -
Page 72: About The Gallery
Deleting Images on page Export the images to a USB flash drive or to a network drive. See Chapter 6, Exporting Images. Merge two images. See About Merging Images on page 80 Merging Images on page 70 | ChemiDoc Touch Imaging System... -
Page 73: Viewing Images In Image View
Viewing Images in Image View Viewing Images in Image View When you acquire an image of a gel or blot in Live View, the image appears in Image View at full size. In the Gallery, you can select and open up to four images at a time. The images open in Image View. -
Page 74: Selecting And Opening Images In The Gallery
To select images in the Gallery Do one of the following: To select an image and view it at full size, tap a thumbnail. To select all images taken on one date, tap a date checkbox. 72 | ChemiDoc Touch Imaging System... - Page 75 Viewing Images in Image View To select all images in the Gallery, tap the Select All checkbox. Tip: To enlarge images in the Gallery, tap the plus (+) zoom icon. User Guide | 73...
- Page 76 Chapter 4 Viewing Images To open 1–4 images in the Gallery Select 1–4 images and tap View x Selected Images (where x is the number of images). 74 | ChemiDoc Touch Imaging System...
-
Page 77: Adjusting How Images Are Displayed
Adjusting How Images Are Displayed Adjusting How Images Are Displayed Image Lab™ Touch software optimizes images based on the range of intensity levels in the image and the known behavior of the applications. Use this optimized image as a starting point. - Page 78 A value >1 redistributes a greater proportion of the gray scale to the second half of the intensity values. To change the histogram scale Open an image in Image View and tap Transform. Tap the Log Histogram box to choose the logarithmic scale. 76 | ChemiDoc Touch Imaging System...
- Page 79 Adjusting How Images Are Displayed Tip: The logarithmic histogram can reveal the presence of intensity values that are otherwise obscured. In images with a large background area, the intensity value of most of the pixels is that of the background. Often, there are too few pixels at the intensity values of the data peaks of interest to make these peaks readily visible in a linear histogram.
-
Page 80: Restoring Default Settings
You can adjust the light intensity range and grayscale settings to enhance the contrast in images that have faint bands. After changing the intensity and contrast, you can return to the default settings. To return to the default settings Tap Auto. 78 | ChemiDoc Touch Imaging System... -
Page 81: Checking Intensity Values
Checking Intensity Values Checking Intensity Values You can check intensity values by tapping the image area of interest. X and Y coordinates identify the location. The value is the average intensity of the pixels in a 3 x 3 pixel area. When you zoom in to an area of the image, you can check intensity values to identify the size of the image detail and its location in the overall image. -
Page 82: About Merging Images
1x1 binning setting and another image with any binning setting. However, you cannot merge two images with any other combinations of binning settings. For more information about binning, see The Image Resolution/Sensitivity Scale on page 49 For more information, see Merging Images on page 80 | ChemiDoc Touch Imaging System... -
Page 83: Comparing Images
Comparing Images Comparing Images You can open and compare up to four images of a gel or blot at a time in the Gallery. The selected images appear in Image View. Each image is labeled with its name. A blue border surrounds the currently selected image. - Page 84 In Image View, select the image whose zoom settings you want to copy. Tap Copy Zoom on the right side of the screen. The pan and zoom settings of the selected image are copied to the other images. 82 | ChemiDoc Touch Imaging System...
- Page 85 Comparing Images To copy transform settings to the other images In the Gallery, select the image whose transform settings you want to copy. Select 1–3 other images to which you want to copy transform settings. Tap View x Selected Images where x is the number of images selected. In Image View, select the image whose transform settings you want to copy.
-
Page 86: Searching For Images In The Gallery
The printer is connected to the imager and is turned on. The page orientation is set to Landscape. To print an image Acquire an image or open an image in the Gallery. Tap Print. 84 | ChemiDoc Touch Imaging System... -
Page 87: Merging Images
Merging Images Merging Images A merged image consists of two images of the same sample combined into a single image. You can merge two images in the Gallery or in Image View. Tip: You can select up to four images in the Gallery, switch to Image View, closely compare them, and then choose two for merging. -
Page 88: Naming Merged Images
The system stores the name of the merged image and the two source images. To view the names of the source images In Image View, open the Image Info box for the merged image. To rename the merged image, see Renaming Images on page 86 | ChemiDoc Touch Imaging System... -
Page 89: Renaming Images
Renaming Images Renaming Images When you acquire an image, the system assigns it a default name. An image name can consist of 190 alphanumeric characters. Spaces are permitted except at the beginning and end. The following characters cannot be used: \ / : * ? “... -
Page 90: Deleting Images
Tap the checkbox for one or more days to select all thumbnails for those days. Tap Select All to select all thumbnails in the Gallery. Tap Delete. The Delete Image prompt appears. Tap OK to delete the selected images. 88 | ChemiDoc Touch Imaging System... -
Page 91: Viewing Image Information
Viewing Image Information To delete an image in Image View Do one of the following: If one image is open in Image View, tap Delete. If more than one image appears in Image View, select the image you want to delete and tap Delete. -
Page 92: Adding Notes To An Image
In Image View, tap Image Info. In the Image Info dialog box, tap the Notes box. A keyboard appears. Type your information. Tap OK to save the information and close the keyboard. Tap X to close the dialog box. 90 | ChemiDoc Touch Imaging System... -
Page 93: Chapter 5 Excising Bands
Chapter 5 Excising Bands Excising Bands from Samples You can excise bands of interest from agarose or acrylamide gels for applications such as mass spectrometry or DNA cloning. The procedure for excising bands varies depending on the sample tray you use. To excise bands on a white or blue tray, see Excising Bands on a White or Blue Tray on page Excising Bands on a Chemi/UV/Stain-Free Tray... - Page 94 To install the UV shield Open the imager front door and pull out the transilluminator drawer. Place a UV tray on the transilluminator drawer. Hold the UV shield by diagonal corners so you can guide it accurately. 92 | ChemiDoc Touch Imaging System...
- Page 95 Excising Bands from Samples Insert the two locking tabs that extend from the front of the UV shield into the two slots on the front of the transilluminator drawer. User Guide | 93...
- Page 96 Chapter 5 Excising Bands Ensure that the two wedges on the front of the UV shield snap into position on the transilluminator handle. The installed UV shield should look like this: 94 | ChemiDoc Touch Imaging System...
- Page 97 Excising Bands from Samples Important: Before you begin excising bands, you must put on the required protective gear and ensure that the UV shield is installed. The UV lights turn off after 15 minutes of continuous use. To turn the UV lights back on, tap Turn Transilluminator On.
- Page 98 When you finish excising the bands, tap Turn Transilluminator Off to turn off the UV lamps. Close the UV shield. Remove the UV shield, remove the sample tray, slide in the transilluminator drawer, and close the main door. 96 | ChemiDoc Touch Imaging System...
-
Page 99: Excising Bands On A White Or Blue Tray
Excising Bands from Samples Excising Bands on a White or Blue Tray Working with white and blue trays does not require using the UV shield or wearing protective gear. However, you must wear yellow XcitaBlue™ goggles to see bands on a blue tray. - Page 100 Chapter 5 Excising Bands 98 | ChemiDoc Touch Imaging System...
-
Page 101: Chapter 6 Exporting Images
Image Lab™ software and use Image Lab features to analyze them. For more information about image analysis, see the Image Lab Software User Guide. You can export images from the ChemiDoc Touch imaging system to one of the following: Flash drive or external hard drive... -
Page 102: Exporting To A Usb Flash Drive Or External Hard Drive
Has no encryption software or other software add-ons on the drive Image Lab Touch exports images to a folder created on the flash drive or external hard drive with the name Chemidoc Touch Images followed by a time stamp of the image export, for example, Chemidoc Touch Images 2015-04-29_19.08.51. -
Page 103: Exporting To A Shared Folder
Shared Folder on page 117. To export images to a shared folder Verify that the ChemiDoc Touch imager is connected via an Ethernet cable to a network outlet or to a stand-alone computer. Do one of the following: Select the images you want to export in the Gallery. - Page 104 Mac: /<IP address>/<file_path_to_shared_folder> Example /22.231.113.64/Team/Alpha/Share (Optional) Delete a network location by tapping a location and then tapping Remove. Tap Save. If a log-in dialog box appears, enter the log-in credentials to the shared folder. 102 | ChemiDoc Touch Imaging System...
-
Page 105: Disconnecting From A Shared Folder
10. When the export is complete, tap OK. Image Lab Touch exports the images to a folder at the top level of the specified location with the name Chemidoc Touch Images followed by a time stamp of the image export, for example, Chemidoc Touch Images 2015-04-29_19.08.51. - Page 106 Chapter 6 Exporting Images 104 | ChemiDoc Touch Imaging System...
-
Page 107: Appendix A Maintaining The Imaging System
Appendix A Maintaining the Imaging System Updating Image Lab Touch Software Updates of Image Lab™ Touch software are delivered on a USB flash drive. Before you start the update, complete any image acquisitions or image exports in progress. Important: Start Image Lab Touch software before you insert the USB flash drive into the USB port. -
Page 108: About The Uv Transilluminator Bulbs
The six bulbs are organized into three groups of two and are identified as Bank 1, Bank 2, and Bank 3. When a transilluminator bulb fails, an error message identifies the failed bank of bulbs. 106 | ChemiDoc Touch Imaging System... -
Page 109: Replacing The Uv Transilluminator Bulbs
Replacing the UV Transilluminator Bulbs Replacing the UV Transilluminator Bulbs One or more transilluminator bulbs can fail at any time. Bio-Rad recommends that you replace all six bulbs, including those that still work. Replacing all bulbs at once ensures consistent light over the imaging stage. - Page 110 Note: Do not place the transilluminator cover directly on the bench. Place the cover on a nonabrasive surface to avoid scratching or damaging the UV filter glass. Important: Exercise caution when touching the lamps. They can be hot. 108 | ChemiDoc Touch Imaging System...
-
Page 111: Replacing The Fuses
Replacing the Fuses Rotate a lamp until it loosens and the pins are vertical and aligned with the socket. Remove the lamp. Install the new lamp by setting it in place and rotating it until the pins are seated and horizontal. - Page 112 Insert the tip of a screwdriver as far as it will go under the center of the fuse drawer. Tug hard on the screwdriver to open the fuse drawer. Remove the drawer from the power module. 110 | ChemiDoc Touch Imaging System...
- Page 113 Replacing the Fuses Remove the fuses from the drawer and inspect them to determine whether they should be replaced. User Guide | 111...
- Page 114 Appendix A Maintaining the Imaging System Snap new fuses into place. Push the fuse drawer in until it snaps into place. 112 | ChemiDoc Touch Imaging System...
-
Page 115: Appendix B Ordering Information
ChemiDoc Touch Trays 1708374 Chemi/UV/Stain-Free Tray 1708372 White Tray 1708373 Blue Tray Optional Accessories 1708375 ChemiDoc Touch UV Shield 1708377 Holder for Sample Trays and UV Shield 1708185 XcitaBlue Viewing Goggles 1708376 Gel Alignment Template Kit 1708089 Mitsubishi Printer, 100/240 V, USB... - Page 116 EZ Load 100 Base Pair PCR Molecular Ruler Protein Standards 1610373 Precision Plus Protein All Blue Standards 1610363 Precision Plus Protein Unstained Standards 1610385 Precision Plus Protein WesternC Pack Buffers 1610732 10x Tris/Glycine/SDS 1610747 4x Laemmli Sample Buffer Electrophoresis Cells 114 | ChemiDoc Touch Imaging System...
- Page 117 Catalog # Description 1656001 Criterion Cell, includes electrophoresis buffer tank, lid with power cables, 3 sample loading guides ® 1658004 Mini-PROTEAN Tetra Cell for Mini Precast Gels, 4-gel vertical electrophoresis system, includes electrode assembly, companion running module, tank, lid with power cables, mini cell buffer dam Blotting System ®...
- Page 118 Appendix B Ordering Information 116 | ChemiDoc Touch Imaging System...
-
Page 119: Appendix C Exporting To A Shared Folder
Appendix C Exporting to a Shared Folder To export images to a stand-alone computer you must have a shared folder set up on that computer. This appendix explains how to create the shared folder and obtain the UNC paths to the folder. Unix-based computers (Mac, Linux) use the SMB (Server Message Block) to communicate with the imager when sharing files. - Page 120 In the Sharing & Permissions box, verify that the user you want to share the folder with has permission to read and write to this folder. On the Apple menu, open System Preferences and select File Sharing. The Sharing dialog box appears. 118 | ChemiDoc Touch Imaging System...
- Page 121 Select File Sharing in the Service pane. Under File Sharing: On, find the SMB address and write it down. You will use the IP address when the imager prompts for a location before you export an image. See Exporting to a Shared Folder on page 101.
- Page 122 To create a shared folder on a Windows computer Log in as the Windows Administrator for the computer. Create a destination folder. Right-click the folder and select Properties in the menu that appears. Click Sharing. Click Share. 120 | ChemiDoc Touch Imaging System...
- Page 123 Choose users with whom you want to share the destination folder. Set Read/Write permissions for each user. Click Share and then click Done. User Guide | 121...
- Page 124 On the Sharing tab, the UNC path appears under Network Path. Write down this path. You will use this address when the imager prompts for a location before you export an image. See Exporting to a Shared Folder on page 101. 10. Click Close. 122 | ChemiDoc Touch Imaging System...
- Page 126 Bio-Rad Laboratories, Inc. Web site www.bio-rad.com USA 800 424 6723 Australia 61 2 9914 2800 Austria 43 1 877 89 01 Life Science Belgium 03 710 53 00 Brazil 55 11 3065 7550 Canada 905 364 3435 China 86 21 6169 8500...
Need help?
Do you have a question about the ChemiDoc Touch and is the answer not in the manual?
Questions and answers