
Related Manuals for Puqpress M2


Summary of Contents for Puqpress M2
- Page 1 Precision coffee tamper Precision coffee tamper an a e ien n san eit n version 1.0.1 Zur gewerblichen Verwendung...
- Page 2 Please investigate this manual closely so you and your customers will enjoy the Puqpress to the fullest and store the manual away safely after reading. If anything remains unclear please feel free to contact your authorized dealer or contact us directly.
-
Page 3: Table Of Contents
Precision coffee tamper Table of content Safety Safety instructions Personel requirements Technical data Description Set-up and basic adjustment Adjustment of port-a-filter clamp Usage location Set-up with Mythos Electrical Installation Operation Normal operation of the tamper Tamping force adjustment Clean modus Remove tamper disk Operating faults Service... -
Page 4: Safety
1. Safety Read all instructions and information in this manual and other literature that might be included in the package before the coffee tamp device is used. 1.1 Safety instructions 1. The appliance is not to be used by persons (including children) with reduced physical, sensory or mental capabilities, or lack of experience and knowledge, unless they have been given supervision or instruction 2. -
Page 5: Personel Requirements
Precision coffee tamper 1.2 Personnel requirements No special requirements are necessary for the users of this tamper. Nevertheless it is a prerequisite that these operating instructions have been carefully read and understood and that all instructions provided are observed. In addition, safety-conscious operation is expected. - Page 6 Main Body Upper clamp Lower clamp Bolts to fasten lower clamp...
-
Page 7: Set-Up And Basic Adjustment
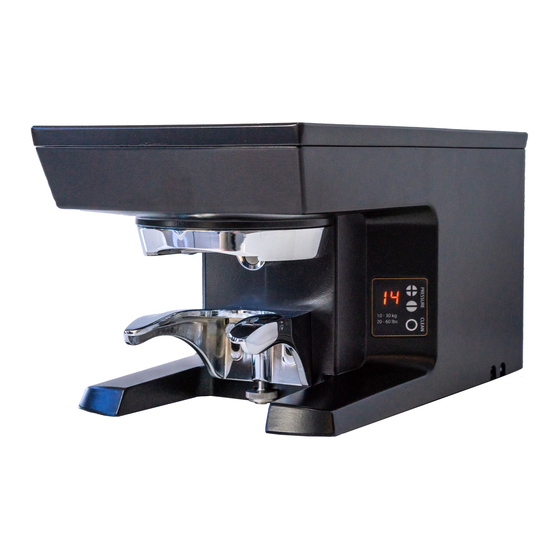
Precision coffee tamper Display Fine adjustment wheel ON/OFF switch Bottom side: power entry tag label Set-up and basic adjustment You have received your tamper in operating condition. Now you only need to adjust the port-a-filter clamp, connect the tamper to the power grid and insert drip tray. - Page 8 2. Slightly loosen the bolts (pos. 5) with the provided T-wrench and pull down the portafilter clamp. 3. Insert the portafilter in between the upper- and lower clamp. Turn the adjustment wheel counter-clockwise to move the lower clamp up against the portafilter. 4.
-
Page 9: Usage Location
Precision coffee tamper 5. Remove the port-a-filter and fasten the screws firmly. 6. Try to insert the portafilter in the clamp and check if the port-a- filter slides in the clamp easily. If the adjustment of the clamp is too loose, start again at step 2. 7. - Page 10 1. Carefully slide the back of Puqpress M2 over the edge of the table or bar where you want to use your set-up. Insert the power cord in the socket at the bottom inside of the tamper. 2. While lifting the Mythos to place on Puqpress M2, guide the...
- Page 11 Precision coffee tamper 3. Choose 1 of 3 directions to guide both cables out and press each cable into the cable-guide, behind the clips. 4. Slide the set-up back onto the bar or table and make sure it’s standing level.
-
Page 12: Electrical Installation
4.4 Electrical installation A damaged power cable must be replaced immediately. Let the defective cords and plugs be replaced immediately at a customer service repair facility or your dealer. 1. Insert the power cord in the socket at the bottom inside of the tamper. -
Page 13: Clean Modus
Precision coffee tamper Force setting ‘up’ Force setting ‘down’ 5.3 Clean modus It is important to clean your tamper disk regularly. Use a brush to clean it. Do not use your fingers / hands. For cleaning the tamper disk proceed the following: 1. -
Page 14: Remove Tamper Disk
6 Remove tamper disk 1. Put the unit in ‘cleaning’ mode: tamper disk goes down in lowest position. 2. Turn the Mythos 90 degrees and get the Allen key. 3. Unscrew by turning counter-clockwise and remove the bolt. (M5x50mm) - Page 15 Precision coffee tamper 4. Unscrew the tamper disk. NOTE: this is left-handed thread! See direction to remove below:...
-
Page 16: Operating Faults
7 Operating faults Defect Cause Remedy Ground coffee sticks The tamper disk is Use the clean to the tamper disk. greasy or dirty. modus and clean the tamper disk. The tamper disk is Use the clean wet. modus and dry the tamper disk. -
Page 17: Service
Precision coffee tamper In the case of other malfunctions or continued faults, please contact your dealer or your authorised customer service centre. 8 Service Always pull out the main plug from the socket before carrying out maintenance or cleaning work on the tamper! Any required repairs may only be conducted by authorized specialist personnel. -
Page 18: Warranty Conditions
10 Warranty Conditions 1. The warranty period is 1 year from the date of purchase. 2. The warranty covers all damages that can be attributed to inferior materials or defective workmanship. The corresponding tamper will be repaired or replaced free-of-charge, with the exception of transport or freight charges. - Page 19 Precision coffee tamper...
Need help?
Do you have a question about the M2 and is the answer not in the manual?
Questions and answers