
Summary of Contents for Skutt KilnMaster LT
- Page 1 KilnMaster LT Models FireBox8x6 LT, FireBox 8x4 LT and GlazeTech operating manual 6441 se Johnson creek Blvd. Portland, or 97206 (503) 774--6000 skutt.com www.skutt.com rev. 01/07/15...
-
Page 2: Table Of Contents
afety What’s Inside Safety........2-3 Advanced Programming.......17 Getting Started......4-5 Display Messages........18-19 Programming Overview....6-7 Troubleshooting........20-21 Cone Fire Mode.......8-9 Programs..........22 Glass Fire Mode......10-11 Wiring Diagram........23 PMC........12-13 Program Notes........24 Ramp/Hold......14-16 Be Safe Tens of thousands of kilns are used safely in homes, schools, and professional studios throughout the world. With a good understanding of your kiln and a little common sense you can avoid any accidents. -
Page 3: Safety
• always unplug the kiln before performing any repairs or general maintenance. • use only skutt replacement parts. Improperly sourced parts may pose a hazard to you and your kiln and void your warranty. • never modify your kiln without first consulting skutt. Improper modifications may pose a hazard to you and your kiln and void your warranty. - Page 4 Minor imperfections in the brick are normal and expected, large cracks and broken out chunks are not. If you notice damage to your kiln or any missing items call Skutt at (503) 774-6000 .
-
Page 5: Getting Started
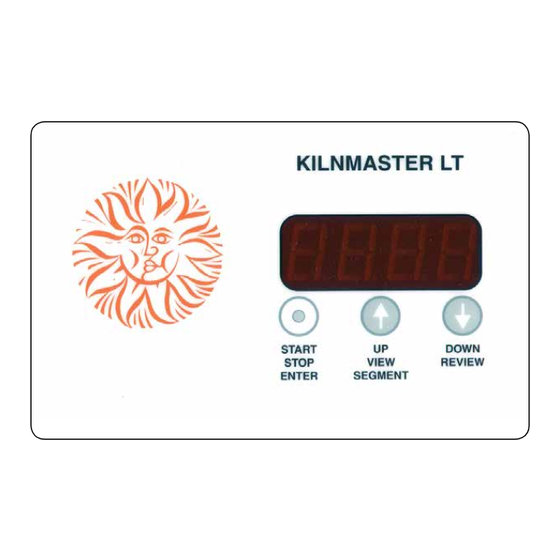
If your cones do not fall within this range chances are your kiln just needs a slight adjustment. Contact a Skutt Technician at (503) 774-6000. To purchase cones when needed go to www.kilnarts.org and find a dealer near you. - Page 6 Programming Modes Your kiln is equipped with the KilnMaster LT Controller, one of the most advanced 3 Button Controllers in the industry. As you can see in the diagram below it offers you 4 different programming modes and an option to change the temperature scale to either Celsius or Fahrenheit.
- Page 7 roGramminG verview Button Descriptions The Start/Stop/Enter key is used for exactly those purposes. Use it to “Start” programming your kiln or to “Start” a firing. If the kiln is firing and you need to shut it down, use it to “Stop” the firing. Lastly it is used to “Enter” a selection. Use the Up or Down buttons to scroll through menu options or scroll to a time or temperature value. In certain controller modes they can also serve a single function action or provide access to a sub-menu.
- Page 8 Overview Cone Fire Mode was developed by Ceramic Engineers to provide artists with an easier way to fire their kiln. In the past artists had to use Pyrometric Cones. Pyrometric Cones are pyramid shaped clay formulations which were designed to bend when they received the appropriate amount of heatwork for the clay or glaze inside the kiln. The artist would look into the kiln through peep holes and when the cone softened and bent, they would shut off the kiln.
-
Page 9: Cone Fire Mode
Entering Firing Speed With Ceramics there are certain critical temperature ranges where it is important to slow down the firing rate. Cone Fire Mode takes care of most of this for you. All you have to do is select one of three firing speeds; Slow, Medium or Fast. From Idle Slow is generally for your bisque firing (clay is dried but has not yet been Press enter fired). Medium is recommended for your glaze firing. All the water should be completely out of the piece and most of the organics have burned out so you can fire a bit faster. If you have an unusually large or thick piece you may want stick with Slow just to be safe. Fast is only recommended for Decals and Lusters. -
Page 10: Glass Fire Mode
Overview Glass Fire Mode was developed by Skutt in order to provide glass artists with a simple way to fire their glass projects without having to be an expert in programming. The built-in programs were designed by glass artist Gil Reynolds to work with the two most popular types of fusible glass, COE 90 and COE 96. - Page 11 laSS Process From idle Press enter Process refers to what you want to do with the glass; Slump, Tac Fuse or Full Fuse Slumping slumping is when you place glass over or into a mold (specifically designed for slumping) and heat the glass until it becomes soft enough to conform to the use arrow keys to select shape of the mold.
- Page 12 PmC m Overview PMC or Precious Metal Clay was developed in 1990 in Japan. It is made of fine particles of precious metal which are mixed with organic binders to form a clay like substance that can be molded into jewelry. Once you have the shape you want, you place it in the kiln and fire it until the binder burns out and the particles sinter together. The result is a nearly pure metal object. The most common versions shrink about 12% to 15% from their original form and are composed of Silver or Gold.
-
Page 13: Pmc
PmC m From Idle Press enter use arrow keys to select Glas Press enter use arrow keys to select slo, med, or Fast Press enter use arrow keys to select slP, tac or Full Press enter use arrow keys to adjust Peak temperature if desired Press enter... - Page 14 Overview Ramp and Hold is a programming mode that allows you to write your own firing programs. It is used when you are firing something that requires programs different from the factory programs found in ConeFire, Glass Fire or PMC Programming Modes. Whenever possible we suggest you use the built in firing modes but if you want to do something different like growing Crystals in a ceramic glaze, casting thick pieces of glass, or tempering custom made tools, you will need to use Ramp and Hold Mode. Before you get started it is a good idea to know a little about firing pro- grams. A firing program consists of a series of one or more segments that are strung together to form the program. A segment consists of a Firing rate (expressed in degrees per hour), a temperature that you are trying to reach at that rate, and an amount of time you want to hold at that tem- perature.
-
Page 15: Ramp/Hold
Ramp/Hold Programming 1. Start with the display reading IdLE, Press ENTER. 2. If “r-Hd” is displayed, press ENTER, else press an Arrow Key to display “r-Hd” and then press ENTER. 3. Display will read “LoAd”. Press ENTER to run a previously stored program (See Load Stored Program be- low) else press Arrow Key to toggle to “Pro”... - Page 16 Form IdLE Press ENTER Use Arrow Keys to select r-Hd To Write a To Load a Press ENTER New Program Stored Program From Use Arrow Keys to LoAd toggle from LoAd Press ENTER to Pro Use Arrows to toggle to desired Press ENTER program # Press ENTER...
-
Page 17: Advanced Programming
dvanCed roGramminG There are a few advanced programming features we have left out of the main programming instructions in order to help simplify them. Most kiln users will not need or use these features however if you find them useful we have listed them below. Change Temperature Scale Change temperature scale by pressing ENTER from iDLE and using the Arrow Keys to togle to CHG° and press ENTER. - Page 18 iSPlay eSSaGeS Display Messages Because we are working with an LED display with limited characters, some of the messages displayed can look a little cryptic. Hopefully this section will help explain some of the messages you are seeing. C-Fr - Indicates that if you press ENTER you will begin programming a Cone Fire Mode program. Press ENTER to select it or use the Arrow Keys to scroll to another selection.
-
Page 19: Display Messages
iSPlay eSSaGeS P3-S - Indicates the controller is in PMC Mode and it is asking if you would like to run a PMC3 Slow program. Press ENTER to select it or press an arrow key to scroll to another selection. GLdF - Indicates the controller is in PMC Mode and it is asking if you would like to run a PMC Gold Fast program. -
Page 20: Troubleshooting
Solid State relay needs to be replaced. Errr - This one is very rare. Call a Skutt technician for more information. Stuc - This error is triggered when a key is held depressed for too long and usually indicates the key is stuck. - Page 21 Once you have completed your test fire and find that the kiln is over firing, the next step is to replace your thermocouple. Thermocouples will begin to slowly drift towards an over fire after a certain number of firings. This number will vary depending on how hot you are firing your kiln and the amount of contaminants it is exposed to. You can purchase a replacement thermocouple from your local distributor or directly from Skutt. There are many different types and shapes of thermocouples so be sure to order one for your specific model. Instructions for replacing a thermocouple can be found on our website in the video section at www.skutt.com. Once you have replaced the thermocouple you will want to do another test fire. If you find the kiln is still over firing call a Skutt Technician for further troubleshooting.
- Page 22 roGramS Cone Fire Mode Programs Fast ramP rateº/hr temPerature hold Preheat 1050 ct - 256 hold note ct = cone temPerature medIum ramP rateº/hr temPerature hold Preheat 1050 00.10 ct - 256 hold note ct = cone temPerature slow ramP rateº/hr temPerature hold Preheat...
-
Page 23: Wiring Diagram
irinG iaGram Wiring Diagram Automatic Kiln Models: Models: Yellow FireBox 8x6 LT FireBox 8x4 LT 1-Phase Transformer Solid State Safety Relay Relay T/C Wire Terminal Block MWS 4/17/13 Wiring Diagram KM 3-Button Controller Automatic Kiln Models: Yellow Safety Control GlazeTech Center 200 - 240V 1-PH (optional) - Page 24 ProGram 2 seGment rate temP hold notes ProGram 3 seGment rate temP hold notes ProGram 4 seGment rate temP hold notes ProGram 5 seGment rate temP hold notes 6441 SE Johnson Creek Blvd., Portland, OR 97206 (503) 774-6000 skutt@skutt.com...
Need help?
Do you have a question about the KilnMaster LT and is the answer not in the manual?
Questions and answers