Table of Contents
Advertisement
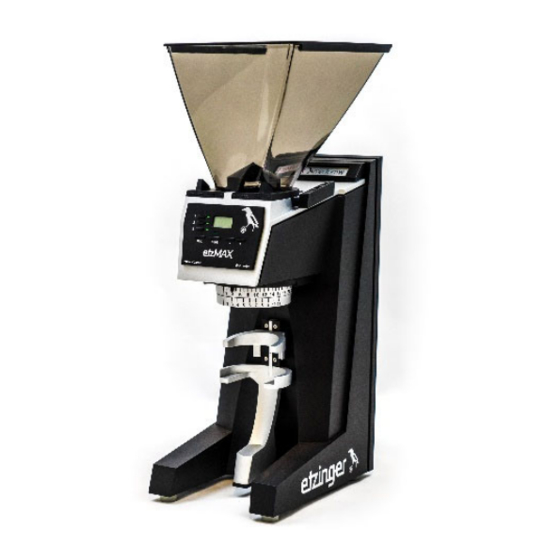
etzMAX‐light/m/plus
Coffee Grinder with Conical
Burrs for commercial use
Congratulations on the purchase of your
new ON‐DEMAND "etzMAX" espresso
grinder!
The etzMAX is one of the
fastest and most precise espresso grinders
on the market.
The team at "Etzinger" would like to wish you happy coffee grinding with your new
"etzMAX"!
_______________________________________________________________________________________
INTRODUCTION
Before operating the device (referred to in these operating instructions as the "coffee grinder",
"grinder", or "device"), please read the operating instructions and safety information carefully.
Keep the operating instructions in an easily accessible location so that you and anyone else who
wishes to use the device has access to them.
Persons who operate the device must have been properly instructed beforehand. Any use not as
intended or failure to observe the safety information can lead to damage to the device and/or
hazards to the health of the operator. Do not make any modifications to the device. Neither the
manufacturer nor the dealer shall be liable for any injury or damage sustained due to failure to
observe the safety information. This Operating Manual is based on EU‐norms and regulations.
The espresso grinder is only designed for the grinding of full coffee beans.
In the event of queries and/or for further information concerning this device, please contact the
manufacturer or your dealer.
For further information, please visit www.etzinger‐ag.com or contact us directly (+423 375
8383/support@etzinger‐ag.com)
ETZINGER AG, Wirtschaftspark 44, FL‐9492 ESCHEN
[1]
Advertisement
Table of Contents
Troubleshooting

Related Manuals for Etzinger etzMAX-m


Summary of Contents for Etzinger etzMAX-m
- Page 1 The etzMAX is one of the fastest and most precise espresso grinders on the market. The team at “Etzinger” would like to wish you happy coffee grinding with your new “etzMAX”! _______________________________________________________________________________________ INTRODUCTION Before operating the device (referred to in these operating instructions as the “coffee grinder”, “grinder”, or “device”), please read the operating instructions and safety information carefully. ...
-
Page 2: Table Of Contents
TABLE OF CONTENTS 1. Safety 3 1.1. Symbols Used 3 1.2. Important Information/Notes 3 1.3. Safety Information ... -
Page 3: Safety
1. SAFETY The device has been constructed in accordance with the state of the art. There are, however, residual risks. To avoid hazards, please observe the following information. 1.1. Symbols WARNING ‐ SAFETY INFORMATION: Failure to observe poses an extreme risk of accident! ATTENTION! Important INFORMATION: Failure to observe may result in damage to the device or impair its operation. NOTE: General information and tips on operating the coffee grinder. 1.2. Important Information/Notes ATTENTION! Important Information 1.2.1. The coffee grinder may only be used for its intended purpose, i.e., the grinding of roasted, unground coffee beans. We shall accept no liability for damage, injury, or warranty services resulting from improper operation, use, and/or repair or maintenance (see also 2. Intended Use). 1.2.2. In addition to applying general common sense, the user must observe national safety regulations as applicable and ensure that maintenance work is carried out at regular intervals and whenever necessary. 1.2.3. The user and specialist personnel carrying out installation, maintenance, or repair are obliged to report any damage or faults that could impair the safety of the device to the manufacturer. 1.2.4. Disconnect the device from the power supply if it is to be left for an extended period unsupervised. 1.2.5. Inproper use and/or incorrect handling of the grinder can lead to injury. General Information and Notes ... -
Page 4: Safety Information
1.2.8. Liability for persons entrusted with operation of the coffee grinder shall be borne by the customer. 1.3. Safety Information (Warning) Shock hazard 1.3.1. Always remove the mains plug from the socket before disassembling the coffee grinder and/or carrying out maintenance or repair work. 1.3.2. Improper use, improper electrical installation, or too high an electrical voltage can lead to electric shock. 1.3.3. Use only alternating current (AC) and the correct voltage. After unpacking, check that the mains voltage and device voltage on the type plate are consistent. 1.3.4. Ensure that a ground conductor is used. Ensure that the electrical system is consistent with the regulations applicable in the country in which the coffee grinder is installed and operated. 1.3.5. Check the coffee grinder at regular intervals for damage to the power cable, plug, etc. Do not use a device and/or coffee grinder if the power cable or plug are damaged. 1.3.6. Connect the coffee grinder to an easily accessible socket so that it can be quickly disconnected from the mains in the event of an emergency. 1.3.7. Clean the grinder housing with a dry or slightly moist cloth only. Never immerse the coffee grinder, plug, or cable in water or other liquids. Never clean the grinder using a water jet and/or compressed air. Never operate the coffee grinder barefooted or with wet hands. Risk of injury and damage 1.3.8. Never expose the coffee grinder to extreme weather (sun, rain, snow, etc.) The coffee grinder must not be used under extreme ambient conditions and never outside of the specified temperature range (‐5 degrees Celsius to +40 degrees Celsius). 1.3.9. Install the coffee grinder and cable outside of the reach of children under the age of 8, persons with limited physical, mental and/or sensor capacity, and animals. ... -
Page 5: Safety Equipment On The Coffee Grinder
1.3.12. Install the coffee grinder only in locations where its operation can be supervised by trained persons. 1.3.13. Route the mains cable such that it does NOT become a trip hazard. 1.3.14. Do not kink the mains cable or route it over sharp edges. 1.3.15. Carry out replacement of listed components (also see 6.1.) as described in the respective instruction sheets, following the instructions carefully. In the event of uncertainty, contact the manufacturer or your dealer. 1.3.16. Repair other than the replacement of the listed components (see 6.1.) may only be carried out by authorized specialist personnel. Liability and guarantee claims shall be excluded in the event of own repairs, improper connection, and improper operation. In the event of damage to the power cable, it must be replaced by the manufacturer, dealer, or appropriately qualified specialist personnel. 1.3.17. The coffee grinder may only be used indoors and never in humid rooms and/or the rain. 1.3.18. Improper and negligent handling of packaging elements with sharp edges can lead to injury and may be hazardous. Store packaging elements out of the reach of children and persons with limited physical, mental, and/or sensory capacity. 1.3.19. Never use inappropriate objects (cutlery, scissors, needles, etc.) to clean the coffee grinder or remove coffee beans/grounds. 1.3.20. Make sure not to have children playing with the grinder, its parts or packaging. Children can become entangled or suffocate while playing. 1.3.21. Make sure to install the grinder on an even and stable surface to prevent it from falling off. 1.4. Safety Equipment on the Coffee Grinder 1.4.1. Machine Safety switch This coffee grinder has one safety switch. In the event that power consumption is too high, the safety switch will trigger and interrupt the circuit. To rectify the fault, the cause of the excessive power consumption must be identified (see 6.2.2.). Following rectification: Depress the switch, which is located on the base of the grinder (from OFF to ON), to reestablish the circuit (also see 6.2.4.). 1.4.2. Heat detector The detector attached to the motor will trigger as soon as the temperature of the motor exceeds 70 ... -
Page 6: Intended Use
2. INTENDED USE The etzMAX coffee grinder has been designed for commercial use by specialist personnel and only for the grinding of roasted, unground coffee beans. It may only be used for this purpose. Do not use the grinder to grind other foods (than coffee beans) or materials. 3. TECHNICAL SPECIFICATIONS, COMPONENTS, and DESCRIPTION 3.1. Technical Specifications [6] ... - Page 7 Only W-Versions / Nur W-Versionen Single Dosing* / Einzeldosierung * Yes / Ja *M/Plus: for Single-Dosing we recommend to use our LIGHT-cone / M/Plus: für Einzeldosierungen empfehlen wir den Einsatz unseres LIGHT-Kegels ETZINGER AG Technische Änderungen vorbehalten Wirtschaftspark 44 01.03.19...
-
Page 8: Delivery Contents
3.2. Delivery Contents Coffee Grinder Bean Hopper (1000g), Bean Hopper (200g) optional Portafilter Holder Bottle Brush Cleaning Brush Shims (0.1mm and 0.2mm, also see 4.5.3.) Additional Light‐cone (only M/plus‐versions) 3.3. Components and Description DEUTSCH ENGLISH 1 Trichterdeckel Hopper Lid 2 Bohnentrichter Bean Hopper 3 Verschluss Gehäusedeckel Lock Cover Lid 4 Gehäusedeckel Cover Lid 5 Verschlusshebel Rechts Locking Lever Right 6 ... -
Page 10: Operation
4. OPERATION 4.1. Before Operation Read the operating instructions and general information and safety information carefully. Take care not to damage the coffee grinder when opening the packaging. Proceed with caution and avoid the use of sharp objects. Carefully remove the coffee grinder from the packaging and check that the delivery is complete (see 3.2.). Check the coffee grinder and/or individual parts for damage. Do not use the coffee grinder if there are signs of damage. In that case, contact the manufacturer or your dealer. Keep packaging material out of the reach of children and ensure that it is properly disposed of. Before initial installation, clean the housing and portafilter holder with a soft, slightly damp cloth. Clean the bean hopper with clean water and allow all parts to dry thoroughly. 4.2. Initial Installation ATTENTION! Position the coffee grinder on a level, stable, and vibration‐free surface that is able to bear the weight of the grinder. Insert the plug into a properly fitted socket of the correct voltage. 4.2.1. Bean hopper Slide the lid of the bean hopper from the back or front onto the bean hopper so that OPEN is at the 6 o’ clock position and CLOSE at the 12 o’ clock position. Installing Bean Hopper Turn the two locking levers (5, 7) on the left and right of the hopper holder (6) rearwards in the OPEN arrow direction as far as they will go (Fig. 1). Fig. 1 [10] ... - Page 11 Position the bean hopper with the bean blocker handle to the right on the intended opening (hopper holder, 6). Close the locking levers (5, 7) in the CLOSE arrow direction until they engage at the front in the locking block and turn the bean blocker handle 180° rearwards into the OPEN position (Fig. 2). The hopper can now be filled with beans. Close the lid by sliding it forwards. Fig. 2 For safety reasons, the grinder cannot be operated without bean hopper. 4.2.2. Portafilter holder (17) To adapt the portafilter holder to the size of the respective portafilter, use the index finger to press against the rear part of the upper holding arm (Fig. 3) while sliding the arm in position with the thumb ‐ upwards/downwards (Fig. 4). Fig. 3 Fig. 4 [11] ...
-
Page 12: Programming
Once you have adjusted the holder to the desired height, you can insert it on the center hook on the front of the grinder (18, Fig. 5) and slide it rearwards as far as it will go (Fig. 6). Fig. 5/Fig. 6 4.3. Programming 4.3.1. Button Programming (Time‐Based Grinding) The etzMAX user interface has three programmable buttons marked 1, 2, and 3 (Fig. 7). These buttons are solely for setting the grinding time in seconds. Factory setting LIGHT: 1= 4.3 seconds 2= 5.6 seconds 3= 7.0 seconds Factory setting M/PLUS: 1= 3.0 seconds 2= 3.5 seconds 3= 4.5 seconds The factory setting can be adjusted and/or programmed as follows: Select a PRESET button Press the + or ‐ button to set the grinding time (in seconds) As soon as you have reached the desired grinding time (in seconds), press and hold the selected PRESET button for approx. 3 seconds or until the display flashes. The setting is confirmed. Repeat steps 1 ‐ 3 to program the other buttons. 4.3.2. Button Programming (Weight‐Based Grinding ‐ W versions only) The etzMAX user interface has three programmable buttons marked 1, 2, and 3 (Fig. 7). These buttons are ... -
Page 13: Operating Time
Fig. 7 4.4. Operating Time The etzMAX has been designed as an ON‐DEMAND espresso coffee grinder for use in commercial environments (definite consumption depends on roast, setting, rush‐hour‐usage). Do NOT exceed the maximum permissible operating cycle. Maximum permissible operating cycle (based on tests with medium roast at setting 5): LIGHT/M: 16‐24g (1‐1.5 double‐shots) per minute (more/less depending on roast/setting/cone‐geometry) PLUS: 2 double‐shots à 18g per minute During high demand periods, it`s possible to do 3 shots/minute for a limited amount of time (depending on roast/setting/cone‐geomtry) ... -
Page 14: Grind Size Control
4.5. Grind Size Adjustment/Control (14) The etzMAX coffee grinder has two different setting options (macro/micro, Fig. 8) to determine the grind size. MACRO (28 steps/clicks from 1 ‐ 29) Zero line corresponds to Click 1 Pointer (13) = reference point Macro adjustment (15) (upper ring) MICRO (10 stepless settings from 1 ‐ 11) Zero line corresponds to setting 1 Click 1 on Marco = reference point Micro adjustment (16) (lower ring) Fig. 8 (Setting macro 1/micro 1 = zero line) Recommended grind size settings (ultimate setting is dependent on the roast and coffee type): Preparation type The higher settings are recommended for lighter roasts Ristretto macro 4‐8 micro 1 Espresso macro 6‐10 micro 1 Longhi ... - Page 15 The pointer/indicator (13) serves as a reference point for the macro‐adjust (Fig. 9‐11). 4.5.2. Micro‐adjust (16) Micro‐adjust has 10 stepless settings and allows even more precise grind size adjustment by turning the micro adjustment ring (16/lower ring) to the right (finer) or left (coarser). Fine/coarse setting on the micro adjustment ring (16) from 1 ‐ 11 or 11 ‐ 1 (change of distance between ring and cone burr = 0.01mm/setting) corresponds to one step on the macro adjustment ring (15). Step (Click) 1 on the macro adjustment ring (Fig. 9‐11) serves as a reference point for the micro‐adjust. Setting examples: Macro 6/Micro 1 Macro 3/Micro 4 Macro 4/Micro 3 Fig. 9 Fig. 10 Fig.11 ATTENTION ! Fine setting when the grinder is NOT running: max. 1 step on the macro ring (15) or max. 5 steps on the micro ring (16). Larger settings must be carried out with the grinder running. Please note that the etzMAX coffee grinder has been designed especially for grinding Espresso, where its best results will be achieved (setting 4‐12). ATTENTION! Failure to follow our recommendations and/or recommended settings (4‐12) can give rise to faster wear of the conical burrs, overheating and/or failure of the motor, inaccurate grinding results, and/or faults in the coffee grinder. Very fine settings (1‐3) – depending on roast – may cause the circuit breaker to trigger (repeatedly). Very coarse settings (16‐29) may cause clogging and/or defects of the Micro‐/Macro‐Adjustment. ...
-
Page 16: Operating The Coffee Grinder
4.6. Operating the Grinder 4.6.1. Time‐Based Grinding Place the portafilter in the holder (17). Press the desired preset button (1, 2, 3). The programmed grinding time is displayed in seconds. Press the START button to start grinding. The grinding time is displayed in seconds during grinding (11). Grinding stops automatically once the programmed grinding time has been reached. 4.6.2. Weight‐Based Grinding – W‐versions only The weighing system is self‐regulating. Accuracy improves with the number of grinding operations within the same parameters (same setting/same roast). After change of roast or setting, it takes a couple of grinding operations for the system to adjust accordingly. Place the portafilter in the holder (17). Press the desired preset button (1, 2, 3). The programmed grinding quantity is displayed in grams (Fig. 12). Press the START button to start grinding. The grinding quantity (g) is displayed during grinding (11). Grinding stops automatically once the programmed quantity has been reached. To pause the grinding during operation, press the START‐button. By repeatedly pushing the START‐button, the target weight may be reached in small steps of 0.1‐0.2g. In the event of interfering factors or if the portafilter is touched during grinding, grinding will be interrupted which may require the START button to be pressed again to continue. Fig. 12 OTHER OPERATING MODES 4.6.3. Manual Mode Non‐programmed quantities can be ground by pressing and holding the START button until the desired coffee quantity is reached. Grinding stops as soon as the START button is released. The grinding quantity is indicated on the display (11) in grams (W‐version) or the grinding time in seconds (T‐version). To switch [16] ... - Page 17 back to automatic mode from manual mode, press the STOP button. 4.6.4. Additional Features (W‐Versions Only) Purging Press and hold the START button until P appears on the display (11). Now you can either grind manually as outlined above or press the START button repeatedly to eject small quantities of coffee (approx. 0.5 g per press). Scale (Manual weighing mode ‐ weighing independent of grinding) To be able to weigh independently of grinding, press and hold the STOP button for at least 5 seconds. When in MANUAL‐WEIGHING mode, all LEDs light up at the same time (Fig. 13). Press STOP for TARE. You can now use the scale to weigh the beans or to grind to the desired quantity (in grams) in manual mode. To switch back to weight‐based, automatic grinding, press and hold STOP for 5 seconds. Fig. 13 Time‐Based Grinding (in the event of failure of the load cell or weight‐related display errors) To switch to time‐based grinding, press the STOP and 1 buttons at the same time. The grinding time now appears on the display (11). While in time‐based grinding, a vertical line is displayed at the top left of the display (Fig. 14). To change the grinding time in seconds, proceed as under outlined in 4.3.1. Button Programming. To switch back to weight‐based grinding, press the STOP and 1 buttons at the same time. The saved weight in grams appears on the display. Fig. 14 [17] ...
-
Page 18: Cleaning And Care
Scale CALIBRATION To calibrate the scale, you need a 500g calibration weight (not included). We recommend to recalibrate on a regular basis (depending on use). Disconnect grinder from power supply by pressing the ON‐/OFF‐button on the bottom side Remove Portafilter holder from center hook Press 1 while reconnecting grinder to power supply by pressing ON‐/OFF‐button Wait for CAL to appear on the display Press START Calibration is completed once PA5 is displayed on screen Slide Portafilter holder onto center hook Software UPDATE (Apple‐Smartphones) ATTENTION! NEVER interrupt an Update! Disconnecting the grinder from the power supply during an update may cause major damage to the power control (no warranty). If updating your software for the first time: Install the etzMAX‐Updater on your Apple‐Smartphone! Before starting the Update, press STOP (to prevent the grinder from going into sleep mode) Follow the Instructions according to the APP. The update takes around 1‐2 minutes. Make sure, nor your grinder neither your smartphone go into sleep mode during the Update. Once the update is finished, unplug the grinder. The update is installed, once you plug it back in. ... - Page 19 5.1.1. Removing the Bean Hopper Turn the bean blocker handle (8) forwards 180°. The bean supply is now stopped. Place the portafilter in the holder (17), press the START button, and grind until the grinding chamber is empty and/or no further beans are drawn in (approx. 8.5 g). Open the locking levers (5, 7) by turning them rearwards as far as they will go. Set the portafilter down on one side. Remove the mains plug from the socket and/or disconnect the grinder from the circuit (ON‐OFF switch on the base of the grinder, see also 6.2.5.) before continuing. Lift the bean hopper out of the holder (6, Fig. 15). Close the locking levers (5, 7). Fig. 15 5.1.2. Removing the Grind Size Adjustment (14) Pull the portafilter holder (17) from the center hook (18, Fig. 16). Note down the grind size settings before continuing. Fig. 16 [19] ...
- Page 20 Turn the macro adjustment ring (15) counter clockwise (left) as far as it will go and until you feel no more restistance (Fig. 17). Fig. 17 Carefully pull the grind size adjustment including cone holder and cone burr downwards out of the opening (Fig. 18). Fig. 18 5.1.3. Cleaning Clean the grinding chamber by pushing the bottle brush into the opening from above and moving it up and down a few times. Clean the grind size adjustment including cone holder by removing any remaining coffee grounds with the small brush. Once in a while, also separate adjustment and coneholder and clean them independently from each other. Ensure coneholder is perfectly snapped in when reassembling (watch the respective Video on our YouTube‐ channel “Replacing cone w/coneholder”). 5.1.4. Fitting the Grind Size Adjustment (14) Position the grind size adjustment at the base of the opening. Ensure that the marker corresponds to the marking at 8 o’ clock (Fig. 19). Fig. 19 [20] ...
-
Page 21: Cleaning The Portafilter Holder
Move it slightly until it engages. Now carefully press upwards and turn it clockwise (right). Return to the original settings. Insert the portafilter holder (17) on the center hook (18) and push it back as far as it will go. Secure the bean hopper as outlined in 4.2.1. Insert the plug of the grinder into the socket. With the grinder running, turn the macro ring to Click 1 to remove remaining coffee powder and then return to the original settings again. Your etzMAX is ready for operation. 5.2. Cleaning the Portafilter Holder (17) Carefully remove the portafilter holder (17) from the center hook (18). Clean the portafilter holder with a soft, slightly damp cloth. 5.3. Cleaning the Housing (9) and Bean Hopper (2) Housing: Clean the etzMAX housing at regular intervals with a soft, slightly damp cloth. Bean hopper and lid: Remove the bean hopper as outlined in 5.1.1. Open the lid (1) by sliding it rearwards. Clean the lid with warm water, then dry it with a soft cloth. Remove any remaining beans from the bean container. Clean the bean container with warm water. If you choose to use a rinsing agent, rinse the bean container several times afterwards with clean water. ... -
Page 22: Service, Spare Parts, And Troubleshooting
6. SERVICE, SPARE PARTS, and TROUBLESHOOTING 6.1 Service and Spare Parts In the event of questions concerning service and spare parts and for further information, please contact your dealer or visit our website www.etzinger‐ag.com (e‐mail support@etzinger‐ag.com). SPARE PARTS designated for replacement etzJET (=grinding mechanism holding motor, belt drive, ring burr, power board, switches) User Interface Adjustment Loadcell Coneholder When replacing spare parts, always follow the instructions in the worksheets supplied with the spare parts (or download them from the website: www.etzinger‐ag.com). Carry out replacement of components only for those spare parts explicitly designated by the manufacturer (see above), following the instructions carefully (see worksheet). Ensure that only original spare parts suitable for installation in your coffee grinder are used. In the event of doubt, please contact your dealer or the manufacturer. Before replacing spare parts, disconnect the coffee grinder from the mains by removing the plug from the socket. 6.1.1. Replacing etzJET ... - Page 23 Loosen the three screws (now visible) by turning them by 1 ½ turns (without removing them) Remove back part of Cover Lock (3) and open Cover Lid (4) Disconnect black cable from white plug (Power Supply) Disconnect black 5V‐cable (User Interface) Remove etzJET‐unit by lifting it out of the opening. Place aside. Insert replacement unit accordingly. Make sure it`s snapped in place properly! Reconnect black cables to User Interface and Power Supply Make sure all cables are carefully stowed inside and close cover lid (4) Replace back part of Cover Lock (3), tighten loosened screws, replace label plate and front part of Cover Lock (3) Reposition Pointer (13), insert and tighten the 2 screws next to the Macro Adjustment Ring Reassemble Adjustment (14) including Coneholder by positioning it according to marking at 8 o`clock. Turn clockwise and return to your previous settings. Insert Portafilter Holder (17) Open Locking Levers (5, 7) and install Bean Hopper (2) Open Bean‐Blocker‐handle (8) Connect etzMAX to Power Supply 6.1.2. Replacing User Interface (Display Panel) Make sure to replace the proper User Interface corresponding to the respective Version (time‐ or weight‐ based). User Interfaces for W‐Versions are equipped with 2 cables/plugs for Power Supply and Loadcell. ...
-
Page 24: Troubleshooting
6.2. Troubleshooting ATTENTION! Ensure regular cleaning of your coffee grinder as remaining coffee powder may cause blockades when firming up during longer periods of non‐use. ATTENTION! Please note that a scale is a sensitive measuring instrument that must be operated with an appropriate level of care. Also note that the weight‐based etzMAX (marked with W) can react more sensitively to interfering factors than the time‐based version (T versions). We recommend to calibrate the weight‐ based etzMAX on a regular basis and/or after having been exposed to interfering factors (also see 4.6.4. Additional Features, Scale Calibration). NOTE: Accuracy (+/‐0.1‐0.2g) improves with the number of grinding operations within the same parameters. When changing any parameter (roast/setting) or after cleaning, it will take 2‐3 grinding operations for the system to adjust accordingly. Beware, that static may have an affect on accuracy. 6.2.1. Inaccuracies/Error Messages on the Scale (W versions only) TRIGGER REMEDY Environmental interfering Ensure that the grinder is on a stable, level, and vibration‐ factors free surface without being touched during grinding Switch to time‐based mode (see also 4.6.4.) Recalibrate (also see 4.6.4.) ... - Page 25 6.2.2. General Troubleshooting FAULT TRIGGER REMEDY Grinder stops working/keeps Foreign object in grinding See 6.2.3. Clearing Blockades humming without grinding chamber because Clogging (caused by oily See 6.2.3. Clearing Blockades ‐ Circuit breaker triggered beans, when grinding too fine (Display not lit) or after longer breaks in between grinding operations) ‐ Motor overheated (Display lit, showing 0.00) Setting (too fine) Go coarser or use optional cone (M‐version only) and reset ON/OFF‐button on the base of the grinder (Fig. 20) Maximum permissible Wait for the motor to cool ...
- Page 26 Reconnect to Power Supply Before restarting, go coarser (also see 4.5. “Recommended settings”) With the grinder running, turn the macro ring to Click 1 to remove last rests of coffee powder and then return to your original settings or go coarser (if the setting was too fine before and thus caused the grinder to block) 6.2.4. Motor Overheating Failure to observe the maximum permissible operating time/cycles can cause the motor to overheat and fail as a result (safety switch). Observe the recommended operating times (see also 4.4. Operating Time). 6.2.5. Machine Safety Switch / Circuit Breaker / ON‐OFF SWITCH Blockages (e.g., when attempting to grind light roasts with the finer setting) and/or exceeding the maximum permissible operating cycle / running time per grind can cause the circuit breaker to trip. Observe the recommended grind size settings (see also 4.5. Adjustment). Observe the maximum permissible operating cycle / running time per grind (see also 4.4. Operating time) Proceed as outlined in 6.2.3. Clearing Blockades. Should the Circuit Breaker keep triggering, consult your dealer or the manufacturer (support@etzinger‐ag.com) RESET: Press the ON‐OFF switch on the base of the grinder (Fig. 20). Fig. 20 [26] ...
-
Page 27: Warranty
7. WARRANTY Warranty Information for EU Countries / Switzerland and Liechtenstein The warranty for coffee grinders from Etzinger AG covers a period of 24 months (domestic) / 12 months (commercial) from the date of purchase under EU Directives (12 months for refurbished grinders). This warranty covers all damage to material and processing including transportation to and from the respective repair workshop(s) within Switzerland, Liechtenstein, and the EU. This warranty shall not apply to improper operation, improper cleaning, misuse, normal wear and tear, inaccuracy when implementing settings, foreign objects in the beans (stones, screws, plastic parts, etc.) as well as in the event of use that is inconsistent with the intended use, i.e., the grinding of complete, roasted coffee beans. In the event of shortcomings within the warranty obligation, please contact your dealer or send us an e‐ mail at support@etzinger‐ag.com or call us on +423 3758383. International Warranty Warranty, service, and maintenance in all countries outside of Switzerland, Liechtenstein, and the EU are the responsibility of your authorized dealer from whom you purchased the device. To find your nearest dealer, please contact us by e‐mail at support@etzinger‐ag.com. [27] ...
Need help?
Do you have a question about the etzMAX-m and is the answer not in the manual?
Questions and answers