Table of Contents
Advertisement
Quick Links
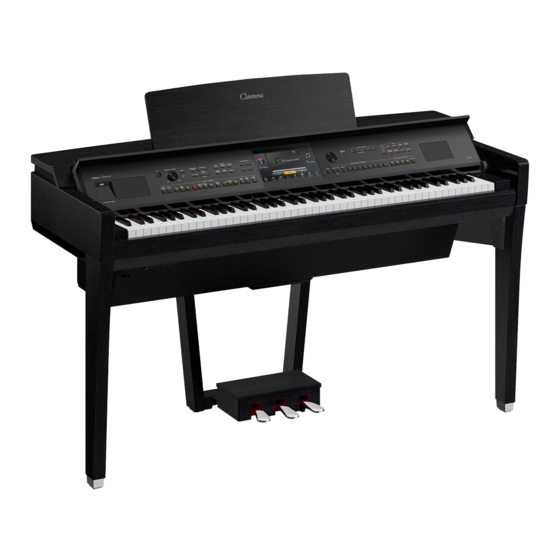
CV P - 809
CVP - 805
Owner's Manual
Mode d'emploi
Manual de instrucciones
Thank you for purchasing this Yamaha Digital Piano!
This instrument provides a comprehensive array of authentic voices and a superb grand piano touch with versatile functions.
We recommend that you read this manual carefully so that you can fully take advantage of the advanced and convenient
functions of the instrument. We also recommend that you keep this manual in a safe and handy place for future reference.
Before using the instrument, be sure to read "PRECAUTIONS" on pages 5-6.
For information on assembling the instrument, refer to the instructions on page 113, 117 or 121.
Nous vous remercions d'avoir choisi ce piano numérique de Yamaha !
Cet instrument dispose d'un ensemble complet de sonorités authentiques, d'un remarquable toucher de piano à queue et de
nombreuses fonctions polyvalentes.
Nous vous conseillons de lire attentivement ce mode d'emploi afin de tirer pleinement profit des fonctions avancées et
pratiques de votre instrument. Nous vous recommandons également de garder ce manuel à portée de main pour toute
référence ultérieure.
Avant d'utiliser l'instrument, lisez attentivement la section « PRÉCAUTIONS D'USAGE » aux pages 5 et 6.
Pour plus d'informations sur le montage de l'instrument, reportez-vous aux instructions figurant aux pages 113, 117 ou 121.
Gracias por adquirir este piano digital Yamaha
Este instrumento ofrece una completa gama de voces auténticas y un excelente tacto de piano de cola con funciones
versátiles.
Le aconsejamos que lea detenidamente este manual para poder disfrutar de las útiles y avanzadas funciones del
instrumento. Recomendamos guardar el manual en un lugar seguro y accesible, para futuras consultas.
Antes de utilizar el instrumento, lea las "PRECAUCIONES", en las páginas 5-6.
Para obtener más información sobre el montaje del instrumento, consulte las instrucciones de la página 113, 117 o 121.
English
Français
Español
EN FR ES
Advertisement
Table of Contents

Related Manuals for Yamaha Clavinova CVP-809


Summary of Contents for Yamaha Clavinova CVP-809
- Page 1 For information on assembling the instrument, refer to the instructions on page 113, 117 or 121. Nous vous remercions d'avoir choisi ce piano numérique de Yamaha ! Cet instrument dispose d'un ensemble complet de sonorités authentiques, d'un remarquable toucher de piano à queue et de nombreuses fonctions polyvalentes.
- Page 2 Implied warranties may also be affected. SPECIFICATIONS SUBJECT TO CHANGE: The information contained in this manual is believed to be correct at the time of printing. However, Yamaha reserves the right to change or modify any of the specifications without notice or obligation to update existing units.
- Page 3 Yamaha Corporation of America or its ual, may cause interference harmful to the operation of subsidiaries. * This applies only to products distributed by Yamaha Corporation of America. (class B) COMPLIANCE INFORMATION STATEMENT (Supplierʼs declaration of conformity procedure) Responsible Party : Yamaha Corporation of America Address : 6600 Orangethorpe Ave., Buena Park, Calif.
- Page 4 Explanation of Graphical Symbols The lightning flash with arrowhead symbol within an equilateral triangle is CA UTION intended to alert the user to the presence RISK OF ELECTRIC SHOCK of uninsulated “dangerous voltage” DO NOT OPEN within the product’s enclosure that may be of sufficient magnitude to constitute a risk of electric shock to persons.
-
Page 5: Precautions
AC outlet. Then have • When one of the following problems occur, immediately turn off the the instrument inspected by qualified Yamaha service personnel. power switch and disconnect the electric plug from the outlet. Then •... - Page 6 AC outlet. Yamaha cannot be held responsible for damage caused by improper use or modifications to the instrument, or data that is lost or destroyed. Always turn the power off when the instrument is not in use.
-
Page 7: Notice
• This product incorporates and bundles contents in which Yamaha owns copyrights or with respect to which Yamaha has license to use others’ copyrights. Due to copyright laws and other relevant laws, you are NOT allowed to distribute media in which these contents are saved or recorded and remain virtually the same or very similar to those in the product. -
Page 8: Compatible Formats For This Instrument
• Windows is a registered trademark of Microsoft® Corporation in the United States and other countries. • Android is a trademark of Google LLC. • The Bluetooth® word mark and logos are registered trademarks owned by Bluetooth SIG, Inc. and any use of such marks by Yamaha is under license. -
Page 9: About The Manuals
Computer-related Operations Includes instructions on connecting this instrument to a computer, and operations related to transferring files and MIDI data. To obtain these manuals, access the Yamaha Downloads, enter the model name for searching the desired files. Yamaha Downloads https://download.yamaha.com/ Included Accessories ... -
Page 10: Table Of Contents
Contents PRECAUTIONS............................... 5 NOTICE ................................7 Information ..............................7 Compatible formats for this instrument....................... 8 About the Manuals ............................9 Included Accessories ............................9 Welcome to the World of CVP! Panel Controls Starting Up Opening/Closing the Key Cover........................16 Using the Music Rest............................. 16 Opening/Closing the Lid (CVP-809 Grand Piano type) ................ - Page 11 Calling up Panel Settings Appropriate for the Current Style (One Touch Setting) ......62 Changing the Chord Fingering Type ......................64 5 Song Playback – Playing and Practice Songs – Playback of Songs............................66 Displaying Music Notation (Score)......................69 Displaying Lyrics............................70 One-handed Practice with the Guide Function..................
-
Page 12: Welcome To The World Of Cvp
Let’s take a look… True Acoustic Piano Feel This instrument features gorgeous piano Voices, created with samples of the Yamaha CFX flagship concert grand piano and the famous Bösendorfer* concert grand piano, as well as the “GrandTouch Keyboard” which reproduces the authentic touch and feel of an actual grand piano. - Page 13 on the fly, instantly selecting different rhythm variations and breaks in real time, including Intro, Ending, and Fill-in, during your performance. Page 57 Enjoyable Song Lesson Features—with Score Display and Guide Lamps The Lesson features are a fun way to learn and master Songs, with notation shown on the display.
-
Page 14: Panel Controls
Panel Controls A-1 B-1 C0 D0 E0 F0 G0 A0 B0 C1 D1 E1 F1 G1 A1 B1 C2 D2 E2 F2 G2 A2 B2 C3 D3 E3 Panel Setup (Panel Settings) These settings of the instrument made by using the controls on the panel are together referred to as “panel setup” or “panel settings” in this manual. - Page 15 & F3 G3 A3 B3 C4 D4 E4 F4 G4 A4 B4 C5 D5 E5 F5 G5 A5 B5 C6 D6 E6 F6 G6 A6 B6 C7 CVP-809 CVP-805 Key cover (page 16) Music rest (page 17) Key cover Music rest (page 16) (page 17) Sheet music braces...
-
Page 16: Starting Up
Starting Up Opening/Closing the Key Cover To open the key cover, hold the hand grip with both hands, then lift the key cover slightly, and push it up and back. To close the key cover, lower the key cover back in place gently with both hands. CAUTION Be careful to avoid catching your fingers when opening/closing the cover. -
Page 17: Opening/Closing The Lid (Cvp-809 Grand Piano Type)
To lower the music rest: Close the Music braces if they are open, and then lower the music rest by following the instructions below. 1 Pull the music rest toward yourself as far as it will go. Music braces 2 Raise the two metal supports (at the rear of the music rest). -
Page 18: Power Supply
For the longer stay, use the inner recess, and for the shorter stay, use the outer recess to support the lid. CAUTION • Do not use the outer recess for the longer stay. Doing so makes the lid unstable and may cause it to fall, resulting in damage or injury. -
Page 19: Turning The Power On/Off
Turning the Power On/Off Turn down the [MASTER VOLUME] dial to “MIN.” Press the [P] (Standby/On) switch to turn the power on. The [MIC] lamp located at right of the [MASTER VOLUME] dial and the display light up. After a while, the Home display (page 26) is shown and the instrument starts up. -
Page 20: Adjusting The Master Volume
Adjusting the Master Volume To adjust the volume of the entire keyboard sound, use the [MASTER VOLUME] dial while playing the keyboard. CAUTION Do not use the instrument for a long period of time at a high or uncomfortable volume level, since this can cause permanent hearing loss. - Page 21 Reproducing a Natural Sound Distance Sensation (even when using Headphones)— Binaural Sampling and Stereophonic Optimizer This instrument features two advanced technologies that allow you to enjoy exceptionally realistic, natural sound, even though listening on headphones. Binaural Sampling (“CFX Grand” Voice only) Binaural Sampling is a method that uses two special microphones set at the ear position of a performer and records the sound from a piano as it would actually be heard.
-
Page 22: Making Basic Settings
Version Indicates the firmware version of this instrument. Yamaha may from time to time update firmware of the product without notice for improvement in functions and usability. To take full advantage of this instrument, we recommend that you upgrade your instrument to the latest version. The latest firmware can be downloaded from the website below: https://download.yamaha.com/... -
Page 23: Changing The Brightness Of Display
Changing the Brightness of Display Here you can change certain display settings as desired, including brightness. Call up the operation display (Utility) (step 1 on page 22). Touch [Touch Screen/Display] on the display. Change the settings by touching the display. Touch Sound Determines whether or not touching the display will trigger the click... -
Page 24: Basic Operations
Basic Operations Display Structure Turning on this instrument calls up the Home display, from which you can call up the File Selection display and Menu display, providing you convenient access to various functions and allowing you to make various settings. For detailed instructions on the display, refer to page 26. Style Selection display Voice Selection display File Selection... - Page 25 Song Selection display Touch here to expand. By expanding the Song area, you can call up the playback- related controls on the display. CVP-809/CVP-805 Owner’s Manual...
-
Page 26: Display Configuration
Display Configuration This section covers the most often used displays: Home, File Selection and Menu. The Home display appears when the power is turned on. The File Selection display and Menu display can be called up from the Home display. Home Display Appears when the power is turned on, and can be called up when the [HOME] button is pressed. - Page 27 File Selection Display The File Selection display is for selecting a Voice, Style, Song, and other data. You can call up this display by touching the name of the Voice, Style or Song on the Home display, or by pressing one of the VOICE or STYLE buttons, etc.
-
Page 28: Closing The Current Display
Menu Display This is the portal display for using various functions and can be called up by touching the [Menu] icon at the bottom right corner of the Home display. 1 Function list Various convenient functions are shown via icons. Touching each of them calls up the corresponding function. -
Page 29: Display-Based Controls
Display-based Controls The display of this instrument is a special touch screen that allows you to select or change the desired parameter by simply touching the corresponding setting on the display. The Data Dial and the [HOME] button can also be used. Data dial [HOME] button Display... - Page 30 Rotate Touch and hold the display knob, and rotate your finger around the knob to change the parameter value. Touch and hold This instruction means to touch the object in the display and hold it for a while. When setting values by using []/[], a slider or a knob, you can restore the default value by touching and holding the value on the display.
-
Page 31: Using The Assignable Buttons
Using the ASSIGNABLE Buttons You can assign the functions which you use frequently to these four panel buttons at the left side of the display. Also, any of the functions listed on the Menu display (page 28) can be assigned here as a shortcut. Call up the operation display via [Menu] →... -
Page 32: File Management
File Management Data you have created such as recorded Song and edited Voice can be saved as files to the instrument (referred to as “User memory”) and a USB flash drive. If you’ve saved a lot of files, you may have trouble finding the desired file quickly. - Page 33 Creating a New Folder Folders can be created, named and organized as desired, making it easier to find and select your original data. NOTE • The maximum total number of files/folders which can be saved to the User memory differs depending on the file size and the length of the file/folder names.
- Page 34 Copying or Moving Files You can copy or cut a file and paste it to another location (folder). You can also copy a folder (but not move it) by using the same procedure. NOTE • Files in the Preset tabs cannot be moved. •...
- Page 35 Registering Files to the Favorite Tab You can call up your favorite or often used Voices or Styles quickly by registering them to the Favorite tab. Touch the star mark ( ) at the right side of each file to register the corresponding file to the Favorite tab. To remove the registered file from the Favorite tab, touch the colored star mark ( ) in the Favorite tab or in the tab which actually contains the corresponding file.
-
Page 36: Entering Characters
Searching for Files In the File Selection display, touch (Search) to call up the Search display. Touch the Search box to call up the Character Entry window. Search box Enter the file name or the folder name (or just a part of it) to start searching (page 37). -
Page 37: Using The Pedals
Touch the character type. When the Language (page 22) is set to other than Japanese: Touching [Symbol] (or [abc]) switches between entering symbols or Roman letters (and numbers). To switch between entering capital letters or small letters, touch (Shift). ... - Page 38 Damper Pedal (Right) Pressing this pedal sustains notes. Releasing this pedal immediately stops (damps) any sustained notes. Pressing this pedal while you play a VRM Voice (page 53) recreates the characteristic string resonance of a real acoustic piano. A “half-pedal” function of this pedal creates partial sustain effects, depending If you press and hold the damper on how far down you press the pedal.
-
Page 39: Using The Metronome
Using the Metronome The [METRONOME ON/OFF] button lets you start or stop the metronome. The metronome provides a click sound, giving you an accurate tempo guide when you practice, or letting you hear and check how a specific tempo sounds. NOTE You can also change the time signature, volume and sound of the metronome on the display called up via [Menu] ... -
Page 40: Setting The Touch Sensitivity Of The Keyboard
Setting the Touch Sensitivity of the Keyboard Touch Sensitivity determines how the sound responds to your playing strength. This setting does not change the weight of the keyboard. Call up the display via [Menu] → [Keyboard]. Make the settings by touching the display. Enter checkmarks to the boxes of the desired keyboard parts, then touch here to Touch Curve call up the setting window and select the Touch Sensitivity type. -
Page 41: Transposing The Pitch In Semitones
Transposing the Pitch in Semitones The TRANSPOSE [-]/[+] buttons transpose the overall pitch of the instrument (the keyboard sound, Style playback, MIDI Song playback, and so on) in semitone steps (from -12 to 12). Pressing the [-] and [+] buttons simultaneously resets the value to 0. NOTE •... -
Page 42: Adjusting The Volume Balance
Adjusting the Volume Balance From the Balance display called up via [Menu] → [Balance], you can adjust the volume balance among the keyboard parts (Main, Layer, Left), the Style, the Song, the microphone sound, and the Audio Input Sound from the external device (page 104). Slide your finger vertically for each part to adjust the volume. Since the volume of MIDI Songs and Audio Songs are handled individually, you need to set the volume balance for each case (when a MIDI Song is selected, or when an Audio Song is selected). -
Page 43: Data Backup
Data Backup You can back up all data in the User memory of this instrument (except for Protected Songs) and settings (System settings, MIDI settings and User Effect settings) to the USB flash drive as a single file. This procedure is recommended for data security and backup in case of damage. NOTE •... -
Page 44: Playing A Piano Performance In The Piano Room
Piano Room – Enjoying the Piano Performance – The Piano Room function is for those who want to simply, conveniently, and fully enjoy playing the instrument as a piano. No matter what settings you’ve made from the panel, you can instantly call up the optimum settings for piano performance with a single button press. -
Page 45: Playing The Piano In Session With Other Instruments
Playing the Piano in Session with Other Instruments Press the [PIANO ROOM] button to call up the Piano Room display. Touch (Accompaniment) at the upper right of the display. Session players appear in the display. Session players can be shown or hidden by touching (Accompaniment) or (Piano). - Page 46 Changing the Accompaniment Settings Touch (Setting) at the bottom of the accompaniment type list of step 3 on page 45, to call up the setting display. Turns all parts, except those of rhythm and bass, on or off. Turns the rhythm parts and bass parts on or off. Turns the bass part on or off.
-
Page 47: Changing/Resetting The Piano Room Settings
Changing/Resetting the Piano Room Settings You can change various Piano Room settings as you like. You can also restore all Piano Room settings to the default. Press the [Piano Room] button to call up the Piano Room display. To change the settings of the accompaniment, touch (Accompaniment) to call up the session players. -
Page 48: Recording Your Performance In The Piano Room
Recording your Performance in the Piano Room You can record your performance in Piano Room as a MIDI Song (page 66) to the User memory of the instrument. Press the [Piano Room] button to call up the Piano Room display. Make any necessary settings, such as the type of piano, calling up the session players, and so on. -
Page 49: Playing Preset Voices
Voices – Playing the Keyboard – The instrument features a wide variety of exceptionally realistic instrumental Voices, including piano, guitar, strings, brass, wind instruments and more. Playing Preset Voices The Voices can be played via three keyboard parts: Main, Layer and Left. These playing modes allow you to play just one single Voice (Main), play two different Voices in layer (Main and Layer), or play different Voices in the right- and left-hand areas of the keyboard (Main/Layer and Left). - Page 50 Using the panel buttons To select the keyboard part, press the VOICE [MAIN/LAYER/LEFT] button repeatedly if necessary until the desired part’s lamp lights. Press one of the desired VOICE category buttons to call up the Voice Selection display. NOTE •...
- Page 51 Voice Characteristics At the left side of each Voice name on the Voice Selection display, the icon which represents its defining characteristic is indicated. There are various Voice characteristics; however, only the following ones are covered here. For detailed explanations, refer to the “VoiceSetting” section in the Reference Manual on the website (page 9).
-
Page 52: Setting The Split Point
Maintaining the Left Voice (even when releasing the keys) When the Left Hold function is set to “On” via [Menu] → [Keyboard], the Voice for the Left part is held even when the keys are released. Non-decaying Voices such as strings are held continuously, while decay- type Voices such as piano decay more slowly (as if the sustain pedal has been pressed). -
Page 53: Calling Up The Appropriate Settings For Piano Performance (Piano Reset)
Calling up the Appropriate Settings for Piano Performance (Piano Reset) You can easily reset to appropriate settings for playing the instrument as a piano, no matter what settings you’ve made from the panel. This function called “Piano Reset” allows you to play the “CFX Grand” Voice across the entire keyboard. -
Page 54: Playing Super Articulation Voices
Playing Super Articulation Voices The Super Articulation Voices (S.Art Voices and S.Art2 Voices) enable you to create subtle, very realistic musical expressions, simply by how you play. The [S.Art]/[S.Art2] icons are shown beside the Voice name of Super Articulation Voices (S.Art, S.Art2) on the Voice Selection display or the Home display. For specific performance instructions on certain Voices, you can call up the Information window of the selected S.Art Voice or S.Art2 Voice by touching this icon on the Home display. -
Page 55: Creating Original Organ Flutes Voices
Creating Original Organ Flutes Voices The instrument uses advanced digital technology to recreate the legendary sound of vintage organs. Just as on a traditional organ, you can create your own sound by increasing and decreasing the levels of the flute footages. - Page 56 Volume Determines the volume of the entire Organ Flutes sound. Rotary/ Alternately switches the Rotary Speaker speed between “Slow” and “Fast. ” This parameter is Tremolo* available only when an effect type which contains “Rotary” in its name is applied. Vibrato* Turns the vibrato on or off, and allows you to adjust the vibrato depth and vibrato speed.
-
Page 57: Playing With A Style
Styles – Playing Rhythm and Accompaniment – The instrument features a variety of accompaniment and rhythmic backing patterns (called “Styles”) in a variety of different musical genres including pop, jazz, and many others. Each Style features Auto Accompaniment, letting you produce automatic accompaniment playback simply by playing “chords” with your left hand. - Page 58 Touch the desired Style. For the example score above, touch [Country & Blues] category and touch [Modern Country], then touch [Country 8Beat 2]. The Style category can be selected also by pressing one of the STYLE buttons. NOTE You can change the sub category by pressing the same Style category button twice or more.
-
Page 59: Style Control Operations
Style Characteristics The Style type and its defining characteristics are indicated on the Preset Style icon (such as Pro and Session). For details about these icons, refer to the “StyleSetting” section in the Reference Manual on the website (page 9). A Style generally consists of eight parts (channels): rhythm, bass, etc. - Page 60 To Start/Stop Playing [R/J] (START/STOP) Starts playback of the rhythm part of the current Style. To stop playback, press this button again. Playing back both rhythm and auto accompaniment ([ACMP ON/OFF] button) If you turn on the [ACMP ON/OFF] button, both the rhythm part and auto accompaniment can be played back when playing chords in the chord section during Style playback.
- Page 61 Changing Variation (Sections) During Style Playback Each Style features four different Main sections, four Fill-in sections and a Break section. By using these sections effectively, you can easily make your performance sound more dynamic and professional. The section can be freely changed while the Style is playing back. ...
-
Page 62: Calling Up Panel Settings Appropriate For The Current Style (One Touch Setting)
Calling up Panel Settings Appropriate for the Current Style (One Touch Setting) One Touch Setting is a powerful and convenient feature that automatically calls up the most appropriate panel settings (Voices or effects, etc.) for the currently selected Style, with the touch of a single button. If you’ve already decided which Style you wish to use, you can have One Touch Setting automatically select the appropriate Voice for you. - Page 63 Memorizing original settings to One Touch Setting You can memorize your original panel settings to the One Touch Setting. The newly created One Touch Setting will be saved in the User tab as a User Style, and you can call up the One Touch Setting as a part of the Style file.
-
Page 64: Changing The Chord Fingering Type
Changing the Chord Fingering Type You can change the Chord Fingering type depending on your playing style. Call up the Split Point/Fingering window: [Menu] → [Split&Fingering]. NOTE The Split Point/Fingering window can be called up also by holding the keyboard illustration on the Home display. Touch []/[] to select the desired Fingering Type. - Page 65 Basically the same as Fingered, with the exception that less than three notes can be AI Fingered played to indicate the chords (based on the previously played chord, etc.). NOTE Only in the Piano Room, your performance in the Chord section produces the sound of the selected Voice as well as that of the accompaniment.
-
Page 66: Playback Of Songs
Song Playback – Playing and Practice Songs – For the Clavinova, “Song” refers to MIDI or audio data which include preset songs, commercially available music files, etc. Not only can you play back a Song and listen to it, but you can also play the keyboard along with Song playback. - Page 67 On the Home display, touch the Song name to call up the Song Selection display. Touch the desired Song on the display to select it. A Preset Song can be selected from one of the following tabs: • 50 Popular: Various popular Songs divided into several categories •...
- Page 68 Queuing the next Song for playback (MIDI Song only) While a MIDI Song is playing back, you can queue up the next MIDI Song for playback. This is convenient for chaining it to the next Song smoothly during stage performance. Select the Song you want to play next in the Song Selection display, while a Song is playing back.
-
Page 69: Displaying Music Notation (Score)
NOTE • The pop-up window mentioned here does not appear when you rewind or fast forward a MIDI Song not having Phrase Marks or an Audio Song by touching on the display. • Phrase Mark is a pre-programmed marker in certain MIDI Song data, which specifies a specific location in the Song. Moving the Song Playback Position When a MIDI Song is selected: When an Audio Song is selected:... -
Page 70: Displaying Lyrics
Changing the Size of the Score/Displaying Lyrics in a Score By touching (View Setting) shown on the lower right of the display, you can change the settings of the Score display, such as changing the size of the score, or displaying note names or lyrics within the score, and so on. -
Page 71: One-Handed Practice With The Guide Function
One-handed Practice with the Guide Function MIDI Audio You can mute the right-hand part to try practicing that part on your own. The explanations here apply when you practice the right-hand part with “Follow Lights” of the Guide functions. The guide lamps indicate the notes you should play and when you should play them. -
Page 72: Repeat Playback
Other guide functions In addition to the “Follow Lights” function explained above, there are more functions in the Guide features, for practicing the timing of playing the keys (Any Key mode), for Karaoke or for practicing a song at your own pace (Your Tempo). -
Page 73: Adjusting The Pitch In Semitones (Pitch Shift)
Top of the Song End of the Song NOTE • When you want to repeat from the top of the song to somewhere in the middle of the song: 1. Turn on the A-B Repeat icon, then start Song playback. 2. -
Page 74: Adjusting The Playback Speed (Time Stretch)
Set the value by touching [L]/[R]. Adjusting the Playback Speed (Time Stretch) MIDI Audio Like Tempo adjustment of a MIDI Song (page 39), you can adjust the playback speed of an Audio Song in USB flash drive by stretching or compressing it. To do this, select an Audio Song then touch (Time Stretch) in the Song area of the Home display to call up the Setup window. -
Page 75: Basic Procedure For Recording (Midi/Audio Recording)
Song Recording – Recording Your Performance – This instrument allows you to record your performance in the following two methods. • MIDI recording With this method, recorded performances are saved to the User memory of the instrument or a USB flash drive as an SMF (format 0) MIDI file. - Page 76 Make the necessary settings such as Voice and Style selection. On the Home display, touch [] at the upper right to expand the Song area, then touch [I] (Rec) to call up the Song Recording window. NOTE • The Song Recording window can be called up also by pressing the SONG CONTROL [I] (Rec) button. Here and in the later steps, the operation in the Song area of the Home display can be controlled by the SONG CONTROL buttons (page 68).
- Page 77 After you finish your performance, touch [J] (Stop) on the Home display to stop recording. K] (Play/Pause). To hear the recorded performance, touch [R Save the recorded performance. In MIDI Recording After recording, (Save) appears in the Song area of the Home display. This icon indicates that recorded data exists but has not yet been saved.
-
Page 78: Independently Recording The Right- And Left-Hand Parts, Or Style And Melodies (Midi Recording)
Independently Recording the Right- and Left-hand Parts, or Style and Melodies (MIDI Recording) With MIDI Recording, you can create a MIDI Song by recording each part (or channel) independently, allowing you create a complete piece which may be difficult to play live. For example, you can record the right-hand part first and then record the left-hand part while listening to the already recorded right-hand part, or you can record the Style playback first and then record melodies while listening to the already recorded Style playback. - Page 79 After you finish your performance, touch [J] (Stop) on the Home display to stop recording. To hear the recorded performance, touch [R/K] (Play/Pause). Since recording of the right-hand or Style parts is completed, go on to the next step to record the left-hand part or a melody.
-
Page 80: Recording To Specific Channels (Midi Recording)
Play the keyboard to start recording of the left-hand part or a melody. You can also start recording by touching [Rec Start] or pressing the SONG CONTROL [R/K] (Play/Pause) button. After you finish your performance, touch [J] (Stop) on the Home display to stop recording. - Page 81 NOTICE Previously recorded data will be overwritten if you set channels which have recorded data to [Rec]. NOTE • Multiple parts can not be recorded to one channel. • If you want to cancel recording, touch [Cancel] in the display or press the SONG CONTROL [I] (Rec) button before going on to step 5.
-
Page 82: Converting A Midi Song To An Audio Song
Record your performance to another Channel by repeating steps 1 – 7. In step 2, confirm that [Overwrite MIDI] is selected. In step 4, select a Channel which has no recorded data. In step 5, play the keyboard while listening to the already recorded data. NOTE When recording another channel, you can turn already recorded channels on or off in the Mixer display (page 97). -
Page 83: Connecting A Microphone
Microphone – Adding Vocal Harmony Effects to Your Singing – By connecting a microphone to the [MIC/LINE IN] jack (standard mono phone jack), you can enjoy singing along with your keyboard performance or with Song playback. The instrument outputs your vocals through the built-in speakers. -
Page 84: Applying Vocal Harmony Effects To Your Voice
Applying Vocal Harmony Effects to Your Voice The Vocal Harmony feature lets you add harmonies to your singing voice, input via the microphone sound. Connect the microphone to the instrument (page 83). Call up the Vocal Harmony display via [Menu] → [VocalHarmony]. Vocal Harmony name Mode (When the Mode is set to “Vocoder”... - Page 85 Follow the steps below, depending on which Type (and mode) you selected. If you selected the Chordal type: Make sure that the [ACMP ON/OFF] button is turned on. Play back a Style, or play back a Song which contains chords. Vocal harmonies based on the chords are applied to your singing.
-
Page 86: Registration Memory/Playlist - Saving And Recalling Custom Panel Setups
NOTE By importing Music Finder Records (.mfd) used on previous Yamaha digital pianos (such as CVP-709, 705, etc.), you can use the Records on the Playlist of this instrument, just like using the Music Finder function on those other instruments. For details, refer to the “Playlist”... -
Page 87: Saving And Recalling Custom Panel Setups With Registration Memory
Saving and Recalling Custom Panel Setups with Registration Memory Registering Your Panel Setups Set up the panel controls (such as Voice, Style and so on) as desired. Refer to “Parameter Chart” in the Data List on the website (page 9) for a list of parameters that can be registered with the Registration Memory function. - Page 88 Saving the Registration Memory as a Bank File All of the panel settings are registered to the eight Registration Memory buttons as a single Bank file. On the Home display, touch [] at the upper right corner to show the Registration area, then touch the area to call up the Registration Bank Selection display.
- Page 89 Confirming the Registration Memory Information You can call up the information window to confirm which Voices and Style are memorized to the [1] – [8] buttons of a Registration Memory Bank. Call up the Registration Bank Selection display, then select the desired Bank. Touch (Information) to call up the Registration Bank Information window.
- Page 90 Enter the search options in the box. • Tag: Enter tags (see below) to the box, or select tags from the list by touching [Existing Tag List]. If you want to enter multiple tags to the box, insert a space between each tag. •...
-
Page 91: Using Playlists To Manage A Large Repertoire Of Panel Setups
Using Playlists to Manage a Large Repertoire of Panel Setups The Playlist is useful for managing multiple set lists for your performances. You can select only the desired files from a large repertoire (the huge number of the Registration Memory Bank files) and create a new set list for each performance. - Page 92 If necessary, edit the Record. The newly added Playlist Record simply recalls the selected registration Bank file. If you want to set more detailed settings (such as directly recalling a specified Registration Memory number), you can edit the Record. Touch [Edit] to call up the Record Edit window. Record name File path of the Registration Bank file...
- Page 93 Recalling Custom Panel Setups via the Playlist Call up the Playlist display via [Menu] → [Playlist]. Registration Memory number called up Display called up after loading the Record. when the Record is loaded. Touch the Playlist name to call up the Playlist Selection display. Select the desired Playlist file.
- Page 94 Deleting the Record from the Playlist On the Playlist display, touch the desired Record to delete. Touch [Delete]. A confirmation message appears. If you want to cancel the operation, touch [No] here. Touch [Yes] to delete the Record. Touch (Save) to save the edited Playlist file. Copying the Playlist Records from Another Playlist (Append Playlist) “Append Playlist”...
-
Page 95: Basic Procedure For The Mixer
Mixer – Editing the Volume and Tonal Balance – The Mixer gives you intuitive control over aspects of the keyboard parts and Song/Style channels, including volume balance and the timbre of the sounds. It lets you adjust the levels and stereo position (pan) of each Voice to set the optimum balance and stereo image, and lets you set how the effects are applied. - Page 96 Unlike the other displays, use this display when you want to adjust the tonal Master characteristics of the entire sound (except for Audio Songs) of this instrument. Touch a tab for editing the desired parameters. When a tab other than “Master” is selected in step 2: Filter For adjusting the Harmonic Content (resonance) and sound brightness.
-
Page 97: Turning Each Channel Of The Style Or Midi Song On/Off
To store the “Master” Mixer settings: Your original edits can be stored as a Master Compressor type and Master EQ type. If you want to recall the settings for future use, select the corresponding type at the upper right of each display. -
Page 98: I/O Connectors
Connections – Using Your Instrument with Other Devices – CAUTION Before connecting the instrument to other electronic components, turn off the power of all the components. Also, before turning any components on or off, make sure to set all volume levels to minimum (0). Otherwise, damage to the components, electrical shock, or even permanent hearing loss may occur. - Page 99 1 [AUX PEDAL] jack For connecting a separately sold foot controller or footswitch (page 109). 2 MIDI terminals For connecting to a computer or external MIDI device, such as a synthesizer or a sequencer (page 108). 3 [USB TO HOST] terminal For connecting to a computer or smart device such as smartphone or tablet (page 102).
-
Page 100: Connecting Usb Devices ([Usb To Device] Terminal)
Up to two USB flash drives can be connected to the The instrument does not necessarily support all [USB TO DEVICE] terminals. commercially available USB devices. Yamaha cannot guarantee operation of USB devices that you purchase. Formatting USB flash drives... - Page 101 Formatting a USB Flash Drive When a USB flash drive is connected, a message may appear indicating that the connected USB flash drive is not formatted. If so, execute the format operation. NOTICE The Format operation deletes any previously existing data. Make sure that the USB flash drive you are formatting does not contain important data.
-
Page 102: Connecting To A Computer ([Usb To Host] Terminal/Midi Terminals)
NOTE • When transmitting or receiving audio signals by using a computer running Windows, the Yamaha Steinberg USB Driver should be installed to the computer. For details, refer to the “Computer-related Operations” on the website. • For instructions on connecting to a smart device, refer to the “Smart Device Connection Manual” on the website. -
Page 103: Connecting To A Smart Device ([Aux In] Jack/Bluetooth/[Usb To Host] Terminal/Wireless Lan)
Find apps that suit your purpose such as viewing notation of Audio Songs, or keeping record of your piano performances. For information about the compatible apps and smart devices, access the web page of the respective apps on the following page: https://www.yamaha.com/kbdapps/ CVP-809/CVP-805 Owner’s Manual... -
Page 104: Listening To Audio Playback By The External Device Through The Instrument's Speaker ([Aux In] Jack/Bluetooth/[Usb To Host] Terminal)
Listening to Audio Playback by the External Device through the Instrument’s Speaker ([AUX IN] jack/Bluetooth/[USB TO HOST] terminal) Audio playback by the connected device can be output from the instrument’s speaker. To input audio, connect an external device by one of the following methods. •... - Page 105 Listening to Audio data from a Bluetooth-equipped device through this instrument (Bluetooth Audio Function) Before using the Bluetooth function, be sure to read “About Bluetooth” on page 106. You can play the sound of audio data saved in a Bluetooth-equipped device, such as a smartphone or portable audio player, on this instrument and listen to it through the built-in speaker of the instrument.
- Page 106 • The speed of signal transfer and the distance at which communication is possible differs according to the distance between the communicating devices, the presence of obstacles, radio wave conditions and the type of equipment. • Yamaha does not guarantee all wireless connections between this unit and devices compatible with Bluetooth function. CVP-809/CVP-805 Owner’s Manual...
-
Page 107: Using An External Speaker System For Playback (Aux Out [L/L+R]/[R] Jacks)
Using an External Speaker System for Playback (AUX OUT [L/L+R]/[R] jacks) You can connect a stereo system to amplify the instrument’s sound by using the AUX OUT [L/L+R]/[R] jacks. The microphone or guitar sound connected to the instrument’s [MIC/LINE IN] jack is output at the same time. -
Page 108: Connecting External Midi Devices (Midi Terminals)
DEVICE] terminal of this instrument. For a list of compatible USB display adaptors, visit the following website: https://download.yamaha.com/ NOTE Before using the [USB TO DEVICE] terminal, be sure to read “Precautions when using the [USB TO DEVICE] terminal” on page 100. -
Page 109: Connecting A Microphone Or Guitar ([Mic/Line In] Jack)
Connecting a Microphone or Guitar ([MIC/LINE IN] jack) To the [MIC/LINE IN] jack (standard 1/4" phone jack), you can connect a microphone, guitar, or other various equipment. For instructions on connecting a microphone, refer to page 83. Note that you need to select “MIC” or “LINE IN” depending on the connected equipment. When the output level of the connected equipment (such as a microphone, guitar, bass) is low, set the [MIC/LINE] switch to “MIC. -
Page 110: Menu Display Function List
Menu Display Function List This section explains simply and very briefly explains what you can do in the displays which are called up by touching each icon on the Menu display. Some functions are described in this Owner’s Manual on the pages indicated below. For details about each function, refer to the Reference Manual on the website (page 9). - Page 111 Menu Description Pages By recording chord progressions you play, the Style can be played back automatically in response to the chord progression data—without the need – Chord Looper for you to play chords in the chord section of the keyboard. Pedal Determines the functions assigned to the pedals.
- Page 112 Menu Description Pages Speaker/ For making the settings for the instrument’s speakers and the external monitor. Connectivity Touch Screen/ For editing the parameters for the display settings, such as the theme of the home display, brightness, and touch panel calibration. Display Determines which parameters (effect, Split Point, etc.) will not be changed Parameter Lock...
-
Page 113: Cvp-809 (Grand Piano Type) Assembly
CVP-809 (Grand piano type) Assembly CAUTION • Assemble the unit on a hard and flat floor with ample space. 6 x 20 mm fixing screws x 4 • Be careful not to confuse or misplace the parts, and be sure to install all parts in the correct orientation. - Page 114 Attach the three legs and three leg beams. Attach the lyre braces. Refer to the diagram below to verify the orientation of the legs. Rear leg Front leg Front leg 1 Install and tighten four screws on each leg, starting with one of the front legs.
- Page 115 Install the pedal box. 1 Remove the twist tie and tape that affix the pedal cord to the upper portion of the pedal box. 6 x 20 mm fixing screws 5 Loosen the four screws that were attached in step 3, and then securely tighten the four screws again while pushing Tape Twist tie...
- Page 116 Rotate the adjuster until it comes in firm After completing the assembly, please check the following. contact with the floor surface. • Are there any parts left over? → Review the assembly procedure and correct any errors. • Is the instrument clear of doors and other movable fixtures? →...
-
Page 117: Cvp-809 Assembly
CVP-809 Assembly CAUTION CVP-809B/CVP-809PE • Assemble the unit on a hard and flat floor with ample space. J, L • Be careful not to confuse or misplace the parts, and be sure to install all parts in the correct orientation. Please assemble the unit in accordance with the sequence described here. - Page 118 Attach units B and C to unit A. Attach unit D to unit A. 1 Align units B and A so that the protrusion fits into the hole. 1 Fix unit D to the bottom surface of unit A using two screws CVP-809B CVP-809PWH CVP-809PE...
- Page 119 3 Pass the pedal cord from under unit D to the backside of Insert the AC power cord plug into the [AC the main unit. IN] jack. 4 Place unit F on the bracket of unit D. 5 Attach unit F to unit D using three screws M. Rotate the adjuster until it comes in firm contact with the floor surface.
- Page 120 CAUTION When moving the instrument, always hold the bottom of the main unit. Do not hold the key cover or top portion. Improper handling can result in damage to the instrument or personal injury. Hold here. Do not hold here. Transporting If you move to another location, you can transport the instrument along with other belongings.
-
Page 121: Cvp-805 Assembly
CVP-805 Assembly CAUTION Attach C to D and E. • Assemble the unit on a hard and flat floor with ample space. 1 Place C, D and E as shown in the illustration. • Be careful not to confuse or misplace the parts, and be sure to install all parts in the correct orientation. - Page 122 Secure A. Attach the headphone hanger. Attach the headphone hanger using two screws J as 1 Adjust the position of A so that the inner lines of the side shown in the illustration. boards of A and D/E are aligned as shown in the illustration.
-
Page 123: Troubleshooting
Troubleshooting Overall A click or pop is heard when the power is Electrical current is being applied to the instrument. This is normal. turned on or off. The power is automatically turned off. This is normal and due to the Auto Power Off function. If necessary, set the parameter of the Auto Power Off function (page 19). - Page 124 Overall An existing file is not shown on the display. The file extension (.MID, etc.) may have been changed or deleted. Manually rename the file on a computer, adding the appropriate extension. Data files with names of more than 50 characters cannot be handled by the instrument.
- Page 125 Song (MIDI) This happens when playing back music data for which a specific, fixed The measure number is different from that of tempo is set. the score in the Song Position display, shown by pressing the [LL] (Rewind)/[RR] (Fast forward) buttons. (MIDI) Playback of these channels may be set to off.
- Page 126 Mixer The sound seems strange or different than When changing the rhythm/percussion Voices (drum kits, etc.) of the Style expected when changing a rhythm Voice and Song from the VOICE parameter, the detailed settings related to the (drum kit, etc.) of the Style or Song from the drum voice are reset, and in some cases you may be unable to restore the original sound.
-
Page 127: Specifications
English Cabinet Key Cover Style Folding Music Rest Yes (with music clips) Voices Tone Generation Piano Sound Yamaha CFX, Bösendorfer Imperial Binaural Sampling Yes (“CFX Grand” Voice only) Piano Effect Key-off Samples Smooth Release Polyphony (max.) Preset Number of Voices... - Page 128 CVP-809GP CVP-809 CVP-805 (Grand Piano type) Effects Types Reverb 65 Preset + 30 User Chorus 107 Preset + 30 User 106 Preset + 30 User Insertion Effect 358 Preset + 30 User 322 Preset + 30 User Variation Effect 358 Preset + 30 User 322 Preset + 30 User Master Compressor 5 Preset + 30 User...
- Page 129 Wireless MIDI adaptor (MD-BT01/UD-BT01) The contents of this manual apply to the latest specifications as of the publishing date. To obtain the latest manual, access the Yamaha website then download the manual file. Since specifications, equipment or separately sold accessories may not be the same in every locale, please check with your Yamaha dealer.
-
Page 130: Index
Index A-B Repeat ................72 Factory Reset ................42 Accessories ................9 Fast Forward ................68 ACMP ON/OFF button ............60 Favorite ................... 35 AI Fingered ................65 File ................... 32 AI Full Keyboard ..............65 File Selection display ............. 27 Assembly ..............113 Fill-in ..................61 ASSIGNABLE buttons ............31 Filter .................. - Page 131 Metronome ................39 Search ..................36 Microphone ................83 Single Finger ................64 MIDI connection ..............108 Soft Pedal ................38 MIDI recording ..............75 Song ..................66 MIDI Song ................66 Song area ................26 Mixer ..................95 Sostenuto Pedal ..............38 Monitor ................108 Speed (Tempo) ..............
- Page 132 MEMO...
- Page 133 GNU GENERAL PUBLIC LICENSE Version 2, June 1991 Copyright © 1989, 1991 Free Software Foundation, Inc., 51 Franklin Street, Fifth Floor, Boston, MA 02110-1301 USA Everyone is permitted to copy and distribute verbatim copies of this license document, but changing it is not allowed. Preamble You must cause any work that you distribute or publish, that in whole or in part contains or is derived from the Program or any part thereof,...
- Page 134 How to Apply These Terms to Your New Each time you redistribute the Program (or any work based on the Program), the recipient automatically receives a license from the original Programs licensor to copy, distribute or modify the Program subject to these terms and conditions.
- Page 135 GNU LESSER GENERAL PUBLIC LICENSE Version 2.1, February 1999 Copyright © 1991, 1999 Free Software Foundation, Inc., 51 Franklin Street, Fifth Floor, Boston, MA 02110-1301 USA Everyone is permitted to copy and distribute verbatim copies of this license document, but changing it is not allowed. [This is the first released version of the Lesser GPL.
- Page 136 sections as part of a whole which is a work based on the Library, the Use a suitable shared library mechanism for linking with the Library. A distribution of the whole must be on the terms of this License, whose suitable mechanism is one that (1) uses at run time a copy of the permissions for other licensees extend to the entire whole, and thus to library already present on the user’s computer system, rather than...
- Page 137 GNU General Public License or GNU Lesser General Public either of that version or of any later version published by the Free License by writing to one of the Yamaha office addresses listed at the end of Software Foundation. If the Library does not specify a license version this Owner’s Manual.
- Page 138 libpng TRADEMARK: The name “libpng” has not been registered by the Copyright owner as a This copy of the libpng notices is provided for your convenience. In case of trademark in any jurisdiction. However, because libpng has been distributed any discrepancy between this copy and the notices in the file png.h that is and maintained world-wide, continually since 1995, the Copyright owner included in the libpng distribution, the latter shall prevail.
- Page 139 Files or Software are furnished to do so, provided that either Except as contained in this notice, the name of the X Consortium shall not be (a) this copyright and permission notice appear with all copies of the Data used in advertising or otherwise to promote the sale, use or other dealings in Files or Software, or this Software without prior written authorization from the X Consortium.
- Page 140 Credits and Copyrights for the pre-installed Songs All Rights on behalf of EMI Longitude Music International Copyright Secured All Rights Administered by Sony/ATV Music Publishing LLC, Reserved 424 Church Street, Suite 1200, Nashville, TN 37219 All I Want For Christmas Is You The Girl From Ipanema (Garôta De Ipanema) International Copyright Secured All Rights Words and Music by Mariah Carey and Walter...
- Page 141 International Copyright Secured All Rights All Rights on behalf of Blue Sky Rider Songs What A Wonderful World Reserved Administered by Irving Music, Inc. Words and Music by George David Weiss and Bob International Copyright Secured All Rights Thiele Let It Be Reserved Copyright ©...
- Page 142 Information for users on collection and disposal of old equipment: This symbol on the products, packaging, and/or accompanying documents means that used electrical and electronic products should not be mixed with general household waste. For proper treatment, recovery and recycling of old products, please take them to applicable collection points, in accordance with your national legislation.
- Page 143 For U.S.A. This transmitter must not be co-located or operated in conjunction with any other antenna or transmitter. For CANADA This device complies with Industry Canada licence-exempt RSS standard(s). Operation is subject to the following two conditions: (1) this device may not cause interference, and (2) this device must accept any interference, including interference that may cause undesired operation of the device.
- Page 144 DECLARACIÓN UE DE CONFORMIDAD SIMPLIFICADA Aš, Yamaha Music Europe GmbH, patvirtinu, kad radijo įrenginių tipas [CVP-809GP, Por la presente, Yamaha Music Europe GmbH declara que el tipo de equipo CVP-809, CVP-805] atitinka Direktyvą 2014/53/ES. Visas ES atitikties deklaracijos radioeléctrico [CVP-809GP, CVP-809, CVP-805] es conforme con la Directiva 2014/ tekstas prieinamas šiuo interneto adresu:...
- Page 146 Clarissenhof 5b, 4133 AB Vianen, The Netherlands P.O Box 10245, Petach-Tikva, 49002 Tel: +31-347-358040 Tel: (972) 3-925-6900 Head Office/Manufacturer: Yamaha Corporation 10-1, Nakazawa-cho, Naka-ku, Hamamatsu, 430-8650, Japan DMI27 (For European Countries) Importer: Yamaha Music Europe GmbH Siemensstrasse 22-34, 25462 Rellingen, Germany...
- Page 148 Yamaha Global Site https://www.yamaha.com/ Yamaha Downloads https://download.yamaha.com/ Manual Development Group © 2019 Yamaha Corporation Published 05/2019 MWMA*.*- **A0 VAH4330...