Table of Contents
Advertisement
Quick Links
Advertisement
Table of Contents

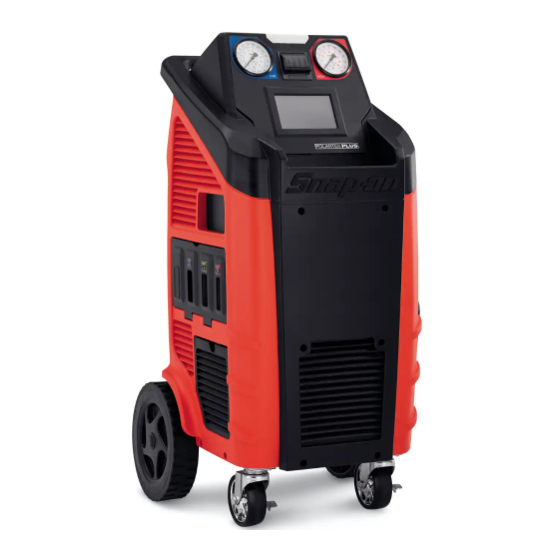
Related Manuals for Snap-On Polartek Plus EEAC331


Summary of Contents for Snap-On Polartek Plus EEAC331
- Page 1 • 1 •...
- Page 2 • 2 •...
- Page 3 • 3 •...
- Page 4 • 4 •...
- Page 5 • 5 •...
- Page 6 • 6 •...
- Page 7 NAMEPLATE FIG. 1 • 7 •...
- Page 8 FIG.4b FIG. 4a • 8 •...
- Page 9 FIG. 5 TANK REL REL TOOLS: Screw driver Box spann • 9 • n°10...
- Page 10 FIG.7 FIG.8 • 10 •...
- Page 11 FIG.9 FIG.10 • 11 •...
- Page 12 R134a SETUP R134a English Français Espanol PREV AUTOMATIC MANUAL SERVICES PAGE NEXT xxxxxxx PAGE hh:mm LANGUAGE SETUP MAINTENANCE INFO mm/dd/yyyy R134a SETUP COUNTERS LANGUAGE MEASURE UNITS PLATE NUMBER PREV QUICKSETUP PAGE SET DATE / TIME NEXT R134a SETUP SETUP HEADER PRINT PAGE SETTINGS Pressure...
- Page 13 R134a SETUP R134a SETUP Welcome to POLARTEK Quick Setup Press ENTER to proceed Press ESC to exit. QUICKSETUP SETUP HEADER PRINT R134a SETUP VACUUM SETTINGS Pressing INFO set default values Vacuum Time Time of check Vacuum rising 9 psi...
- Page 14 R134a R134a MAINTENANCE Connect and open HP and LP coupling to A/C system Press ENTER AUTOMATIC MANUAL SERVICES xxxxxxx hh:mm SETUP MAINTENANCE INFO mm/dd/yyyy A/C PRESSURES CHECK R134a MAINTENANCE A/C PRESSURE CHECK AIR PURGE MANUAL R134a MAINTENANCE CALIBRATION CHANGE DRYER FILTER Turn on A/C system and PREV check pressure using...
- Page 15 R134a MAINTENANCE R134a MAINTENANCE Empty hoses Are you sure that you have unscrewed Hoses pressure coupling or couplings without removing them? A/C PRESSURES CHECK EMPTY HOSES R134a MAINTENANCE R134a MAINTENANCE With LP coupling connected turn on vehicle’s engine Disconnect coupling from A/C and Press and A/C system ENTER then press ENTER...
- Page 16 R134a MAINTENANCE PRESS ENTER TO PURGE PRESS ENTER TO PURGE Tank pressure xxx psi AUTOMATIC MANUAL SERVICES Tank Temperature xxx °F Target Pressure xxx psi xxxxxxx hh:mm SETUP MAINTENANCE INFO mm/dd/yyyy AIR PURGE MANUAL MAINTENANCE CALIBRATION EMPTY HOSES TANK FILLING CHANGE DRIER FILTER PREV A/C PRESSURE CHECK...
- Page 17 CALIBRATION INSERT THE CODE TO ENTER CALIBRATION MENU PQRS WXYZ _________________ ← FIG. 13 CALIBRATION TANK CELL OIL CELL USED OIL CELL TANK PRESSURE PREV A/C PRESSURE PAGE EVAPORATOR PRESSURE NEXT PAGE TEMPERATURE FIG. 14 TANK REL REL TOOLS: ...
- Page 18 FIG. 16 TANK REL REL FIG. 15 TOOLS: Scre wdriv Box TANK CELL spann n°10 FIG. 17 • 18 •...
- Page 19 OIL CELL USED OIL CELL • 19 •...
- Page 20 TANK PRESSURE AUTOMATIC CALIBRATION Calibration running TANK PRESSURE Please wait… PB AUTOMATIC CALIBRATION AUTOMATIC CALIBRATION Press OK TANK PRESSURE AUTOMATIC CALIBRATION TANK PRESSURE Open the red tank valve Press OK Automatic BP calibration can be done only after a PA/C calibration and with a minimum of 1kg of gas inside the tank.
- Page 21 A/C PRESSURE End of PA/C AUTOMATIC CALIBRATION Press OK A/C PRESSURE PA/C AUTOMATIC CALIBRATION Press OK A/C PRESSURE Make sure that HP and LP couplings are disconnected from A/C system or else Press OK to continue A/C PRESSURE Verify HP or LP manometer Pressure lower or equal to 0,2 bar? A/C PRESSURE PA/C...
- Page 22 TEMPERATURE RESTORE CALIBRATION Tank temperature °F RESTORE CALIBRATION °F Press OK Ambient temperature °F °F • 22 •...
- Page 23 R134a MAINTENANCE Recovering gas from filter… CHANGE DRYER FILTER R134a MAINTENANCE Reset service alarm Enter filter code _________________ PQRS WXYZ ← CHANGE DRYER FILTER R134a MAINTENANCE R134a MAINTENANCE An accidental leakage of refrigerant may cause serious damage to skin and eyes Unscrew wear protective gloves and goggles Press ENTER to continue...
- Page 24 R134a MAINTENANCE R134a MAINTENANCE Verify that both o-rings are correctly placed into their seats press enter Check leaks with vacuum CHANGE DRYER FILTER CHANGE DRYER FILTER R134a MAINTENANCE R134a MAINTENANCE VACUUM LEAKS Check filter tightening Screw and Press ENTER Insert new dryer filter use the special wrench and press ENTER CHANGE DRYER FILTER...
- Page 25 R134a MAINTENANCE Internal gas removal CHANGE DRYER FILTER R134a VEHICLE BRAND R134a MAINTENANCE VEHICLE MODEL YEARS CHANGE DRYER FILTER GENERAL INFO OPERATION COMPLETED REFRIGERANT DATA Press ENTER OIL DATA CHANGE DRYER FILTER R134a MAINTENANCE Recovered gas Hoses pressure EMPTY HOSES R134a MAINTENANCE EMPTY HOSES –...
- Page 26 R134a MAINTENANCE REPORT R134a MAINTENANCE FILTER CHANGE mm/dd/yy xx lbs mm/dd/yy xx lbs TANK CELL CHECK mm/dd/yy xx lbs PREV Don't touch the machine! please wait... PAGE NEXT PAGE TANK CELL CHECK R134a MAINTENANCE TANK CELL CHECK Attach the reference weight to the magnet on the rear of the machines and Press ENTER...
- Page 27 R134a MAINTENANCE Tank Pressure Ext. Tank Pressure R134a MAINTENANCE TANK FILLING TANK FILLING connect and open LP or HP coupler to the liquid side of the external tank and open the liquid valve, then Press ENTER R134a MAINTENANCE Close liquid valve of the external tank Press ENTER to continue 2 valve tank 1 valve tank...
- Page 28 R134a MAINTENANCE Hours remaining (hh:mm) XX:XX Do you want to change the oil? VACUUM PUMP OIL CHANGE R134a MAINTENANCE Unscrew the fitting cap and the drain cap then remove used oil from vacuum pump then press ENTER VACUUM PUMP OIL CHANGE FIG.
- Page 29 FIG. 27 TOOLS: Funn FIG. 24 Disp osal TOOLS: conta Funn iner Allen Disp FIG. 25 wren osal ch n° TOOLS: conta Funn 5; 8. iner Allen Disp wren osal ch n° OPTIMAL conta 5;...
- Page 30 FIG. 30 FIG. 29 TOOLS: Funn Disp osal conta iner Allen wren ch n° 5; 8. FIG. 31 • 30 •...
- Page 31 FIG. 33 FIG. 32 TOOLS: Funn Disp osal conta iner Allen wren ch n° 5; 8. FIG. 34 • 31 •...
- Page 32 FIG. 37 FIG. 38 TOOLS: Funn Disp osal conta iner Allen wren ch n° 5; 8. FIG. 39 • 32 •...
- Page 33 FIG. 40 • 33 •...
- Page 34 • 34 •...
- Page 35 • 35 •...
- Page 36 • 36 •...
- Page 37 • 37 •...
- Page 38 • 38 •...
- Page 39 • 39 •...
- Page 40 • 40 •...
- Page 41 • 41 •...
- Page 42 • 42 •...
- Page 43 • 43 •...
- Page 44 R134a MAINTENANCE TANK CELL CHECK CHECK OK Press ENTER to continue TANK CELL CHECK R134a MAINTENANCE TANK CELL CHECK Don't touch the machine! please wait... TANK CELL CHECK R134a MAINTENANCE TANK CELL CHECK Attach the reference weight to the magnet on the rear of the machines and Press ENTER TANK CELL CHECK R134a...
- Page 45 • 45 •...
- Page 46 • 46 •...
- Page 47 • 47 •...
- Page 48 • 48 •...
- Page 49 • 49 •...
- Page 50 • 50 •...
- Page 51 • 51 •...
- Page 52 • 52 •...
- Page 53 • 53 •...
- Page 54 • 54 •...
- Page 55 • 55 •...
- Page 56 • 56 •...
- Page 57 • 57 •...
- Page 58 • 58 •...
- Page 59 • 59 •...
- Page 60 • 60 •...
- Page 61 • 61 •...
- Page 62 • 62 •...
- Page 63 • 63 •...
- Page 64 • 64 •...
- Page 65 PIPING ITEMS REF. DESCRIPTION REF. DESCRIPTION High pressure fitting-EVl High pressure fitting Low pressure fitting-EV2 A/C High pressure manometer Evaporator-Filter Low pressure fitting Manifold heater-Condenser A/C Low pressure manometer Compressor-Oil separator Manifold CKI-Compressar Mechanical filter Pump-EV5 Safety valve ( 12 bar ) Tank 3rd connection - EV9 A/C Pressur Transducer Manifold-LP manometer...
- Page 66 EV2,EV3, COMPRESSOR EV1,EV2,EV3, COMPRESSOR EV3, COMPRESSOR EV6, EV7 • 66 •...
- Page 67 EV1, EV2,EV4,EV5, PUMP, COMPRESSOR EV9,COMPRESSOR • 67 •...
- Page 68 EV1 EV2 , EV4, PUMP EV1, EV2 , EV12 • 68 •...
- Page 69 EV1, EV2, EV14 EV1, EV2, EV8 • 69 •...
- Page 70 EV1, EV2, EV2, EV3, COMPRESSOR EV3, COMPRESSOR • 70 •...
- Page 71 EV1, EV2,EV4, EV5, PUMP, COMPRESSOR EV6,COMPRESSOR EV9,COMPRESSOR COMPRESSOR • 71 •...
- Page 72 EV10 • 72 •...
- Page 73 • 73 •...
- Page 74 • 74 •...
- Page 75 MOTHERBOARD MOTHERBOARD [SCH1452] rev.C-01 [SCH1452] rev.C-01 REF. PIN DESCRIPTION REF. PIN DESCRIPTION Battery Input DC - 5V & 12V Buzzer 01-03 Compressor 7" graphic display (data I/O) 04-06 - - - - - - 07-09 Vacuum pump 7" graphic display (backlight) 10-12 - - - 7"...
- Page 76 • 76 •...
- Page 77 Supplier Snap-on Supplier Snap-on # DESCRIPTION # DESCRIPTION Part Part Part Part Number Number Number Number 300mm rear wheel Transparent LED cover RUO7141 EEAC330-60 PLA2576-03 EEAC331-12 Rear wheel retainer LED light motherboard RUO7401 EEAC330-61 SCH6600-15 Rear wheel cap Upper plastic carter...
- Page 78 • 78 •...
- Page 79 MANIFOLD [DIS7200] PIPING REF. DESCRIPTION Code High pressure fitting-EV1 TUB1176 Low pressure fitting-EV2 TUB1177 Evaporator-Filter TUBX085 Manifold heater-Condenser TUBX086 Compressor-Oil separator TUBX088 CK1-Compressor TUBX089 Pump-EV5 TUB1258 Oil discharge bypass TUB1258 Air purge bypass TUB1226 Condenser-Refrigerant bottle (LP side) TUB1174 Refrigerant bottle (HP side)-Manifold TUB1175 EV4-Vacuum pump TUB1259...
- Page 80 REF. ITEM Inlet Check valve body Outlet Plunger – seal Spring REF. ITEM Inlet valve body Spring Plunger – seal Outlet • 80 •...
- Page 81 • 81 •...
- Page 82 • 82 •...
- Page 83 • 83 •...
- Page 84 • 84 •...
Need help?
Do you have a question about the Polartek Plus EEAC331 and is the answer not in the manual?
Questions and answers