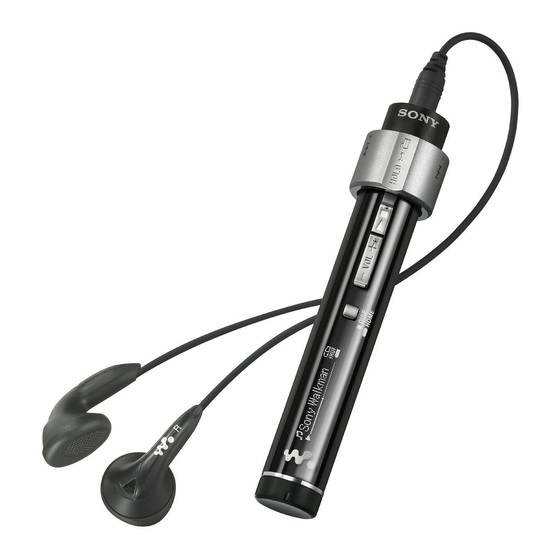
Sony S2 Sports Walkman NW-S205F Operation Manual
Sony operation guide mp3 player
Hide thumbs
Also See for S2 Sports Walkman NW-S205F:
- Specifications (2 pages) ,
- Operation manual (93 pages) ,
- Service manual (44 pages)

Related Manuals for Sony S2 Sports Walkman NW-S205F


Summary of Contents for Sony S2 Sports Walkman NW-S205F
- Page 1 Operation Guide NW-S202F / S203F / S205F / S202 ©2006 Sony Corporation 2-699-315-13 (1)
-
Page 2: About The Manuals
About the Manuals Included with the player are the Quick Start Guide and this PDF-format Operation Guide. Additionally, after installing SonicStage software from the supplied CD-ROM, you can refer to the Help within SonicStage. – The Quick Start Guide explains set up and the basic operations, enabling you to import songs to a computer, to transfer them to the player, and to play them back. - Page 3 To change the page layout The buttons at the bottom of the Adobe Reader screen enable you to select how pages are displayed. Single Page Pages are displayed one at a time. When you scroll, the display changes to a previous or succeeding page. Continuous Pages are displayed as a continuous roll of pages.
-
Page 4: Table Of Contents
Table of Contents Supplied Accessories ... 6 Home Menu List ... 8 Parts and Controls ... 9 Playing Songs Playing Songs (ALL SONGS) ... Playing Lists of Songs Searching for Songs (SEARCH) ... Searching for songs by song name Searching for songs by artist Searching for songs by album Changing the Play Mode Changing the play mode by shaking the... - Page 5 Advanced Features Recharging the Player ... 62 Maximizing Battery Life ... 63 What are Format and Bit Rate? ... 64 Playing Songs Without Pauses ... 65 How is Song Information Imported to the Player?... 66 Storing Data Other Than Audio Files ...
-
Page 6: Supplied Accessories
Supplied Accessories Please check the accessories in the package. Headphones (1) USB cable (1) Arm band* (1) Clip* (1) This is used to clip onto your clothes when carrying the player. CD-ROM** (1) - SonicStage software - Operation Guide (PDF file) ... - Page 7 To remove the player from the arm band Pull the tab on the undersurface of the arm band’s holder in the direction of the arrow to detach the player, then release the player from the arm band’s holder Attaching the player with the clip Slide the player (display facing up) on the clip.
-
Page 8: Home Menu List
Home Menu List You can display the HOME screen by pressing and holding the DISP/HOME button of the player. The HOME screen is the starting point to play audio, search for songs, and change settings such as follows. DISP/HOME button HOME screen* * 5 of the 7 icons appear in the display with the current selection in the centre. -
Page 9: Parts And Controls
Parts and Controls * button Starts song playback. When starting playback, appears at the bottom left of the display, and if the button is pressed again, appears and playback stops. When you press the button, just after purchasing the player or after disconnecting the supplied USB cable from the computer, playback... - Page 10 Shuttle switch By rotating the shuttle switch, you can select a menu item, skip to the beginning of the song, or fast-forward /fast-rewind. You can also set to the Folder control mode, Normal mode or HOLD by sliding the shuttle switch. to ...
- Page 11 USB jack Rotate the lid to the left to set the OPEN position, and then open. Connect the player to the small connector of the supplied USB cable. To close the lid, rotate it to set the OPEN position and close, then rotate it to the right to set the LOCK position.
- Page 12 Display Sorting status indication / icon During playback operation, the icon or the current song order icon ( (Artist order), (Albums by artist order)) appears. In Normal mode, the appears, and in Folder control mode, the song order icon appears. Text/graphic information display Displays album title, artist name, song name, current date and time,...
-
Page 13: Button To Confirm
Playing Songs Playing Songs The songs on the player are played back. Press and hold the DISP/HOME button until the HOME screen appears. Rotate the shuttle switch to select button to confirm. All songs on the player appear and playback starts from the last song you listened to. -
Page 14: Playing Lists Of Songs (Playlist)
Playing Songs Playing Lists of Songs You can play lists of songs (Playlist) created in SonicStage. If you change a name in SonicStage, the changed name appears on the player. See the SonicStage Help for details. Note When (PLAYLIST) is selected, ... -
Page 15: Searching For Songs (Search)
Playing Songs Searching for Songs You can search for songs by “Song name, ” “Artist name, ” or “Album name. ” Searching for songs by song name Press and hold the DISP/HOME button until the HOME screen appears. Rotate the shuttle switch to select button to confirm. -
Page 16: Searching For Songs By Artist (Artist)
Playing Songs... Searching for Songs Searching for songs by artist Press and hold the DISP/HOME button until the HOME screen appears. Rotate the shuttle switch to select button to confirm. Rotate the shuttle switch to select “Artist>” and press the button to confirm. -
Page 17: Searching For Songs By Album (Album)
Playing Songs... Searching for Songs Searching for songs by album Press and hold the DISP/HOME button until the HOME screen appears. Rotate the shuttle switch to select button to confirm. Rotate the shuttle switch to select “Album>” and press the button to confirm. -
Page 18: Changing The Play Mode (Play Mode)
Playing Songs Changing the Play Mode The player offers a variety of play modes, including random play and selected repeat play. You can change the play mode by shaking the player 3 times ( page 20) after activating the G Sensor menu ( page 40). ... - Page 19 Playing Songs... Changing the Play Mode List of play modes Play mode type/Icon Normal/No icon Folder/ Repeat All (all repeat)/ Repeat Folder (folder repeat)/ Repeat 1 Song (one song repeat)/ 1 Repeat Shuffle All (all song shuffle repeat)/ SHUF Repeat Shuffle Folder (folder shuffle repeat)/ SHUF * If you set “Album”...
-
Page 20: Changing The Play Mode By Shaking The Player 3 Times (Shuffle Shake)
Playing Songs... Changing the Play Mode Changing the play mode by shaking the player 3 times You can change the play mode (shuffle activated or deactivated) by shaking the player 3 times during playback. Holding the player as illustrated below (display facing up), shake the player up and down 3 times in rhythm within two seconds. -
Page 21: Playing Songs During Exercise
Playing songs during exercise Playing songs to a set target You can set the target items such as playback time, calories, or distance during playback and exercise listening to music until the target items are achieved. Press and hold the DISP/HOME button until the HOME screen appears. - Page 22 Playing songs during exercise... List of target setting Target item Time Calorie DIST_km (distance (km)) DIST_mile (distance (mile)) Sets target distance. You can set the distance Hints When there is a previous target not yet achieved can start count down after selecting “Start”...
-
Page 23: Playing Songs In Automatic Selection Mode Depending On Your Exercise Pace (Music Pacer)
Playing songs during exercise Playing songs in automatic selection mode depending on your exercise pace In SPORTS MODE, you can play songs using the automatic selection function in which the player changes the playlist automatically depending on your pace of movement, like walking or jogging. ... - Page 24 Playing songs during exercise... Playing songs in automatic selection mode according to your exercise pace Hints Playlists of “Walk” and “Run” are included on the player by default. Furthermore, you can add songs to the playlists of “Walk” and “Run” using the SonicStage software.
-
Page 25: Changing The Playlists Of The Automatic Song Selection (Set Playlist)
Playing songs during exercise... Playing songs in automatic selection mode according to your exercise pace Changing the playlists of the automatic song selection You can change the playlists of the automatic song selection. Note To activate the automatic song selection, select “ON” on the Music Pacer ( page 23). ... -
Page 26: Using The Stop Watch Function (Stopwatch)
Playing songs during exercise Using the stop watch function You can use the player as a stop watch. You can time up to 9 hours 59 minutes 59 seconds by 1 second increments. Press and hold the DISP/HOME button until the HOME screen appears. -
Page 27: Settings
Settings Changing the Display Mode You can change the desired display for playback or stop mode. Each time the DISP/HOME button is pressed, the screen changes as follows. Basic: Displays the basic screen. (Default setting) Property: Displays song information. Displays the current song number (or current album/artist number)/total song number (or total album/artist number) of the play range, elapsed time, codec (compression type), bit rate, and current sound quality setting... - Page 28 Settings... Changing the Display Mode Hint Set the power save setting ( page 54) to “OFF” to show the screen constantly. Notes When the sound quality setting (Equalizer) ( page 33) is set to “OFF, ” it does not appear on the “Property”...
-
Page 29: Changing The Song Order (Sort)
Settings Changing the Song Order You can set the song order by album order, albums by artist order, or artist name order. Press and hold the DISP/HOME button until the HOME screen appears. Rotate the shuttle switch to select ... -
Page 30: Setting The Volume Using The Preset Volume Function (Volume Mode)
Settings Setting the Volume Using the Preset Volume Function (Volume Mode) There are 2 modes to adjust the volume level. Manual (Manual Volume): Press the VOL +/– button to adjust the volume level from 0 to 30. Preset (Preset Volume): Press the VOL +/–... - Page 31 Settings... Setting the Volume Using the Preset Volume Function Rotate the shuttle switch to select “Preset” and press the button to confirm. A line appears above and below “Low. ” Rotate the shuttle switch to set the volume for each preset level, and press the ...
-
Page 32: Switching To Manual Mode (Manual)
Settings... Setting the Volume Using the Preset Volume Function Switching to manual mode Press and hold the DISP/HOME button until the HOME screen appears. Rotate the shuttle switch to select button to confirm. Rotate the shuttle switch to select “Advanced Menu>” and press the ... -
Page 33: Customizing Sound Quality (Equalizer)
Settings Customizing Sound Quality You can customize the sound quality to match the genre of music. Note You cannot customize the sound quality while using the FM tuner (NW-S202F/S203F/ S205F only). Press and hold the DISP/HOME button until the HOME screen appears. -
Page 34: Registering A Desired Sound Quality (Preset Custom)
Settings Registering a Desired Sound Quality You can set 7 levels for each 5 bands and register a desired sound quality. And you can select the registered setting on “Custom” in “Customizing Sound Quality (Equalizer)” ( page 33). Note ... -
Page 35: Adjusting The Volume Level (Dynamic Normalizer)
Settings Adjusting the Volume Level You can set to reduce the volume level between songs. With this setting, when listening to album songs in shuffle play mode, the volume level between songs is moderated to minimize the difference in their recording levels. Note ... -
Page 36: Limiting The Volume (Avls)
Settings Limiting the Volume You can set AVLS (Automatic Volume Limiter System) to limit the maximum volume to prevent auditory disturbance or distraction. With AVLS, you can listen to music at a comfortable volume level. Press and hold the DISP/HOME button until the HOME screen appears. -
Page 37: Turning Off The Beep Sound (Beep)
Settings Turning Off the Beep Sound You can turn off the beep sounds of the player. Press and hold the DISP/HOME button until the HOME screen appears. Rotate the shuttle switch to select button to confirm. Rotate the shuttle switch to select “Advanced Menu>”... -
Page 38: Setting The Information For Calorie-Count And Distance (Height/Weight)
Settings Setting the information for calorie-count and distance (Height/Weight) You can set the information (height/weight/step length) to measure for calorie- count and distance when playing back songs in SPORTS MODE ( page 21). Press and hold the DISP/HOME button until the HOME screen appears. - Page 39 Settings... Setting the information for calorie-count and distance After pressing the button to decide “Walk Stride>,” rotate the shuttle switch to set step length for when walking, and then press the button to confirm. Step length is calculated by the height value (set in step ) × 0.5. ...
-
Page 40: Setting The G Sensor (G Sensor)
Settings Setting the G Sensor The player’s built-in G Sensor recognizes speed variation and provides functions such as step count, distance covered and consumed calorie calculations, or play mode change by shaking the player 3 times ( page 20). You can also deactivate the G Sensor. - Page 41 Settings... Setting the G Sensor Hint When the G Sensor menu is set to “ON-MusicPB” or “ON-Anytime, ” “G” appears on the screen of “Step” or “Calorie” ( page 27). Note We recommend using the supplied clip or arm band ( page 6) when using the player.
-
Page 42: Displaying Step Count History (Count History)
Settings Displaying step count history Step count history is recorded when counting steps while the G Sensor menu is set to “ON” ( page 40). You can display up to 7 histories from the latest history. Press and hold the DISP/HOME button until the HOME screen appears. -
Page 43: Setting The Reset Method Of The Step Count (Counter Reset)
Settings Setting the reset method of the step count (Counter Reset) You can reset the accumulated step count. “Daily” is set by default. Press and hold the DISP/HOME button until the HOME screen appears. Rotate the shuttle switch to select ... -
Page 44: Adjusting The Current Time Setting (Set Date-Time)
Settings Adjusting the Current Time Setting You can set and display the current time. You can set the date and time of the player to either synchronize with your computer automatically, or manually by the player. Press and hold the DISP/HOME button until the HOME screen appears. - Page 45 Settings... Adjusting the Current Time Setting Rotate the shuttle switch to adjust the year setting and press the button to confirm. A line appears above and below the month digit. As you did in step , adjust the settings for month, date, hour, and minute.
-
Page 46: Setting The Date Format (Date Disp Type)
Settings Setting the Date Format You can select the date format you set ( page 44) from either “month/day, ” or “day/month. ” Press and hold the DISP/HOME button until the HOME screen appears. Rotate the shuttle switch to select ... -
Page 47: Setting The Time Format (Time Disp Type)
Settings Setting the Time Format You can select the time format you set ( page 44) from either a 12 or 24 hour display. “24h” is set by default. Press and hold the DISP/HOME button until the HOME screen appears. -
Page 48: Displaying The Player Information (Information)
Settings Displaying the Player Information Information such as product name, built-in flash memory capacity, serial number and firmware version can be shown. Press and hold the DISP/HOME button until the HOME screen appears. Rotate the shuttle switch to select ... -
Page 49: Resetting To Factory Settings (Reset All Setting)
Settings Resetting to Factory Settings You can reset the player to the factory settings. Resetting the player does not delete the music songs you have transferred to the player. Note Only available when using the ALL SONGS function in stop mode. ... -
Page 50: Formatting Memory (Format)
Settings Formatting Memory You can format the built-in flash memory of the player. If the memory’s formatted, all the music data and the other data stored will be erased. Be sure to verify the data stored in the memory prior to formatting. Note ... - Page 51 Settings... Formatting Memory To return to the previous menu Press the DISP/HOME button. To cancel formatting Select “Cancel” in step and press the button to confirm. Note Do not format the built-in flash memory of the player using Windows Explorer.
-
Page 52: Changing The Usb Connection Setting (Usb Power)
Settings Changing the USB Connection Setting Depending on how you are using the computer, if the power supply (USB Bus Powered) is insufficient, incomplete data transfer may occur from the computer to the player. In this case, setting the USB connection (USB Power) to “100mA”... -
Page 53: Setting The Display's Left/Right Orientation (Disp. Rotation)
Settings Setting the Display’s Left/Right Orientation (Disp. Rotation) You can change the display’s orientation to operate easily, for example, when attaching the player using the supplied clip or arm band. Press and hold the DISP/HOME button until the HOME screen appears. -
Page 54: Saving Power Consumption (Power Save)
Settings Saving Power Consumption The screen changes to the power save screen when the player is not operated for about 15 seconds. Press and hold the DISP/HOME button until the HOME screen appears. Rotate the shuttle switch to select ... -
Page 55: Listening To Fm Radio (Nw-S202F/S203F/S205F Only)
Listening to FM Radio (NW-S202F/S203F/S205F only) Enjoy Listening to FM Radio You can listen to FM radio. Charge the built-in rechargeable battery before using the player ( page 62), and connect the headphones to the headphone jack. 1 Switching to the FM tuner ... -
Page 56: Presetting Broadcast Stations Automatically
Listening to FM Radio (NW-S202F/S203F/S205F only) To stop the FM tuner and return to the audio player Press and hold the DISP/HOME button until the HOME screen appears, and then select (ALL SONGS) or press the button to confirm. If there are no songs in the playlist, select To turn off the volume of the FM tuner briefly By pressing the ... -
Page 57: Selecting Broadcast Stations
Listening to FM Radio (NW-S202F/S203F/S205F only) Rotate the shuttle switch to select “FM Auto Preset>” and press the button to confirm. Rotate the shuttle switch to select “OK” and press the button to confirm. The receivable broadcast stations will be preset in order from low to high frequency. - Page 58 Listening to FM Radio (NW-S202F/S203F/S205F only) Manual Tuning , frequency, and preset number appear on the FM tuner screen, in order. Select the previous frequency Select the next frequency Select the previous receivable broadcast station* Select the next receivable broadcast station* * By rotating and holding the shuttle switch to ...
-
Page 59: Presetting Desired Broadcast Stations
Listening to FM Radio (NW-S202F/S203F/S205F only) Presetting Desired Broadcast Stations You can preset broadcast stations that “FM Auto Preset” misses ( page 56). Select the desired frequency by manual tuning mode ( page 57). Press and hold the button. The frequency you select in step appears. -
Page 60: Setting The Reception (Scan Sens)
Listening to FM Radio (NW-S202F/S203F/S205F only) Setting the Reception When you set the “FM Auto Preset” ( page 56) or “Manual Tuning” ( page 57), it may receive many unnecessary broadcast stations because reception is too sensitive. In this case, set to “Low. ” “High” is set by default. ... -
Page 61: Changing The Monaural/Stereo (Mono/Auto)
Listening to FM Radio (NW-S202F/S203F/S205F only) Changing the Monaural/Stereo If noise occurs during FM reception, set to “Mono” for monaural. If you set to “Auto, ” stereo/monaural reception is automatically set, depending on reception conditions. “Auto” is set by default. ... -
Page 62: Advanced Features
Advanced Features Recharging the Player The player is rechargeable when connected to a computer. When you connect the player to your computer, use the supplied USB cable. When the remaining battery indication of the display shows: charging is complete (charging time is approx. 45 minutes*). When you use the player for the first time, or if you have not used the player for a long time, recharge it fully (to indication of the display). -
Page 63: Maximizing Battery Life
Advanced Features Maximizing Battery Life By following a few simple guidelines, you can extend the playing time available from a battery charge. Screen display auto-off Setting the display to turn off after a certain period of time of not using the player (approx. -
Page 64: What Are Format And Bit Rate
Advanced Features What are Format and Bit Rate? What is format? The format of a song refers to the method used by SonicStage to store the song’s audio information when songs are imported to SonicStage from the Internet or audio CDs. Common formats include MP3, WMA and ATRAC, etc. -
Page 65: Playing Songs Without Pauses
Advanced Features Playing Songs Without Pauses If you import songs to SonicStage in ATRAC format and transfer them to the player, you can play them on the player continuously, without pauses between the songs. For example, an album that includes a long recording of a live performance with no pauses between songs can be played continuously without pauses after the songs are imported to SonicStage in ATRAC format and then transferred to the player. -
Page 66: How Is Song Information Imported To The Player
Advanced Features How is Song Information Imported to the Player? When you import CD songs into SonicStage, SonicStage automatically retrieves information about the songs (such as album title, artist name, and song name) from a CD database service (CDDB, the Gracenote CD DataBase) on the Internet at no charge. -
Page 67: Storing Data Other Than Audio Files
Advanced Features Storing Data Other Than Audio Files You can store computer data into the built-in flash memory of the player by transferring it from your computer with Windows Explorer. If the player is connected to the computer, the built-in flash memory appears in Windows Explorer as a removable storage drive. -
Page 68: Upgrading The Player's Firmware
For customers in Canada: http://www.sony.ca/ElectronicsSupport/ For customers in Europe: http://www.support-nwwalkman.com For customers in Latin America: http://www.sony-latin.com/pa/info/ For customers in other countries/regions: http://www.css.ap.sony.com For customers who purchased the overseas models: http://www.sony.co.jp/overseas/support/ Download the update program to your computer from the web site. ... -
Page 69: Troubleshooting
Check for information about the issue in SonicStage Help. Look for information about the issue on one of the support Web sites. For customers in the USA, visit: http://www.sony.com/walkmansupport For customers in Canada, visit: http://www.sony.ca/ElectronicsSupport/ For customers in Europe, visit: http://www.support-nwwalkman.com For customers in Latin America, visit: http://www.sony-latin.com/pa/info/... - Page 70 Troubleshooting Operation (continued) Symptom Noise is generated. Buttons do not work. The player does not work. The remaining battery is insufficient. The transferred songs cannot be found. The volume is not loud enough. There is no sound from right channel of the headphones.
- Page 71 Troubleshooting Operation (continued) Symptom Even if you use the Music Pacer function ( page 23), the playlist is not changed. Even if you shake the player 3 times, play mode is not changed. Display Symptom “” appears for a title. Cause/Remedy ...
- Page 72 ( page 63). The battery is required to be replaced. Consult your near Sony dealer. The USB cable is not connected to a USB port on your computer properly.
- Page 73 Troubleshooting Connection with the computer/SonicStage Symptom SonicStage does not start “USB CONNECT” does not appear when connected to the computer with the supplied USB cable. The player is not recognized by the computer when it is connected to the computer. (continued) Cause/Remedy ...
- Page 74 Troubleshooting Connection with the computer/SonicStage Symptom Audio data cannot be transferred to the player from your computer. Only a small number of songs can be transferred to the player. (Available recording time is short.) Audio data cannot be transferred back to your computer from the player.
- Page 75 Troubleshooting FM Tuner (NW-S202F/S203F/S205F only) Symptom You cannot hear the FM broadcast well. Reception is weak and sound quality is poor. The FM broadcast is affected by interference. Other Symptom There is no beep sound when the player is operated. The player gets warm.
-
Page 76: Messages
Troubleshooting Messages Follow the instructions below if a message appears in the display. Message ACCESS AVLS (blinks) CANNOT PLAY CHARGE ERROR DATA ACCESS DRM ERROR EXPIRED Meaning Remedy This message appears This is not an error after disconnecting the message. Wait until the USB cable from the message disappears. - Page 77 “To delete abnormal data from the built-in flash memory” ( page 79). If this message still appears, consult your nearest Sony dealer. There are no audio files in If there are no audio files the built-in flash memory.
- Page 78 Playlist (automatic song ( page 25). selection) menu of “SPORTS MODE. ” There is a problem with Consult your nearest Sony the hardware. dealer. When the player fails to Follow the on-screen update the firmware.
- Page 79 Troubleshooting... Messages To delete abnormal data from the built-in flash memory If “CANNOT PLAY, ” “DRM ERROR, ” “EXPIRED, ” “FILE ERROR, ” “FORMAT ERROR, ” “MEMORY ERROR, ” or “NO DATABASE” appears, there is a problem with all or part of the data stored in the built-in flash memory. Please follow the procedure below to erase data you cannot play.
-
Page 80: Uninstalling Sonicstage
Troubleshooting Uninstalling SonicStage To uninstall the supplied software from your computer, follow the procedure below. Click “Start”– “Control Panel.” Double-click “Add or Remove Programs.” Click “SonicStage X.X” in the “Currently Installed Programs” list, and then click “Remove.” Follow the displayed instruction and restart your computer. -
Page 81: Additional Information
The model and serial numbers are located on the rear of the player. Record the serial number in the space provided below. Refer to these numbers whenever you call upon your Sony dealer regarding this product. Model No. ___________________________ Serial No. ___________________________... - Page 82 Additional Information If you have any questions about this product: Visit: www.sony.com/walkmansupport Contact: Sony Customer Information Service Center at 1-(866)-456-7669 Write: Sony Customer Information Services Center 12451 Gateway Blvd., Fort Myers, FL 33913 Declaration of Conformity Trade Name: Model No.: Responsible Party: Sony Electronics Inc.
- Page 83 Additional Information Disposal of Old Electrical & Electronic Equipment (Applicable in the European Union and other European countries with separate collection systems) This symbol on the product or on its packaging indicates that this product shall not be treated as household waste. Instead it shall be handed over to the applicable collection point for the recycling of electrical and electronic equipment.
-
Page 84: Precautions
Do not touch the rechargeable battery with bare hands if it is leaking. Since battery liquid may remain in the player, consult your nearest Sony dealer if the battery has leaked. If the liquid gets into your eyes, do not rub your eyes as it may lead to blindness. - Page 85 Additional Information... When using the player, remember to follow the precautions below in order to avoid warping the cabinet or causing the player to malfunction. – Make sure not to sit down with the player in your back pocket. –...
- Page 86 In no event will SONY be liable for any financial damage, or loss of profits, including claims made by third parties, arising out of the use of the software supplied with this player.
- Page 87 The recorded music is limited to private use only. Use of the music beyond this limit requires permission of the copyright holders. Sony is not responsible for incomplete recording/downloading or damaged data due to problems of the player or computer.
-
Page 88: On Copyrights
Sony Corporation. OpenMG, ATRAC, ATRAC3, ATRAC3plus and their logos are trademarks of Sony Corporation. “WALKMAN” and “WALKMAN” logo are registered trademarks of Sony Corporation. Microsoft, Windows, Windows NT and Windows Media are trademarks or registered trademarks of Microsoft Corporation in the United States and/or other countries. -
Page 89: Specifications
Additional Information Specifications Audio compression technology – MPEG-1 Audio Layer-3 (MP3) – Windows Media Audio (WMA) – Adaptive Transform Acoustic Coding (ATRAC) – Advanced Audio Coding (AAC) * WMA/AAC format audio files that are copyright-protected cannot be played back. Maximum recordable number of songs and time (Approx.)* * The approximate times are based on a transferred 4-minute ATRAC or MP3 format song. - Page 90 Additional Information... Specifications Supported bit rates MP3: 32 to 320 kbps variable bit rate-compliant WMA: 32 to 192 kbps variable bit rate-compliant ATRAC: 48/64/66 (ATRAC3)*/96/105 (ATRAC3)*/128/132 (ATRAC3)/160/192/256/320/352 kbps * CD recording cannot be done using SonicStage software in ATRAC3 at 66/105 kbps. AAC: 16 to 320 kbps variable bit rate-compliant* * Nonstandard bit rates or non-guaranteed bit rates are included depending on the sampling frequency.
- Page 91 Additional Information... Minimum System Requirements (for the player) Computer IBM PC/AT or compatible computer preinstalled with the following Windows operating systems: – Windows 2000 Professional (Service Pack 3 or later) – Windows XP Home Edition – Windows XP Professional –...
-
Page 92: Index
Additional Information Index Symbols (Album)... 29 (Artist) ... 29 (Artist/Album) ... 29 (Folder) ... 19 1 (Repeat 1 Song) ... 19 (Repeat All) ... 19 (Repeat Folder) ... 19 SHUF (Repeat Shuffle All) ... 19 SHUF (Repeat Shuffle Folder) ... 19 AAC ... - Page 93 Additional Information... km ... 22 Manual (Volume) ... 32 Manual tuning ... 57 Messages ... 76 miles ... 22 Mono/Auto ... 61 MP3 ... 64, 89 Music Pacer ... 23 Playback ... 9 Playlist ... 14 Play Mode ... 18 Play Range ...
Need help?
Do you have a question about the S2 Sports Walkman NW-S205F and is the answer not in the manual?
Questions and answers