Table of Contents
Advertisement
Available languages
Available languages
Advertisement
Chapters
Table of Contents

Related Manuals for Sony Net MD Walkman MZ-N505


Summary of Contents for Sony Net MD Walkman MZ-N505
- Page 1 Portable MiniDisc Recorder Operating Instructions __________________________ __________________________________ __________________________________ WALKMAN is a trademark of Sony Corporation. MZ-N505 © 2002 Sony Corporation 3-234-037-73(1)
- Page 2 The CE mark is valid only for products marketed in the European Union. • OpenMG and its logo are trademarks of Sony Corporation. • US and foreign patents licenced from Dolby Laboratories. • All other trademarks and registered trademarks are trademarks or registered trademarks of their respective holders.
-
Page 3: Notice For Users
• In no event will SONY be liable for any financial damage, or loss of profits, including claims made by third parties, arising out of the use of the software supplied with this recorder. -
Page 4: Table Of Contents
Table of contents Overview ... 8 Checking the supplied accessories ...9 Looking at the controls ... 10 Getting started! ... 13 Recording an MD right away! (Synchro-recording) ... 16 Transferring songs from the computer to the MiniDisc (Check-out) ... 20 Playing an MD right away! ... - Page 5 Various ways of playback ... 33 Using the group function (Group Mode) ... 33 Listening to tracks in a specific group (Group Mode Playback) ... 33 Selecting and playing groups (Group Skip Mode) ... 33 Changing play modes ... 34 Emphasizing bass (DIGITAL MEGA BASS) ...
- Page 6 Additional information ... 51 Precautions ...51 System limitations ...54 Troubleshooting ...56 List of menus ...59 Messages ...64 Specifications ...66 Explanations ...67 Index ...68...
-
Page 8: Overview
Overview What you can do with your MD Walkman You can easily transfer digital audio files from your computer to the MiniDisc using this product, and carry it anywhere to enjoy. Store digital audio files on your computer*. Transfer the files to the MiniDisc Walkman. -
Page 9: Checking The Supplied Accessories
• The recorded music is limited to private use only. Use of the music beyond this limit requires permission of the copyright holders. • Sony is not responsible for music files that are not saved on your computer due to unsuccessful recording from CD or music downloading. -
Page 10: Looking At The Controls
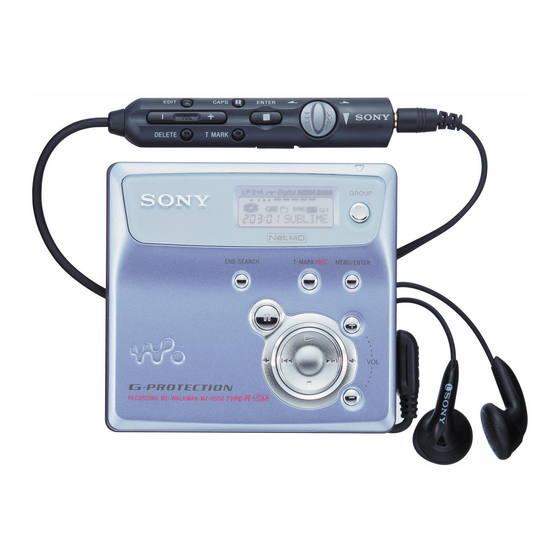
Looking at the controls The recorder OPEN button END SEARCH button X (pause) button DC IN 3V jack VOL +/– button The VOL + button has a tactile dot. N (play) button The N button has a tactile dot. ./> (search/AMS) button x (stop)/CHARGE button CHARGE Display window... -
Page 11: Digital Mega Bass
The display window of the recorder L P 2 . 4 MONO (monaural) indication LP mode indication Mega bass indication Disc indication Shows that the disc is rotating for recording, playing or editing an MD. Level meter Shows the volume of the MD being played or recorded. -
Page 12: The Headphones/Earphones With A Remote Control
The headphones/earphones with a remote control ./>/N (search/AMS/play) • >/. button x (stop) • ENTER button X (pause) • CAPS button EDIT button VOL +/– button Headphones/earphones Can be replaced with optional headphones/earphones. HOLD switch Slide to lock the controls of the remote control. -
Page 13: Getting Started
Getting started! Charge the rechargeable battery before using. Even if the rechargeable battery is not charged, you can use the recorder as long as the AC power adaptor is connected. Insert the rechargeable battery. Slide to open the battery compartment lid. Using the dry battery Insert one LR6 (size AA) alkaline dry battery (not supplied) instead of the rechargeable battery. -
Page 14: Charging The Rechargeable Battery
Charging the rechargeable battery. Connect the AC power adaptor to DC IN 3V. Press CHARGE (x). “Charge” flashes, e appears in the display, and charging starts. When charging is completed, the battery indication disappears. Full charging of a completely discharged rechargeable battery takes about 3 hours. - Page 15 For details, refer to “Battery life” (page 50). When recording (Unit: approx.hours) Batteries Stereo Stereo NC-WMAA Nickel Cadmium rechargeable battery LR6 (SG) Sony alkaline dry battery When playing (Unit: approx.hours) Batteries Stereo Stereo NC-WMAA Nickel Cadmium rechargeable battery LR6 (SG)
-
Page 16: Recording An Md Right Away! (Synchro-Recording)
Recording an MD right away! (Synchro-recording) This section explains the basic procedure for making digital recordings using an optical cable connected to a CD player, Digital TV or other digital equipment. (For further information, see “System limitations” (page 54)) During synchro-recording, the recorder starts and stops recording in sync with the sound source. -
Page 17: Make Connections
Make connections. firmly and completely into the appropriate jacks) CD player, MD to a wall player, DVD video player, etc. outlet AC power adaptor to DC IN 3V ∗ See “Optional accessories” (page 66) Record an MD. END SEARCH / >/ While the recorder is stopped, press MENU. - Page 18 • Make sure the MD is not record-protected (page 52). • Premastered MDs cannot be recorded over. About the DSP TYPE-R for ATRAC “TYPE-R” is a high-level Sony specification used in the Digital Signal Processor (DSP), which is the heart of the MiniDisc sound. This...
- Page 19 Notes • The pause function cannot be turned on or off manually during synchro-recording. Press x to stop recording. • Do not change SYNC-R setting while recording. Recording may not be done properly. • Even when there is no recorded sound on the sound source, there may be cases when recording does not pause automatically during synchro-recording due to the noise level...
-
Page 20: Transferring Songs From The Computer To The Minidisc (Check-Out)
Transferring songs from the computer to the MiniDisc (Check-out) Install the supplied OpenMG Jukebox software onto your computer. For details, refer to the OpenMG Jukebox Operating Instructions. Note When you connect the recorder to your computer for the first time, make sure to install the “OpenMG Jukebox software”... - Page 21 Record audio data to the OpenMG Jukebox. For details, refer to the OpenMG Jukebox Operating Instructions. The display window on the recorder appears as shown below when the recorder is connected to your computer. Transfer the music file to the recorder (Check-out).
-
Page 22: Playing An Md Right Away
Playing an MD right away! Insert an MD. Press OPEN to open the lid. Play an MD. Press N (flip the lever towards >/ A short beep sounds in the headphones/ earphones. Press VOL +/– to adjust the volume. The volume will be shown in the display. - Page 23 Operation on the recorder Operation on the remote Press .. Find the beginning of Press . repeatedly until the the current track or a previous track beginning of the desired track. Find the beginning of Press > once. the next track Press and hold ..
-
Page 24: Various Ways Of Recording
Various ways of recording Note on digital and analog recording (Digital input and analog input) The input jack of this recorder works as both digital and analog input jacks. Connect the recorder to a CD player or a cassette recorder using either digital (optical) input or analog (line) input. -
Page 25: Recording In Analog (Analog Recording)
Recording in analog (Analog Recording) The sound will be input from the connected equipment as an analog signal, but recorded digitally to the disc. To connect to a sound source, an optional line cable is required. When connecting the cable, make sure to insert the connectors firmly. -
Page 26: When You Do Not Want "Lp:" Added Automatically At The Beginning Of A Track
Long-time recording (MDLP) Select each recording mode according to the recording time that you want. Stereo recording is possible at 2 times (LP2) or 4 times (LP4) the normal (stereo) recording time. Monaural recording at 2 times normal recording time is also possible. MDs recorded in monaural, LP2, or LP4 mode can be played back only on MD players or recorders with... -
Page 27: Recording Tracks Using The Group Function (Group Mode Recording)
Press . or > repeatedly until “OFF” flashes in the display, and then press ENTER. If you want “LP:” added, select “ON” in this step, and then press ENTER. Note “LP:” is added to tracks checked-out in LP stereo from your computer regardless of the “LP Stamp”... -
Page 28: To Activate Group Mode (Group Mode Recording)
How is group information recorded? When recording in group mode, the group information is written to the disc name recording area. This information consists of text strings that are written as shown in the following example. Disc name recording area Example Disc name: “Favorites”... -
Page 29: Recording A Track Into An Existing Group
Recording a track into an existing group • This function can be operated on the recorder only. • Turn group mode on. • Insert a disc with group settings. Press GROUP. “ ” flashes in the display and you can select a group directly (Group Skip Mode) (page 33). -
Page 30: Adding Track Marks Automatically (Auto Time Stamp)
Notes • The setting will remain even after the power is turned off. • If you start recording while the recorder is in play-pause mode, the recording will begin from the point at which it is paused even when the “R-Posi” is set to “Fr End”. Adding track marks automatically (Auto Time Stamp) -
Page 31: Adjusting The Recording Level Manually (Manual Recording)
Adjusting the recording level manually (Manual Recording) When you record, the sound level is adjusted automatically. If necessary, you can set the recording level manually during both analog and digital recording. This function can be set with the recorder only. MENU/ENTER Press REC while pressing X. -
Page 32: Checking The Remaining Recordable Time
Checking the remaining recordable time You can check the remaining time, track number, etc. when recording or during stop. Group-related items appear only when a track with group settings is played and then stopped. When you operate the recorder with the supplied remote control, use the buttons and controls shown in parentheses. -
Page 33: Various Ways Of Playback
Various ways of playback Using the group function (Group Mode) The recorder can operate various playback with a disc which has group setting. For more information on group mode, see “Recording tracks using the group function (Group Mode Recording)” (page 27) This function can be set with the recorder only. -
Page 34: Changing Play Modes
When group mode is off: Disc Track number 1 2 3 Skip Skip When group mode is on: Disc Group 2 Group 1 Track Track number number 1 2 3 Skip Skip • Insert a disc with group settings. Press GROUP. “... -
Page 35: Emphasizing Bass (Digital Mega Bass)
Display window on the recorder Shuf.R When you press > (flip the lever towards , B changes. When you press ENTER, A appears. On B/A Normal/(none) All the tracks are played once. AllRep/ All the tracks are played repeatedly. 1 Rep/ A single track is played repeatedly. -
Page 36: Checking The Remaining Time Or The Playing Position
Display window Digital MEGA BASS On B/A OFF/(none) Normal play BASS 1/ Mega Bass (moderate effect) BASS 2/ Mega Bass (strong effect) Notes • If the sound becomes distorted when emphasizing bass, turn down the volume. • The Mega Bass function does not affect the sound that is being recorded. - Page 37 Display window on the recorder On B LapTim The elapsed time of the current track. 1 Rem The remaining time of the current track. GP Rem The remaining time after the current location in the group. AllRem The remaining time after the current location.
-
Page 38: Editing Recorded Tracks
Editing recorded tracks You can edit your recordings by adding/ erasing track marks or labeling tracks and MDs. Premastered MDs cannot be edited. Notes on editing • You cannot edit tracks on an MD that is record-protected. Before editing tracks, close the tab on the side of the MD (page 52). -
Page 39: Labeling Recordings
Labeling recordings Insert a disc and do the following operations: To label a track Start playing or recording a track you want to label, and label the track while playing or recording operations. To label a group Turn group mode on (page 28) and start playing or recording a track within the group you want to label, and label the group while playing or... -
Page 40: Relabeling Recordings
• You cannot label or relabel the premastered disc or blank disc. Relabeling recordings Insert a disc and do the following operations: To relabel a track Start playing a track you want to relabel, and change a track name during playback operation. To relabel a group Turn group mode on (page 28) and start playing or recording a track... -
Page 41: To Release A Group Setting
MENU/ENTER ./> While the recorder is stopped, press MENU. Press . or > repeatedly until “EDIT” flashes in the display, and then press ENTER. Press . or > repeatedly until “G:Set” flashes in the display, and then press ENTER. The track number of the first track (“STR”) appears in the display. -
Page 42: Moving Recorded Tracks
Press MENU. Press . or > repeatedly until “EDIT” flashes in the display, and then press ENTER. Press . or > repeatedly until “G:Rls” flashes in the display, and press ENTER. “G:Rls?” and “ENTER” appear in the display. Press ENTER. The group setting of the selected group is released. -
Page 43: Moving A Track To A Different Group
Moving a track to a different group • Insert a disc with group settings. GROUP/CANCEL ./> EDIT ENTER >/. Press GROUP for 2 seconds or more. “ ” lights up in the display group mode turns on. While playing the track you want to move, press MENU (EDIT for 2 seconds or more). -
Page 44: Adding A Track Mark
While playing a track within a group whose order you want to change, press MENU (EDIT for 2 seconds or more). Press . or > (flip the lever towards > or .) repeatedly until “EDIT” flashes in the display, and then press ENTER (ENTER). Press . -
Page 45: Erasing A Track Mark
Erasing a track mark When you record with analog (line) input, unnecessary track marks may be recorded where recording level is low. You can erase a track mark to combine the tracks before and after the track mark. The track numbers will change as follows: You cannot erase a track mark on a track that has been checked-out from your... -
Page 46: Erasing Tracks
Erasing tracks Note You can not erase tracks that have been checked out from your computer. You can not erase a group or an entire disc if it contains a checked- out track. In this case, check in the track or tracks to OpenMG Jukebox. -
Page 47: To Erase A Group
While the recorder is stopped, press MENU. Press . or > repeatedly until “EDIT” flashes in the display, and then press ENTER. “ ” and “D:Name” flash in the display. Press . or > repeatedly until “ ” and “D:Ers” flash in the display, and then press ENTER. -
Page 48: Other Operations
Other Operations Protecting your hearing (AVLS) The AVLS (Automatic Volume Limiter System) function keeps down the maximum volume to protect your ears. ./> >/. Press MENU (EDIT for 2 seconds or more). Press . or > (flip the lever towards > or .) repeatedly until “OPTION”... -
Page 49: Locking The Controls (Hold)
Press . or > (flip the lever towards > or .) repeatedly until “M-UNIT” or “REMOTE” flashes in the display, and then press ENTER (ENTER). M-UNIT: when turning off the beep sound on the recorder. REMOTE: when turning off the beep sound on the remote control. -
Page 50: Power Sources
Measured in accordance with the JEITA (Japan Electronics and Information Technology Industries Association) standard. When using a 100% fully charged rechargeable battery. When using a Sony LR6 (SG) “STAMINA” alkaline dry battery (produced in Japan). When playing Batteries NC-WMAA Nickel... -
Page 51: Additional Information
Additional information Precautions On safety • Do not put any foreign objects in the DC IN 3V jack. • Keep the terminals on the recorder away from metallic objects or surfaces. Such contact may short-circuit the terminals and cause dangerous heat generation. On power sources •... - Page 52 Notes on battery Incorrect battery usage may lead to leakage of battery fluid or bursting battery. To prevent such accidents, observe the following precautions: • Install the + and – poles of the battery correctly. • Do not try to recharge dry battery. •...
- Page 53 Sony dealer. (If a trouble occurred when the disc was in the recorder, we recommend that the disc be left in the recorder when you consult your Sony dealer so that the cause of trouble may be better understood.) Recordable...
-
Page 54: System Limitations
System limitations The recording system in your MiniDisc recorder is radically different from those used in cassette and DAT decks and is characterized by the limitations described below. Note, however, that these limitations are due to the inherent nature of the MD recording system itself and not to mechanical causes. - Page 55 Symptom The playing time of a checked-out track is different from the time that appears on your computer monitor. You cannot check out tracks that will fill up the remaining recording time on the disc. (For example, you cannot check-out tracks that total 160 minutes to an 80- minute disc in LP2 stereo mode.)
-
Page 56: Troubleshooting
Troubleshooting Should any problem persist after you have made these checks, consult your nearest Sony dealer. Refer to “Messages” (page 64) as well. Symptom The recorder does not work or works poorly. Cause/Solution • Audio sources may not be securely connected. - Page 57 Symptom Cause/Solution The recorder does • The disc is record-protected (“SAVED” appears). not work or works , Slide the tab (page 52). poorly. • Recording level is too small to record (when recording manually). , Pause the recorder and adjust the recording level. •...
- Page 58 Symptom An MD is not played normally. An MD is not played from the first track. Playback sound skips. Sound has a lot of static. Cannot find the track marks. The rechargeable battery does not start charging. The rechargeable battery cannot be fully charged.
-
Page 59: List Of Menus
List of menus Menu functions Press MENU, and press . or > on the recorder or press EDIT for 2 seconds or more on the remote control to enter a menu. Menu on the Functions recorder EDIT Selecting editing operations (labeling, erasing tracks, discs, or groups, etc.) (page 39 to 44, 46 and 47). - Page 60 Tables of Menus on the recorder The menus provided on the recorder for each operating status are shown on this and the following pages. Each chart shows the various menus and the menu items that can be selected at each menu level. See “List of menus” (page 59) for details on menu operations. Menus and menu items toggle in the display.
- Page 61 continued from the previous page SYNC-R OPTION AVLS Appears only when the recorder is in group mode and a group other than “GP --” is selected. Appears only when the recorder is in group mode. Selectable only when group mode is turned off. Press CANCEL on the recorder to cancel a menu operation.
- Page 62 Menus and menu items selected while the recorder is playing EDIT T:Name DISP LapTim P-MODE Normal BASS OPTION AVLS Appears only when the recorder is in group mode and a group other than “GP --” is selected. Appears only when the recorder is in group mode. Press CANCEL on the recorder to cancel a menu operation.
- Page 63 Menus and menu items selected while the recorder is recording EDIT T:Name DISP LapTim RecVol Auto R-MODE BASS TimeMK SYNC-R OPTION AVLS Appears only when the recorder is in group mode. Appears only when the recorder is in standby mode. Press CANCEL on the recorder to cancel a menu operation.
-
Page 64: Messages
Messages If the following messages flash in the display window, check the messages below. Error message Meaning/Remedy BLANK • An MD with no recording on it is inserted. BUSY • You tried to operate the recorder while it was accessing the recorded Saving •... - Page 65 Error message Meaning/Remedy FULL • You tried to enter more than 200 letters to label a single track or disc. • You tried to enter a total of more than 1,700 letters for track or disc names. , Enter a shorter name for the track, group, or disc (page 38), or set the “LPStmp”...
-
Page 66: Specifications
5 mW + 5 mW, load impedance 16 ohm General Power requirements Sony AC Power Adaptor (supplied) connected at the DC IN 3 V jack (country model in parentheses): 120 V AC, 60 Hz (USA, Canada, and... -
Page 67: Explanations
Explanations What is “Net MD”? Net MD is a format of that allows the high- speed transfer of audio data from a computer to a MiniDisc device over a USB (Universal Serial Bus) cable using the highly sophisticated OpenMG and MagicGate copyright protection technology. -
Page 68: Index
Index Accessories optional supplied Auto Time Stamp AVLS Battery battery life dry battery rechargeable battery Beep sound Charging Checking playing position remaining time Check-out Cleaning Connecting analog digital to computer when charging DIGITAL MEGA BASS DSP TYPE-R Erasing a group a track a whole disc G-PROTECTION... - Page 70 為防止發生火災或電擊的危險,請勿 將本機暴露於雨中或受潮。 請勿將本系統安放在書櫥或壁櫥等 狹窄封閉處。 為防止發生火災,請勿用報紙、桌布、 窗簾等蓋住通風孔。另請勿將點燃的蠟 燭置於本設備上。 為防止發生火災或電擊的危險,請勿 將裝滿液體的物件(例如花瓶)置於 本設備上。 某些國家或地區對於本產品供電電池 的處理方式可能會有所限制。 請向您當地的有關單位洽詢。 注意¥在開啟時有無形的雷射輻射 請勿直接接觸光束 資訊 銷售商對於因使用有缺陷的產品 或使用其他產品而產生的任何直 接的、偶發的、重大的損壞或開 支概不負責。 CE 標誌僅對在歐盟行銷的產 品有效。 ‡ OpenMG 與其徽標是 Sony Corporation 的商標。 ‡ 美國和外國之注冊專利由杜比實驗室 提供。 ‡ 所有其他商標與註冊商標是其相關所 有者的商標或註冊商標。 ‡ Œ Š 與 標誌在本說明書中被省略。...
- Page 71 質,軟體規格如有變更,恕不另行通 知。 ‡ 請使用所提供的軟體操作本播放機, 其他軟體不在保固範圍之內。 ‡ 版權法嚴格禁止在未經版權所有者明 確允許的情況下,複製本軟體與使用 說明書的任何或全部內容,或者將本 軟體租借給協力廠商。 ‡ 對於因 使用本軟 體 而 引起的 金錢損 失、利潤損失或協力廠商所作出的聲 明,Sony 不承擔任何形式的責任。 ‡ 如果是因生產缺陷而發生問題,Sony 的責任僅限於更換有缺陷的商品。 ‡ 本軟體經核准僅可與指定的設備配合 使用。 ‡ Sony 保留變更軟體規格的權利,而不 預先通知。 Program ‹ 2000 Sony Corporation Documentation ‹ 2002 Sony Corporation...
- Page 72 目錄 概觀 ... 8 檢查提供的附件 ...9 各部份名稱 ... 10 準備操作! ... 13 立即錄製 MD!(同步錄音) ... 16 將歌曲從電腦傳輸至微型雷射唱碟(擷取) ... 20 立即播放 MD! ... 22 各種不同的錄音方法 ... 24 有關數碼與類比錄音(數碼輸入與類比輸入)的注意事項 ...24 使用類比輸入錄音(類比錄音) ...25 長時間錄音 (MDLP) ...26 在您不希望於曲目的起始處自動增加 ¦LP:§ 時 ...26 使用群組功能錄製曲目(群組模式錄音) ...27 啟動群組模式(群組模式錄音) ...28 將曲目錄製至新群組...
- Page 73 各種不同的播放方法 ... 33 使用群組功能(群組模式) ... 33 聆聽特定群組中的曲目(群組模式播放) ... 33 選擇與播放群組(群組跳過模式) ... 33 變更播放模式 ... 34 強化低音 (DIGITAL MEGA BASS) ... 35 查看剩餘時間或播放位置 ... 36 編輯錄製的曲目 ... 38 標識 / 重新標識錄音 ... 38 錄音標識 ... 39 重新標識錄音 ... 40 將曲目或群組記錄為新群組(群組設定) ... 40 取消群組設定...
- Page 74 其他資訊 ... 51 注意事項 ...51 系統限制 ...54 故障排除 ...56 功能表清單 ...59 訊息 ...64 規格 ...66 說明 ...67 索引 ...68...
- Page 76 概觀 MD Walkman 的功能 使用本產品,您可以輕鬆地將數碼音頻檔案從電腦傳輸至微型雷射唱碟,並可攜帶 至任何地方進行享受。 在電腦上儲存數 碼音頻檔案 。 將檔案傳輸至 微型雷射唱碟 Walkman。 聆聽微型雷射 唱碟 Walkman。 ∗ ¦OpenMG§,一種符合 SDMI(Secure Digital Music Initiative,數位音樂版權保護組 織)規格的版權技術,可讓您在保護所有者版權的情況下錄製或播放數碼音樂。 ∗∗ EMD 僅適用於世界上的某些地區。 MP3、WAV 及 音頻 CD EMD Windows 媒體 服務 格式檔案 USB 電纜連接...
-
Page 77: 檢查提供的附件
‡ 錄製的音樂僅限於私人使用。要將此音樂作為其他用途,必須獲得版權所有者 的許可。 ‡ 對於因未能從 CD 成功錄音或未完成音樂下載而無法儲存在電腦上的音樂檔案, Sony 概不負責。 有關使用的注意事項 在以下情況下,您可能無法正確完成錄音或可能遺失錄製的資料: ¥ 您從錄音機中取出光碟、中斷 AC 電源轉接器與錄音機的連接、或在讀取或寫 入資料時拔下 USB 電纜。 ¥ 您所使用的光碟受到靜電或電磁噪音的干擾。 檢查提供的附件 提供的附件 NC-WMAA 充電式鎳鎘電池 (1) AC 電源轉接器 (1) 配備遙控器的耳機 (1) 光纖數碼電纜 (1) USB 電纜 (1) 電池攜帶盒 (1) 配有皮帶夾的攜帶盒(僅限於歐洲機型)(1) CD-ROM (1) -
Page 78: 各部份名稱
各部份名稱 錄音機 A OPEN 按鈕 B END SEARCH 按鈕 (暫停)按鈕 D DC IN 3V 插孔 E VOL +/- 按鈕 VOL + 按鈕具有觸摸點。 (播放)按鈕 按鈕具有觸摸點。 (搜索 /AMS)按鈕 > (停止)/CHARGE 按鈕 CHARGE G 顯示屏 H GROUP/CANCEL 按鈕 I T MARK/REC 按鈕 J HOLD 開關 K USB 連接插孔... -
Page 79: Digital Mega Bass
錄音機的顯示屏 L P 2 . 4 A MONO(單音)指示 B LP 模式指示 C 重低音指示 D 唱碟指示 在錄製、播放或編輯 MD 時,顯示 唱碟正在旋轉。 E 音量表 顯示播放或錄製 MD 的音量。 F REC REMAIN/REMAIN(剩餘時間 / 曲 目)指示 與曲目的剩餘時間、MD 的剩餘時 間或剩餘曲目數一起顯示。 G SYNC(同步錄音)指示 C D E Digital MEGA BASS H REC 指示... - Page 80 配備遙控器的耳機 (搜索/AMS/播放)‡ >/N 按鈕 > (停止)‡ ENTER 按鈕 (暫停)‡ CAPS 按鈕 D EDIT 按鈕 E VOL +/- 按鈕 F 耳機 可以使用其他的耳機來取代。 G HOLD 開關 滑動它以鎖定遙控器控制鈕。 H T MARK 按鈕 I DELETE 按鈕...
-
Page 81: 準備操作
準備操作! 在使用之前為充電式電池充電。只要已連接 AC 電源轉接器,即 使未為充電式電池充電,您亦可使用錄音機。 裝入充電式電池。 合上蓋子。 滑動電池室蓋子以打開它。 先裝入充電式電池的負極端。 使用乾電池 裝入一顆 LR6(型號為 AA)鹼性乾電池(未提供)以取代充電式電池。 接下頁... - Page 82 為充電式電池充電。 將 AC 電源轉接器連接至 DC IN 3V。 按下 CHARGE ( x )。 ¦Charge§ 會 閃爍, e 會 在顯 示 屏 中顯 示,且 開 始充 電。在 完 成充 電 時,電池指示會消失。 為完全放電的充電式電池完全充電大約需要 3 個小時。 拔下 AC 電源轉接器。 註 在您於步驟 中按下 CHARGE ( 是,在大約...
- Page 83 電操作,因為電池已完全充電。 ¥ 如果您在充電時嘗試操作錄音機,則會 停止充電。 電池壽命 要獲得詳細資訊,請參閱 「電池壽命」 ( 第 50 頁 )。 在錄音時 (單位:大約小時數) 電池 立體聲 立體聲 NC-WMAA 充電式鎳 鎘電池 LR6 (SG) Sony 鹼性 乾電池 在播放時 (單位:大約小時數) 電池 立體聲 立體聲 NC-WMAA 充電式鎳 鎘電池 LR6 (SG) Sony 鹼性 乾電池 立體聲 立體聲...
-
Page 84: 立即錄製 Md!(同步錄音
立即錄製 MD!(同步錄音) 本章節說明使用光纖數碼電纜連接至 CD 播放機、數碼電視或其 他數碼設備以進行數碼錄音的基本步驟。[要獲得更多資訊,請 參閱「系統限制」 ( 第 54 頁 )]在同步錄音期間,錄音機將與 音源同步開始和停止錄音。曲目標記將按照其在音源中出現的位 置增加。建議您在錄音時使用 AC 電源轉接器。 要從類比音源 (例如卡式錄音座或收音機)錄音 音) 」 ( 第 25 頁 )。 要使用群組模式錄音 插入 MD。 (使用可錄音 MD 進行錄音) 按下 OPEN 以打開蓋子。 「使用群組功能錄製曲目 (群組模式錄音) 」 ( 第 27 頁 ) 。 「使用類比輸入錄音... - Page 85 連接。 (將電纜平穩且完全插入適當的插孔中) CD 播放機、MD 連接至 播放機、DVD 電源插座 視頻播放機等 AC 電源轉接器 連接至 DC IN 3V ∗ 請參閱「可選購的附件」 ( 第 66 頁 ) 錄製 MD。 END SEARCH > / 在錄音機停止時,按下 MENU。 功能表項目會在顯示屏中顯示。 光纖插頭 光纖數碼電纜 POC-15B 等 重複按下 MENU/ ¦SYNC-R§ 在顯示屏中閃爍,然後按 ENTER 下...
- Page 86 ‡ 請確保 MD 不是處於錄音保護狀態(第 52 頁)。 ‡ 放音專用 MD 不能被覆寫錄音。 關於用於 ATRAC 的 DSP TYPE-R ¦TYPE-R§ 是用於數碼訊號處理器(DSP,其 為 微 型 雷 射 唱 碟 聲 音 的 核 心)的 高 等 級 Sony 規格。此技術為微型雷射唱碟錄音機 提供的訊號處理功能是之前微型雷射唱碟 Walkman 機型的兩倍,可產生與微型雷射唱 碟機座接近的聲音品質。此裝置僅在以一般 立體聲(或單音)模式錄音或播放時支援 ¦TYPE-R§ 功能。它在 MDLP 模式下,或使...
- Page 87 註 ‡ 您無法在同步錄音時手動開啟或關閉暫停 功能。按下 以停止錄音。 ‡ 請勿在錄音時變更 SYNC-R 設定值。否則, 錄音可能無法正常進行。 ‡ 由於音源所發出的噪音,即使音源上沒有 可錄製的聲音,在同步錄音時,錄音也可 能不會自動暫停。 ‡ 在從非 CD 或 MD 音源進行同步錄音時, 若出現約 2 秒鐘的無聲部份,新的曲目 標記會自動增加在無聲部份結束的位置。 ‡ 在錄音時,您無法變更錄音模式。 ‡ 在錄製錄音資料(曲目的起始處與結尾處 等)時,¦Saving§ 或 ¦Edit§ 會閃爍。請 勿在指示正在顯示屏中閃爍時,移動錄音 機或中斷其電源。 ‡ 在顯示屏中的 ¦Edit§ 消失後方可打開蓋 子。 ‡ 如果在進行錄音或編輯操作時,或者在顯 示屏中出現...
-
Page 88: 將歌曲從電腦傳輸至微型雷射唱碟(擷取
將歌曲從電腦傳輸至微型雷射唱碟 (擷取) 將提供的 OpenMG Jukebox 軟體安裝在 電腦上。 要獲得詳細資訊,請參閱 OpenMG Jukebox 使用說明書。 註 在 您 第一 次 將 錄音 機 連 接至 電 腦 時,請務 必 從 提供 的 Jukebox 軟體」與「Net MD 驅動程式」。如果已安裝 OpenMG Jukebox,您應在將錄 音機連接至電腦之前安裝用於 Net MD 的驅動程式。如果您將錄音機連接至電腦,但 未先安裝 Net MD 驅動程式,則錄音機將無法正常操作。 連接。... - Page 89 將音頻資料錄製至 OpenMG Jukebox。 要獲得詳細資訊,請參閱 OpenMG Jukebox 使用說明書。 在錄音機連接至電腦時,錄音機上的顯示屏將如下顯示。 將音樂檔案傳輸至錄音機(擷取)。 要獲得詳細資訊,請參閱 OpenMG Jukebox 使用說明書。 註 ‡ 在將錄音機連接至電腦時,您僅可以使用錄音機上的 VOL +/- 按鈕與遙控器上的 VOL +/- 控制鈕。 ‡ 請確保在擷取曲目時不要搖動、碰撞錄音機,或者拔下 AC 電源轉接器或 USB 電 纜,否則,可能會導致之前錄製到該位置的資料遺失。 ‡ 在將錄音機連接至電腦期間,蓋子將無法在進行編輯操作時打開。...
-
Page 90: 立即播放 Md
立即播放 MD! 插入 MD。 按下 OPEN 以打開蓋子。 播放 MD。 N / x 按下 N (將控制桿轉至 >/ N )。 耳機會發出短的「嗶」聲。 按下 VOL +/- 以調節音量。 顯示屏會顯示音量大小。 將 MD 貼有標籤的一面朝前插入, 然後按下蓋子以將其合上。 要停止播放,請按下 耳機會發出長的「嗶」聲。 在您按下錄音機上的 以停止播放之後,錄音機大約會在 10 秒鐘 (如果使用乾電池或充電式電池)或 3 分鐘 VOL +/- (如果使用 AC 電源轉接器)內自動關閉。 >/N 播放會從您上次停止播放的位置開始。要從... - Page 91 若要 在錄音機上執行的操作 搜 索 目 前 曲 目 的 按下 起 始 處 或 前 一 首 重複 按 下 曲目 所要曲目的起始處。 搜 索 下 一 首 曲 目 按一下 的起始處 一 邊 播 放 一 邊 快 按住 倒 一...
-
Page 92: 各種不同的錄音方法
各種不同的錄音方法 有關數碼與類比錄音(數碼輸入與類比輸入)的注意事項 本錄音機的輸入插孔可以作為數碼與類比輸入插孔。使用數碼(光纖)輸入或類比 (線路)輸入將錄音機連接至 CD 播放機或卡式錄音機。要進行錄音,請參閱「立 即錄製 MD!(同步錄音)」( 第 16 頁)以使用數碼(光纖)輸入進行錄音,並參 閱「使用類比輸入錄音(類比錄音)」( 第 25 頁)以使用類比(線路)輸入進行 錄音。 數碼(光纖)與類比(線路)輸入之間的差異 差異 數碼(光纖)輸入 可連接的音源 配備數碼(光纖)輸出插孔的設 備(CD 播放機、DVD 播放機等) 可使用的導線 光纖數碼電纜(配備光纖或光纖 微型插頭)(第 17 頁) 音源訊號 數碼 曲目標記 自動標記(複製) ‡ 在與音源相 同的 位置(音源 是 CD 或 MD 時)。 ‡... -
Page 93: 使用類比輸入錄音(類比錄音
使用類比輸入錄音(類比錄 音) 所連接設備發出的聲音將以類比訊號 輸入,但會以數碼訊號錄製至唱碟。 要連接至音源,則需要可選購的線路 電纜。在連接電纜時,請確保電纜穩 固地插入接口。 CD 播放機、卡式 錄音機等 連接至 LINE OUT 插孔等 R(紅色) (白色) 線路電纜 連接至 LINE IN (OPTICAL) ∗ 請使用沒有衰減器的連接導線。 要連接至配備立體聲微型插孔的 便攜式 CD 播放機,請使用 RK- G136 連接導線。要獲得更多有關 連接導線的資訊,請參閱(「可 選購的附件」,第 66 頁)。 在按下 REC 的同時,按下 REC 指示會在顯示屏中顯示,且開 始錄音。 播放您要錄製的音源。... -
Page 94: 長時間錄音 (Mdlp)
長時間錄音 (MDLP) 根據您需要的錄音時間選擇每種錄音 模式。 立體聲錄音的時間可能是一般(立體 聲)錄音時間的 2 倍 (LP2) 或 4 倍 (LP4)。單音錄音亦可能是一般錄音時 間的 2 倍。 在單音、LP2 或 LP4 模式下錄製的 MD 僅可以在具有單音、LP2 或 LP4 播放 模式的 MD 播放機或錄音機上播放。 > / N 在錄音機停止時,按下 MENU。 重複按下 MODE§ 在顯示屏中閃爍,然後按下 ENTER。 重複按下 要的錄音模式,然後按下 ENTER。 每次您按下... -
Page 95: 使用群組功能錄製曲目(群組模式錄音
‡ 支援 LP2 立體聲或 LP4 立體聲模式的音 頻裝置以 或 ‡ 如果將錄音機設定為在曲目的起始處不增 加 ¦LP:§,您將可以使用全長的文字字串 「重新標識錄音」( 第 40 頁),以輸入 較長的曲名。 ‡ 由於新開發了用於 ATRAC(Adaptive TRansform Acoustic Coding,可轉 換 聲 音編碼)的 DSP TYPE-R,因此在您以 SP 立體聲(或單音)錄音時可以獲得較佳的 音效品質與豐富的音調(第 18 頁)。 註 ‡ 要進行長時間錄音,建議您使用 AC 電源 轉接器。 ‡ 在對透過數碼(光纖)輸入插孔連接的立 體聲音源進行單音錄音時,您仍可使用連... -
Page 96: 啟動群組模式(群組模式錄音
如何錄製群組資訊? 在以群組模式錄音時,群組資訊將寫 入碟名錄音區。 此資訊包含以下範例中所列的文字字 串。 碟名錄音區 範例 碟名:¦Favorites§ (最愛) 曲目 1 至 5 的群組名稱:¦Rock§ (搖滾樂) 曲目 6 至 9 的群組名稱:¦Pops§ (流行音樂) 因此,如果您將以群組模式錄製的 MD 載入不支援群組模式的系統,或嘗試 在關閉群組模式的錄音機上編輯唱碟 的內容,則上面的文字字串將完整地 顯示為碟名。 您可以執行「標識 / 重新標識錄音」 ( 第 38 頁)中的 「重新標識錄音」 ,以變更 文字字串。請注意,如果您錯誤地重寫 此文字字串,則可能無法使用該 MD 的 群組功能。... -
Page 97: 將曲目錄製至現有群組
將曲目錄製至現有群組 ‡ 此功能僅可在錄音機上操作。 ‡ 開啟群組模式。 ‡ 插入一張具有群組設定值的唱碟。 按下 GROUP。 ¦ § 會在顯示屏中閃爍,您可以 直 接 選 擇 一 個 群 組(群 組 跳 過 模 式)(第 33 頁)。 在 5 秒鐘內,重複按下 ,直到顯示您要的曲目所在之 > 群組。 在按下 REC 的同時,按下 播放音源。 新錄製的曲目會增加在目前內容的 後面。 註 ‡... -
Page 98: 自動增加曲目標記(自動時間印記
註 ‡ 即使在關閉電源之後,設定仍會保留。 ‡ 如果您在錄音機處於暫停播放模式時開始 錄音 , 即使 ¦R-Posi§ 已設定為 ¦Fr End§ , 錄音也會從暫停處開始。 自動增加曲目標記(自動時間 印記) 在透過類比輸入接口錄音時,您可以 使用此功能以指定的間隔時間自動增 加曲目標記。 . / > 在錄音機錄音或暫停錄音時,按下 MENU。 重複按下 ¦TimeMk§ 在顯 示屏中 閃爍,然後 按下 ENTER。 重複按下 要的間隔時間在顯示屏中閃爍,然 後按下 ENTER。 選擇以下其中一種間隔時間: 顯示 時間 ¥ 5 min 約為... -
Page 99: 手動調節錄音音量(手動錄音
手動調節錄音音量(手動錄 音) 在您錄音時,音量會自動調節。如有 必要,您可以在類比與數碼錄音期間 手動設定錄音音量。 此功能僅可在錄音機中設定。 MENU/ENTER 在按下 的同時,按下 REC。 錄音機等候錄音。 按下 MENU。 重複按下 或 ¦RecVol§ 在 顯示 屏 中閃爍,然後 按下 ENTER。 重複按下 或 ¦Manual§ 在 顯示 屏 中閃爍,然後 按下 ENTER。 Manual 播放音源。 在觀察顯示屏中的音量表時,請按 下 量。 請設定音量,以使音量表上的最大 輸入顯示在第五段。如果顯示在第 六段,請按下 在此步驟中錄音尚未開始。 ./>/ 如果您的音源來自外接式裝置,在... -
Page 100: 查看剩餘的可錄音時間
查看剩餘的可錄音時間 您可以在錄音或停止時,查看剩餘時 間、曲目編號等。與群組相關的項目 僅在具有群組設定值的曲目播放然後 停止時顯示。 在 您 使 用 提 供 的 遙 控 器 操 作 錄 音 機 時,請使用括號中所示的按鈕與控制 鈕。 ./> > / . 在錄音機錄音或停止時,按下 MENU (按住 EDIT 2 秒鐘或更長時間) , 重複按下 轉至 或 > 在 顯 示 屏 中 閃 爍,然 後 再 次 按 下 ENTER (ENTER)。... -
Page 101: 各種不同的播放方法
各種不同的播放方法 使用群組功能(群組模式) 錄音機可以對具有群組設定的唱碟進 行各種播放。要獲得更多有關群組模式 的資訊,請參閱「使用群組功能錄製曲 目 (群組模式錄音) 」( 第 27 頁) , 此功能僅可在錄音機中設定。 ENTER . / > 聆聽特定群組中的曲目(群組模 式播放) ‡ 插入一張具有群組設定值的唱碟。 開始播放。 按住 GROUP 2 秒鐘或更長時間。 ¦ § 與 ¦GP ON§ 會在顯示屏中 顯示,且開啟群組模式。 播放將在選定群組中最後一首曲目 的結尾處停止。 要獲得有關選擇另一個群組的詳細 資訊 ,請參閱「選擇與播放群組(群 組跳過模式) 」( 第 33 頁) 。 ‡... -
Page 102: 變更播放模式
在群組模式關閉時: 唱碟 曲目編號 1 2 3 跳過 跳過 在群組模式開啟時: 唱碟 群組 1 群組 2 曲 目 曲目 編號 編號 1 2 3 跳過 ‡ 插入一張具有群組設定值的唱碟。 按下 GROUP。 ¦ § 會在顯示屏中閃爍,您可以 選擇群組。 在 5 秒鐘之內,重複按下 或 以選擇您所要的群組,然 > 後按下 ENTER。 錄音機會從群組的第一首曲目開始 播放。... -
Page 103: 強化低音 (Digital Mega Bass)
錄音機上的顯示屏 Shuf.R 在您按下 > (將控制桿轉至 時, B 會發生變更。 在您按下 ENTER 時, A 將會顯示。 關於 Normal/(none) 所有曲目播放一次。 AllRep/ 所有曲目重複播放。 1 Rep/ 一首曲目重複播放。 Shuf.R/6KXI 播放完目前選定的曲目之後,剩 餘曲目將以隨機順序重複播放。 在群組模式開啟時,您可以為選定的群組指 定播放模式。要啟動群組模式,請參閱「選 擇與播放群組(群組跳過模式)」( 第 33 頁)。 強化低音 (DIGITAL MEGA BASS) 重低音功能可強化低頻聲音以再現高 品質的音頻。它僅影響耳機聲音。 ./> ) > / . 按下... -
Page 104: 查看剩餘時間或播放位置
顯示屏 Digital MEGA BASS 關於 OFF/(none) 一般播放 BASS 1/ 重低音(中等效果) BASS 2/ 重低音 (強烈效果) 註 ‡ 如果在強化低音時聲音失真 , 請調低音量 。 ‡ 重低音功能不會影響正在錄製的聲音。 BASS 2 查看剩餘時間或播放位置 您可以在播放時查看曲名與碟名等。 與群組相關的項目僅在播放具有群組 設定值的曲目時顯示。 ./> EDIT > / . 在錄音機播放時按下 EDIT 2 秒鐘或更長時間),然後 重 複 按 下 或... - Page 105 錄音機上的顯示屏 關於 LapTim 目前曲目的經過時間。 1 Rem 目前曲目的剩餘時間。 GP Rem 群 組 中 目 前 位 置 之 後 的 剩 餘 時 間。 AllRem 目前位置之後的剩餘時間。 按下 ENTER (ENTER)。 顯示屏會按以下方式變更: 在步驟 2 中選定的資訊會顯示在 與 中。 ¥ 在步驟 2 中選定的資訊。 ¥ 曲目編號、曲名、群組名稱 或碟名。...
-
Page 106: 編輯錄製的曲目
編輯錄製的曲目 您可以透過增加 / 拭除曲目標記或標識 曲目與 MD 來編輯錄音。但無法編輯 放音專用 MD。 有關編輯的注意事項 ‡ 您無法編輯處於錄音保護狀態的 MD 中之 曲目。在編輯曲目之前,請合上 MD 側面 的防寫彈片(第 52 頁)。 ‡ 如果您在播放時執行編輯操作,請確保在 顯示屏中的 ¦Edit§ 消失之後才關閉電源 。 ‡ 請勿在顯示屏中的 ¦Edit§ 閃爍時移動錄 音機。 ‡ 在編輯之後,直到顯示屏中的 ¦Edit§ 消 失時,蓋子方可打開。 ‡ 在群組模式開啟時,您僅可對選定群組中 記錄的曲目進行編輯。 在您使用提供的遙控器操作錄音機時,... -
Page 107: 錄音標識
錄音標識 插入唱碟,然後執行以下操作: 標識曲目 開始播放或錄製您要標識的曲目, 然後在執行播放或錄音操作時標識 曲目。 標識群組 開啟群組模式(第 28 頁)並開始 播 放 或錄 製 群組中 您 要標識 的曲 目,然後在執行播放或錄音操作時 標識群組。 標識唱碟 如果唱碟已錄製,請在錄音機停止 時從步驟 2 開始進行。如果唱碟 為新的,請開始錄音,並在錄音時 標識唱碟。 如 果 您標 識 的唱碟 具 有群組 設定 值,請開啟群組模式(第 28 頁) 。 按下 MENU(按住 EDIT 2 秒鐘或 更長時間)。... -
Page 108: 重新標識錄音
重新標識錄音 插入唱碟,然後執行以下操作: 重新標識曲目 開始播放您要重新標識的曲目,然 後在執行播放操作時變更曲名。 重新標識群組 開啟群組模式(第 28 頁)並開始 播放或錄製群組中您要重新標識的 曲目,然後在執行播放或錄音操作 時變更群組名稱。 重新標識唱碟 如果唱碟已錄製,請在錄音機停止 時從步驟 2 開始進行。 如果您重新標識的唱碟具有群組設 定值,請開啟群組模式(第 28 頁)。 執行「錄音標識」( 第 39 頁)的 步驟 2 至 4,以顯示曲目、群組 或碟名。 執行 「錄音標識」( 第 39 頁)的 步驟 5 至 7,然後持續按住 ENTER (ENTER) 2 秒鐘或更長時間。... -
Page 109: 取消群組設定
MENU/ENTER . / > 在錄音機停止時,按下 MENU。 重複按下 或 ¦EDIT§ 在顯示 屏中閃 爍,然 後按 下 ENTER。 重複按下 或 ¦G:Set§ 在顯示屏中閃爍,然後按 下 ENTER。 第 一 首 曲 目 的 曲 目 編 號 (¦STR§) 會在顯示屏中顯示。 重複按下 或 > 要的第一首曲目之編號或名稱在顯 示屏中閃爍,然後按下 ENTER。 這樣,您就選擇了新群組中的第一 首曲目。... -
Page 110: 移動錄製的曲目
按下 ENTER。 選定群組的群組設定已取消。 移動錄製的曲目 您可以變更錄製的曲目之順序。 範例 將曲目 C 從第三首曲目移至第二首曲目 的位置。 移動之前 移動之後 MENU/ENTER ./> T MARK > / . CANCEL 取消移動 在步驟 4 中按下 CANCEL (T MARK)。 EDIT ENTER 在 播 放 您 要 移 動 的 曲 目 時,按 下 MENU(按住... -
Page 111: 將曲目移至不同的群組
將曲目移至不同的群組 ‡ 插入一張具有群組設定值的唱碟。 GROUP/CANCEL > EDIT ENTER > / . 按住 GROUP 2 秒鐘或更長時間。 ¦ § 會在顯示屏中顯示,且開啟 群組模式。 在播放您要移動的曲目時,請按下 MENU(按住 EDIT 2 秒鐘或更長時 間)。 重複按下 或 > 桿轉至 或 ),直到 > ¦EDIT§ 在顯示 屏中閃 爍,然 後按 下 ENTER (ENTER)。 錄音機會重複播放選定的曲目。 重複按下... -
Page 112: 增加曲目標記
重複按下 桿 轉 至 > ¦EDIT§ 在顯 示屏中 閃爍,然後按 下 ENTER (ENTER)。 重複按下 桿 轉 至 > ¦G:Move§ 在 顯 示屏中 閃爍,然 後 按下 ENTER (ENTER)。 您現在即可移動選定的群組。 重複按下 桿轉至 或 > 上選擇目標位置,然後按下 ENTER (ENTER)。 取消移動 在步驟 5 中按下 CANCEL (T MARK)。 增加曲目標記... -
Page 113: 拭除曲目標記
拭除曲目標記 在 您 以 類 比(線 路)輸 入 錄 音 時,如 果錄音音量過低,可能會錄製到不必 要的曲目標記。您可以拭除曲目標記 以結合曲目標記之前與之後的曲目。 曲目編號會按以下方式變更: 您無法拭除已從電腦擷取的曲目上之 曲目標記。 拭除曲目標記 曲目編號減少 在播放具有您要拭除曲目標記的曲 目時,按下 以暫停。 輕輕地按下 以搜索曲目標記。 例如,要拭除第三首曲目的標記, 請 搜 索 第 三 首 曲 目 的 起 始 處。 ¦00:00§ 會在顯示屏中顯示。 ¦MK 003§ 隨後會在顯示屏中顯示 2 秒鐘。... -
Page 114: 拭除曲目
拭除曲目 註 您無法拭除已從電腦擷取的曲目。如果唱碟 包含擷取的曲目,則您無法拭除其群組或整 張唱碟。若如此,請將曲目記錄至 OpenMG Jukebox。 > > / . 拭除一首曲目 請注意,一旦拭除錄音,您將無法再 恢復它。請確定您要拭除的曲目。 在播放您要拭除的曲目時,請按下 MENU(按住 EDIT 2 秒鐘或更長時 間)。 GROUP/CANCEL MENU/ ENTER EDIT ENTER 拭除曲目的一部份 在要拭除部份的起始與結尾處增加曲 目標記(第 44 頁) ,然後拭除該部份。 取消拭除 在步驟 3 中按下 CANCEL (T MARK)。 拭除整張唱碟 您可以同時快速拭除 MD 中的所有曲 目與資料。... -
Page 115: 拭除群組
重複按下 或 ¦EDIT§ 在顯示 屏中閃爍,然後按 下 ENTER。 ¦ § 與 ¦D:Name§ 會在 顯 示屏 中閃爍。 重複按下 或 ¦ § 與 ¦D:Ers§ 在顯示屏中閃 爍,然後按下 ENTER。 ¦Erase?§ 與 ¦ENTER§ 會在顯示屏 中交替顯示。 再次按下 ENTER。 ¦Edit§ 會在顯示屏中閃爍,所有 曲目將被拭除。 在完成拭除時,¦BLANK§ 會在顯示 屏中顯示。 取消拭除 在步驟 5 中按下 CANCEL。 拭除群組... -
Page 116: 其他操作
其他操作 保護您的聽覺 (AVLS) AVLS(Automatic Volume Limiter System,自 動 音 量 限 制 系 統)功 能 會 降低最大音量以保護您的聽覺。 ./> > / . 按下 MENU(按住 EDIT 2 秒鐘或 更長時間)。 重複按下 桿 轉 至 或 > ¦OPTION§ 在 顯 示屏中 閃爍,然後 再次按下 ENTER (ENTER)。 重複按下... -
Page 117: 鎖定控制鈕 (Hold)
重複按下 或 桿 轉 至 或 > ¦M-UNIT§ 或 ¦REMOTE§ 在顯示屏中 閃爍,然後按下 ENTER (ENTER)。 M-UNIT:在關閉錄音機的嗶聲時。 REMOTE:在關閉遙控器的嗶聲時。 重複按下 或 桿 轉 至 或 > ¦OFF§ 在顯示屏中閃爍,然後按下 ENTER (ENTER)。 開啟嗶聲 在步驟 5 中選擇 ¦ON§。 鎖定控制鈕 (HOLD) 要 防 止 在 攜 帶 錄 音 機 時 意 外 操 作 按 鈕,請使用此功能。... -
Page 118: 電池壽命
乾電池 由於受操作狀態、存放地點溫度及電池種 類的影響,電池壽命可能會縮短。 在您錄音時,使用完全充電的充電式電池。 錄音時間可能隨不同的鹼性電池而異。 依據 JEITA (Japan Electronics and Information Technology Industries Association,日本電子與資訊技術工業協 會 ) 標準測量。 在使用 100% 完全充電的充電式電池時。 在使用 Sony LR6 (SG) ¦STAMINA§ 鹼性乾 電池(日本製造)時。 在播放時 電池 NC-WMAA 充電式鎳 鎘電池 LR6 (SG) Sony 鹼性 乾電池 依據 JEITA(Japan Electronics and Information Technology Industries Association,日本電子與資訊技術工業... -
Page 119: 其他資訊
其他資訊 注意事項 關於安全措施 ‡ 請勿在 DC IN 3V 插孔中放置任何異物。 ‡ 使錄音機的接端遠離金屬物件或表面。如 果發生接觸,可能會使接端短路並產生危 險的熱量。 關於電源 ‡ 請使用家用電源、充電式鎳鎘電池、LR6 (型號為 AA)電池或汽車電池。 ‡ 在室內使用 : 請使用本錄音機隨附的 AC 電 源轉接器 。 請勿使用任何其他的 AC 電源轉 接器,因為它可能會導致錄音機發生故障。 插頭的極性 ‡ 只要錄音機與電源插座連接,即使它本身 已經關機,也不會中斷與 AC 電源(主電 源)的連接。 ‡ 如果長時間不使用本錄音機,請務必中斷 與電源(AC 電源轉接器、乾電池、充電 式電池或汽車電池導線)的連接。要從電... - Page 120 有關電池的注意事項 不正確地使用電池可能會導致電池殘液外漏 或電池爆炸。要防止這種情況發生,請注意 以下防範措施: ‡ 正確地安裝電池的 + 與 ¤ 極。 ‡ 請勿嘗試為乾電池重新充電。 ‡ 在長時間不使用錄音機時,請務必將電池 取出。 ‡ 在攜帶充電式電池時,應將其置於電池攜 帶盒內。如果不將電池置於盒內,而隨意 將其與金屬物件(如鑰匙圈)一起置於口 袋或背袋中是很危險的,因為這可能會引 起電池短路。 ‡ 請勿將乾電池與金屬物件(如硬幣、鑰匙 圈或項鏈)一起攜帶或存放。這可能會引 起電池短路並產生熱量。 ‡ 如果電池漏液,請仔細地將電池室的電池 殘液完全擦淨,然後才裝入新電池。 有關機械噪音的注意事項 在操作錄音機時如果發出機械噪音,是由於 錄音機的節電系統因素所致,並非出現問 題。 保護已錄製的 MD 要防止錄製 MD,請滑開 MD 側邊的防寫彈 片。這時將無法錄製或編輯 MD。要再次錄 製,請向後滑動防寫彈片,以便可以看到彈...
- Page 121 麥克風、錄音機、調頻器等(配備類比 輸出插孔)。 類比錄音 家庭式錄製 MD 數碼錄音 禁止數碼 可錄音 MD 錄音 有關維護的注意事項 定期用棉花棒或軟布清潔接端,如下圖所 示。 如果您有任何有關錄音機的疑問或問題,請 就近與 Sony 經銷商聯絡。(如果唱碟在錄 音機內時發生故障,我們建議您把唱碟留在 機內,以便在您洽詢 Sony 經銷商時,其能 更好地查明原因。) 可錄音 MD 接端...
-
Page 122: 系統限制
系統限制 微型雷射唱碟錄音機中的錄音系統與卡式和 DAT 機座中的系統有很大差異,以下 所述的限制是其具有的特性。但請注意,這些限制是由於 MD 錄音系統本身固有的 特性,而不是機械導致。 問題 即使唱碟尚未達到最大錄 音時間 (60、74 或 80 分 鐘) ,¦TrFULL§ 仍會顯示。 即使唱碟尚未達到最大曲 目編號或錄音時間, ¦TrFULL§ 仍會顯示。 無法拭除曲目標記。 即使在拭除許多短曲目之 後,仍無法增加剩餘錄音 時間。 唱碟上的總錄音時間與剩 餘時間的合計可能不等於 最長錄音時間(60、74 或 80 分鐘)。 在搜索作業期間,編輯的 曲目可能顯示聲音訊息遺 失。 擷取曲目的播放時間與電 腦顯示器上顯示的時間不 同。 起因 在唱碟上錄製的曲目達到 254 首時,無論錄音總時間 有多長,¦TrFULL§... - Page 123 問題 您無法擷取將超過唱碟剩 餘 錄 音 時 間 的 曲 目。 (例 如,您無法以 LP2 立體聲 模式將 160 分鐘的曲目擷 取至 80 分鐘的唱碟上。) 您無法拭除從電腦擷取的 曲目。 起因 唱碟上的最少可錄音時間一般為 2 秒鐘(使用立體 聲)、4 秒 鐘(使 用 LP2 立 體 聲 模 式)及 8 秒 鐘 (使用 LP4 立體聲模式)。在您從電腦擷取曲目時, 即使曲目長度不足...
-
Page 124: 故障排除
故障排除 如果您檢查了以下內容後仍然存在問題,請就近與 Sony 經銷商聯絡。另請參閱 「訊息」( 第 64 頁)。 問題 錄 音 機無 法操 作 或 操作效果極差。 起因 / 對策 ‡ 音源可能未穩固地連接。 中斷音源的連接一次,並將其再次連接(第 17 、25 頁) 。 ‡ HOLD 功能已開啟(在您按下錄音機上的操作按鈕時 , ¦HOLD§ 會在顯示屏中顯示) 。 在錄音機上,將 HOLD 開關沿著箭頭的反方向滑動以關 閉 HOLD(第 14、49 頁)。... - Page 125 問題 起因 / 對策 ‡ 唱碟處於錄音保護狀態(¦SAVED§ 會顯示)。 錄 音機 無法 操 作或 操作效果極差。 ‡ 錄音音量過低而無法錄製(在手動錄音時)。 ‡ 在錄音時插入了放音專用 MD(¦PbONLY§ 會顯示)。 ‡ 您嘗試在設定節目時開啟群組模式。 ‡ 錄音的起始位置設定值 (¦R-Posi§) 設定為 ¦FrHere§。 在 錄音 時錄音 機會 覆寫現有材料。 ‡ 電腦無法識別錄音機。 錄 音機 在連 接 至電 腦時無法操作。 ‡ 沒有來自便攜式 CD 播放機的數碼訊號。 在...
- Page 126 問題 MD 不是從第一首曲 目開始播放。 播放跳音。 聲音有大量靜電。 無法搜索曲目標記。 ‡ 在按下 無法 為充 電式 電 池 開始充電。充電式電 池無法完全充電。 唱碟 無 法 在其 他 裝 置上編輯。 聽到短促的雜音。 顯示屏不正常。 起因 / 對策 ‡ 唱碟在播放至最後一首曲目之前停止播放。 按住 2 秒鐘或更長時間以開始播放,或將遙控器上 的控制桿重複轉至 ‡ 群組模式已開啟。 關閉群組模式,然後從第一首曲目開始播放(按住 2 秒鐘或更長時間以開始播放,或將遙控器上的控制桿 重複轉至 )。...
-
Page 127: 功能表清單
功能表清單 功能表功能 按下錄音機上的 MENU,然後按下 鐘或更長時間以進入功能表。 錄音機上的 功能 功能表 EDIT 選 擇 編 輯 操 作(標 識、拭 除 曲 目、唱 碟 或 群 組等)(第 39 至 43、46 及 47 頁)。 DISP 顯示已播放的時間、剩餘的播放時間等(第 32 與 36 頁)。 P-MODE 選擇播放模式(重複播放、隨機播放等)(第 34 頁)。 RecVol 選擇自動或手動錄音音量調節(第... - Page 128 錄音機上的功能表 本頁與之後幾頁顯示了錄音機所提供的每種操作狀態之功能表。每個圖表顯示了每 個功能表層級可以選擇的各種功能表與功能表項目。請參閱「功能表清單」( 第 59 頁)以獲得有關功能表操作的詳細資訊。功能表與功能表項目會在顯示屏中進行切 換。 在錄音機停止時可供選擇的功能表與功能表項目 EDIT D:Name DISP LapTim P-MODE Normal R-MODE BASS 接下頁 G:Set G:Rls RecRem GP Rem AllRep 1 Rep BASS 1 BASS 2 G:Ers D:Ers AllRem Shuf.R MONO , :按下 ENTER h :按下 或 >...
- Page 129 接上頁 SYNC-R OPTION AVLS 僅在錄音機處於群組模式且選定的群組為非 ¦GP --§ 時顯示。 僅在錄音機處於群組模式時顯示。 僅在群組模式關閉時方可選擇。 按下錄音機上的 CANCEL 以取消功能表操作。 , :按下 ENTER h :按下 BEEP R-Posi FrHere M-UNIT REMOTE 或 > 。 LPStmp Fr End...
- Page 130 在錄音機播放時可供選擇的功能表與功能表項目 EDIT T:Name DISP LapTim P-MODE Normal BASS OPTION AVLS 僅在錄音機處於群組模式且選定的群組為非 ¦GP --§ 時顯示。 僅在錄音機處於群組模式時顯示。 按下錄音機上的 CANCEL 以取消功能表操作。 G:Name T:Move 1 Rem GP Rem AllRep 1 Rep BASS 1 BASS 2 BEEP M-UNIT G:Move T:Ers AllRem Shuf.R , :按下 ENTER h :按下...
- Page 131 在錄音機錄音時可供選擇的功能表與功能表項目 EDIT T:Name DISP LapTim RecVol Auto R-MODE BASS TimeMK SYNC-R OPTION AVLS 僅在錄音機處於群組模式時顯示。 僅在錄音機處於待機模式時顯示。 按下錄音機上的 CANCEL 以取消功能表操作。 G:Name D:Name RecRem Manual BASS 1 BASS 2 5 min 10 min MONO 15 min , :按下 ENTER h :按下 或 > 。...
- Page 132 訊息 如果以下訊息在顯示屏中閃爍,請查閱以下訊息。 錯誤訊息 含義 / 矯正 ‡ 插入了未錄音的 MD。 BLANK ‡ 在錄音機正在存取所錄製的資料時,您嘗試操作錄音機。 BUSY ‡ MD 播放機正在將記憶體中的資訊(聲音)錄製至唱碟。 Saving ‡ 錄音無法正確完成。 ERROR ‡ 唱碟上沾有油膜或指紋、有刮痕或非標準唱碟。 ‡ 錄音機無法正確讀取唱碟資訊。 ‡ 錄音機無法正確讀取唱碟資訊。 ‡ 唱碟上的剩餘錄音時間為 12 秒鐘(立體聲)、24 秒鐘(LP2 FULL ‡ 電源電壓太高(未使用提供的 AC 電源轉接器或建議的汽車電 HiDCin ‡ 已鎖定錄音機。 HOLD ‡...
- Page 133 錯誤訊息 含義 / 矯正 ‡ 您嘗試從受到序列備份管理系統保護的唱碟製作備份。如果唱 NoCOPY 碟本身是使用數碼連接的方式錄製的,您將無法從數碼連接音 源處製作備份。 請使用類比連接來進行(第 25 頁)。 ‡ 在錄音機內無唱碟的情況下,您嘗試播放或錄音。 NoDISC 插入 MD。 ‡ 錄音機無法偵測數碼輸入訊號。 No SIG 請確定已穩固地連接音源(第 16 頁)。 ‡ 您嘗試對放音專用 MD 進行錄音或編輯(Pb 表示「播放」)。 PbONLY 插入可錄音 MD。 ‡ 您嘗試對防寫彈片處於錄音保護位置的 MD 進行錄音或編輯。 SAVED 向後滑動防寫彈片(第 52 頁)。 ‡...
- Page 134 光纖(數碼)輸入:光纖(數碼)微型插孔 輸出 :立體聲微型插孔,最大輸出音量為 5 mW + 5 mW,負載阻抗為 16 ohm 一般 電源要求 連接於 DC IN 3 V 插孔(僅限於括號中的 國家或地區機型)的 Sony AC 電源轉接器 (已提供): 120 V AC、60 Hz(美國、加拿大及 台灣) 230 V AC、50/60 Hz(歐洲大陸) 240 V AC、50 Hz(澳洲) 220 V AC、50 Hz(中國)...
- Page 135 說明 何謂 ¦Net MD§? Net MD 是 一 種 可 讓 您 使 用 非 常 精 密 的 OpenMG 與 MagicGate 版權保護技術,透 過 USB(通 用序列匯 流排)電 纜將音 頻 資料從電腦高速傳輸至微型雷射唱碟裝 置的格式。 由於此格式在微型雷射唱碟錄音系統中 無法變更,因此它支援使用現有微型雷 射 唱 碟,並 支援 播放 傳 輸(擷 取)至 現 有微型雷射唱碟裝置上的音頻資料。...
- Page 136 索引 英文字母 AVLS 48 DIGITAL MEGA BASS 35 DSP TYPE-R 18 EMD 8 G-PROTECTION 23 HOLD 14, 49 MDLP 26 Net MD 67 OpenMG Jukebox 8, 20 SDMI 8 電纜 8, 9, 20 四劃 手動錄音 31 五劃 充電 14 功能表 59 六劃...
- Page 138 인해 발생하는 손실이나 비용에 대하여 책임을 지지 않습니다. 유럽 연합에서 제조한 Walkman에는 CE 마크가 부착되어 있습니다. ‡ OpenMG 및 로고는 Sony Corporation의 상표입니다. ‡ 미국 및 외국 특허들은 Dolby Laboratories로부터 사용허가된 것입니다. ‡ 기타 상표 및 등록 상표는 해당 제품...
- Page 139 없으며, 저작권 소유자의 승인 없이 소프트웨어를 대여할 수 없습니다. ‡ 본 레코더와 함께 제공된 소프트웨어 사용으로 인해 발생된 제3자의 청구를 비롯해 재정적 또는 이윤 손실에 대해 SONY는 어떠한 경우도 책임을 지지 않습니다. ‡ 제조상의 결함으로 인해 소프트웨어에 문제가 발생한 경우는 소프트웨어를 교환해 드립니다.
- Page 140 차례 개요 ... 8 기본 제공 부속품 확인 ... 9 컨트롤 살펴보기 ...10 시작하기 ...13 간단한 MD 녹음하기 ( 동시 녹음 ) ...16 컴퓨터의 음악 파일을 MiniDisc 로 전송하기 ( 체크 아웃 ) ...20 간단한 MD 재생하기 ...22 다양한 녹음 방법 ...24 디지털...
- Page 141 다양한 재생 방법 ... 33 그룹 기능 ( 그룹 모드 ) 사용 ... 33 특정 그룹의 트랙 재생하기 ( 그룹 모드 재생 ) ... 33 그룹 선택 및 재생 ( 그룹 건너뛰기 모드 ) ... 33 재생 모드 변경 ... 34 저음...
- Page 142 추가 정보 ...51 주의 사항 ... 51 시스템 제한 사항 ... 54 문제 해결 ... 56 메뉴 목록 ... 59 메시지 ... 64 사양 ... 66 설명 ... 67 색인 ... 68...
- Page 144 개요 MD Walkman의 기능 본 제품을 이용해 편리하게 컴퓨터의 디지털 오디오 파일을 MiniDisc에 녹음하여 언제 어디서나 음악을 즐길 수 있습니다. 컴퓨터 에 디지털 오디오 파일 저장 ∗ ∗ ∗ ∗ MiniDisc Walkman 으로 파일 전송 MiniDisc Walkman 청취 SDMI(Secure Digital Music Initiative) 규격에 부합하는 저작권 기술인 ³OpenMG´를 이용할...
-
Page 145: 기본 제공 부속품 확인
‡ 녹음된 음악은 개인적인 용도로만 사용이 제한됩니다. 그 이상의 용도로 음악을 이용하려면 저작권 소유자의 승인을 받아야 합니다. ‡ Sony는 CD에 녹음이 되지 않았거나 음악이 다운로드되지 않은 관계로 음악 파일이 컴퓨터에 저장되지 않은 것에 대해서는 책임을 지지 않습니다. 사용시 참고 사항... -
Page 146: 컨트롤 살펴보기
컨트롤 살펴보기 레코더 A OPEN 버튼 B END SEARCH 버튼 (일시 정지) 버튼 D DC IN 3V 잭 E VOL +/- 버튼 VOL + 버튼에 촉각 도트가 있습니다. (재생) 버튼 버튼에 촉각 도트가 있습니다. (검색/AMS) 버튼 > (정지)/CHARGE 버튼 CHARGE G 디스플레이... - Page 147 레코더 디스플레이 창 L P 2 . 4 A MONO (모노) 표시 B LP 모드 표시 C 메가 베이스 표시 D 디스크 표시 MD 녹음, 재생, 편집시 디스크가 회전하는 모습을 표시합니다. E 볼륨 표시계 녹음 중이거나 재생 중인 MD의 볼륨을 표시합니다. F REC REMAIN/REMAIN (남은...
- Page 148 리모콘이 달린 헤드폰/이어폰 (검색/AMS/재생) ‡ >/N > / . 버튼 (정지) ‡ ENTER 버튼 (일시정지) ‡ CAPS 버튼 D EDIT 버튼 E VOL +/- 버튼 F 헤드폰/이어폰 헤드폰/이어폰 옵션으로 교체할 수 있습니다. G HOLD 스위치 옆으로 밀면 리모콘이 작동하지 않습니다. H T MARK 버튼...
-
Page 149: 시작하기
시작하기 작동 전 전지를 충전하십시오. 충전지가 충전되어 있지 않더라도 AC 전원 어댑터를 연결하여 레코더를 사용할 수 있습니다. 충전지 삽입하기 전지 수납부 덮개를 밀어서 여십시오. 건전지 사용 충전지 대신에 LR6(AA 사이즈) 알카라인 건전지(별매)를 넣으십시오. 충전지의 음극부터 집어 넣습니다. 덮개를 닫으십시오. 계속... - Page 150 충전지 충전하기 AC 전원 어댑터를 DC IN 3V에 연결하십시오. CHARGE ( x )를 누르십시오. ³Charge´가 깜박이고, 디스플레이에 e 가 표시됩니다. 충전이 완료되면 전지 표시가 사라집니다. 완전히 방전된 충전지를 최대로 충전하려면 약 3시간이 소요됩니다. AC 전원 어댑터를 분리하십시오. 참고 단계에서 CHARGE ( 않을...
- Page 151 자세한 내용은 ³전지 수명´ (50 페이지 )을 참조하십시오. 녹음시 (단위: 대략적인 사용 시간) 전지 스테 스테 레오 레오 NC-WMAA 니켈 금속 수소 화물 충전지 LR6 (SG) Sony 알카라인 건전지 재생시 (단위: 대략적인 사용 시간) 전지 스테 스테 레오 레오 NC-WMAA 니켈 금속 수소 화물 충전지...
-
Page 152: 간단한 Md 녹음하기 (동시 녹음)
간단한 MD 녹음하기 (동시 녹음) 본 항목에서는 CD 플레이어, 디지털 TV 또는 디지털 기기에 광 케이블을 연결하여 디지털 녹음을 하는 기본적인 방법에 대해 설명합니다 (자세한 내용은 ³시스템 제한 사항´ (54 페이지) 을 참조하십시오). 동시 녹음 중에는 음원에 맞추어 레코더가 녹음을 시작하고... - Page 153 연결하기 CD 플레이어, 벽면 MD 플레이어, 콘센트에 DVD 비디오 연결 플레이어 등 AC 전원 어댑터 DC IN 3V에 연결 ³ ´ 별매 부속품 (66 페이지)을 참조하십시오. MD 녹음하기 END SEARCH > / 레코더가 멈춘 상태에서 MENU를 누르십시오. 디스플레이에 메뉴 항목이 나타납니다.
- Page 154 녹음을 정지하려면 x 를 누르십시오. x 를 눌러 녹음을 정지하면 10초(건전지나 충전지 사용시) 또는 3분(AC 전원 어댑터 사용시) 이내에 레코더가 자동으로 꺼집니다. 동시 녹음을 해제하려면 3 단계에서 . 또는 > 를 계속해서 눌러 디스플레이에 ³OFF´가 깜박이면 ENTER를 누르십시오. 참고 이미 녹음되어 있는 디스크에 녹음하는 경우 기본적으로 레코더는 디스크의 전체 내용을 지우고...
- Page 155 ATRAC의 DSP TYPE-R 정보 ³TYPE-R´은 DSP(디지털 신호 프로세서)에 사용되는 Sony의 최고급 기술로서 MiniDisc 사운드의 핵심입니다. 본 기술로 MiniDisc 레코더는 기존 MiniDisc Walkman 모델보다 신호 처리 능력이 두 배나 향상되었으며, MiniDisc 데크와 유사한 수준의 음질을 구현합니다. 본 기기는 일반 스테레오(또는 모노) 모드에서...
-
Page 156: 컴퓨터의 음악 파일을 Minidisc로 전송하기(체크 아웃)
컴퓨터의 음악 파일을 MiniDisc로 전송하기(체크 아웃) 제공된 OpenMG Jukebox 소프트웨어 컴퓨터에 설치하기. 자세한 내용은 OpenMG Jukebox 사용 설명서를 참조하십시오. 참고 컴퓨터에 레코더를 처음 연결하면 제공된 CD-ROM으로 ³OpenMG Jukebox 소프트웨어´와 ³Net MD 드라이버´를 설치하십시오. OpenMG Jukebox가 이미 설치되어 있는 경우에는 Net MD 드라이버를 설치한 다음, 레코더를 컴퓨터에... -
Page 157: Openmg Jukebox
OpenMG Jukebox에 오디오 데이터 녹음하기 자세한 내용은 OpenMG Jukebox 사용 설명서를 참조하십시오. 컴퓨터에 레코더를 연결했을 때 레코더의 디스플레이 창에 다음과 같이 표시됩니다. 레코더에 음악 파일 전송하기 (체크 아웃) 자세한 내용은 OpenMG Jukebox 사용 설명서를 참조하십시오. 참고 ‡ 레코더를 컴퓨터에 연결하면 레코더의 VOL +/- 버튼과 리모콘의 VOL +/- 컨트롤만... -
Page 158: 간단한 Md 재생하기
간단한 MD 재생하기 MD 삽입하기 OPEN을 눌러 덮개를 여십시오. MD 재생하기 N / x N 를 누르십시오(레버를 쪽으로 젖히십시오). 헤드폰/이어폰에서 짧은 신호음이 들립니다. VOL +/-를 눌러 볼륨을 조절하십시오. 볼륨이 디스플레이에 표시됩니다. 라벨면이 앞쪽에 오도록 MD를 넣은 다음, 덮개를 눌러 닫으십시오. 재생을... - Page 159 작동 레코더 조작 방법 현재 트랙 또는 이전 트랙의 시작 원하는 트랙의 시작 부분을 부분을 찾으려면 찾을 때까지 서 누르십시오. 다음 트랙의 시작 > 부분을 찾으려면 재생 중 뒤로 이동하려면 재생 중 앞으로 > 이동하려면 를 누르십시오. 일시 정지하려면 다시 재생하려면 더...
-
Page 160: 다양한 녹음 방법
다양한 녹음 방법 디지털 및 아날로그 녹음 참고 사항(디지털 및 아날로그 입력) 이 레코더의 입력 잭은 디지털 및 아날로그 겸용입니다. 디지털(광) 입력 또는 아날로그(라인) 입력을 사용하여 CD 플레이어나 카세트 레코더에 레코더를 연결하십시오. 디지털(광) 입력을 사용하여 녹음을 하려면 ³간단한 MD 녹음하기 (동시... -
Page 161: 아날로그 녹음
아날로그 녹음 사운드는 연결된 장치에서 아날로그 신호의 형태로 입력되고 디지털 방식으로 디스크에 녹음됩니다. 음원에 연결하려면 광 라인 케이블이 필요합니다. 케이블을 연결할 때 커넥터가 제대로 삽입되었는지 확인하십시오. CD 플레이어, 카세트 레코더 등 LINE OUT 잭에 연결 (흰색) (빨강색) 라인 케이블 LINE IN (OPTICAL) 에... -
Page 162: 장시간 녹음(Mdlp)
장시간 녹음(MDLP) 원하는 녹음 시간에 따라 녹음 모드를 선택하십시오. 스테레오 녹음은 표준(스테레오) 녹음 시간의 2배속 (LP2) 또는 4배속 (LP4)이 가능합니다. 표준 녹음 시간의 2 배속으로 모노 녹음도 가능합니다. 모노, LP2 또는 LP4 모드에서 녹음된 MD는 모노, LP2 또는 LP4 재생 모드의... -
Page 163: 그룹 기능으로 트랙 녹음 (그룹 모드 녹음)
또는 를 계속해서 눌러 > 디스플레이에 ³OFF´가 깜박이면 ENTER를 누르십시오. ³LP:´를 추가하려면 이 단계에서 ³ON´을 선택하고 ENTER를 누르십시오. 참고 ³LP:´가 ³LP Stamp´ 설정에 관계없이 컴퓨터에서 LP 스테레오로 전송되는 트랙에 추가됩니다. ³LP:´를 삭제하려면, ³ ´ 녹음 이름 변경 (40 페이지)을 참조하십시오. ‡... -
Page 164: 그룹 모드 작동 방법 (그룹 모드 녹음)
그룹 정보가 녹음되는 방법 그룹 모드에서 녹음할 때 그룹 정보는 디스크 이름 녹음 영역에 기록됩니다. 이 정보는 다음 예와 같이 기록된 텍스트 스트링으로 구성됩니다. 디스크 이름 녹음 영역 예 디스크 이름: ³Favorites´ 트랙 1 - 5의 그룹 이름: ³Rock´ 트랙 6 - 9의 그룹 이름: ³Pops´ 따라서, 그룹... -
Page 165: 트랙을 기존 그룹에 녹음
트랙을 기존 그룹에 녹음 ‡ 이 기능은 레코더에서만 사용할 수 있습니다. ‡ 그룹 모드를 켜십시오. ‡ 그룹이 설정된 디스크를 삽입하십시오. GROUP를 누르십시오. ³ ´가 깜박이면 그룹을 직접 선택할 수 있습니다(그룹 건너 뛰기 모드)(33 페이지). 5초 이내에 트랙이 들어갈 그룹이 나타날 때까지 계속... -
Page 166: 트랙 표시 자동 추가 (자동 시간 스탬프)
참고 ‡ 전원을 꺼도 설정은 유지됩니다. ‡ 레코더가 일시 중지된 상태에서 녹음을 다시 시작하면 ³R-Posi´가 ³Fr End´로 설정되어 있어도 녹음이 일시 정지된 지점에서부터 다시 녹음이 시작됩니다. 트랙 표시 자동 추가 (자동 시간 스탬프) 이 기능은 아날로그 입력 커넥터를 통해 녹음할 때 지정된 간격으로 트랙 표시를... -
Page 167: 녹음 음량을 수동으로 조절 (수동 녹음)
녹음 음량을 수동으로 조절 (수동 녹음) 녹음할 때 음량은 자동으로 조절됩니다. 필요한 경우 아날로그 녹음이나 디지털 녹음 시 녹음 음량을 직접 설정할 수 있습니다. 이 기능은 레코더에서만 설정할 수 있습니다. MENU/ENTER REC를 누른 상태에서 누르십시오. 레코더가 녹음 대기 상태가 됩니다. MENU를... -
Page 168: 남은 녹음 시간 확인
남은 녹음 시간 확인 녹음중이거나 정지 상태에서 남은 시간, 트랙 번호 등을 확인할 수 있습니다. 그룹 관련 항목은 그룹 설정이 된 트랙을 재생한 뒤 정지할 때만 나타납니다. 제품과 함께 제공된 리모콘으로 레코더를 작동할 때에는 괄호 안의 버튼과 컨트롤을 사용하십시오. ./> >... -
Page 169: 다양한 재생 방법
다양한 재생 방법 그룹 기능(그룹 모드) 사용 그룹 설정된 디스크를 레코더에서 다양하게 재생할 수 있습니다. 그룹 모드에 대한 자세한 내용은 ³그룹 기 능으로 트랙 녹음 (그룹 모드 녹음)´ (27 페이지)을 참조하십시오. 이 기능은 레코더에서만 설정할 수 있습니다. ENTER . / > 특정... -
Page 170: 재생 모드 변경
그룹 모드가 꺼져 있을 때 디스크 트랙 번호 1 2 3 건너뛰기 건너뛰기 그룹 모드가 켜져 있을 때 디스크 그룹 2 그룹 1 트랙 트랙 번호 번호 1 2 3 건너뛰기 건너뛰기 건너뛰기 ‡ 그룹 설정된 디스크를 삽입하십시오. GROUP을 누르십시오. 디스플레이에... -
Page 171: 저음 증폭(Digital Mega Bass)
레코더의 디스플레이 창 Shuf.R > 를 누르면(레버를 히면) B 가 바뀝니다. ENTER를 누르면 A 가 표시됩니다. / / / / Normal/(없음) 모든 트랙이 한 번만 재생됩니다. AllRep/ 모든 트랙이 반복 재생됩니다. 1 Rep/ 단일 트랙이 반복 재생됩니다. Shuf.R/6KXI 현재 선택한 트랙의 재생이 끝나면... -
Page 172: 남은 시간 또는 재생 위치 확인
디스플레이 창 Digital MEGA BASS / / / / OFF/(없음) 표준 재생 BASS 1/ 저음 증폭(중간 효과) BASS 2/ 저음 증폭(강한 효과) 참고 ‡ 저음 증폭시 사운드가 갈라지면 볼륨을 낮추십시오. ‡ 저음 증폭 기능은 녹음 중인 사운드에는 영향을 주지 않습니다. BASS 2 남은... - Page 173 레코더의 디스플레이 창 LapTim 현재 트랙의 경과시간 1 Rem 현재 트랙의 남은 시간 GP Rem 그룹의 현재 위치 다음에 남은 시간 AllRem 현재 위치 다음에 남은 시간 ENTER (ENTER)를 누르십시오. 디스플레이가 다음과 같이 바뀝니다. 2 단계에서 선택한 내용이 에 표시됩니다. ²...
-
Page 174: 녹음된 트랙 편집
녹음된 트랙 편집 트랙 표시를 추가/삭제하거나 트랙과 MD에 이름을 붙여 녹음을 편집할 수 있습니다. 그러나 사전 마스터 처리된 MD는 편집할 수 없습니다. 편집시 주의 사항 ‡ 녹음 방지된 MD에서는 트랙을 편집할 수 없습니다. 트랙을 편집하기 전에 MD 옆면의 탭을 닫으십시오(52 페이지). ‡... -
Page 175: 녹음 이름 작성
녹음 이름 작성 디스크를 넣고 다음을 수행하십시오. 트랙명을 작성하려면 이름을 작성할 트랙을 재생하거나 녹음을 시작하여 작동 중에 트랙명을 작성하십시오. 그룹명을 작성하려면 그룹 모드를 켜고(28 페이지) 이름을 작성할 그룹의 트랙을 재생하거나 녹음을 시작하여 작동 중에 그룹명을 작성하십시오. 디스크명을 작성하려면 디스크가 이미 녹음된 경우는 레코더가... -
Page 176: 녹음 이름 변경
참고 ‡ 녹음하는 중에 트랙, 그룹 또는 디스크 이름을 작성하면서 녹음을 중단하거나 트랙에 이름을 작성할 때 다음 트랙으로 이동한 경우, 지금까지 입력한 내용이 자동으로 입력됩니다. ‡ MDLP 모드에서 녹음된 트랙의 이름 앞에는 자동으로 ³LP:´가 추가됩니다 (26 페이지). ‡ 사전 마스터 처리된 디스크나 공 디스크는 이름을... -
Page 177: 그룹 설정을 해제하려면
‡ 트랙은 그룹 내에서의 순서로 표시되지 않고 항상 디스크의 순서대로 표시됩니다(그룹 모드가 켜져 있는 경우에도). ‡ 이 기능은 레코더에서만 사용할 수 있습니다. ‡ 디스크를 넣으십시오. MENU/ENTER . / > 레코더가 정지된 상태에서 MENU를 누르십시오. 또는 를 계속해서 눌러 > 디스플레이에 ³EDIT´가 깜박이면... -
Page 178: 녹음된 트랙 이동
MENU를 누르십시오. 또는 를 계속해서 눌러 > 디스플레이에 ³EDIT´가 깜박이면 ENTER를 누르십시오. 또는 를 계속해서 눌러 > 디스플레에서 ³G:Rls´ 가 깜박이면 ENTER를 누르십시오. ³G:Rls?´와 ³ENTER´가 디스플레이에 나타납니다. ENTER를 누르십시오. 선택한 그룹의 그룹 설정이 해제됩니다. 녹음된 트랙 이동 녹음된 트랙의 순서를 변경할 수 있습니다. -
Page 179: 다른 그룹으로 트랙 이동
다른 그룹으로 트랙 이동 ‡ 그룹이 설정된 디스크를 넣으십시오. GROUP/CANCEL > EDIT ENTER > / . GROUP를 2초 이상 누르십시오. ³ ´가 표시되고 그룹 모드가 켜집니다. 이동할 트랙 재생 중에 MENU를 (EDIT를 2초 이상)를 누르십시오. 또는 를 계속해서 눌러 > (레버를... -
Page 180: 트랙 표시 추가
순서를 변경할 그룹의 트랙 재생 중에 MENU를(EDIT를 2초 이상) 누르십시오. 또는 를 계속해서 눌러 > (레버를 또는 > 젖혀) 디스플레이에 ³EDIT´가 깜박이면 ENTER (ENTER)를 누르십시오. 또는 를 계속해서 눌러 > (레버를 또는 > 젖혀) 디스플레이에 ³G:Move´가 깜 박이면 ENTER (ENTER)를 누르십시오. -
Page 181: 트랙 표시 삭제
트랙 표시 삭제 아날로그(라인) 입력으로 녹음하는 경우, 음량이 낮으면 불필요한 트랙 표시가 녹음될 수 있습니다. 트랙 표시의 앞 뒤 트랙을 연결하여 트랙 표시를 삭제할 수 있습니다. 트랙 표시는 다음과 같이 변경됩니다. 컴퓨터에서 전송된 트랙의 트랙 표시는 삭제할 수 없습니다. 트랙 표시 삭제 트랙... -
Page 182: 트랙 삭제
트랙 삭제 참고 컴퓨터에서 전송받은 트랙은 삭제할 수 없습니다. 즉, 체크 아웃 트랙이 포함되어 있는 그룹이나 디스크는 삭제할 수 없습니다. 이러한 경우, OpenMG Jukebox 의 트랙을 확인하십시오. > > / . 트랙을 삭제하려면 녹음 내용을 삭제하면 다시 복원할 수 없습니다. 삭제하려는 트랙을 반드시 확인하십시오. -
Page 183: 그룹을 삭제하려면
삭제할 디스크를 재생하여 내용을 확인하십시오. x 를 눌러 정지하십시오 . 레코더가 정지된 상태에서 MENU를 누르십시오. 또는 를 계속해서 눌러 > 디스플레이에 ³EDIT´가 깜박이면 ENTER를 누르십시오. ³ ´와 ³D:Name´이 깜박입니다. 또는 를 계속해서 눌러 > ³ ´와 ³D:Ers´가 깜박이면 ENTER를 누르십시오. 디스플레이에... -
Page 184: 기타 작동 방법
기타 작동 방법 귀 보호(AVLS) AVLS (Automatic Volume Limiter System, 자동 볼륨 제한 시스템) 기능이 귀를 보호하기 위해 볼륨이 최대인 경우 볼륨을 낮춥니다. ./> > / . MENU 를(EDIT를 2초 이상) 누르십시오. 또는 를 계속해서 눌러 > (레버를 또는 > 젖혀) 디스플레이에... -
Page 185: 컨트롤 잠금(Hold)
또는 를 계속해서 눌러 > (레버를 또는 > 젖혀) 디스플레이에 ³M-UNIT´ 또는 ³REMOTE´가 깜박이면 ENTER (ENTER)를 누르십시오. M-UNIT: 레코더의 신호음을 끌 경우 REMOTE: 리모콘의 신호음을 끌 경우 또는 를 계속해서 눌러 > (레버를 또는 > 젖혀) 디스플레이에 ³OFF´가 깜박이면 ENTER (ENTER)를 누르십시오. -
Page 186: 전지 수명
사용하십시오. 알카라인 전지에 따라 녹음 시간이 달라질 수 있습니다. JEITA(Japan Electronics and Information Technology Industries Association) 표준에 따라 측정되었습니다. 100% 완전 충전된 니켈 금속 수소화물 충전지를 사용하는 경우. Sony LR6 (SG) ³STAMINA´ 알카라인 건전지(일본 제품)를 사용하는 경우. 재생시 전지 NC-WMAA 니켈 금속 수소화물 충전지... -
Page 187: 추가 정보
추가 정보 주의 사항 안전 ‡ DC IN 3V 잭에 이물질을 넣지 마십시오. ‡ 레코더의 터미널 가까이에 금속성 물체를 두지 마십시오. 레코더의 터미널이 단락하여 폭발할 위험이 있습니다. 전원 ‡ 가정용 전원, 니켈 금속 수소화물 충전지, LR6(AA 사이즈) 전지 또는 차량용 전지를 사용하십시오. - Page 188 ‡ 마른 헝겊으로 헤드폰/이어폰 또는 리모콘의 플러그를 닦아주면 더 좋은 음질을 유지할 수 있습니다. 플러그에 이물질이 끼면 음질이 떨어지고 사운드가 고르지 않을 수 있습니다. 전지에 대한 참고 사항 전지를 올바로 사용하지 않으면 전지액이 누출되거나 전지가 폭발할 수 있습니다. 다음 사항에 따라 이와 같은 사고를 예방하십시오.
- Page 189 관리에 대한 참고 사항 면봉이나 부드러운 헝겊으로 터미널을 주기적으로 닦으십시오. 레코더에 대해 궁금한 사항이나 문제가 있으면 가까운 Sony 제품 대리점에 문의하십시오(레코더에 디스크가 들어 있을 때 문제가 발생한 경우는 문제의 원인을 빨리 확인할 수 있도록 디스크가 들어 있는 상태로 Sony 대리점에...
-
Page 190: 시스템 제한 사항
시스템 제한 사항 MiniDisc 레코더의 녹음 시스템은 카세트와 DAT 데크에서 사용되는 것과는 완전히 다르며 다음과 같은 제한 사항을 가지고 있습니다. 그러나, 이러한 제한 사항은 MD 녹음 시스템 자체의 특성 때문에 발생하는 것이며 기계적 결함이 있는 것은 아닙니다. 징후 디스크가 최대 녹음 시간 (60, 74 또는... - Page 191 징후 확인된 트랙 재생 시간과 컴퓨터 모니터에 표시된 시간이 다릅니다. 디스크의 남은 녹음 시간을 초과하는 트랙은 전송할 수 없습니다(예를 들어, LP2 스테레오 모드에서 80분 녹음 디스크에 총 160분의 트랙을 전송할 수 없습니다). 컴퓨터에서 전송된 트랙은 삭제할 수 없습니다. 원인 레코더와 컴퓨터의 시간 계산이 다르기 때문입니다. 일반적으로...
-
Page 192: 문제 해결
문제 해결 위 사항을 확인한 후에도 문제가 계속되면 가까운 Sony 대리점에 문의하십시오. ³메시지´ (64 페이지)도 확인하십시오. 징후 레코더가 작동하지 않거나 제대로 작동하지 않습니다. 원인/해결 방법 ‡ 오디오 음원이 제대로 연결되지 않았을 수 있습니다. , 오디오 음원을 분리한 후 다시 연결하십시오... - Page 193 징후 원인/해결 방법 ‡ 레코더가 디스크가 녹음 방지 상태입니다(³SAVED´가 표시됨). 작동하지 않거나 , 탭을 미십시오(52 페이지). ‡ 제대로 작동하지 녹음 음량이 적어 녹음이 되지 않습니다(수동 음량 조절시). 않습니다. , 레코더를 일시 정지하고 녹음 음량을 조절하십시오. ‡ 녹음시 사전 마스터 처리된 MD를 넣었습니다(³PbONLY´가 표시됨).
- Page 194 징후 MD가 정상적으로 재생되지 않습니다. MD가 첫번째 트랙부터 재생되지 않습니다. 사운드가 고르지 못하게 재생됩니다. 잡음이 많이 납니다. 트랙 표시를 찾을 수 없습니다. 충전지가 충전되지 않습니다. 충전지가 완전히 충전되지 않습니다. 다른 컴포넌트에서 디스크를 편집할 수 없습니다. 갑자기 잡음이 들립니다. 디스플레이 창이 정상적으로...
-
Page 195: 메뉴 목록
메뉴 목록 메뉴 기능 메뉴를 실행하려면 레코더의 MENU를 누른 다음 리모콘의 EDIT를 2초 이상 누르십시오. 레코더 메뉴 기능 EDIT 편집 기능(이름 작성, 트랙, 디스크 또는 그룹 삭제 등) 선택(39 페이지 ~ 44페이지, 47페이지) DISP 경과 시간, 남은 재생 시간 등 표시(32 페이지, 36페이지). P-MODE 재생... - Page 196 레코더의 메뉴 목록 각 작동 상태에 따라 레코더에 나타나는 메뉴는 이 페이지와 다음 페이지에 수록되어 있습니다. 각 차트에는 여러 메뉴 및 각 메뉴 단계에서 선택될 수 있는 메뉴 항목이 표시됩니다. 메뉴 작동에 대한 자세한 내용은 ³메뉴 목록´ (59 페이지) 을 참조하십시오. 메뉴 및 메뉴 항목은 디스플레이에서 토글합니다. 레코더가...
- Page 197 이전 페이지에서 계속 SYNC-R OPTION AVLS 레코더가 그룹 모드에 있는 상태에서 ³GP --´ 이외의 그룹을 선택한 경우에만 표시됩니다. 레코더가 그룹 모드에 있을 경우에만 표시됩니다. 그룹 모드가 꺼져 있을 경우에만 선택할 수 있습니다. 메뉴 작동을 취소하려면 레코더의 CANCEL을 누르십시오. BEEP R-Posi FrHere M-UNIT REMOTE...
- Page 198 레코더 재생 중에 선택되는 메뉴 및 메뉴 항목 EDIT T:Name DISP LapTim P-MODE Normal BASS OPTION AVLS 레코더가 그룹 모드에 있는 상태에서 ³GP --´이외의 그룹을 선택한 경우에만 표시됩니다. 레코더가 그룹 모드에 있을 경우에만 표시됩니다. 메뉴 작동을 취소하려면 레코더의 CANCEL을 누르십시오. G:Name T:Move 1 Rem...
- Page 199 레코더 녹음 중에 선택되는 메뉴 및 메뉴 항목 EDIT T:Name DISP LapTim RecVol Auto R-MODE BASS TimeMK SYNC-R OPTION AVLS 레코더가 그룹 모드에 있을 경우에만 표시됩니다. 레코더가 대기 모드에 있을 경우에만 표시됩니다. 메뉴 작동을 취소하려면 레코더의 CANCEL을 누르십시오. G:Name D:Name RecRem Manual BASS 1...
-
Page 200: 메시지
메시지 디스플레이 창에 다음 오류 메시지가 깜박이면 아래 표를 확인하십시오. 오류 메시지 내용/해결 방법 ‡ BLANK ‡ BUSY ‡ Saving ‡ ERROR ‡ ‡ ‡ ‡ FULL ‡ HiDCin ‡ HOLD ‡ LoBATT ‡ MEMORY 녹음 내용이 없는 MD를 넣었습니다. 녹음된... - Page 201 오류 메시지 내용/해결 방법 ‡ FULL 하나의 트랙 또는 디스크의 이름을 작성하는데 200자 이상을 입력하려고 했습니다. ‡ 트랙명이나 디스크명에 1,700자 이상을 입력하려고 했습니다. , 트랙명, 그룹명 또는 디스크명을 더 짧게 입력하거나 (38 페이지), ³LPStmp´ 설정을 ³OFF´로 설정하여 트랙명 앞 에 ³LP:´가 추가되지 않도록 하십시오(26 페이지). ‡...
- Page 202 : 스테레오 미니 잭, 최소 출력 레벨 5 mW + 5 mW, 부하 임피던스 16 ohm 일반 사항 전원 사양 DC IN 3 V 잭에 연결하는 Sony AC 전원 어댑터(제공), 괄호는 국가별 모델: 120V AC, 60 Hz(미국, 캐나다, 대만) 230V AC, 50/60 Hz(유럽) 240V AC, 50Hz(호주)
- Page 203 설명 ³Net MD´란? Net MD란 USB 케이블을 통해 컴퓨터의 오디오 데이터를 MiniDisc 기기로 고속 전달하는 고도의 OpenMG 및 MagicGate 저작권 보호 기술이 이용된 전송 포맷입니다. 이 포맷은 MiniDisc의 녹음 형식을 변경할 필요 없이 기존의 MiniDisc를 지 원하여 전송된(체크 아웃된) 오디오 데 이터를...
- Page 204 색인 가 그룹 그룹 건너뛰기 모드 33 그룹 모드 녹음 28 그룹 모드 재생 33 그룹 이동 43 삭제 47 설정 40 해제 41 녹음 MDLP 모드 26 그룹 모드 녹음 27 디지털 16 트랙 마크 추가 ( 자동 시간 스탬프...
- Page 208 Printed in Malaysia...
Need help?
Do you have a question about the Net MD Walkman MZ-N505 and is the answer not in the manual?
Questions and answers