
Related Manuals for BioNano Genomics Saphyr 60325


Summary of Contents for BioNano Genomics Saphyr 60325
- Page 1 Saphyr ® System User Guide for Saphyr P/N 60325 Document Number: 30247 Document Revision: A For Research Use Only. Not for use in diagnostic procedures. Copyright © 2019 Bionano Genomics Inc. All Rights Reserved...
-
Page 2: Table Of Contents
Table of Contents Legal Notice ..........................3 Revision History ........................4 Chapter 1: Overview ........................ 5 Introduction ..........................5 Features ........................... 5 Workflow ..........................5 Prepare Sample ........................5 Chapter 2: Getting Started ...................... 6 Start the Saphyr Instrument ..................... 6 Laser Safety Light ........................ -
Page 3: Legal Notice
All other trademarks are the sole property of their respective owners. No license to use any trademarks of Bionano Genomics is given or implied. Users are not permitted to use these trademarks without the prior written consent of Bionano Genomics. The use of these trademarks or any other materials, except as permitted herein, is expressly prohibited and may be in violation of federal or other applicable laws. -
Page 4: Revision History
Revision History Revision Notes Initial Release 30247 Rev A, Saphyr System User Guide for Saphyr P/N 60325 Page 4 of 43... -
Page 5: Chapter 1: Overview
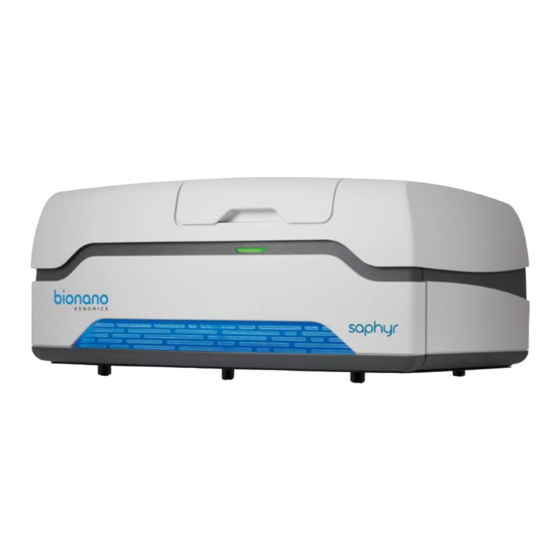
Chapter 1: Overview Introduction ® CAUTION: Prior to operating the Saphyr Instrument, please review the Saphyr System Safety Guide (P/N 30253) for all safety and compliance information. ® The Saphyr System (Saphyr Instrument with Instrument Controller and Bionano Access Server) together with the Saphyr Compute and Bionano Compute provides rapid, high-throughput, long-range genome mapping for de novo assembly of genome maps, hybrid scaffolding of NGS, and structural variation analysis. -
Page 6: Chapter 2: Getting Started
CAUTION: Before lifting the sample door to insert or remove the Saphyr chip, ensure the laser safety light is blue (below, left). If the laser safety light is red (below, right), do not open the sample door and contact Bionano Genomics Support for assistance; users may be at risk for laser radiation exposure if the sample door is opened. -
Page 7: Instrument Status Light
Instrument Status Light The instrument status light indicates the following: Color Description Light off The instrument is powered off. Flashing yellow The instrument is initializing. Green The instrument is ready to use. Flashing green The instrument is running or the workflow has been paused. The instrument encountered an error. -
Page 8: Chapter 3: Configure Analysis Settings In Bionano Access
Chapter 3: Configure Analysis Settings in Bionano Access The Instrument Control Software and Bionano Access interact to allow users to track run progress and view results in real time. Prior to performing the run on the Saphyr instrument, an experiment must be set up in Bionano Access. -
Page 9: Chapter 4: Prepare Chip
Chapter 4: Prepare Chip Load Sample on Saphyr Chip • Equilibrate the labeled samples and Saphyr chip (sealed in pouch) to room temperature for at least 30 minutes prior to use. Important: Do not open the pouch containing the Saphyr Chip when the chip is cold. Wait until the pouch is at room temperature before removing the chip. - Page 10 Open the pouch containing the Saphyr Chip. Place the chip on a clean and level lab bench. With a 10 µl pipette, press the plunger down and hold at the first stop. Lower the pipette tip into the sample and gently stir the sample with the tip. Position the pipette tip near the middle or bottom of the sample and slowly aspirate 8.5 µl of the sample.
- Page 11 11. Align the plug (with the electrodes facing down) to flowcell 1. Use a slight to-and-away rocking motion on the plug to gently insert the plug fully into the chip. 12. Repeat steps 9-11 for flowcells 2 and 3. Note: It is highly recommended that all flowcells in the chip are used in the same run. Once the chip has been removed from the original sealed back, the performance will degrade over time.
-
Page 12: Saphyr Clip Care
14. The chip and sample can be left out for up to 1 hour at room temperature with the clip engaged before starting the run. Saphyr Clip Care Always position clip inserts on their side or upside down, as shown below. Do not place them on the bench with the electrodes down. -
Page 13: Chapter 5: Perform Run
Chapter 5: Perform Run Insert Saphyr Chip Before inserting the Saphyr chip into the Saphyr instrument, check the underside of the chip for dust or debris. If there is dust or debris, gently wipe the underside of the chip with lens paper. Avoid touching the underside of the chip with anything other than lens paper. - Page 14 3. Press the button that says “Press” to release the bundle arm. The bundle gently rise to a vertical orientation, thereby presenting the two positions where the chip(s) can be inserted into the instrument. 4. Insert one or two chips into the instrument and ensure that it rests snugly on the stage. If only inserting one chip, either platform can be used.
-
Page 15: Configure Run
Configure Run 1. From the Home Screen, click Configure Run. The Configure Run screen appears. If two chips were inserted, you will be prompted to configure the chip on platform 1 first (Chip Location: P1). Platform 1 is on the left side of the stage. 2. - Page 16 5. [Optional] Prior to clicking Accept or Next, you can click on either Skip Current Chip or Remove Chips. a) Skip Current Chip – This will allow you to disregard the chip in this platform. The chip will not be run. See the Chip and Flowcell States section below for more details.
- Page 17 Gbp from the previous scan Total Gbp collected during this run Estimated time remaining – Either N50 (kbp) for Map Rate molecules ≥ to hit throughput target or when the maximum time is reached 150 kbp Label Density (labels per 100 kbp) Note: The color of the progress bar indicates the following: Color Description...
-
Page 18: Chip And Flowcell States
12. Clicking on one of the flowcells expands the details of the run metrics for that flowcell. In the expanded view, you can see the per-scan throughput and map rate metrics: When the chip run is complete, if there is another chip (“pending”) in the instrument, it will automatically start running. -
Page 19: Pausing A Run To Insert A New Chip And/Or Remove A Completed Chip
When a chip is running, the flowcells associated with the chip can be in any of the following states: Flowcell State Description Icon Loading Sample is being loaded in preparation for scanning. Scanning The flowcell is being imaged. Cleaning Post-scanning cleaning is taking place. Complete Flowcell has achieved its throughput target or runtime limit as defined in the Run Configuration. - Page 20 2. When you are asked whether you want to pause the run, click yes. The current scan will complete before the run is paused. This may take up to 15 minutes. 3. You will be prompted to insert and remove chips. Open the sample door to add and/or remove chips as described in steps 2-6 of the Insert Saphyr Chip section above.
- Page 21 4. In the Configure Run screen, confirm that you are the correct user in the User field. If you are not, update the user name. Individuals with “User” privileges can only run experiments that they have created. To update the user name, click on Change next to the current user. Then enter your username and password.
-
Page 22: Pausing The Run To Rehydrate The Chip
Pausing the Run to Rehydrate the Chip If the sample level becomes too low during a run, the ICS will notify the user that there is a sample contact problem and will not continue to run that flowcell. 1. To pause a run that has a flowcell(s) with a sample contact problem, follow the instructions above in the Pausing a Run to Insert a New Chip and/or Remove a Completed Chip Section. -
Page 23: Stopping The Run
Stopping the Run To stop the instrument run before it reaches the limits that were set at the beginning of the run, press the stop icon at the top left of the user interface. Otherwise, the run will continue until the throughput or time limit is met. When you press this button, you will be asked to confirm you want to stop. -
Page 24: Remove Chip(S)
Remove Chip(s) In addition to the Pausing a Run section above, users can remove the Saphyr Chip from the Saphyr instrument when the run is successfully complete or when the run is stopped. 1. From the Home Screen, click Remove Chip. 2. -
Page 25: Chapter 6: Analyze Data
Chapter 6: Analyze Data Data Transfer for Analysis After the instrument scans the chip for about 2-3 minutes, users can monitor the run progress and view quality metrics in real time on Bionano Access. Following the completion of a run, users can perform various analyses. For more details on Bionano Access analysis and visualization features, see the Bionano Access Software User Guide (P/N 30142). -
Page 26: Chapter 7: Maintenance
Chapter 7: Maintenance Clean Saphyr Clip Plugs Clean the clip plugs before and after each use. Use gloves when cleaning clips. 1. Use a lint-free wipe saturated with 70% alcohol to remove any visible dirt or debris on all sides of the clip plugs. -
Page 27: Replace Air Filter
Replace Air Filter The air filter should be replaced every 3 months. Air filters are included in the Accessory Kit that came with the Saphyr instrument. Turn off the instrument. 2. On the back of the instrument, pull the air filter cover firmly away from the instrument to release the magnets that hold the cover in place. -
Page 28: Appendix A
Appendix A Troubleshooting Problem Possible Cause Recommended Action The instrument did not The software was unable to Restart the instrument. initialize and the Saphyr connect to the hardware instrument status icon devices. does not turn blue. The run does not start due There is insufficient Pause the run;... - Page 29 Export Tier 1 Run Diagnostics If there is an issue with a flowcell run that needs to be addressed by Bionano Genomics Support for troubleshooting, a small diagnostic package can be generated. 1. At the top of the window, click on the icon.
- Page 30 Users can export the instrument data configuration to their computer, such as log and calibration data from the instrument, and then send to Bionano Genomics Support for troubleshooting. 1. From the Home Screen, click the Help icon at the top-right corner of the screen. A dialog box appears.
-
Page 31: Appendix B
Appendix B Rerunning a Chip ICS allows for user flexibility in collecting data to accommodate various workflow issues and scenarios. Each flowcell in the chip has an associated maximum accumulated throughput and maximum accumulated runtime. The chip can be re-run as many times as desired to collect data up until either of these limits are reached. See the Chip Specification Document for the maximum accumulated throughput and accumulated runtime associated for a particular chip part number. - Page 32 If the user desires to re-run the chip to collect more data on flowcells 1 & 2, the configure run screen will appear as below. Here, the user can re-run the chip to collect an additional 100 Gbp and 200 Gbp in flowcells 1 & 2 respectively.
- Page 33 Scenario 3: Desired throughput target insufficient. In this example, the user determines that the amount of data collected was insufficient, and wants to collect more. This is allowed provided the total accumulated throughput is within the allowed limits. For example, the initial run completed with the following: Flowcell Run Conditions Set by the User in the First Run...
-
Page 34: Appendix C
Blue The instrument is working normally. Flashing Green The instrument is initializing. Flashing Red The instrument encountered an error. Contact Bionano Genomics Support for assistance. Flashing Bright The instrument door is open. If the instrument door is closed, there Blue is an issue with the safety interlocks, please contact Bionano Support. - Page 35 Bionano Access Connection Status The Bionano Access Connection icon indicates that there is a network connection between the Saphyr Instrument Controller and Bionano Access. The instrument must be connected to Bionano Access before it can begin a run. If connection fails while the instrument is scanning, ICS will cache run data locally and will automatically resume once the connection is reestablished.
-
Page 36: Appendix D
Appendix D Instrument Initialization The hardware components of the Saphyr instrument initialize upon startup of the Instrument Control Software. During initialization, the instrument status icon will flash green. Once initialization is complete, the icon will turn blue. If there is an issue with the initialization of any component, the icon will turn red. Clicking on the icon will show the initialization status of each component, as shown below. -
Page 37: Appendix E
3. Copy off any images that you want to retain to a separate server. Note: Bionano Genomics is not responsible for the integrity of the data transfer Note: Do not cut or delete images from the controller. Use the copy function only. Removing images from this directory will inhibit the ability to archive diagnostic information that may be useful for troubleshooting issues in the future. - Page 38 3. When the process is complete, the screen will show no additional data that can be deleted. 4. Click the Home icon to return to the Home Screen. 30247 Rev A, Saphyr System User Guide for Saphyr P/N 60325 Page 38 of 43...
-
Page 39: Appendix F
Appendix F Upload Run to Access The Resubmit Run to Access option from the Help Screen allows users to resubmit a dataset for reanalysis. This may be used if an error in the initial analysis of the run data has occurred. Note: If ICS and Access disconnect during a run, the run will continue. -
Page 40: Appendix G
Saphyr’s ability to archive diagnostics and may result in data loss. The only exception to this rule are the diagnostics packages generated by ICS after the packages have been safely copied off the instrument and sent to Bionano Genomics customer support. •... -
Page 41: Appendix H
Appendix H Instrument Disposal This label indicates that the instrument meets the 2012/19/EU Directive on waste electrical and electronic equipment (WEEE). Email support@bionanogenomics.com for instrument disposal in the EU. WEEE Label 30247 Rev A, Saphyr System User Guide for Saphyr P/N 60325 Page 41 of 43... -
Page 42: Additional Resources
Additional Resources The following documentation is available for download from the Bionano Support page. Resource Description Saphyr System Safety Guide for Saphyr P/N Provides information about the instrument safety 60325 (P/N 30249) considerations. Saphyr Site Preparation Guide for Saphyr P/N Provides specifications for laboratory space, 60325 (P/N 30248) electrical requirements, and environmental... -
Page 43: Technical Assistance
Technical Assistance For technical assistance, contact Bionano Genomics Technical Support. You can retrieve documentation on Bionano products, SDS's, certificates of analysis, frequently asked questions, and other related documents from the Support website or by request through e-mail and telephone. Type...
Need help?
Do you have a question about the Saphyr 60325 and is the answer not in the manual?
Questions and answers