
Summary of Contents for EAR Yoshino EAR 912
- Page 1 EAR 912 Designed by Tim de Paravicini OWNER’S MANUAL EAR / Yoshino Ltd Huntingdon, Cambridgeshire, England, United Kingdom www.earyoshino.com sales@earyoshino.com...
-
Page 2: Technical Description
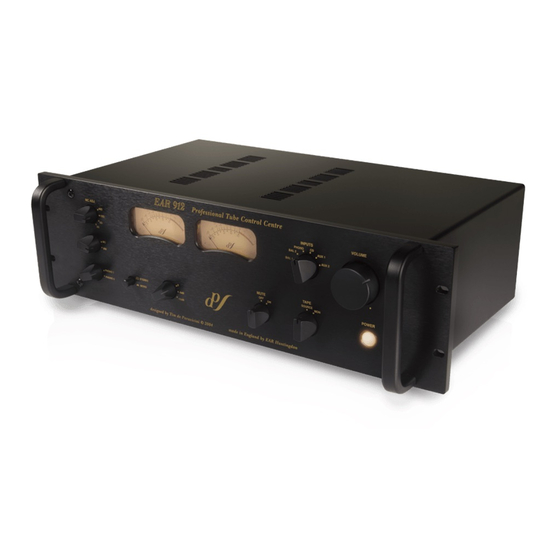
Designed by Tim de Paravicini INTRODUCTION Thank you for purchasing an EAR 912 preamplifier. You are now the owner of one of the world’s finest preamplifiers. We trust that it will give you many years of faithful service and musical pleasure. Please take a few moments to read this manual as it gives useful tips on operation and care of your new amplifier. - Page 3 realised, with carefully optimised headroom and noise at all stages. The attenuation switch which follows the phono stage operates by selecting winding taps, avoiding the problem of variable source impedance that arises when resistors are used to provide signal attenuation. As you would expect from such a comprehensively featured product, the 912 has a very high quality phono stage compatible with practically any cartridge ever made.
- Page 4 SETTING UP YOUR AMPLIFIER – MAINS SUPPLY Your 912 is capable of running off mains supplies from 100 volts to 250 volts. This voltage is pre-selected at the factory for the country of destination. If the adjustment taps do need to be changed, please refer to diagram for further information. If in doubt, contact your local agent.
- Page 5 With screened cables, this will not have any adverse effect on channel separation. The balanced inputs and outputs of the EAR 912 allow for optimum performance when connected to suitably equipped partnering components (source components and/or power amplifiers).
- Page 6 use an extra stage of amplification to generate the balanced signal from the unbalanced outputs (the 912, with its use of transformers, significantly avoids this problem) and that extra stage may have its own ‘sound signature’, in some cases making the unbalanced connection preferable.
-
Page 7: Care And Maintenance
slowly turn the volume control clockwise, until the required level is reached. Sit down and enjoy the music! If the orange power switch fails to light, check the IEC plug is pushed fully in the amplifier, and the mains outlet is switch on. If both appear good, then check the mains fuse on the rear panel of the amplifier. -
Page 8: Specifications
EAR 912 PREAMP SPECIFICATIONS Inputs: 2 x phono 3 x line level unbalanced (RCA phono connector) 1 Tape Out: 2 x line level balanced (XLR connector) 1 x tape monitor Line Amp Gain 14dB (reference sensitivity = 775mV for “0”dB V.U.
Need help?
Do you have a question about the EAR 912 and is the answer not in the manual?
Questions and answers