Table of Contents
Advertisement
Advertisement
Table of Contents

Related Manuals for Telrad CPE9000


Summary of Contents for Telrad CPE9000
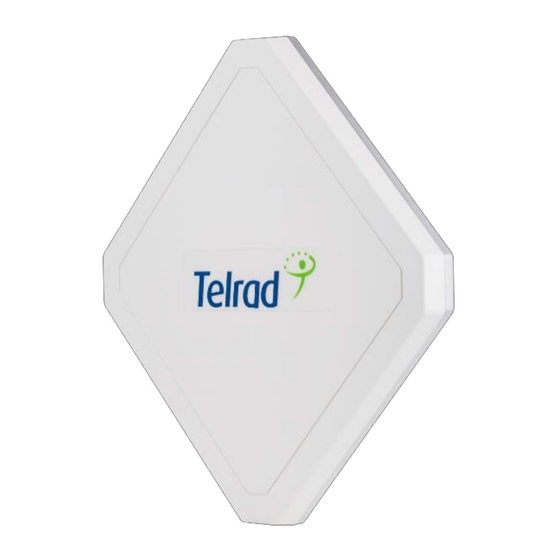
- Page 1 LTE Outdoor CPE9000 System Manual October 2017...
-
Page 2: Warranties And Disclaimers
Exclusive Warranty (a) Telrad Networks warrants that the Product hardware it supplies and the tangible media on which any software is installed, under normal use and conditions, will be free from significant defects in materials and workmanship for a period of fourteen (14) months from the date of shipment of a given Product to Purchaser (the "Warranty Period"). - Page 3 RANGE OF THE INTENDED USE, OR BY ACCIDENT, FIRE, LIGHTNING OR OTHER HAZARD. Disclaimer (a) The Software is sold on an "AS IS" basis. Telrad Networks, its affiliates or its licensors MAKE NO WARRANTIES, WHATSOEVER, WHETHER EXPRESS OR IMPLIED, WITH RESPECT TO THE SOFTWARE AND THE ACCOMPANYING DOCUMENTATION.
-
Page 4: Limitation Of Liability
THE SALE, INSTALLATION, MAINTENANCE OR USE OF ITS PRODUCTS. Limitation of Liability (a) TELRAD NETWORKS SHALL NOT BE LIABLE TO THE PURCHASER OR TO ANY THIRD PARTY, FOR ANY LOSS OF PROFITS, LOSS OF USE, INTERRUPTION OF BUSINESS OR FOR ANY INDIRECT, SPECIAL,... - Page 5 Content Copyright Notice About this Guide Prerequisite Skills and Knowledge Conventions Used in this Document Introduction Product Overview Product Package Connectors LED Indicators Installation Connecting the Cables Web Interface Login to Web-GUI Brief Summary Page Detailed Configuration Page Menu Structure Reference Manual LTE | Status | Basic LTE | Status | PDN...
- Page 6 Network | MGMT Service | Dynamic DNS Network | MGMT Service | Web Service Firewall Firewall | Basic Firewall | L3 MGMT Filter Firewall | L3 DATA Filter Firewall | L2 Filter Firewall | Access Restriction Management Management | Account Management | Language Management | Device Setting Management | Restore Default...
- Page 7 Exclusive Warranty (a) Telrad Networks warrants that the Product hardware it supplies and the tangible media on which any software is installed, under normal use and conditions, will be free from significant defects in materials and workmanship for a period of fourteen (14) months from the date of shipment of a given Product to Purchaser (the "Warranty Period").
- Page 8 Disclaimer (a) The Software is sold on an "AS IS" basis. Telrad Networks, its affiliates or its licensors MAKE NO WARRANTIES, WHATSOEVER, WHETHER EXPRESS OR IMPLIED, WITH RESPECT TO THE SOFTWARE AND THE ACCOMPANYING DOCUMENTATION. TELRAD NETWORKS SPECIFICALLY DISCLAIMS ALL IMPLIED WARRANTIES OF MERCHANTABILITY AND FITNESS FOR A PARTICULAR PURPOSE AND NON- INFRINGEMENT WITH RESPECT TO THE SOFTWARE.
- Page 9 CPI process per section 96.45 The CPE9000 (Category B CBSD) ) must report to a SAS to register and obtain spectrum grants per FCC part 96. Local administration should be executed through the domain proxy and all freq, bandwidth and power adjustments must be handled in coordination with the SAS and grant process.
-
Page 10: About This Guide
About this Guide This document provides information and procedures on the installation and configuration of Telrad Outdoor CPE9000. You could utilize the information in this guide to set up your device. Prerequisite Skills and Knowledge To use this document effectively, you should have a working knowledge of Local Area Networking (LAN) concepts and wireless Internet access infrastructures. -
Page 11: Cpe9000 Product Highlights
Introduction CPE9000 Product Highlights • TD-LTE – 3GPP Release 10, UE Category 6 Supports wired (LAN port) • High gain 15dBi embedded Antenna • • Device Management – Web, TR69 & SNMP IP67 environmental rating – fully ruggedized, suitable for the harshest outdoor deployment •... -
Page 12: Cpe9000 Outdoor Specification
Channel bandwidth (MHz) 10, 20 Modulation DL: MCS1 - MCS28 (QPSK, 16QAM, 64QAM) UL: MCS1 – MCS28 (QPSK, 16QAM, 64QAM) Uplink 64QAM with Telrad eNodeB MIMO TM1, TM2, TM3, TM4, TM8 L2 & L3 Multiple APN PLMN and Cell Selection... - Page 13 Maximum Transmit 23 dBm Power Antenna 1TX/2RX, 15dBi Power Source Environmental IP67 - withstands harsh weather and outdoor environments Operating Temperature -40° to 55° C | -40° to 131° F Humidity 5% to 95% non-condensing ESD Rating +/-15KV Power Consumption 6.7W Regulatory Compliance 2.X GHz:...
-
Page 14: Product Package
If any item of mentioned above is missing or damaged, please contact our customer support immediately. Connectors The Outdoor LTE CPE CPE9000 has following connectors (from left to right): One RJ-45 connector for connecting to the PoE adaptor. LED indicator inside and SIM card slot for inserting SIM card. - Page 15 LED Indicators LED name Location Color LED Behavior Status Indication LED List ●●● ●●● MAIN power Blue Power On ○○ ● ○○○ Power Off Yellow Ethernet Detect Ethernet ○●○ Steady ON status Device Connected ○○○ Blinking Detect IAD No Ethernet action LTE Outdoor CPE | User Manual...
-
Page 16: Sim Status
SIM status Green ○○● Steady ON SIM Detected ○○○ Blinking when PUK / PIN Code On-hook No SIM Detected LTE Status LED : When CPE is power on, each LED indicates each link status Link Status 1 ○○○ Steady ON SINR <... -
Page 17: Connecting The Cables
Mounting the ODU: Mount LTE Outdoor CPE on a 1”-4” pole using the supplied kit, or ● the optional tilt accessory. • Using the clamp 1. Thread the M10*100mm bolt through a spring washer, flat washer and the bracket holes. 2. - Page 18 Outdoor Connection: Connect a grounding cable between the Ground terminal of the ● LTE outdoor CPE and a good ground connection. Preparing and connecting the cable: Use only UTP-FTP 4x2x24AWG CAT. 5E outdoor ● cable from an approved manufacturer. The cable provides pin-to-pin connection on both ends.
- Page 19 in standard cables supplied by the manufacturer are as listed in the table. 2. Connect the cable • Remove the sealing cable gland plug from the gland nut. • Open the sealing gland nut and remove it. Don not disassembles the gland base from the bracket.
- Page 20 • Tighten the gland nut. Use the dedicated tool for fastening the sealing glands. 3. Seal the connector • Attach the mastic tape (Scotchfil Electrical Insulation Putty) and wrap it around the connector butting up against the connector. Do not over stretch. •...
- Page 21 Use ONLY the PoE adaptor which supplied with the ODU. Otherwise, LTE Outdoor CPE may be damaged. Plug in PoE into power line. The device will start the booting process. Please wait for a minute to let the booting process complete. Select Local Area Connection Status from Windows task bar and click Properties.
- Page 22 Local Area Connection Status Double click on the Internet Protocol (TCP/IP). Local Area Connection Properties Select Obtain an IP address automatically / Obtain DNS server address automatically and click OK. LTE Outdoor CPE | User Manual...
- Page 23 Internet Protocol (TCP/IP) Properties By now, the device should have got IP address from your DHCP server. LTE Outdoor CPE | User Manual...
- Page 24 How to verify CPE has a successful connection to the LTE eNodeB. This can be verified by observing the signal strength LEDs (Please refer LED Indications section in Introduction chapter of this manual to find the location of these LEDs on the LTE Outdoor CPE | User Manual...
-
Page 25: Web Interface
device). At least one of these LEDs glowing continuously is an indication of successful connection to the Base Station. Now you can start browsing the Internet. Web Interface Login to Web-GUI Users’ devices are assumed in CPE LAN side. Please follow the steps below to configure your device through the web interface: Step1: Open the Web browser (Ex: Internet Explorer, Firefox or Chrome) and enter the... -
Page 26: Brief Summary Page
Step2: Enter USERNAME/PASSWORD to access the web management interface. The operator / Telrad4G default is for operator and admin / admin for end-user. Web management interface Step3: After successful login, you can see “Brief Summary Page”. Brief Summary Page is composed of many blocks and each block contains its own feature. - Page 27 After login, users can see a “Brief Summary Page” about all functions of LTE CPE, each block is a link to “Detailed Configuration Page”. (Ex: Click “Network”, you can go to “Network” main menu with sub-menu like DHCP or Port Forwarding and other settings about Network) Detailed information for each block is in the below table.
- Page 28 Logo of Service Provider. Login Identity, could be Superuser or Enduser Button of REBOOT Button of LOGOUT , this logo is an example. It can be customized if needed. Mode: Either APN Name (LTE mode) Operator: Signal: (More bar means better signal) (Disconnect, no signal) Signal: Only an example, the real signal depends on local connection...
- Page 29 LAN IP: LAN IP of CPE WAN IP: WAN IP of CPE means Firewall is enabled Status: means Firewall is disabled. Device Name: Name of LTE CPE in LAN side Device Name Telrad_2C3263 is just an example. In general, it looks like XXXXX_YYYYYY (XXXXX = Service Provider) (YYYYYY = Last six words of WAN MAC.) The uptime from the bootup of...
-
Page 30: Detailed Configuration Page
Detailed Configuration Page After clicking any block in “Brief Summary Page”, the webpage would be switched to the “Detailed Configuration Page”. (Take “Mobile Network” block for example) Detailed Configuration Page Main Menu Show the current main menu Sub Menu Clickable, can jump to another Sub Menu under the same Main Menu Each icon in Quick Panel represents a “Main Menu”, when users click it, a Quick Panel list of “Sub Menu”... - Page 31 Pop up Sub Menu in Quick Panel Logo of service provider. Current service, could be LTE Signal bar, more bar means better signal means no signal or disconnection. When CPE cannot Detect SIM card, the ICON will appear. Login identity, could be Superuser or Enduser Button of REBOOT Button of LOGOUT Button to go Back to brief information Page...
-
Page 32: Menu Structure
Menu Structure After entering “Detailed Configuration Page”, the user can quickly jump to the specified Sub Menu. (By clicking “Quick Panel” at the bottom of the page.) Users can refer to the menu structure given below: Status Cell Selection Default PDN Multiple PDN PLMN Selection Advanced... - Page 33 Reference Manual In “LTE” main menu, user can see the LTE basic information and uplink/downlink status. All the setting about LTE placed here such as LTE Earfcn and PIN code, PDN, multiple PDN, PLMN search and Cell Lock. Display in Brief Summary Page Display in “Quick Panel”...
-
Page 34: Lte | Status | Basic
LTE | Status | Basic LTE > Status General Information ● ■ State: Possible states are connecting and connected. ■ Network Operator: It shows APN name. ■ Technology: LTE. ■ Connection Time: the accumulated time after the state is “connected”. LTE Information ●... - Page 35 ◆ Device Ready: Unlock pin code. ◆ Search: Scan the available eNodeB. ◆ Network Entry: Cell detection. ◆ Attached: As titled. ◆ Idle: As titled. ◆ No Signal: NAS attached RRC detached. ■ DL Frequency: Downlink frequency. ■ UL Frequency: Uplink frequency. ■...
- Page 36 LTE | Status | PDN LTE > Status > PDN ■ Cid: Identity number of PDN connection. ■ APN Name: Access point name identifies specific packet data network. ■ PDN Type: The connection type of each packet data network. ■ Authentication Type: The Authentication type of each packet data network.
- Page 37 LTE | Cell Selection note only B48 su pported in LTE > Cell Selection Mode: TDD ● Scan Mode: Full Band or Dedicated Earfcn. Searching full band would take much longer ● time than Dedicated Earfcn. Band: ● Type: DL-Earfcn or Dl-Frequency. ●...
- Page 38 LTE | PIN LTE > PIN LTE > PIN > Enable PIN LTE > PIN > Change PIN Enable PIN: Enable/Disable PIN code protection. ● Change PIN: Change the PIN code. ● Remaining Attempts: remaining times to try PIN code. ●...
- Page 39 Please make sure the current technology is LTE. It can be checked from upper left corner of Web-GUI. If you enter wrong PIN more than three times (maximum numbers of attempts allowed), your SIM card will become “PUK-locked” status. Please contact your service provider for further unlock instruction. Remaining Attempts is just an example.
-
Page 40: Lte | Default Pdn
LTE | Default PDN LTE > Default PDN APN for network attach: Users can choose Auto or Manual. If choosing Manual, users ● need to specify an APN Name. Authentication Type: There are None, PAP and CHAP to choose from. If choosing PAP ●... -
Page 41: Lte | Multiple Pdn
LTE | Multiple PDN LTE > Multiple PDN Multiple PDN is a wonderful way to separate different network service. For example, users can have Default PDN for management and multiple PDN for data transfer. PDN Type: Only support IPv4 right now. ●... -
Page 42: Lte | Plmn Selection
LTE | PLMN Selection PLMN selection is a technique to keep connecting to ISP for CPE. If CPE search PLMNs, it will be recorded in the table below. “Survey” button: to scan all the PLMN around the CPE ● Index: Number of PLMN. ●... -
Page 43: Lte | Advanced (Not Part Of Current Release)
LTE | Advanced (Not part of current release) The below capabilities depending on eNodeB features supported and IOT, therefore these features currently not available. For further details, please contact Telrad team. LTE > Advanced eMBMS is a way to deliver popular multimedia content to a mass audience. It provided an efficient broadcasting of content only to interested receivers. -
Page 44: Lte | Cell Lock
LTE | Cell Lock LTE > Cell Lock Cell Lock is use to lock CPE into specific Cell. CPE will only connect to specific cell that define in the list. The list contains up to 10 in priority to others cells. Detected Cell ●... - Page 45 ■ Click “Add +” button to add a new rule, clicking “Delete” icon ) to delete the rule. ■ Add: User can lock specific cell by click add. Maximum CPE can input 10 Cell in the list. ■ DL-Earfcn: Downlink EUTRA Absolute radio-frequency channel number. ■...
- Page 46 Network The “Network” page allows user to configure network function such as WAN setting, LAN Setting, QOS, Port Management, DSCP, and MGMT Service. Display in Brief Summary Page Display in “Quick Panel” of Detailed Configuration Page Menu Structure: ● Status WAN Setting LAN Setting Network...
-
Page 47: Network Status
Network | Status LAN Information ● Network > Status > LAN Information WAN Information: This section shows WAN IP, MAC, Gateway, DNS Server, Time Server ● of LTE CPE and statistics of TX and RX Bytes and Packets of WAN interface. These values may differ from “Single PDN”... -
Page 48: Auto Button
Network > Status > WAN Information Lease Status Table: This section shows all clients who get IP from DHCP server in LTE CPE. ● Network > Status > Lease Status Table Refresh button Click the “Refresh” button to trigger refresh manually. Auto button This button will update the status information periodically. - Page 49 The period can be set from “ in page GUI Refresh Time” Management / Device Setting) The address and TX/RX bytes are all examples here. Real values depend on the local ISP provider.. LTE Outdoor CPE | User Manual...
- Page 50 Network | WAN Setting (NAT Mode) Network > WAN Setting Operation Mode: The mode includes NAT, Tunnel, Bridge and Router Mode. The ● following pages will show how to configure “NAT mode”. Changing the “Operation Mode” needs reboot to take effect. A pop- up window will ask users to “Reboot”...
- Page 51 Pop-up windows to confirm reboot Connection Mode: “DHCP” or “Static”. ● ➢ If “DHCP” mode is selected, CPE would automatically acquire configuration information from a DHCP server. ➢ If “Static” mode is selected, users have to manually enter the required information in below fields.
- Page 52 NAT mode, choosing “Separate” in WAN MGMT and Data Interface If users choose “Separate” in WAN MGMT and Data Interface, make sure other PDN is well configured in page LTE > Multiple PDN. WAN IP Address/ Subnet Mask/ Gateway Address: These values are un-editable when ●...
- Page 53 PDN connection CID for MGMT: If selecting “Separate” in “WAN MGMT and DATA ● Interface”, users need to assign the PDN used as MGMT. By now, the only option is “Default”. PDN connection CID for DATA: If selecting “Separate” in “WAN MGMT and DATA ●...
-
Page 54: Network | Wan Setting (Tunnel Mode - Layer 2 Gre Only)
Network | WAN Setting (Tunnel Mode – Layer 2 GRE Only) Network > WAN Setting > PPTP, L2TP, GRE Operation Mode: The mode includes NAT, Tunnel, Bridge and Router Mode. The ● following pages will show how to configure “Tunnel mode”. Changing the “Operation Mode”... - Page 55 Pop-up windows for reboot confirm VPN Type: PPTP (with IPsec) – Not supported ● L2TP (with IPsec & BCP Disable/Enable) – Not supported GRE (Layer2/ Layer3) Tunnel Mode - Only Layer 2 supported GRE Type (Layer 2)/ Destination IP Address: The IP address of the peer to build GRE ●...
-
Page 56: Network | Wan Setting (Bridge Mode) - Not Supported By Telrad
Commit the changes made and save to the CPE device, some Apply button services will be reloaded. Network | WAN Setting (Bridge Mode) - NOT SUPPORTED BY TELRAD Network > WAN Setting Operation Mode: users have NAT, Tunnel, Bridge and Router Mode to choose from. - Page 57 Pop-up windows for reboot confirm Connection Mode: “DHCP” or “Static”. ● ➢ If “DHCP” mode is selected, CPE would automatically acquire configuration information from a DHCP server. ➢ If “Static” mode is selected, users have to manually enter the required information in below fields.
-
Page 58: Network | Wan Setting (Router Mode)
Multi-PDN in Bridge Mode NTP1/2: It is used to calibrate the time in CPE. Users can specify two NTP ● servers in “IP” or “Domain name” format. For example 45.79.167.181or 0.us.pool.ntp Cancel button Reset fields to the last saved values. Commit the changes made and save to the CPE device, some Apply button services will be reloaded. - Page 59 Network > WAN Setting Connection Mode: “DHCP” or “Static”. ● ➢ If “DHCP” mode is selected, CPE would automatically acquire configuration information from a DHCP server. ➢ if “Static” mode is selected, users have to manually enter the required information in below fields. Host Name: Currently no function.
- Page 60 WAN MTU: This value is “Maximum Transmission Unit”. It is the largest size of a single ● packet. DNS1/2: Domain Name Server. It is editable when users select “Static” in “Connection ● Mode”. Otherwise, these values will be given by DHCP server. NTP1/2: It is used to calibrate the time in CPE.
-
Page 61: Network | Lan Setting
Network | LAN Setting Network > LAN Setting LAN Setting: ● ➢ LAN IP Address / Subnet Mask: The IP address and subnet mask used by CPE in LAN ◆ If users choose “L2TP with BCP Enabled” in “Operation Mode”, this IP only means a back-up IP address. - Page 62 Network > LAN Setting CPE has a built-in DHCP server to manage the distribution of IP addresses. A device connected to CPE through the Ethernet port would obtain a dynamic IP address from CPE. Enable DHCP Server: enable/disable DHCP server ●...
- Page 63 If users want to know DNS Servers obtained from ISP, It can be found in “Network > Status > WAN Information > DNS Server” Primary/Secondary/Tertiary DNS: If the checkbox “From ISP” is not ticked, users can ● designate the DNS server for DHCP clients. Two pictures below are captured from CPE and a PC in LAN, DNS fields are “1.1.1.1”, “2.2.2.2”...
- Page 64 “Example”, “11:22:33:44:55:66”, “192.168.254.222” are examples here. Cancel button Reset fields to the last saved values. Commit the changes made and save to the CPE device, some Apply button services will be reloaded. LTE Outdoor CPE | User Manual...
-
Page 65: Network | Qos (Available In Nat, Tunnel, Router Mode)
Network | QoS (Available in NAT, Tunnel, Router Mode) Network > QoS QoS stands for “Quality of Service”, different network services can be prioritized. Users have to add rules which designate that network flow through certain port ranges or IP address range would have a guaranteed sending rate. - Page 66 About Min Rate and Max Rate, we can discuss this in 3 cases. For example, Min Rate=50 kbps Max Rate=100 kbps 1. If 20 kbps is needed, the traffic will only get 20 kbps, CPE will not give it 50 kbps (50 kbps=Min Rate, this can prevent wasting bandwidth) 2.
-
Page 67: Network | Routing (Available In Tunnel, Router Mode)
Network | Routing (Available in Tunnel, Router Mode) Network > Routing Users can designate routing rules of CPE Static Routing: Enable/Disable static routing. ● Click “Add +” button to add a new rule, clicking “Delete” icon ) to delete the rule. ●... - Page 68 Network | Port Management | Port Forwarding (Available in NAT, Tunnel Mode) Network > Port Management > Port Forwarding Port forwarding forwards the packet according to the port setting in this page. If packets with the port number in these ranges, packets will be forwarded to the designated LAN IP and LAN Port.
- Page 69 Delete: Delete the rule. ● WAN Port 53, 68, 113, 123, 161, 2948, 7547, 58603 are reserved for management use. The priority of port forwarding rules is higher than DMZ. Users can set DMZ and it will not influence port forwarding. Cancel button Reset fields to the last saved values.
- Page 70 Network | Port Management | Port Trigger (Available in NAT, Tunnel Mode) Network > Port Management > Port Trigger The table allows you to configure Port Trigger rules. Port Trigger is a way to automate port forwarding. Outbound traffic on predetermined ports ('trigger port') causes inbound traffic to specific ports (call it port P here) to be dynamically forwarded to the host which uses trigger port.
- Page 71 Enable: Enable/Disable the rule. ● Delete: Delete the rule. ● Cancel button Reset fields to the last saved values. Commit the changes made and save to the CPE device, some Apply button services will be reloaded. LTE Outdoor CPE | User Manual...
-
Page 72: Network | Dscp
Network | DSCP Network > DSCP Differentiated Services Code Point (DSCP) is a computer networking architecture that specifies a simple, scalable and coarse-grained mechanism for classifying and managing network traffic and providing quality of service (QoS) on modern IP networks. DSCP value range is between 0~63 ●... - Page 73 Network | MGMT Service | Dynamic DNS Network > MGMT Service > Dynamic DNS Dynamic Domain Name System (DDNS) is a mechanism that can map a fixed domain name to a dynamic IP address. This is very useful when you can only get a dynamic IP in WAN. If DDNS is enabled, clients can connect to CPE through “DDNS Host Name”.
-
Page 74: Network | Mgmt Service | Web Service
Network | MGMT Service | Web Service Network > MGMT Service MGMT service is about HTTP and HTTPs configuration. HTTP Service: When it is enabled, clients in the LAN side can link to CPE HTTP service. ● Users can set the port used by HTTP service. HTTPs Service: When it is enabled, clients in the LAN can link to CPE HTTPs service. - Page 75 The port number setting in this page is only for LAN; if users want to login to GUI from WAN, it needs to enable “Allow Https login from WAN” in “Firewall | Basic”. Cancel button Reset fields to the last saved values. Commit the changes made and save to the CPE device, some Apply button services will be reloaded.
- Page 76 Firewall The “Firewall” page allows user to configure firewall to block and grant some network access. Display in Brief Summary Page Display in “Quick Panel” of Detailed Configuration Page Menu structure: ● Basic L3 MGMT Filter L3 DATA filter Firewall L2 Filter Access Restriction LTE Outdoor CPE | User Manual...
-
Page 77: Firewall | Basic
Firewall | Basic Firewall > Basic Enable Firewall: Enable/Disable firewall. ● Allow ping from WAN: As titled. ● Allow HTTPs login from WAN: It is available only when HTTPs Service is enabled in ● Network | MGMT Service. HTTPs Login Port from WAN: As titled. ●... - Page 78 they pass through. Enable UPnP IGD: Active UPnP function on CPE. ● Cancel button Reset fields to the last saved values. Commit the changes made and save to the CPE device, some Apply button services will be reloaded. LTE Outdoor CPE | User Manual...
- Page 79 Firewall | L3 MGMT Filter Firewall > L3 MGMT Filter L3 MGMT filter disallow/allows packets with certain ports and IP address which is sent to CPE. Click “Add +” button to add a new rule, clicking “Delete” icon ) to delete the rule. ●...
- Page 80 Dst Mask: It would be used with Dst IP to form a subnet. ● Enable: Enable/Disable the rule. ● Delete: Delete the rule. You need to press the apply button to take effect. ● Cancel button Reset fields to the last saved values. Commit the changes made and save to the CPE device, some Apply button services will be reloaded.
-
Page 81: Firewall | L3 Data Filter
Firewall | L3 DATA Filter Firewall > L3 DATA Filter L3 DATA filter disallow/allows packets with designated ports and IP address to the device which is not CPE. Click “Add +” button to add a new rule, clicking “Delete” icon ) to delete the rule. - Page 82 Dst IP: The destination IP to filter. ● Src Mask: It would be used with Src IP to form a subnet. ● Dst Mask: It would be used with Dst IP to form a subnet. ● Enable: Enable/Disable the rule. ●...
-
Page 83: Firewall | L2 Filter
Firewall | L2 Filter Firewall > L2 Filter L2 filter can filter packets in layer 2 of the 7-layer OSI model of computer network. Click “Add +” button to add a new rule, clicking “Delete” icon ) to delete the rule. ●... - Page 84 Src MAC: The source MAC to filter. ● Dst MAC: The destination MAC to filter. ● Src Mask: The source Mask to filter. ● Dst Mask: The destination Mask to filter. ● Enable: Enable/Disable the rule. ● Cancel button Reset fields to the last saved values. Commit the changes made and save to the CPE device, some Apply button services will be reloaded.
-
Page 85: Firewall | Access Restriction
Firewall | Access Restriction Firewall > Access Restriction Access Restriction provides a comprehensive way to control the network. First, users can block all the network traffic at certain time. For example, deny all the traffic from 10:00 to 12:00. Second, users can deny devices with certain MAC address accessing the network. Third, users can deny clients accessing certain URL. - Page 86 Enable: Enable/Disable the rule. ● Blocked Day / Blocked Time: The day and time to block the network. ● Blocked Device: Block the device with specified MAC address or block packets with ● specified IP range. Blocked Reason: (1) block all traffic (2) block packets with specified keyword. ●...
- Page 87 Management The “Management” page allows user to configure the main system parameters such as password, language, device time/name …etc. Display in Brief Summary Page Display in “Quick Panel” of Detailed Configuration Page Menu structure: ● Account Language Device Setting Restore Default Management Device Log Software...
-
Page 88: Management | Account
Management | Account Management > Account Management The Account Management page lets you change the default username and password for Superuser and Enduser. There should be at least 9 characters for the password. Click “Apply” to save this change. ● Tick the checkbox “Enable”... -
Page 89: Management | Language
Management | Language Management > Language The language page allows user to switch the language used in the web. Select the language you want from the drop down list and then click “Apply” button to apply the changes. Apply button Commit the changes made and save them to the CPE device. -
Page 90: Management | Device Setting
Management | Device Setting Management > Device Setting Device Time ● ➢ Current Local Time: Display current local time; or click “Synchronize with PC” button to synchronize the time of CPE with PC. ➢ Time Zone: as titled. ➢ Auto Adjust for Daylight Saving Time: Enable this option if your location observes Daylight Savings Time. - Page 91 every the designated time. (Range: 5-60 Seconds) Device Name: The name of CPE. Users can log in to CPE from any device in the internal ● network by entering the device name on the address bar. ➢ Current Device Name: Display the current device name. ➢...
-
Page 92: Management | Restore Default
Management | Restore Default Management > Restore Default Select Management > Restore Default to go back to the factory default settings. Restore Default: Click “Restore” button to clear all users’ configuration and restore to ● factory default settings. Restore to default settings Window Last Good Configuration. - Page 93 ➢ Remove Last Good: Remove the last saved configuration. ➢ Reset to Last Good: Load the last saved configuration. Integrity Check: Integrity check for the software used in the device in case the storage ● device is broken. The green check indicates the investigation is passed.
-
Page 94: Management | Device Log
Management | Device Log Management >Device Log Management >Device Log> Options of Severity & Syslog Target Syslog is an efficient tool for engineer debugging. CPE provide two kinds of ways to output its Syslog include output to Web and output to Remote server. And CPE also defines different Severity Level of output data, it can help engineer to get the specific logging data they want. - Page 95 Refresh button Click the “Refresh” button to trigger refresh manually. Auto button This button will update the syslog information periodically. Apply button Commit the changes made and save them to the CPE device. LTE Outdoor CPE | User Manual...
-
Page 96: Management Software
Management | Software Management > Software Software Upgrade: Click “Browse” button to select the ipkg file to upload, and then click ● “Upgrade” to install the selected file. The Upgrading window will be shown as below and then the reboot process will be started to let the change taken effect. The ipkg file you have uploaded will be shown in the table below the device software version. - Page 97 button. File Download Window If user wants to restore the system to the restore the configuration, click “Browse” button to select the previously saved configuration file, and then click “Restore” button to restore the system to the previous settings. Management > Software > Upgrading Window A window will be popped up to let users to key in the passphrase when users save/restore the configuration.
- Page 98 Press the “Restore” button, CPE will automatically reboot and adjust the configuration with the uploaded file. Users will be prompted to re- login to the CPE after the process is complete. LTE Outdoor CPE | User Manual...
-
Page 99: Management | Rm Settings
Management | RM Settings Management > RM Settings (Disable) In this page, users can set up the remote management. RM Type-Disable: Select “Disable” to disable the remote management. ● RM Type-SNMP (Simple Network Management Protocol) ● LTE Outdoor CPE | User Manual... - Page 100 Management > RM Settings (SNMP) For SNMP, CPE serves as the server, users can use the tool such as MIB browser as the client to connect to CPE and do remove control. ➢ SNMP Server: The type of the server. It includes SNMPv2c, SNMPv3. ➢...
- Page 101 community string is correct, the server responds with the requested information. ➢ SNMP Trap Server IP Address: As titled. ➢ SNMP Trap Server Port: As titled. ➢ Contact: The name or organization responsible for the switch. ➢ System Name: The name that identifies the SNMP agent. ➢...
- Page 102 ➢ SNMP Engine Table (SNMPv3 only): LTE Outdoor CPE | User Manual...
- Page 103 RM Type-TR-069 (Technical Report 069) ● Management > RM Settings(TR-069) TR-069 is a technical specification entitled CPE WAN Management Protocol (CWMP). It defines an application layer protocol for remote management of end-user devices. In the following, the word ACS stands for Auto Configuration Server. ➢...
- Page 104 Periodic Inform” is enabled. ➢ Connection Request UserName: When ACS connects to CPE, CPE also needs to challenge ACS for authentication. ACS has to provide the username which matches this field. (20 alphanumeric characters allowed) ➢ Connection Request Password: When ACS connects to CPE, CPE also needs to challenge ACS for authentication.
-
Page 105: Global Settings
RM Type-ODM-DM (Open Mobile Alliance Device Management) – NOT SUPPORTED ● BY TELRAD Management > RM Settings (OMA-DM) Using OMA-DM (OMA – Device Management) the terminals can communicate with the OMA DM Server and establish the configuration automatically. It’s the current standard for activation of terminals in OMA (Open Mobile Alliance), it is designed for management of small mobile devices such as mobile phones, PDAs and palm top computers. - Page 106 • Server Port: Enter the port number of DM Server for the CPE to connect to. • Server ID: The server ID for the CPE when connected to the DM Server. • Server Password: The server password for the CPE when connected to the DM Server.
- Page 107 • Client Polling Interval: As titled. • Client Polling Attempt: As titled. ➢ Client Initiated Session • Client Initial Session: If you press this button, the client would ask the server for tasks to do immediately. ➢ DRMD Authorized Msg •...
- Page 108 Monitoring This section shows the device status such as CPU loading and memory usage and provides the interface to use the tools such as Iperf, ping and traceroute. Display in Brief Summary Page Display in “Quick Panel” of Detailed Configuration Page Menu structure: ●...
-
Page 109: Monitoring | Status
Monitoring | Status Monitor > Status Monitor Period Configuration: The period to record devices status. The recorded data is ● used to compute the CPU, memory and network statistics. Reset button: Reset CPU/Memory utilization and Uplink/Downlink data rate. ● CPU Utilization: ●... - Page 110 ■ Current Data rate ■ Max Data rate ■ Min Data rate. System Information ● ➢ Firewall: The status of firewall. It is either ON or OFF. ➢ Device Uptime. The accumulated time after the device is powered on. ➢ Restart Reason ■...
- Page 111 Monitoring | Iperf Monitor > Iperf Iperf is a tool to measure network environment such as throughput, packet loss and delay jitter. Typically, to use Iperf, there should be a client and a server. The server opens a port and waits for clients to build the connection.
- Page 112 Result ● ➢ Uplink Latency (only UDP) ➢ Downlink Latency (only UDP) ➢ Uplink Speed. ➢ Downlink Speed. LTE Outdoor CPE | User Manual...
-
Page 113: Monitoring | Diagnostic Tools
Monitoring | Diagnostic Tools Monitor > Diagnostic Tools CPE has built-in tools “ping” and “traceroute”. “Ping” is used to test if CPE can reach an IP address or domain by sending the ICMP “ECHO_REQUEST” packet and waiting for the ICMP “ECHO_RESPONSE”... - Page 114 About This section shows the device information such as Service Provider, Product Name, Model ID, Serial ID, IMEI, IMSI, Firmware version, Firmware Creation Date, Bootrom Version, Bootrom Creation Date and LTE Support Band. Display in Brief Summary Page Display in “Quick Panel” of Detailed Configuration Page Menu structure: ●...
-
Page 115: About | Status
About | Status About > Status This section shows CPE basic information. Service Provider: As titled. ● Product Name: The name is composed of functions provided by CPE. ● Model ID: The ID used by the manufacturer. ● Serial ID: The ID used by the operator. ●... -
Page 116: Europe - Eu Declaration Of Conformity
Europe – EU Declaration of Conformity This device complies with the essential requirements of the R&TTE Directive 1999/5/EC. The following test methods have been applied in order to prove presumption of conformity with the essential requirements of the R&TTE Directive 1999/5/EC: EN 301 908-1 V7.1.1 EN 301 908-13 V6.2.1 EN 62311:2008... - Page 117 Česky [Czech] [Jméno výrobce] tímto prohlašuje, že tento [typ zařízení] je ve shodě se základními požadavky a dalšími příslušnými ustanoveními směrnice 1999/5/ES. Dansk [Danish] Undertegnede [fabrikantens navn] erklærer herved, at følgende udstyr [udstyrets typebetegnelse] overholder de væsentlige krav og øvrige relevante krav i direktiv 1999/5/EF.
- Page 118 Latviski Ar šo [name of manufacturer / izgatavotāja nosaukums] deklarē, ka [Latvian] [type of equipment / iekārtas tips] atbilst Direktīvas 1999/5/EK būtiskajām prasībām un citiem ar to saistītajiem noteikumiem. Lietuvių Šiuo [manufacturer name] deklaruoja, kad šis [equipment type] atitinka [Lithuanian] esminius reikalavimus ir kitas 1999/5/EB Direktyvos nuostatas.
- Page 119 LTE Outdoor CPE | User Manual...
Need help?
Do you have a question about the CPE9000 and is the answer not in the manual?
Questions and answers