Table of Contents
Advertisement
Advertisement
Table of Contents

Related Manuals for Aura Roboclean Splus 114K


Summary of Contents for Aura Roboclean Splus 114K
- Page 1 USER MANUAL...
- Page 3 Dear Customer, Congratulations on your purchase of an AURA ROBOCLEAN SPLUS. You have made a great decision for the health of your family. We recommend that you read this User Manual thoroughly and retain it for future reference in order to use your product as effectively as possible.
- Page 4 Important safety instructions Please read all instructions before using this appliance. ! WARNING To reduce the risk of electric shock use indoors use only. ! WARNING To reduce the risk of fire, electric shock, or injury, when using an electrical appliance, basic precautions should always be followed. Save These Instructions • T his appliance is intended for household use only. Do not use outdoors and on wet surfaces.
- Page 5 • Do not handle plug or appliance with wet hands. • Do not put any object into openings. Do not use with any opening blocked; keep free of dust, lint, and anything that may reduce air flow. • Keep hair, loose clothing, fingers, and all parts of body away from opening and moving parts. • Use extra care when cleaning on stairs. • Do not vacuum any burning or smoking objects such as cigarettes, matchsticks, embers or hot ashes. Do not use your appliance to clean up flammable or combustible liquids such as fuel or use it anywhere where these materials may be present. • Never use your appliance to clean out a fireplace, flue or the inside of any duct not limited to those as oil, soot, ceramic powder, lime, plaster, sheetrock dust, etc. • Never use your appliance to clean up volatile or toxic substances or anywhere near these substances.
- Page 7 Premium features of your appliance 1 Dust bag free, water filtration system that retains 99.99% of dust with its specially designed separator and water basin. 2 Uninterrupted suction power with its non-blocking water filtration system. 3 Special deep cleaning tool with brushed helical cylinder, operating with a electrical motor which is power of 150 Watts. 4 Rich variety of tools designed for different functions suitable for any type of cleaning. 5 4-in-1 appliance with the following functions: ionizer, aromatizer, vacuum cleaner and deep cleaner.
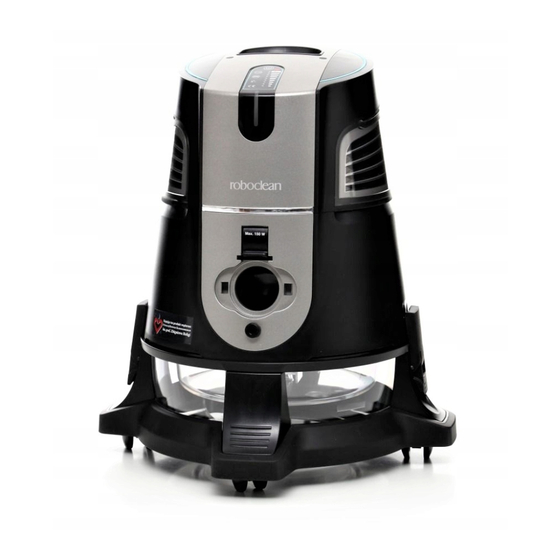
- Page 9 BODY ASSEMBLY 1 Touchscreen Control Panel 2 On/Off Button 3 Handle 4 Power Nozzle Outlet Cover 5 Power Nozzle Power Outlet 6 Suction Nozzle Port 7 Power Cord 8 Rear Panel Cover 9 Ion Outlet Channel 10 Separator 11 Separator Nut 12 Separator Cleaning Brush 13 Pollen Filter 14 Safety Switch Mechanism 15 Locking Latches 16 Basin Leds 17 Dolly 18 Clean Water Basin 19 Dirty Water Basin...
- Page 10 Alternative...
- Page 11 ACCESSORY ASSEMBLY ASSEMBLY 1 Power Nozzle 2 Power Nozzle Joint 3 Joint Fixing Latch 4 Power Nozzle Cord 5 Trigger Handle & Hose 6 Trigger 7 Trigger Control Panel 8 Control Securing Latch 9 Telescopic Tube Adaptor 10 Hose Adaptor 11 Remote Control 12 Carpet And Hard Floor Nozzle 13 Hard Floor Nozzle (Alternative) 14 Cord Retaining Clamp 15 Fragrance Set 16 Vacuum Bag 17 Telescopic Tube 18 Upholstery Tool 19 Easy Access Tool 20 Circular Brush 21 Inflator & Vacuuming Tool 22 Crevice Tool...
- Page 12 Installation and operation of the Roboclean TOUCHSCREEN CONTROL PANEL ( ) ON/OFF: You can start or stop your appliance by touching this symbol for 1 second. This symbol will glow white indicating its standby position when the appliance is plugged in and will glow red during operation. ( ) SLIDER: You can set the suction power in 9 different levels by moving your finger up and down on the slider switch or you may switch to the desired level by a single touch. ) POWER NOZZLE: You can activate the deep cleaning function by touching this symbol.
- Page 13 ON/OFF Suction power level buttons Power Nozzle Ionizer LCD display REMOTE CONTROL PANEL You can use the remote control on the trigger assembly or separate from the trigger assembly. The remote should be removed by pulling the remote control retaining latch towards you. When you want to place it on its housing again, slide the front side of the remote into the housing on the trigger first and press the rear side slightly.
- Page 15 FILLING THE BASIN WITH WATER 1 Release the latches on both sides of the appliance. Separate the main body from the water basin. 2 Fill the dirty water basin with clean water up to the top of the measuring post in its center. The water amount to be filled isabout 1.8 L. (Please ensure that the water does not exceed the height of the measuring post). ! Do not operate the appliance without water. 3 Put the water-filled basin, into the clean water basin and place it on the dolly.
- Page 16 Setting up the Power Nozzle 1 Install the telescopic tube to the tube adaptor on the end of the vacuum hose so that the locking pin is engaged. 2 Install the other side of the telescopic tube to the joint part of the Power Nozzle so that the locking pin is engaged. 3 Plug the Power Nozzle cord into the dual socket slot under the trigger arm. 4 Install the cord retaining clamps to the telescopic tube equal distance from each other so that they hold the Power Nozzle cord. To adjust the length of the telescopic tube, push the button located at the center of the tube in the direction of the arrow and adjust the tube to the desired length.
- Page 17 USAGE AND REWINDING OF THE POWER CORD 1 Unplug power cord by pulling it out of its housing. 2 After adjusting the to the desired length and hearing it click, release it. This action will lock the cord and prevent it from getting pulled back in its housing. The red line on the cord indicates the end of the cord length. Do not pull the cord more when you see this sign. 3 After all connections are performed, plug in the appliance and bring it to the standby position. 4 If you want the cord to be pulled back into its housing, slightly pull and release it. Hold the cord in your hand to ensure that it is pulled back into its housing in a controlled manner. 5 Never let children play with the cord. USAGE OF THE POWER NOZZLE a. When you want to operate the appliance from the body control panel; • Activate the suction motor by touching the [ ] On/Off symbol. • Activate the Power Nozzle by touching the [ ] symbol. Press the same button when you want to stop it.
- Page 18 Installation and operation of other accessories When you want to use any of the accessories, attach the accessory to the appliance before plugging it in. a. When you want to operate the appliance from the body control panel; • Activate the suction motor by touching the [ ] On/Off symbol. You may set the suction power in 9 different levels with the slider switch. b.
- Page 19 5 Crevice tool This tool is especially designed for cleaning the base moulding along walls and the joints of armchairs and sofas. 6 Easy Access Tool It is used for cleaning places which are impossible to reach such as the spaces behind cupboards, wardrobes and radiators. Install the adapter head of the Inflator & Vacuuming tool (no. 21) to the telescopic tube to use this tool. 7 Inflator & Vacuuming tool You can clean keyboards and electronics as well as inflate toys with this special tool.
- Page 21 Ionizing function In order to operate the negative ion function at a more efficiently, remove the rear panel cover and turn the suction motor on to the 1st level. Then, activate the ionizer function by pressing the ion symbol on the touch panel or pressing the ION button on the control. NEGATIVE (-) IONS AND THEIR IMPORTANCE IN FRESH AIR QUALITY • Negative ions electrostatically attract the positively charged dust that form ion clusters in the air and cause them to get heavier and fall onto the nearest surface. • This helps to reduce the presence of air-borne bacteria and fungi with its oxidation effect.
- Page 22 Cleaning and maintenance of Roboclean ! Always unplug your appliance before cleaning or maintenance EMPTYING AND CLEANING PROCEDURE OF THE BASIN Make sure to wipe out the remaining water from the basin before storing the machine in order to prevent corrosion inside of the motor. Drain the water from the basin and clean it after every use. To do so, separate the body from the basin by releasing the latches on the side. Empty the dirty water. Remove the heavy dirt inside the basin. We recommend that you replace the water frequently during cleaning.
- Page 23 CLEANING OF THE SEPERATOR REPLACEMENT OF THE POLLEN FILTER Always remove and clean the separator every two to three uses. Remove the separator cleaning brush from its slot on the body. Remove the separator nut with the Replace the pollen filter on your appliance with the auxiliary wrench on the brush. Remove the separator and clean pollen filter supplied with the product after using it for 5-6 the inside and outside of the separator with soapy months. To change the filter, pull the tab on the filter cover water using the separator cleaning brush. Put in back and remove the cover. Replace the old filter with the new one...
-
Page 24: Troubleshooting
Troubleshooting PROBLEMS CAUSES RECOMMENDED SOLUTIONS • The appliance does not • Power supply is not available or the appliance is • Plug the power cord carefully into the power outlet. turn on. unplugged. • Open the latches and firmly reseat the main body on the • The Motor safety switch is not turned on. basin. • The cord, plug or motor may be faulty. • Contact an Authorized Service Provider. • Suction is not adequate. • The vacuum hose may be torn or pierced. • Replace with a new one. • The suction line may be blocked. • Check the suction line and remove any obstructions. • Separator may be dirty • Clean the separator. • Emits dust and particles • Separator may be blocked or not installed • Clean the separator and ensure that it is installed correctly. correctly. • No water or very low level of water inside the dirty • Fill water in the dirty water basin up to the top of the water basin. measuring post. • Water inside the dirty water basin may have • Replace the water inside the dirty water basin. become very dirty. • Replace the pollen filter. • Pollen filter may have become very dirty. • Abnormal sound, noise • Separator may be blocked or not firmly • Clean the separator and ensure that it is installed correctly. - Page 25 WARRANTY CERTIFICATE...
- Page 26 Warranty Certificate AURA ROBOCLEAN OWNER’S Name, Surname ............................................... Phone Number ............................................... Address ............................................... Purchase Date ............................................... AURA ROBOCLEAN’S Appliance Serial Number ............................................... Power Nozzle Serial Number : ............................................... Date of Invoice ............................................... Invoice No ............................................... AURA ROBOCLEAN DISTRIBUTOR’S Company Name ............................................... Address ............................................... Phone Number ............................................... Other Information ............................................... AURA ROBOCLEAN SALES REPRESANTATIVE’S Name, Surname ............................................... Phone Number ............................................... Signature ............................................... Warranty Conditions This product is manufactured for global distribution and sales.
- Page 27 Complies with WEEE regulations This symbol on the product or package indicates that the appliance is not to be discarded with usual household waste. It should be delivered to the collection points for the recycling of electrical and electronic devices. You shall contribute to the protection of nature and human health when you dispose of this product correctly. Improper disposal may harm the environment and human health. You can get more information on the recycling of this product from your municipality, waste collection service or the store where you purchased this product.
Need help?
Do you have a question about the Roboclean Splus 114K and is the answer not in the manual?
Questions and answers