
Related Manuals for JGaurora JGMAKER Magic


Summary of Contents for JGaurora JGMAKER Magic
- Page 1 With User to Create Better Product Version:A0 Magic USER MANUAL This manual is only for JGMAERK Magic desktop 3D printer...
-
Page 2: Table Of Contents
With User to Create Better Product Content Introduction ........................3 1, Attention ........................4 1.1 User Safety Issue.........................4 1.2 Power Requirements........................4 1.3 Printer Environmental Requirements..................4 1.4 Filament Usage and Storage....................... 5 1.5 Important Announcement......................5 2, Product information......................6 2.1 Machine specs..........................6 2.2 Machine parts.......................... - Page 3 With User to Create Better Product 5.1 software install..........................26 5.2 soft instruction..........................27 6, Common Problems and Solutions................31 7, 3D Printer Maintenance....................32 7.1. Daily maintenance........................32 7.2. Basic maintenance........................32 7.3. Maintenance of Moving Components..................33 8, Supports and service ....................34...
-
Page 4: Introduction
With User to Create Better Product Introduction This manual includes detail information of JGMAKER 3D printer Magic use procedure, notice and maintenance.for user’s safety and make the good use of printer, please this manual carefully before use printer. Please keep this manual in place, if you lose it you can find it in below two place: 1、In the SD card we had stored a electronic version manual;... -
Page 5: 1, Attention
With User to Create Better Product 1, Attention 1.1 User Safety Issue Forbidden to somewhere near flammable gas, liquid and dusty area; Forbidden for children or untrained people to use the machine alone; When machine running,forbidden to touch model and nozzle, to avoid scald; ... -
Page 6: Filament Usage And Storage
With User to Create Better Product 1.4 Filament Usage and Storage Filament Usage : when using machine , please JGMAKER filament. If use third party filament, and cause damage, will not under our warrant。 Filament Storage:filament should be stored in seal. If not need to use filament, please tear the package, ... -
Page 7: 2, Product Information
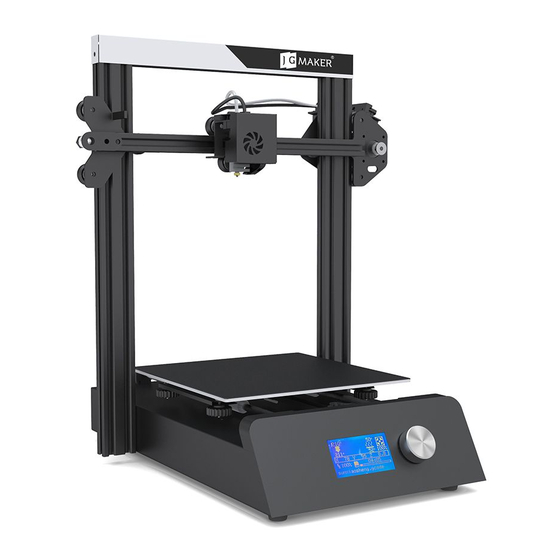
With User to Create Better Product 2, Product information 2.1 Machine specs Model:Magic Machine size:443*450*472mm Layer thickness: 0.05~0.3mm Machine weight:8kg Print speed:10~150mm/s Packing size:550*465*175mm (recommend 30~60mm/s) Nozzle Temp.:Room temp to 240’C Packing weight:9.6kg Nozzle diameter:0.4mm Build volume:220*220*250mm Hotbed temp.:Room temp. To 110’C Platform material:FA special made platform Filament:PLA/ABS/Wood ect. -
Page 8: Tool Box List
With User to Create Better Product 2.3 Tool box list Reader SD card Wrench 7 Wrench 8-10 钉 钉 Allen wrench Power cable Screw T nut USB cable Blade Mark:The others are spare parts or gift... -
Page 9: 3, Machine Assembly
With User to Create Better Product 3, Machine Assembly 3.1 Machine Parts 1.Y box 2.Extruder suite 3.X right module 4.X left module 7 Filament break detection 5. Feeding motor module 6.Z motor module 8.Idler module module 9.Z limited witch seat 10.T Lead Screw 11.2040 aluminium profile 12.2020... -
Page 10: Assembly Step
With User to Create Better Product 17.Filament stand 18.User manual Note :different batch might slightly different in outlook,some detail improvement might not be informed,Thank you! 3.2 Assembly step 3.2.1 remove packaging Step 1:Taking out all parts from box; Step 2:checking list,pls reference 3.1 machine parts for list&pics; Step 3:Checking tool and screw list, details as followin listing;... -
Page 11: Assembly
With User to Create Better Product 3.2.1 Assembly For more detail, you can contact our after sales. suite step Assembly process detail parts 3. X right module long Note:long or short means distant install hole position。 short 4. X left module 2020aluminum profile-350 axis... - Page 12 With User to Create Better Product Assembly process Accessories Suite Step Detail 6.Z-axis Motor Suite Z-axis Limit switch Base Note: 1. The profile side with the counterbore is placed on the outside of the machine. 11. 2040 aluminum Couple profile To easy install the Z-axis limit swithc base, the coupling can be remove...
- Page 13 With User to Create Better Product Assembly process Accessories Suite Step Detail print 12. 2020 aluminum Note : If the installation profile-340 ① holes is not correct, you loosen ② screws right picture and re-lock after screw M5*25 installation.
- Page 14 With User to Create Better Product 16. Top decoration Button-headed M5*8 10. T type screw rod print Note:After the T-type screw installed coupling, please tighten the screws to ensure that the machine is properly driven. Screw position...
- Page 15 With User to Create Better Product 7. Filament Sensor Base screw M3*8 Note:When installing, the 3pcs screw on 5. Feeding Suite the component should be unscrewed, the print feeding device and the motor should be loaded from the top and bottom of the mounting sheet metal, then reinstall the removed 3pcs screw Place the other end of the white...
- Page 16 With User to Create Better Product 17. Filament Holder Button-headed M5*8 print...
-
Page 17: Cable Assembly
With User to Create Better Product 3.2.1 cable assembly Please refer to the table below or see the installation video of the SD card for the specific process of plugging the cable. If you do not understand, please contact our after-sales service at the end of this manual. Assembly process suite detail... - Page 18 With User to Create Better Product eturder 第 三 步 Heated bed...
-
Page 19: 4, Printing Instruction
With User to Create Better Product 4, Printing Instruction 4.1 Main Menu Introduction 4.1.1 Control Panel ①Nozzle Setted Temp. ⑥Hotbed Setted Temp. ⑦Hotbed Actual Temp. ②Nozzle Actual Temp. ⑧Adjustment knob ③X/Y/Z Axis Coordinate (Rotate Select, Press Ok) ④Speed Adjustment Ratio ⑨Fan speed ⑩Print Progress ⑤SD Card Status... - Page 20 With User to Create Better Product (3)Move axis:Move X\Y\Z\ axis. 【Move X】 : The nozzle moves along the X axis, X+ is away from the original point, X- is close the original point; 【Move Y】 : The hot bed moves along the Y axis, Y+is away from the original point, Y-is close the original point; 【Move Z】:The nozzle moves along the Z axis,Z+ is up,Z- is down;...
-
Page 21: Operating Procedures
With User to Create Better Product 4.2 Operating procedures Check Power Voltage Check the display voltage fit for your local voltage standard or not? Connect power cable, Power On Power On Platform leveling After leveling,you will feel a little friction when you move A4 Paper,... -
Page 22: Operating Instructions
With User to Create Better Product 4.3 Operating Instructions 4.3.1 Input Power Voltage Adjustment The input power of Magic is select-able AC 115/220,please adjust it according to your local voltage standard as below: Check the voltage through the hole under the base. ( 115V means input power is 110V , 230V means input power is 220V),adjust it with red toggle switch to you local voltage standard;... -
Page 23: Leveling
With User to Create Better Product 4.3.2 Leveling The first step: Firstly, we should screw all the four leveling nuts counterclockwise, then make leveling. The second step: Press the control button into the main menu, select “Prepare” → “HOME”, press the button, the extruder will go to the home place, find “... -
Page 24: Filament Loading
With User to Create Better Product 4.3.3 Filament loading The first step:Press the button into the main menu, select “ Prepare” → “Preheat PLA”→ “Preheat PLA”, press the button then extruder and hot bed begin heating.(Temp. in reference:PLA≈200 ℃,ABS≈240 ℃). Attention: We take the PLA as an example in this manual. -
Page 25: Model Printing
With User to Create Better Product 4.3.4 Model printing The first step: Save the gcode file into the sd card of root directory(Details of slicing, please see the chapter 5). The second step: Insert the sd card into the port of printer, when shows “ card inserted”, press the button and choose the file you’d like to print, and make sure of it. -
Page 26: Power Failure Recovery Printing
With User to Create Better Product Model finished to change filament, should do as below: (1)Press the button,select “Prepare”→ “change filament”→ “Preheat PLA”. (2)When press the button to confirm preheating and pause printing, display will shows “ Heating nozzle , please wait...”, steps is the same as change in printing. -
Page 27: 5, Slice Software
With User to Create Better Product 5, slice software 5.1 software install first:copy the file in SD card to computer; second:Double click software icon, enter setup iterface, setup procedure as below:... -
Page 28: Soft Instruction
With User to Create Better Product Note :because difference of computer system, it might need to repair, before install success! Third:press finish,then run the software. 5.2 soft instruction first : Double click software icon,enter into the software interface;... - Page 29 With User to Create Better Product second:choice printer model,start software,automaticlly come out model choice; third:software interface instruction;...
- Page 30 With User to Create Better Product fourth:upload model,choice the printing quality you want,in the right corner will show“slicing”,means Gcode is generating;...
- Page 31 With User to Create Better Product fifth:after slice,press right corner【save】button; sixth:save Gcode or copy it to the SD card,and insert it into SD card slot,then can start print. :for the detail of slice software please check the document in SD card. Note...
-
Page 32: 6, Common Problems And Solutions
With User to Create Better Product 6, Common Problems and Solutions Problems item Reasons Solution description A. Replace filament before its gone A. Filament has run out . B. Store filament in air-tight container Filament breaks B. Filament was exposed to moisture, when finished printing.Replace with fresh at the top of and has become brittle.. -
Page 33: 7, 3D Printer Maintenance
With User to Create Better Product 7, 3D Printer Maintenance 7.1. Daily maintenance 1) Before using the machine to print, make observe the safety recommendations. 2) Regularly clean and maintain the equipment. Clean the surface of the nozzle, print bed, moving parts and other parts, to help prevent wear caused by excessive dust. -
Page 34: Maintenance Of Moving Components
With User to Create Better Product 7.3. Maintenance of Moving Components If you notice the printer has become noisy, or vibrates excessively, you may need to clean the rail rods and add some lubricating oil to reduce friction. To Clean and Lubricate: first, with a clean dust cloth, clean the grease or dust from the moving parts.Then apply 3-5ml (about 5-8 drops) lubricating oil along the motion rails. -
Page 35: 8, Supports And Service
With User to Create Better Product 8, Supports and service 1. Please see theWarranty Card for details on our policies for repair and support. 2. If your printer is malfunctioning or damaged, for your safety, and to avoid further damaging the printer, please contact the after-sale service center or our support team for advice first, before attempting any repair.
Need help?
Do you have a question about the JGMAKER Magic and is the answer not in the manual?
Questions and answers