
Related Manuals for Kettler 0193321-2100

Summary of Contents for Kettler 0193321-2100
-
Page 1: Assembly Instructions
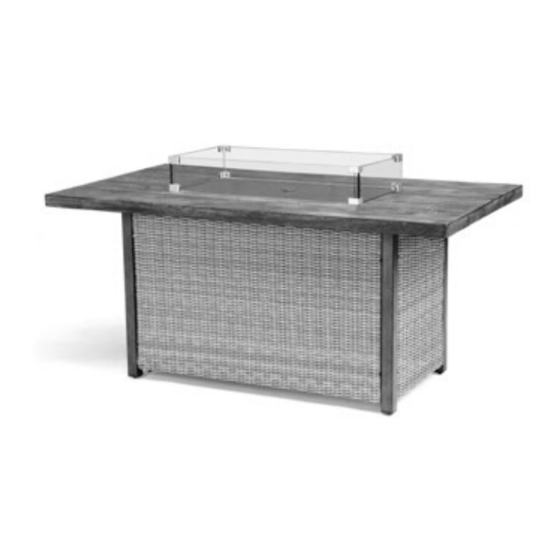
Assembly Instructions Palma Fire Pit Table 0193321-2100/5510 IMPORTANT PLEASE KEEP THIS BOOKLET FOR FUTURE REFERENCE. THIS IS IMPORTANT INFORMATION REGARDING THE USE AND CARE OF YOUR GARDEN FURNITURE. May 2019... -
Page 2: Important Safety Information
Important Safety Information Danger Warning If you smell gas: Improper installation, adjustment Shut off gas to the alteration, service or maintenance appliance. can cause injury or property damage. Extinguish any open flame. Read the installation, operating and If odor continues, contact maintenance instructions thoroughly your gas canister supplier before installing or servicing this... - Page 3 Important Safety Information Before you assemble or operate this unit, please carefully read this entire manual. Failure to do to may result in a fire, explosion, injury or death. • DO NOT fill tank over 80 percent full. • THIS UNIT IS INTENDED FOR OUTDOOR USE ONLY! This product shall be used outdoors, •...
- Page 4 Important Safety Information • Keep all electrical cords and fuel supply hose • Keep gas tank at least 5 feet away from unit away from heated surfaces. when lit. (if external tank) • Combustible material should not be within • The maximum gas supply pressure is 250psi. 72 inches of the top of the unit, or within 48 •...
- Page 5 Important Safety Information • Any guard or other protective device IF APPLICABLE: removed for servicing the appliance • Allow heating item to cool completely shall be replaced prior to operating the before placing on lid. appliance. • DO NOT use heating item while lid is •...
-
Page 6: Parts List
8. Please do not use substitute parts. Use only additional or replacement parts supplied by Kettler. 9. In the unlikely event that this product has missing or damaged parts, please visit our website... - Page 7 Parts List Item Description Item Description Burner Lid Fire Bowl (Pre-assembled) Table Top Control Knob (Pre-assembled) Electronic Ignitor Side Panel (Pre-assembled) End Panel Lava Rocks Door Panel Battery(AA) Metal Stand Glass Fixing Brackets Control Side Panel Side Glass Guard (Pre-assembled) End Glass Burner (Pre-assembled)
- Page 8 Assembly Check that the control knob (K) for the gas supply system is tumed to the OFF position before starting any assembly. Attach the side panel (C) and door panel (E) to the table top (B) ,using eight M6x20 screws (2), eight washers (5), eight screw caps (1).
- Page 9 Assembly Attach the control side panel (G) to the side panel (C) and door panel (E), using eight M6x35 screws (4), eight washers (5), eight screw caps (1). Attach the metal stand (F) to the side panel (C) and door panel (E), using eight M6x25 screws (3), eight washers (5), eight screw caps (1).
- Page 10 Assembly Assemble the Glass Screen Attach the glass (P) and glass (Q) to the eight fixture parts (B), using sixteen screw (6). Do not over tighten. Place propane gas tank (not included) into the metal stand (F). Make sure the gas tank sits on the metal stand (F) completely.
- Page 11 Assembly Unscrew the rubber cap on the electronic igniter (L) by unscrewing and slide battery (N) into the battery slot. Make sure the positive side of the battery faces outwards. Screw the electronic igniter cap (L) over the battery tightly. Caution To ensure proper function, the guard (H) on this Pour the box of lava glass (M)
-
Page 12: Operation
Operation Before performing a leak test, be sure that no sparks can occur and you are in a spacious outdoor area. Connect the propane gas tank to the regulator and turn the valve on the unit to the “off” position. Brush a soap and water mixture on all connections. Turn the gas supply on; if bubbles occur on any connection there may be a leak. -
Page 13: Troubleshooting
Troubleshooting Problem Cause Solution Igniter pin and burner are wet Dry off with a soft cloth Check which direction the battery is Igniter battery is incorrectly inserted inserted Contact Bond Manufacturing for a Heating Igniter pin is broken replacement part unit won’t Reconnect wire to the igniter box light... -
Page 14: Spare Parts
Spare Parts Short Glass Panel Long Glass Panel Short Support Hinge SPG-0193319GLASSSHORT SPG-0193319GLASSLONG SPG-0193319GLASSHINGE Lava Rocks Footcaps SPG-0193319LAVAROCKS SPGFC-0193319 For further information and spare parts visit our website www.kettler.co.uk/shop... -
Page 15: Maintenance And Care Instructions
• Kettler cushions are not suitable for dry cleaning and are not machine washable. Sponge clean only. • We recommend you clean your Kettler furniture at the beginning and end of the season. • To clean your Kettler furniture, use warm soapy water only. Never use abrasive chemicals or cleaning agents. -
Page 16: For Your Safety
• Damaged components may endanger your safety or shorten the life of the product. Replace all damaged parts immediately. Use only spare parts manufactured by Kettler. Should you wish to purchase spare parts, they can be ordered directly from: www.kettler.co.uk/shop •...
Need help?
Do you have a question about the 0193321-2100 and is the answer not in the manual?
Questions and answers