
Related Manuals for ROBOTIQ 2-Finger Adaptive Robot Gripper - 200


Summary of Contents for ROBOTIQ 2-Finger Adaptive Robot Gripper - 200
- Page 1 © ROBOTIQ INC. 2008-2013 Get the latest version of the manual at support.robotiq.com...
-
Page 2: Table Of Contents
..............112 Robotiq inc. © 2008-2013... -
Page 3: Revisions
Information provided by Robotiq in this document is believed to be accurate and reliable. However, no responsibility is assumed by Robotiq for its use. There may be some differences between the manual and the product if the product has been modified after the edition date. -
Page 4: General Presentation
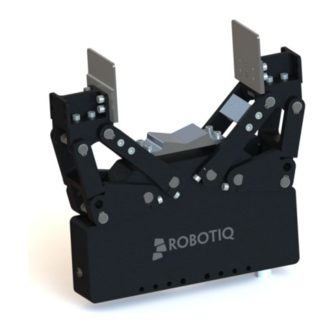
Robotiq 2-Finger Adaptive Robot Gripper - 200 Instruction Manual 1. General Presentation The terms "Gripper", "Adaptive Gripper", "Robotiq Gripper", "Robotiq Adaptive Gripper", "B-Model", "2-Finger Gripper" and "2-Finger – 200" used in the following manual all refer to the Robotiq 2-Finger Adaptive Robot Gripper –... - Page 5 Robotiq 2-Finger Adaptive Robot Gripper - 200 Instruction Manual Figure 1.1 : The 2-Finger Adaptive Robot Gripper – 200. Each of the Gripper features present on Figure 1.1 are detailed : Finger movement is detailed in section 6.5 Finger Movement Standard pads and custom design guidelines are in section 6.4 Pad design and customization...
- Page 6 Robotiq 2-Finger Adaptive Robot Gripper - 200 Instruction Manual Figure 1.2 : The 2-Finger Adaptive Robot Gripper – encompassing and parallel grip. Note It is important to note that a parallel grip can only be performed when the fingers touch the object with the distal phalanxes first.
- Page 7 Robotiq 2-Finger Adaptive Robot Gripper - 200 Instruction Manual Figure 1.3 : The 2-Finger Adaptive Robot Gripper – 200 parallel locking mechanism. The 2-Finger Adaptive Robot Gripper – 200 also offers internal and external gripping. The fingers can pick hollow parts by applying pressure with the outside of the fingers.
- Page 8 The Gripper actuator provides the same force with the inside or the outside of the fingers, but beware that surface contact may not be the same. The Gripper is powered and controlled via the Robotiq Controller (2-Finger Adaptive Robot Gripper –...
- Page 9 Robotiq 2-Finger Adaptive Robot Gripper - 200 Instruction Manual Figure 1.5 : The 2-Finger Adaptive Robot Gripper – 200 Controller. The Robotiq 2-Finger – 200 Gripper equilibrium region is the gripping region that separates the encompassing grip from the parallel grip. When gripping an object close enough to the inside (palm) of the Gripper, the encompassing grip will occur (unless the object size or shape is not adequate) and the fingers will close around the object.
- Page 10 Robotiq 2-Finger Adaptive Robot Gripper - 200 Instruction Manual Figure 1.6 : Equilibrium zone for the Gripper finger pad. Info The same principles apply for an inside grip, but the encompassing grip region becomes the parallel grip region and vice-versa.
-
Page 11: Safety
2. Safety Warning The operator must have read and understood all of the instructions in the following manual before handling the Robotiq 2-Finger Adaptive Robot Gripper – 200. The term "operator" refers to anyone responsible for any of the following operations on the 2-Finger Adaptive Robot Gripper –... -
Page 12: Warning
Robotiq 2-Finger Adaptive Robot Gripper - 200 Instruction Manual 2.1 Warning Note Any use of the Gripper in noncompliance of these warnings is inappropriate and may cause injury or damage. Warning Concerning installation and operation : The Gripper needs to be properly secured before operating the robot. -
Page 13: Intended Use
The unit may be used only within the range of its technical data and specifications. Any other use of the product is deemed improper and unintended use. Robotiq will not be liable for any damages resulting from improper use. Robotiq inc. © 2008-2013... -
Page 14: Installation
Robotiq 2-Finger Adaptive Robot Gripper - 200 Instruction Manual 3. Installation Warning Be sure to read and understand the safety instructions related to the 2-Finger Adaptive Robot Gripper - 200 prior to installation. Warning Do not operate the Gripper, or even turn on the power supply, before it is firmly anchored and danger zone is cleared. -
Page 15: Scope Of Delivery
Robotiq 2-Finger Adaptive Robot Gripper - 200 Instruction Manual 3.1 Scope of delivery Standard upon delivery : Robotiq 2-Finger Adaptive Robot Gripper – 200 unit ( AGB-GRP-001 Default fingertip (see Technical dimensions Mandatory but not standard : Robotiq 2-Finger Adaptive Robot Gripper Controller unit (... -
Page 16: Environmental And Operating Conditions
Robotiq 2-Finger Adaptive Robot Gripper - 200 Instruction Manual 3.2 Environmental and operating conditions The Gripper is designed for industrial applications. Always respect the following specified storage and operating environmental conditions: Minimum storage/transit temperature -22°F [-30°C] Maximum storage/transit temperature 140°F [60°C] Minimum operating temperature 14°F [-10°C]... -
Page 17: Mechanical Connections
3.3 Mechanical connections You must use Robotiq's coupling to attach the Gripper to the robot. Be sure to use the coupling and optional adapters related to your robot model. If there is no options for your robot, you can modify a blank adapter plate, Robotiq can create a custom version for you or you can build one based on the dimensions in section 3.3.2... - Page 18 Robotiq 2-Finger Adaptive Robot Gripper - 200 Instruction Manual Figure 3.3.2 : 2-Finger Adaptive Robot Gripper – 200 Controller Unit fixed on DIN rails. Robotiq inc. © 2008-2013...
-
Page 19: Parallelism Mechanism
Robotiq 2-Finger Adaptive Robot Gripper - 200 Instruction Manual 3.3.1 Parallelism mechanism The Robotiq 2-Finger Adaptive Robot Gripper – 200 features encompassing and parallel grips, the parallelism mechanism can be locked to prevent the use of the encompassing grip. To do so, lock the parallelism mechanism... - Page 20 Robotiq 2-Finger Adaptive Robot Gripper - 200 Instruction Manual Warning Retaining rings can cause injury if they slip out of retaining ring pliers. Wear safety goggles when manipulating the retaining rings. Robotiq inc. © 2008-2013...
-
Page 21: Dimensions For Custom Coupling
Robotiq 2-Finger Adaptive Robot Gripper - 200 Instruction Manual 3.3.2 Dimensions for custom coupling Figure 3.3.2.1 : 2-Finger Adaptive Robot Gripper – 200 dimensions for custom coupling. The Gripper must be fixed with at least four (4) of the six (6) M8 screws available on each side of the Gripper to ensure a secure attachment. -
Page 22: Power Supply Specifications
Output regulation 2% maximum Overvoltage protection Not required 1. The Gripper has built-in over-voltage protection. Robotiq recommends the use of the following power supply : TDK-Lambda DPP480 Series, 480W Single Output DIN Rail Mount Power Supplies DDP480-24-1 Robotiq inc. © 2008-2013... -
Page 23: Wiring
Note that the Communication Option Panel shown in figure 3.5.1 will change according to the provided communication protocol. The Standard Panel, which include the Status LEDs and the USB 2.0 port is standard on every Robotiq 2-Finger Adaptive Robot Gripper Controller unit. Figure 3.5.1 : The Robotiq 2-Finger Adaptive Robot Gripper –... - Page 24 Robotiq 2-Finger Adaptive Robot Gripper - 200 Instruction Manual Figure 3.5.2 : Controller supply connection and Robotiq Device connector for the Robotiq 2-Finger Adaptive Robot Gripper – 200 Controller. Robotiq inc. © 2008-2013...
- Page 25 Robotiq 2-Finger Adaptive Robot Gripper - 200 Instruction Manual Figure 3.5.3 : Gripper Signal Cable for the Robotiq 2-Finger Adaptive Robot Gripper – 200. Info Gripper signal cable is supplied by Robotiq, see Spare Parts, Kits and Accessories section. Warning Use proper cabling management.
-
Page 26: Power Connection
Figure 3.5.1.1 : Power connection diagram of the 2-Finger Adaptive Robot Gripper – 200. Caution The fuse is external to the Gripper and Gripper Controller. It is not provided by Robotiq and the user is responsible for proper installation. Suggested fuse is Phoenix Contact # 0916610 10 A thermal, use AWG #12 wiring. - Page 27 Installed in compliance with the Machinery Directive or compliance to national standards derived from the directive used in your country. Warning Robotiq strongly advised the use of an emergency stop switch on the power connector. The emergency stop must be in proximity of the work zone, easily reachable and visible. Info When not using an emergency stop (see diagram Figure 3.5.1.1) jumper must be placed on pin 4...
-
Page 28: Communication Connection
Fieldbus DeviceNET CANopen Modbus RTU The figure 3.5.2.1 shows the communication side of the Robotiq Adaptive Gripper 2-Finger – 200 Controller. The communication port will vary depending on the communication protocol chosen. Real-Time Ethernet family protocols ( EtherNet IP, EtherCAT, Modbus TCP) will come with two (2) RJ45 standard ports. DeviceNet protocol will come with a 5-pin Combicon connector. - Page 29 Figure 3.5.2.1 : Representation of the communication panel options for the Robotiq Adaptive Gripper 2-Finger – Controller. It is the users responsibility to setup the right cable between the controller unit and the master controller. Robotiq can provide you with appropriate cables. See Spare Parts, Kits and Accessories section for a list of available parts.
-
Page 30: Devicenet Communication Protocol
There is no terminating resistor mounted in the Gripper. The shield for the cable must be grounded in the robot controller. The DeviceNet communication and the Gripper use 24 V power supply. Robotiq suggests you separate power supplies as shown in Figure 3.5.2.2. - Page 31 DATA SETTINGS Prod. Data Length : Cons. Data Length : Hint Mac Address settings and Baud Rate settings can be set on the Robotiq Controller using the Robotiq UI. See the User Interface section for details. Robotiq inc. © 2008-2013...
-
Page 32: Canopen Communication Protocol
0x2000 Receive Object : 0x2200 Output Databytes : Hint Node Address settings and Baud Rate settings can be set on the Robotiq Controller using the Robotiq UI. See the User Interface section for details. Hint The CANopen communication interface supports SDO (Service Data Object) and PDO (Process Data Object) protocols. -
Page 33: Real-Time Ethernet Communication Protocols
Robotiq 2-Finger Adaptive Robot Gripper - 200 Instruction Manual Real-time Ethernet communication protocols The Real-Time Ethernet communication protocols are established via the Communication Panel pin-out. Figure 3.5.2.1 shows the pin-out of the RJ45 receptacle present on the 2-Finger Adaptive Robot Gripper – 200 Controller. - Page 34 N / A Output Data Bytes : Cons. Data Length : N / A Hint IP Address settings and Netmask settings can be set on the Robotiq Controller using the Robotiq UI. See the User Interface section for details. Info EtherCAT protocol uses inherent dynamic addressing thus bus settings cannot be customized.
-
Page 35: Control
4. Control 4.1 Generalities The Robotiq 2-Finger Adaptive Robot Gripper – 200 is operated from the robot controller (see Figure 4.1.1) using an industrial protocol (EtherNet/IP, DeviceNet, CANopen, EtherCAT, etc.). The programming of the Gripper can be done with the Teach Pendant of the robot or by offline programming. -
Page 36: Status Overview
Robotiq 2-Finger Adaptive Robot Gripper - 200 Instruction Manual 4.2 Status overview The 2-Finger Adaptive Robot Gripper – 200 returns several registers of information to the robot controller: Global Gripper Status - A global Gripper status is available. This gives information such as if the Gripper is closed or open. -
Page 37: Control Overview
Robotiq 2-Finger Adaptive Robot Gripper - 200 Instruction Manual 4.3 Control overview The Gripper Controller has an internal memory that is shared with the robot controller. One part of the memory is for the robot output, Gripper functionalities . The other part of the memory is for the robot input,... -
Page 38: Status Leds
Robotiq 2-Finger Adaptive Robot Gripper - 200 Instruction Manual 4.4 Status LEDs Four LED lights provide general information about the Gripper status on the controller communication panel. Figure 4.4.1 shows the LEDs and their locations. Figure 4.4.1 : Controller status LEDs. - Page 39 Robotiq 2-Finger Adaptive Robot Gripper - 200 Instruction Manual Figure 4.4.2 : 2-Finger Adaptive Robot Gripper – 200 status LEDs. Robotiq inc. © 2008-2013...
-
Page 40: Power Leds
Robotiq 2-Finger Adaptive Robot Gripper - 200 Instruction Manual 4.4.1 Power LEDs The following applies to both the Controller power LED and the Gripper power LED, both are blue (note that the Gripper LED is a dual blue/red LED). Color... -
Page 41: Fault Led
Gripper LED is a dual blue/red LED). hint Error code can be obtained reading the Fault Status byte described in section 4.7 Robot Input registers & status or using the Robotiq User Interface menu option ''Input Registers". For the Gripper LED : Color State Code... - Page 42 Robotiq 2-Finger Adaptive Robot Gripper - 200 Instruction Manual For the Controller LED : Color State Code Information 0x00 No fault detected Warning 0x04 24V not detected (reconfiguration through usb is possible) No device detected 0x05 Minor fault occurred 0x09...
-
Page 43: Gripper Register Mapping
Robotiq 2-Finger Adaptive Robot Gripper - 200 Instruction Manual 4.5 Gripper register mapping Info Register format is Little Endian (Intel format), namely from LSB (Less Significant Bit) to MSB (Most Significant Bit). The Gripper firmware provides many functionalities such as the direct position control of the fingers via "go to"... -
Page 44: Robot Output Registers & Functionalities
Robotiq 2-Finger Adaptive Robot Gripper - 200 Instruction Manual 4.6 Robot output registers & functionalities Info Register format is Little Endian (Intel format), namely from LSB (Less Significant Bit) to MSB (Most Significant Bit). Register: ACTION REQUEST Address: Byte 0... - Page 45 Robotiq 2-Finger Adaptive Robot Gripper - 200 Instruction Manual closing and 1 if the Gripper is opening. The rARD bit should be set prior or at the same time as rATR bit as the motion direction is set when the auto-release is initiated.
- Page 46 Robotiq 2-Finger Adaptive Robot Gripper - 200 Instruction Manual Register: SPEED Address: Byte 4 Name Description 0 – 7 Set closing/opening speed of the Gripper. 0x00 (Minimum speed) to 0xFF (Maximum speed) This register is used to set the Gripper closing or opening speed in real time, however, setting a speed will not initiate a motion.
-
Page 47: Robot Input Registers & Status
Robotiq 2-Finger Adaptive Robot Gripper - 200 Instruction Manual 4.7 Robot input registers & status Info Register format is Little Endian (Intel format), namely from LSB (Less Significant Bit) to MSB (Most Significant Bit). Register: GRIPPER STATUS Address: Byte 0... - Page 48 Robotiq 2-Finger Adaptive Robot Gripper - 200 Instruction Manual Caution The object detection is precise only to the order of a few mm. In some circumstances object detection may not detect an object even if it is successfully gripped. For example, picking up a thin object in a fingertip grip may be successful without object detection occurring.
- Page 49 Robotiq 2-Finger Adaptive Robot Gripper - 200 Instruction Manual Register: FAULT STATUS Address: Byte 2 Name Description 0 – 3 gFLT 0x00 – No Fault Priority Fault 0x05 – Action delayed, initialization must be completed prior to action 0x07 – The activation bit must be...
- Page 50 Robotiq 2-Finger Adaptive Robot Gripper - 200 Instruction Manual Register: POSITION REQUEST ECHO Address: Byte 3 Name Description 0 – 7 Echo of the requested position for the Gripper 0x00 (Full Opening) to 0xFF (Full Closing) Register: POSITION Address: Byte 4...
-
Page 51: Example
Robotiq 2-Finger Adaptive Robot Gripper - 200 Instruction Manual 4.8 Example Figure 4.8.1 : Example of 2-Finger Adaptive Robot Gripper – 200 registers. Robotiq inc. © 2008-2013... -
Page 52: Modbus Rtu Communication Protocol
Robotiq 2-Finger Adaptive Robot Gripper - 200 Instruction Manual 4.9 MODBUS RTU communication protocol The Gripper can be controlled over USB using the Modbus RTU protocol on the mini-USB port. This section is intended to provide guidelines for setting up a Modbus scanner that will adequately communicate with the Gripper. -
Page 53: Read Holding Registers (Fc03)
Robotiq 2-Finger Adaptive Robot Gripper - 200 Instruction Manual 4.9.2 Read holding registers (FC03) Function code 03 (FC03) is used for reading the status of the Gripper (robot input). Examples of such data are Gripper status, object status, finger position, etc. -
Page 54: Preset Multiple Registers (Fc16)
Robotiq 2-Finger Adaptive Robot Gripper - 200 Instruction Manual 4.9.3 Preset multiple registers (FC16) Function code 06 (FC06) is used to activate functionalities of the Gripper (robot output). Examples of such data are action request, speed, force, etc. Ex: This message requests to set position request, speed and force of the Gripper by setting register 0x03E9 (1001) and 0x03EA. -
Page 55: Master Read & Write Multiple Registers (Fc23)
Robotiq 2-Finger Adaptive Robot Gripper - 200 Instruction Manual 4.9.4 Master read & write multiple registers (FC23) Function code 23 (FC23) is used for reading the status of the Gripper (robot input) and activating functionalities of the Gripper (robot output) simultaneously . - Page 56 Robotiq 2-Finger Adaptive Robot Gripper - 200 Instruction Manual where Bits Description SlaveID Function Code 23 (read and write multiple registers) Number of data bytes to follow (2 registers x 2 bytes/register = 4 bytes) E000 Content of register 07D0...
-
Page 57: Modbus Rtu Example
Robotiq 2-Finger Adaptive Robot Gripper - 200 Instruction Manual 4.9.5 Modbus RTU example This section depicts the example given in section 4.8 when programmed using the Modbus RTU protocol. The example is typical of a pick and place application. After activating the Gripper, the robot is moved to a pick-up location to grip an object. - Page 58 Robotiq 2-Finger Adaptive Robot Gripper - 200 Instruction Manual Request is: 09 03 07 D0 00 01 85 CF where Bits Description SlaveID Function Code 03 (Read Holding Registers) 07D0 Address of the first requested register 0001 Number of registers requested (1)
- Page 59 Robotiq 2-Finger Adaptive Robot Gripper - 200 Instruction Manual where Bits Description SlaveID Function Code 03 (Read Holding Registers) Number of data bytes to follow (1 registers x 2 bytes/register = 2 bytes) 3100 Content of register 07D0 (GRIPPER STATUS = 0x31, RESERVED = 0x00): gACT = 1 for "Gripper...
- Page 60 Robotiq 2-Finger Adaptive Robot Gripper - 200 Instruction Manual Response is: 09 10 03 E8 00 03 01 30 where Bits Description SlaveID Function Code 16 (Preset Multiple Registers) 03E8 Address of the first register 0003 Number of written registers...
- Page 61 Robotiq 2-Finger Adaptive Robot Gripper - 200 Instruction Manual where Bits Description SlaveID Function Code 03 (Read Holding Registers) Number of data bytes to follow (3 registers x 2 bytes/register = 6 bytes) 3900 Content of register 07D0 (GRIPPER STATUS = 0x39, RESERVED = 0x00): gACT = 1 for "Gripper Activation",...
- Page 62 Robotiq 2-Finger Adaptive Robot Gripper - 200 Instruction Manual where Bits Description SlaveID Function Code 03 (Read Holding Registers) Number of data bytes to follow (3 registers x 2 bytes/register = 6 bytes) B900 Content of register 07D0 (GRIPPER STATUS = 0xB9, RESERVED = 0x00): gACT = 1 for "Gripper Activation",...
- Page 63 Robotiq 2-Finger Adaptive Robot Gripper - 200 Instruction Manual where Bits Description SlaveID Function Code 16 (Preset Multiple Registers) 03E8 Address of the first register 0003 Number of registers to write to Number of data bytes to follow (3 registers x 2...
- Page 64 Robotiq 2-Finger Adaptive Robot Gripper - 200 Instruction Manual Step 8: Read Gripper status until the opening is completed Request is: 09 03 07 D0 00 03 04 0E where Bits Description SlaveID Function Code 03 (Read Holding Registers) 07D0...
- Page 65 Robotiq 2-Finger Adaptive Robot Gripper - 200 Instruction Manual 09 03 06 F9 00 00 00 0D 00 56 4C where Bits Description SlaveID Function Code 03 (Read Holding Registers) Number of data bytes to follow (3 registers x 2...
-
Page 66: Modbus Tcp-Ip Communication Protocol
4.10 MODBUS TCP-IP communication protocol The Robotiq 2-Finger Adaptive Robot Gripper – 200 can be controlled using the Modbus TCP/IP protocol (note that this is an option). This section is intended to provide guidelines for setting up a Modbus TCP/IP communication to adequately send commands and read input from the Gripper. -
Page 67: Read Input Registers (Fc04)
Robotiq 2-Finger Adaptive Robot Gripper - 200 Instruction Manual 4.10.2 Read Input Registers (FC04) Function code 04 (FC04) is used for reading the status of the Gripper (robot input). Examples of such data are Gripper status, object status, finger position, etc. For example, this message asks for registers 0x0000 (0000) to 0x0006 (0006) which contain all the robot input statuses. -
Page 68: Preset Multiple Registers (Fc16)
Robotiq 2-Finger Adaptive Robot Gripper - 200 Instruction Manual 4.10.3 Preset Multiple Registers (FC16) Function code 06 (FC16) is used to activate functionalities of the Gripper (robot output). Examples of such data are action request, position request, speed, force, etc. -
Page 69: Modbus Tcp Example
Robotiq 2-Finger Adaptive Robot Gripper - 200 Instruction Manual 4.10.4 Modbus TCP example This section depicts the example given in section 4.8 when programmed using the Modbus TCP protocol. The example is typical of a pick and place application. After activating the Gripper, the robot is moved to a pick-up location to grip an object. - Page 70 Robotiq 2-Finger Adaptive Robot Gripper - 200 Instruction Manual where Bits Description 339A Unique transaction identifier (chosen randomly) 0000 Protocol Identifier (Modbus) 0006 Length SlaveID Function Code 16 (Preset Multiple Registers) 0000 Address of the first register 0003 Number of written registers...
- Page 71 Robotiq 2-Finger Adaptive Robot Gripper - 200 Instruction Manual Response (if the activation IS NOT completed): 45 33 00 00 00 05 02 04 02 11 00 where Bits Description 4533 Unique transaction identifier (chosen randomly) 0000 Protocol Identifier (Modbus)
- Page 72 Robotiq 2-Finger Adaptive Robot Gripper - 200 Instruction Manual Step 4: Close the Gripper at full speed and full force Request is: 71 EE 00 00 00 0D 02 10 00 00 00 03 06 09 00 00 FF FF FF...
- Page 73 Robotiq 2-Finger Adaptive Robot Gripper - 200 Instruction Manual where Bits Description 71EE Unique transaction identifier (chosen randomly) 0000 Protocol Identifier (Modbus) 0006 Length SlaveID Function Code 16 (Preset Multiple Registers) 0000 Address of the first register 0003 Number of written registers...
- Page 74 Robotiq 2-Finger Adaptive Robot Gripper - 200 Instruction Manual where Bits Description 776B Unique transaction identifier (chosen randomly) 0000 Protocol Identifier (Modbus) 0009 Length SlaveID Function Code 04 (Read Input Registers) Number of data bytes to follow (3 registers x 2...
- Page 75 Robotiq 2-Finger Adaptive Robot Gripper - 200 Instruction Manual Example of response if the grip is completed 77 6B 00 00 00 09 02 04 06 B9 00 00 FF BD 00 where Bits Description 776B Unique transaction identifier (chosen randomly)
- Page 76 Robotiq 2-Finger Adaptive Robot Gripper - 200 Instruction Manual Step 6: Move the robot to the release location Step 7: Open the Gripper at full speed and full force Request is: 34 AB 00 00 00 0D 02 10 00 00 00 03 06 09 00 00 00 FF FF...
- Page 77 Robotiq 2-Finger Adaptive Robot Gripper - 200 Instruction Manual Response is: 34 AB 00 00 00 06 02 10 00 00 00 03 where Bits Description 34AB Unique transaction identifier (chosen randomly) 0000 Protocol Identifier (Modbus) 0006 Length SlaveID Function Code 16 (Preset Multiple Registers)
- Page 78 Robotiq 2-Finger Adaptive Robot Gripper - 200 Instruction Manual D605 Unique transaction identifier (chosen randomly) 0000 Protocol Identifier (Modbus) 0009 Length SlaveID Function Code 04 (Read Input Registers) Number of data bytes to follow (3 registers x 2 bytes/register = 6 bytes)
- Page 79 Robotiq 2-Finger Adaptive Robot Gripper - 200 Instruction Manual where Bits Description D605 Unique transaction identifier (chosen randomly) 0000 Protocol Identifier (Modbus) 0009 Length SlaveID Function Code 04 (Read Input Registers) Number of data bytes to follow (3 registers x 2...
-
Page 80: Application With Universal Robots
Robotiq 2-Finger Adaptive Robot Gripper - 200 Instruction Manual 4.10.5 Application with Universal Robots This section contains some additional information related to the communication between the Gripper and the Univer sal Robots model UR-5 UR-10 using the Modbus TCP protocol. -
Page 81: User Interface
Robotiq 2-Finger Adaptive Robot Gripper - 200 Instruction Manual 5. User Interface Section in development while Robotiq 2-Finger Adaptive Robot Gripper – 200 is in beta testing. Robotiq inc. © 2008-2013... -
Page 82: Specifications
Robotiq 2-Finger Adaptive Robot Gripper - 200 Instruction Manual 6. Specifications 6.1 Technical dimensions Figure 6.1.1 : Robotiq 2-Finger Adaptive Robot Gripper – 200 technical dimensions in open position. Robotiq inc. © 2008-2013... - Page 83 Robotiq 2-Finger Adaptive Robot Gripper - 200 Instruction Manual Figure 6.1.2 : Robotiq 2-Finger Adaptive Robot Gripper – 200 technical dimensions in closed position. Robotiq inc. © 2008-2013...
- Page 84 Robotiq 2-Finger Adaptive Robot Gripper - 200 Instruction Manual Figure 6.1.3 : Robotiq 2-Finger Adaptive Robot Gripper – 200 controller unit technical dimensions. Robotiq inc. © 2008-2013...
-
Page 85: Mechanical Specifications
Robotiq 2-Finger Adaptive Robot Gripper - 200 Instruction Manual 6.2 Mechanical specifications Specification Metric units Imperial units Gripper opening ( see section 0 to 200 mm 0 to 7.9 in Pad design and customization Object diameter for encompassing 103 to 191 mm 4 to 7.5 in... - Page 86 Robotiq 2-Finger Adaptive Robot Gripper - 200 Instruction Manual Info The "Actuation Force" is the force that can be applied to an object by the motors of the Gripper. The Gripper is self-locking. The user of the Gripper must always ensure that the result of the forces being applied to the finger is always lower than the maximum holding Force.
-
Page 87: Moment Of Inertia And Center Of Mass
Robotiq 2-Finger Adaptive Robot Gripper - 200 Instruction Manual 6.3 Moment of inertia and center of mass The coordinate system used for calculating the moment of inertia and center of mass for the Gripper is shown in ure 6.3.1 . The center of mass and moment of inertia are calculated for a configuration where the fingers are fully open (at position 0). -
Page 88: Pad Design And Customization
Robotiq 2-Finger Adaptive Robot Gripper - 200 Instruction Manual 6.4 Pad design and customization Pads for the Robotiq 2-Finger Adaptive Robot Gripper – 200 can be customized to fit your gripping application. The following subsection details the design of standard Finger Pads, Palm Pads and Proximal Pads, information for custom design is also provided. - Page 89 Maximum center of mass is : (20000/400) -13 = 37 mm above the top of the Gripper Distal Phalanx Modifying the Gripper fingers by any means (drilling holes, adding fixtures, etc.) without Robotiq Engineering Service approval does not respect safety measures and warranty conditions. Never modify the Gripper without consent from Robotiq.
- Page 90 Robotiq 2-Finger Adaptive Robot Gripper - 200 Instruction Manual Figure 6.4.1.2 : Technical dimensions for the B-005 Finger Pad Holder. Robotiq inc. © 2008-2013...
- Page 91 Robotiq 2-Finger Adaptive Robot Gripper - 200 Instruction Manual Figure 6.4.1.3 : Technical dimensions of the Gripper Distal Phalanx. Note When designing a completely custom fingertip (replacing Finger Holders and Finger Pads) your design must use the four (4) M6 Socket Head Cap Screw fixation points on the Gripper Distal Phalanx.
-
Page 92: Proximal Pad
Robotiq 2-Finger Adaptive Robot Gripper - 200 Instruction Manual 6.4.2 Proximal Pad The Robotiq 2-Finger Adaptive Robot Gripper – 200 Proximal Pads can be customized to fit your gripping application. The Proximal Pad B-011 is fixed directly to the Gripper as shown in figure 6.4.2.1. For a list of available parts see section 8. - Page 93 Robotiq 2-Finger Adaptive Robot Gripper - 200 Instruction Manual Figure 6.4.2.2 : Proximal Pad screw thread patterns. Robotiq inc. © 2008-2013...
-
Page 94: Palm Pad
Robotiq 2-Finger Adaptive Robot Gripper - 200 Instruction Manual 6.4.3 Palm pad The Robotiq 2-Finger Adaptive Robot Gripper – 200 Proximal Palm Pad can be customized to fit your gripping application. The Palm Pad B-010 is fixed directly to the Gripper as shown in figure 6.4.3.1. For a list of available parts see section 8. - Page 95 Instruction Manual Figure 6.4.3.2 : Working envelope of the Gripper (centered on the Palm Pad). Modifying the Gripper fingers by any means (drilling holes, adding fixtures, etc.) without Robotiq Engineering Service approval does not respect safety measures and warranty conditions. Never modify the Gripper without consent from Robotiq.
- Page 96 Robotiq 2-Finger Adaptive Robot Gripper - 200 Instruction Manual Figure 6.4.3.3 : Palm Pad screw thread patterns. Robotiq inc. © 2008-2013...
-
Page 97: Finger Movement
Robotiq 2-Finger Adaptive Robot Gripper - 200 Instruction Manual 6.5 Finger movement Figure 6.5.1 relates the Finger opening (distance between the two Finger Pads) to the corresponding ''Go To'' position request (from a range of 0 to 255), see section 4.6 Robot output registers &... - Page 98 Robotiq 2-Finger Adaptive Robot Gripper - 200 Instruction Manual Figure 6.5.2 Finger trajectory Note The described finger trajectory is accurate for the standard 2-Finger Adaptive Robot Gripper – 200 Finger Pads ( B-012 part). Robotiq inc. © 2008-2013...
-
Page 99: Coupling
Robotiq 2-Finger Adaptive Robot Gripper - 200 Instruction Manual 6.6 Coupling The following are available standard Coupling for the 2-Finger Adaptive Robot Gripper – 200, to order see section Spare Parts, Kits and Accessories. B-061 : M8 Socket Head Cap Screws on 100mm PCD (Pitch Circle Diameter). - Page 100 Robotiq 2-Finger Adaptive Robot Gripper - 200 Instruction Manual Figure 6.6.2 : B-062 coupling. Robotiq inc. © 2008-2013...
-
Page 101: Maintenance
The Adaptive Gripper requires only external maintenance with limited downtime. Maintenance of the 2-Finger Adaptive Robot Gripper - 200 is required after specified usage, measured in time (normal 40h week) or in cycles (requesting an open and a close movement from the Gripper). Following the maintenance interval will ensure : Correct functioning of your Gripper. -
Page 102: Gripper Cleaning
Dry tissue or towel Reminder The Robotiq 2-Finger Adaptive Robot Gripper - 200 is water resistant, not waterproof, clean the Gripper with a wet towel and then dry with a dry towel. Note Always turn off robot and Gripper power supply before doing maintenance operations on the Gripper. -
Page 103: Periodic Inspection
Finger pad wear must not affect gripping, if wear is visible and affects movement, change finger pad(s). Check for any collision damage, if damage is visible, contact Robotiq Support. Check for any sign of wear on the Gripper chassis, if wear is present and may affect Gripper performance, contact Robotiq Support. -
Page 104: Finger Pad Replacement
Robot Gripper - 200 Finger Pads. visible Value currently under evaluation. Spare Parts, Kits and Accessories section to order Robotiq 2-Finger Adaptive Robot Gripper - 200 replacement parts. Pad design and customization section for details on the creation of custom Finger Pads. -
Page 105: Overhaul
XXX Mio. cycles or at warranty expiration Gripper overhaul is necessary when the Gripper reaches XXX Mio. cycles or when warranty has expired. Overhaul is done by Robotiq, please contact Robotiq Support Service. Value currently under evaluation Robotiq inc. © 2008-2013... -
Page 106: Spare Parts, Kits And Accessories
Robotiq 2-Finger Adaptive Robot Gripper - 200 Instruction Manual 8. Spare Parts, Kits and Accessories Spare parts, kits and accessories list : Item Description Ordering Number B-061 AGB-CPL-061 Coupling for 100 mm PCD diamete r and M8 screws. B-062 AGB-CPL-062 Coupling for 125 mm PCD diamete r and M10 screws. - Page 107 Robotiq 2-Finger Adaptive Robot Gripper - 200 Instruction Manual Finger Pad includes : AGB-PAD-B012 one (1) B-012 Finger Pad. four (4) Y-826 M6 x 12mm Socket Head Cap Screws. four (4) Y-931 DIN 7980 M6 locking rings. Proximal Pad includes : AGB-PAD-B011 one (1) B-011 Proximal Pad.
-
Page 108: Troubleshooting
Robotiq 2-Finger Adaptive Robot Gripper - 200 Instruction Manual 9. Troubleshooting If your Gripper is not working, check the following : Check the blue LED on the Gripper : It's ON : Check communication LED state (step 2) It's OFF : Check the blue LED on the controller : It's ON : Gripper is not powered, but the controller is. - Page 109 Robotiq 2-Finger Adaptive Robot Gripper - 200 Instruction Manual Communication & Network issues : Only use one connection at a time, either USB or the industrial protocol. Ethernet family : Use the proper Ethernet options, Modbus TCP/IP and EtherNet IP require fixed IP, EtherCAT requires DHCP.
-
Page 110: Warranty
– 200 against defects in material and workmanship for a period of one year from the date of reception when utilized as intended. Robotiq also warrants that this equipment will meet applicable specifications under normal use. Warranty applies under the following conditions: Usage respects the operating and storage conditions specified in section 3.2... - Page 111 Gripper may be a part. Exclusion Robotiq reserves the right to make changes in the design or construction of any of its products at any time without incurring obligation to make any changes whatsoever on units already purchased. This warranty excludes failure resulting from: improper use or installation, normal wear and tear, accident, abuse, neglect, fire, water, lightning or other acts of nature, causes external to the Gripper or other factors beyond Robotiq's control.
-
Page 112: Contact
Robotiq 2-Finger Adaptive Robot Gripper - 200 Instruction Manual 11. Contact www.robotiq.com Go to Contact Us Phone 1-888-ROBOTIQ (762-6847) 1-418-800-0045 (outside US and Canada) 1-418-800-0046 Technical support and Engineering 1-866-508-1997, X201 Sales US 1-812-220-4578 Sales Canada, Europe and Asia 1-418-800-0045... -
Page 113: Translation Of Original Ec Declaration Of Incorporation
Robotiq 2-Finger Adaptive Robot Gripper - 200 Instruction Manual Translation of original EC declaration of incorporation Robotiq inc. © 2008-2013...
Need help?
Do you have a question about the 2-Finger Adaptive Robot Gripper - 200 and is the answer not in the manual?
Questions and answers