
Related Manuals for Beckman Coulter Avanti J-26S XPI


Summary of Contents for Beckman Coulter Avanti J-26S XPI
- Page 1 Instructions For Use Avanti J-26S XPI High-Performance Centrifuge PN B10093AE April 2019 Beckman Coulter, Inc. 250 S. Kraemer Blvd. Brea, CA 92821 U.S.A.
- Page 2 PN B10093AE (April 2019) © 2019 Beckman Coulter, Inc. All rights reserved. Beckman Coulter, the stylized logo, and the Beckman Coulter product and service marks mentioned herein are trademarks or registered trademarks of Beckman Coulter, Inc. in the United States and other countries.
-
Page 3: Revision History
Revision History For labeling updates, go to www.beckman.com/techdocs and download the latest version of the manual or system help for your instrument. Issue AD, 05/2016 Updates were made to the following sections: Multi Compliance Label; CHAPTER 1, Control Features Issue AE, 04/2019 Updates were made to the following sections: CHAPTER 1, Control Features Note: Changes that are part of the most recent revision are indicated in text by a bar in the margin of the... - Page 4 Revision History PN B10093AE...
-
Page 5: Safety Notice
This instrument is designed to be installed by a Beckman Coulter Field Service representative. Installation by anyone other than authorized Beckman Coulter personnel invalidates any warranty covering the instrument. Also, if the instrument needs to be moved, a Beckman Coulter Field Service representative must reinstall and relevel the instrument in its new location. -
Page 6: Electrical Safety
Mechanical Safety For safe operation of the equipment, observe the following: • Use only the Beckman Coulter rotors and accessories designed for use in this instrument. • Do not exceed the maximum rated speed of the rotor in use. • NEVER attempt to slow or stop a rotor by hand. -
Page 7: Chemical And Biological Safety
• Dispose of all waste solutions according to appropriate environmental health and safety guidelines. It is your responsibility to decontaminate the instrument and accessories before requesting service by Beckman Coulter Field Service. RoHS Notice These labels and materials declaration table (the Table of Hazardous Substance’s Name and Concentration) are to meet People’s Republic of China Electronic Industry Standard SJ/T11364-2006... - Page 8 Safety Notice RoHS Notice Environmentally Friendly Use Period (EFUP) date. Therefore, it can safely be used indefinitely. The circling arrows indicate the product is recyclable. The date code on the label or product indicates the date of manufacture. viii PN B10093AE...
-
Page 9: Table Of Contents
Contents Revision History, iii Safety Notice, v Alerts for Danger, Warning, Caution, Important, and Note, v Safety During Installation and/or Maintenance, v Electrical Safety, vi Safety Against Risk of Fire, vi Mechanical Safety, vi Chemical and Biological Safety, vii RoHS Notice, vii China RoHS Caution Label, vii... - Page 10 Features, 1-9 Operational Features, 1-9 Physical Data, 1-10 Available Rotors, 1-11 CHAPTER 2: Operation, 2-1 Introduction, 2-1 Summary of Avanti J-26S XPI Run Procedures, 2-1 Manual Run, 2-1 Programmed Run, 2-2 Preparation, 2-3 Installing the Rotor, 2-3 Manual Operation, 2-4...
- Page 11 Checking for Rotor Drive Pins, A-7 Using the JA-18 Rotor, A-8 Using the JCF-Z Continuous Flow/Zonal Rotor, A-8 Zonal Bracket Kits, A-8 Ensuring Correct JCF-Z Continuous Flow/Zonal Rotor Identification, A-8 APPENDIX B: Temperature Calibration Procedure, B-1 Introduction, B-1 Beckman Coulter, Inc.
- Page 12 Contents Avanti J Series Centrifuge Warranty Related Documents...
- Page 13 Illustrations Illustrations The Power Switch, 1-4 The Control Panel, 1-5 The Actual Value Display, 1-5 The Setup Screen, 1-6 Elutriation Controls, 2-18 Emergency Door Release Latch Access, 3-5 Manual Door Release, 3-6 Venting the Chamber Vacuum, 3-7 Front Panel Retaining Strip, 3-8 Single-Phase Electrical Requirements, A-3...
- Page 14 Illustrations...
- Page 15 Tables Tables Acceleration and Deceleration Settings, 2-11 Diagnostic Message Chart, 3-2 Nominal Supply Voltage Ratings for the Avanti J-26S XPI, A-2 Required Wire Connections, A-3...
- Page 16 Tables...
-
Page 17: Introduction
Scope of Manual This manual is designed to familiarize centrifuge users and site engineers with the Avanti J-26S XPI centrifuge, its functions, specifications, operation, and routine care and maintenance. Beckman Coulter recommends that you read this entire manual, especially the... -
Page 18: Typographic Conventions
For Beckman Coulter products bearing this label please contact your dealer or local Beckman Coulter office for details on the take back program that will facilitate the proper collection, treatment, recovery, recycling and safe disposal of the device. -
Page 19: Multi Compliance Label
Introduction Multi Compliance Label Multi Compliance Label • The RCM mark is intended for use on products that comply with Austrailian Communications Media Authority (ACMA) EMC Requirements. • Recycling — Refer to the Recycling Label section in this document. • 169502 — This label indicates recognition by a Nationally Recognized Testing Laboratory (NRTL) that the instrument has met the relevant product safety standards. - Page 20 Introduction Multi Compliance Label PN B10093AE...
-
Page 21: Description
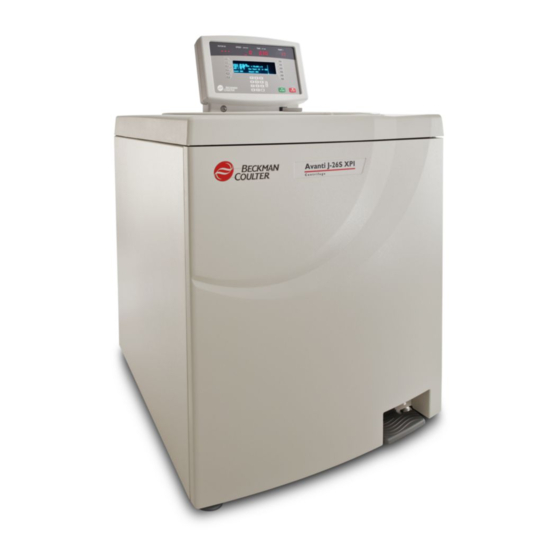
CHAPTER 1 Description Introduction This section describes the Avanti J-26S XPI centrifuge components and their functions. It also describes system safety features and centrifuge controls and displays. Refer to the applicable rotor manual for rotor descriptions. Centrifuge Function and Safety Features... -
Page 22: Safety Features
The instrument control housing, door assembly, and cover panels are made from a highly-durable unfinished plastic. The control panel is covered by a protective overlay made of coated polycarbonate. * In the United States, call 1-800-742-2345. Outside the U.S., contact your local Beckman Coulter office or visit us at www.beckman.com. PN B10093AE... -
Page 23: Rotor Chamber
Description Centrifuge Chassis The door is opened by stepping on a foot pedal, which is located at the bottom right front of the instrument. The door is hinged at the back left to open at a 60-degree angle to the centrifuge side panels, providing clearance for loading and unloading of the centrifuge. -
Page 24: Name Rating Plate
The name rating plate is affixed to the rear of the centrifuge. Check that the line voltage agrees with the voltage listed on this name rating plate before connecting the centrifuge. Always mention the model number and serial number when corresponding with Beckman Coulter regarding your centrifuge. -
Page 25: Control Panel
Description Controls and Indicators Control Panel The control panel (Figure 1.2) is mounted at an angle on the centrifuge top rear for easy visibility and access. It contains a separate Actual Value Display and a Setup Screen, numerical keypad, and touch keys for parameter entry and system control. -
Page 26: Setup Screen
Description Controls and Indicators TIME • In time mode, indicates the remaining run time in hours and minutes. The TIME display begins counting down when START is pressed and continues counting down to 0, when deceleration begins. • In hold mode, indicates the time elapsed since START was pressed. After 99 hours and 59 minutes the timer will reset to 0 and continue counting elapsed time. - Page 27 Description Controls and Indicators ROTOR Pressed to select the rotor in use. When ROTOR is pressed, the rotor type soft keys are displayed (JA: fixed angle rotors; JS: swinging bucket rotors; JLA: lightweight fixed angle rotors; JV: vertical tube rotors; JE: elutriator rotors; JCF-Z: continuous flow/zonal rotors). Pressing a rotor type soft key displays a list of the rotors of that type that can be used.
-
Page 28: Keypad
Description Specifications Pressed to enter acceleration and deceleration rates that will maintain optimum separation while protecting samples. When A/D is pressed, the Accel: field flashes, prompting you to enter an acceleration setting. Pressing A/D once more moves the cursor to the Decel: field. Available acceleration rates are maximum, slow, and timed (1 to 10 minutes from 0 to 500 RPM). -
Page 29: Control Features
Description Specifications Control Features Specifications Description Speed • Setting range: — 100 to 26,000 RPM or equivalent RCF (in 100 g increments) • Elutriation speed setting range: — 0 to 5000 RPM (in 10-RPM or 10 g increments) • Speed display: —... -
Page 30: Physical Data
Description Specifications Specifications Description Rotor Chamber Diameter 51.3 cm (20 in.) Friction Reduction 190 mm (7.5 in.) Hg System (FRS) Physical Data Specification Description Width 71 cm (28 in.) Depth • 86 cm (34 in.) • including air diverter extending from back panel —... -
Page 31: Available Rotors
Description Available Rotors Specification Description Noise Level 0.91 m (3 ft) 57 dBa in front of instrument at 26,000 RPM Installation (overvoltage) Category Pollution Degree a. Unbalanced three-phase. Split for single-phase operation internally. b. Normally, only nonconductive pollution occurs; occasionally, however, a temporary conductivity caused by condensation must be expected. - Page 32 Description Available Rotors Rotor Profile Description Rotor Max RCF Max Capacity Rotor Code ( g) Manual Number JA-20.1 20.1 20,000 32 15 mL J-TB-022 Fixed Angle, 23° (32 Place) = 115 mm 51,500 (outer row) 43,900 = 98 mm (inner row) JA-20 20,000...
- Page 33 Description Available Rotors Rotor Profile Description Rotor Max RCF Max Capacity Rotor Code ( g) Manual Number F14BCI-14x50cy F50C 14,000 33,500 14 50 mL — Fixed Angle, 34° (14 place) = 153 mm F14BCI-6x250y F250 14,000 30,000 6 250 mL —...
- Page 34 Description Available Rotors Rotor Profile Description Rotor Max RCF Max Capacity Rotor Code ( g) Manual Number JS-24.38 24.38 18,000 6 38.5 mL J-TB-058 10,000 Swinging Bucket (6 place) = 161 mm JS-24.15 24.15 19,200 6 15 mL J-TB-058 10,000 Swinging Bucket...
- Page 35 1.4 g/mL; the JCF-Z rotor is rated for a density of 1.45 g/mL; and the JE-5.0 rotor is rated for a density of 3 g/mL. b. Temperature performance for the JA-30.50 Ti rotor in the Avanti J-26S XPI is as follows: 15°C minimum at 26,000 RPM (at 30°C ambient);...
- Page 36 Description Available Rotors 1-16 PN B10093AE...
-
Page 37: Chapter 2: Operation
Do not lean on the centrifuge or place items on it while it is operating. Summary of Avanti J-26S XPI Run Procedures For runs at temperatures other than ambient, precool or prewarm the rotor to the required temperature before the run. -
Page 38: Programmed Run
Operation Summary of Avanti J-26S XPI Run Procedures Depress the foot pedal to open the chamber door. Install the rotor according to instructions in the applicable rotor manual, then firmly close the chamber door. Press press the soft key to select rotor type, press the soft key to select the rotor name. -
Page 39: Preparation
Operation Preparation Depress the foot pedal to open the chamber door. Install the rotor according to instructions in the applicable rotor manual, then firmly close the chamber door. Press then use the keypad to enter the program number. Check that all parameters are correct and that the door is closed. a. -
Page 40: Manual Operation
Operation Manual Operation CAUTION Do not drop the rotor onto the drive hub. The drive shaft can be bent if the rotor is forced sideways or dropped onto the spindle hub. Install the rotor by centering it over the hub and carefully lowering it straight down. Securely attach the rotor lid knob, or tie-down knob in rotors without lids, to the drive shaft by turning it to the right (clockwise). -
Page 41: Entering Run Speed
Operation Manual Operation a. Press the soft key to display additional fixed angle rotor codes. MORE b. To select a different rotor type, press again and then press another soft key. ROTOR Rotor : - - Speed : 0 0 x G Time : 00:00 Temp : 25°C... -
Page 42: Entering Rcf
Operation Manual Operation • The indicator illuminates in the actual value display. ROTOR ID SPEED TIME TEMP RPM/RCF HR:MIN °C Rotor : JA-30.50 Speed : - - -- x G Time : 00:00 Temp : 25°C Max Temp : 29°C Accel : MAX Decel : MAX Enter the required RPM on the keypad and press... -
Page 43: Entering Run Time
Operation Manual Operation field flashes. RPM = - - G ROTOR ID SPEED TIME TEMP RPM/RCF HR:MIN °C RCF (x g) Rotor : JA-30.50 Speed : - - = 81 800 x G Time : 00:00 Temp : 25°C Max Temp : 29°C Accel : MAX Decel :... -
Page 44: Entering A W2T Run
Operation Manual Operation Entered time appears in the field. Time: Rotor : JA-30.50 HH:MM Speed : 26 000 Time : 00:25 HOLD Temp : 25°C Max Temp : 29°C Accel : MAX Decel : MAX Press the next function key or press , then ENTER START... -
Page 45: Entering A Continuous (Hold) Run
Operation Manual Operation • If you enter a value out of the achievable t range for that rotor, a message prompts you to enter a different value. ROTOR ID SPEED TIME TEMP RPM/RCF °C rad2/sec Rotor : JA-30.50 HH:MM Speed : 26 000 81 800 x G Time :... -
Page 46: Entering Run Temperature
Operation Manual Operation Press the next function key or press , then ENTER START • After you start the run, the indicator illuminates in the display. HOLD TIME • The elapsed run time is displayed. • The run continues until is pressed. -
Page 47: Entering Acceleration And Deceleration Rates
Operation Manual Operation Choose to make the system shut down at maximum temperature, or to allow the system to run above maximum temperature. Your selection ( ) appears to the right of the field. Max Temp: Entering Acceleration and Deceleration Rates The centrifuge provides a choice of three acceleration rates and four deceleration rates to protect the gradient and sample-to-gradient interface. -
Page 48: Deceleration
Operation Manual Operation Press the appropriate soft key. • If you choose , your selection appears in the field. SLOW Accel: If you choose , enter an acceleration time from 1 to 10 minutes and press again or • TIME accept the 10-minute default setting. -
Page 49: Changing Parameters During A Run
Operation Programmed Operation Changing Parameters During a Run While a run is in progress, run parameters (speed, time, temperature, and acceleration and deceleration settings) can be changed without stopping the run by entering the new setting and pressing ENTER Ending a Run To end a run in progress, press . - Page 50 Operation Programmed Operation Enter run parameters (rotor, speed, time, temperature, acceleration/deceleration settings) for step 1. a. Press when programming is complete. ENTER The message “ ” appears. Switch steps, save, or exit program mode NOTE To program a delayed start, set the time in step 1 to the required delay length and set the speed in step 1 to 0 RPM.
-
Page 51: Modifying A Program
Operation Programmed Operation Press the soft key when programming is complete. SAVE Press the soft key to exit program mode. EXIT Modifying a Program Press the key. field flashes, and the message “ ” appears. Prog Recall: Enter program number (1–30) Press again to move the cursor to the field. -
Page 52: Running A Program
Operation Setting Up a Zonal Run Steps 1 and 2 are saved under the selected program number. STEP1 Rotor : JA-30.50 STEP2 Speed : 26 000 81 800 SAVE Time : 00:20 EXIT Temp : 20°C Max Temp : 24°C Shutdown? No Accel : 5 Decel : 5... - Page 53 Operation Setting Up a Zonal Run Turn the key to the position. ZONAL ZONAL • Open-door operation up to 3000 RPM is enabled. • JCF-Z appears in the field. Rotor: Rotor : JCF-Z JCF-Z Speed : 0 Time : 00:00 Temp : 25°C Max Temp : 29°C Accel : MAX...
-
Page 54: Setting Up An Elutriation Run
Operation Setting Up an Elutriation Run Close the door. The rotor accelerates to the set speed. a. If you entered a loading speed other than 2000 RPM, re-enter the run speed after you close the door. End the run. • When the run is complete (the run time has expired, the set t value has been reached, or has been pressed), the rotor decelerates to the default unloading speed of 2000 RPM. - Page 55 Operation Setting Up an Elutriation Run Install the rotor. Set up sample and buffer reservoirs and tubing lines as described in the rotor manual. Route tubing lines through the elutriator port holes at the left side of the door seal. b.
- Page 56 Operation Setting Up an Elutriation Run 1. Delay Control Knob DELAY ELUTRIATOR NOTE At the end of the run, after disassembling the liquid and power lines, be sure to replace the black rubber stoppers in the ports at the left side of the centrifuge door. Failure to seal these openings will prevent proper operation of the FRS system, which will cause a diagnostic shut down during the next run.
-
Page 57: Troubleshooting
CHAPTER 4, Care and Maintenance. For any problems not covered here, contact Beckman Coulter Field Service (1-800-742-2345 in the United States; outside the U.S. contact your local Beckman office or visit us at www.beckman.com) for assistance. NOTE It is your responsibility to decontaminate the instrument, as well as any rotors and/or accessories, before requesting service by Beckman Coulter Field Service. - Page 58 No temp control, refer malfunction maximum brake dirty (see CHAPTER 4, Care and to manual Maintenance). • Call Beckman Coulter Field Service. D1 and D9 Erroneous signal from Erroneous display of Call Beckman Coulter Field Service. tachometer board to 0 RPM immediately after...
- Page 59 Problem Result Recommendation D1–5/ Drive system problem (for Run stops, usually with Call Beckman Coulter Field Service. Drive error, call example, over current, no brake. Door may not Before trying to open the door, listen Beckman Coulter Field over/under voltage, unlock for up to an hour.
-
Page 60: Accessing The Rotor In Case Of Power Failure
Keep the door closed as much as possible. a. In the U.S. call 1-800-742-2345. Outside the U.S., contact your local Beckman Coulter office or visit us at www.beckman.com. b. Friction Reduction System. Accessing the Rotor in Case of Power Failure... -
Page 61: Emergency Door Release Latch Access
Troubleshooting Accessing the Rotor in Case of Power Failure To access the door-locking mechanism, you must remove the instrument front panel. Two latches secure the front panel in place; these latches are accessible through two holes at the upper right and left of the panel (see Figure 3.1). -
Page 62: Manual Door Release
Troubleshooting Accessing the Rotor in Case of Power Failure Lift the front panel up and off the centrifuge; set it aside. • You will see an inner front panel that extends about halfway down from the centrifuge top (see Figure 3.2). -
Page 63: Venting The Chamber Vacuum
Troubleshooting Accessing the Rotor in Case of Power Failure a. Use a back-and-forth motion as you pull; this takes quite a bit of force. The vacuum will be completely vented several seconds after the hose is detached. NOTE Several tubing lines are tied to the red hose. As you grasp the hose, place your hand over these lines. -
Page 64: Front Panel Retaining Strip
Troubleshooting Accessing the Rotor in Case of Power Failure Pull the interlock level out and left, and while holding it out, step on the foot pedal. Remove your sample. DANGER Never try to slow or stop the rotor by hand. To replace the panel on the centrifuge, Holding the panel at the top (with the instrument label facing out), insert the three grooved brackets on the bottom inside of the door over the front panel retaining strip (see... -
Page 65: Jcf-Z Rotor Identification
If the JCF-Z rotor is misidentified, the run speed will be limited to the maximum speed for the identified rotor. (The maximum speed for the JCF-Z rotor is 20,000 RPM.) * In the United States, call 1-800-742-2345. Outside the U.S., contact your local Beckman Coulter office or visit us at www.beckman.com. - Page 66 Troubleshooting JCF-Z Rotor Identification 3-10 PN B10093AE...
-
Page 67: Care And Maintenance
Check the air filter on the back panel for obstructions. a. Keep vents clear and clean. * In the United States, call 1-800-742-2345. Outside the U.S., contact your local Beckman Coulter office or visit us at www.beckman.com. PN B10093AE... -
Page 68: Cleaning
Care and Maintenance Maintenance Wipe condensation out of the chamber between runs with a sponge or clean cloth to prevent chamber icing. If chamber icing occurs, defrost the system and wipe moisture out of the chamber before use. a. To defrost the system, set the temperature to 30°C for 20 minutes. (These are suggested settings that may be adjusted as appropriate for your laboratory conditions.) NOTE... -
Page 69: Decontamination
Ethanol is a flammability hazard. Do not use it in or near operating centrifuges. While Beckman Coulter has tested ethanol (70%) and found that it does not damage the centrifuge, no guarantee of sterility or disinfection is expressed or implied. When sterilization or disinfection is a concern, consult your laboratory safety officer regarding proper methods to use. -
Page 70: Circuit Breaker And Fuses
Then set the bottom edge down. Circuit Breaker and Fuses There are no user-replaceable fuses in the Avanti J-26S XPI centrifuge. If the centrifuge circuit breaker trips for any reason, the power switch will move to the OFF ( position. -
Page 71: Storage And Transport
Refer to the applicable rotor manual for materials and supplies needed for rotors. * In the United States, call 1-800-742-2345. Outside the U.S., contact your local Beckman Coulter office or visit us at www.beckman.com. -
Page 72: Replacement Parts And Supplies
Care and Maintenance Supply List Replacement Parts and Supplies NOTE For MSDS information, go to the Beckman Coulter website at www.beckman.com. Description Part Number Air filter 885218 Solution 555 (1 qt) 339555 Zonal Bracket Kit for Cole-Parmer size 16 tubing 366431 (6.4-mm [... -
Page 73: Appendix A: Preinstallation Requirements
APPENDIX A Preinstallation Requirements Preinstallation Requirements Do not attempt to install this instrument. Its purchase price includes installation by Beckman Coulter personnel. Installation by anyone other than an authorized Beckman Coulter representative invalidates any warranty covering the instrument. Preinstallation requirements have been sent prior to shipment of the instrument. The following information is provided in case the centrifuge must be relocated. -
Page 74: Single And Three-Phase Power Connections
Preinstallation Requirements Preinstallation Requirements Table A.1 Nominal Supply Voltage Ratings for the Avanti J-26S XPI Nominal Instrument Instrument Nominal Supply Power Cord and Plug Description Instrument Part Part Number Frequency Voltage Rating Number (Elutriation System) Single-phase, B14538 B14544 180–264 V,... -
Page 75: Single-Phase Electrical Requirements
Preinstallation Requirements Preinstallation Requirements Figure A.1 Single-Phase Electrical Requirements 1. 30-ampere Circuit Breaker 3. Earth-Ground 2. Wall Outlet: Hubell 9930, 4. Measured Line Voltage Bryant 96-30-FR, or Equivalent (NEMA 6-30 R) Figure A.2 Three-Phase “Y” Electrical Requirements 1. 16-ampere Circuit Breaker 3. -
Page 76: Additional Requirements For Three-Phase Power Connections
Preinstallation Requirements Preinstallation Requirements Additional Requirements for Three-Phase Power Connections For three-phase power service to the centrifuge, use the “ ” connected configuration shown in Figure A.3. Also note the following information: • The steady state current draw of the centrifuge can be as high as 12 amperes per phase, depending on the voltage. -
Page 77: Securing The Centrifuge To The Floor
Refer to this document for additional installation instructions. NOTE Beckman Coulter representatives are not equipped to drill holes in your floor. The holes must be drilled before your scheduled installation. Bio-Safety Level 3 Installation For laboratories with epoxy aggregate (resinous) floors, such as BSL-3 labs, a non-invasive installation kit (PN 393316) is available. -
Page 78: Rear View And Dimensions
Preinstallation Requirements Preinstallation Requirements Figure A.4 Rear View and Dimensions 58.5 1.8 m 6.0 ft 45.5 16.0 6.25 1. Air Exit 2. Power Cable 3. Air Diverter 4. Depth 5. Air Intake PN B10093AE... -
Page 79: Using J2 Series Rotors In The Avanti J-26S Xpi
Using J2 Series Rotors in the Avanti J-26S XPI Using J2 Series Rotors in the Avanti J-26S XPI CAUTION Do not use the Beckman Coulter JA-10, JS-7.5, JA-14, or JS-13 rotors in the Avanti J-26S XPI centrifuge before reading this information. Checking for Rotor Drive Pins... -
Page 80: Using The Ja-18 Rotor
Check all J2 series rotors for drive pins before using them in an Avanti J series centrifuge and do not use rotors without drive pins in the Avanti J-26S XPI. To check for drive pins, hold the rotor up or turn it on its side and look into the drive hole. - Page 81 Beckman Coulter fixed angle rotors. If rotor misidentification occurs when your JCF-Z rotor is used, first perform three runs from 0 to 5000 RPM and back to 0 RPM. If rotor misidentification recurs, replace the bearings.
- Page 82 Preinstallation Requirements Using J2 Series Rotors in the Avanti J-26S XPI A-10 PN B10093AE...
-
Page 83: Appendix B: Temperature Calibration Procedure
Temperature Calibration Procedure Introduction The Avanti J-26S XPI centrifuge specification for temperature control is 2°C of the set temperature. That means that your sample will stay within 2°C of set temperature at all times, after rotor and system equilibration, described below. (During transient conditions, such as acceleration and deceleration, the rotor temperature may be outside this range.) The following procedure is... - Page 84 Temperature Calibration Procedure Introduction For example: If the required sample And the measured Set the temperature temperature is buffer/water temperature is 4°C 6°C 2°C 5°C 4°C 6°C PN B10093AE...
-
Page 85: Beckman Coulter, Inc
Any product claimed to be defective must, if requested by Beckman Coulter, be returned to the factory, transportation charges prepaid, and will be returned to Buyer with the transportation charges collect unless the product is found to be defective, in which case Beckman Coulter will pay all transportation charges. - Page 86 Beckman Coulter, Inc. Avanti J Series Centrifuge Warranty Warranty-2 PN B10093AE...
- Page 88 Related Documents Rotors and Tubes for Beckman Coulter J2, J6,and Avanti J Series Centrifuges PN JR-IM-10 • Rotors • Tubes, Bottles, and Accessories Using Tubes and Accessories • • Using Fixed-Angle Rotors • Using Swinging-Bucket Rotors • Using Vertical-Tube and Rack Type Rotors Care and Maintenance •...
Need help?
Do you have a question about the Avanti J-26S XPI and is the answer not in the manual?
Questions and answers