Table of Contents
Advertisement
1 Welcome
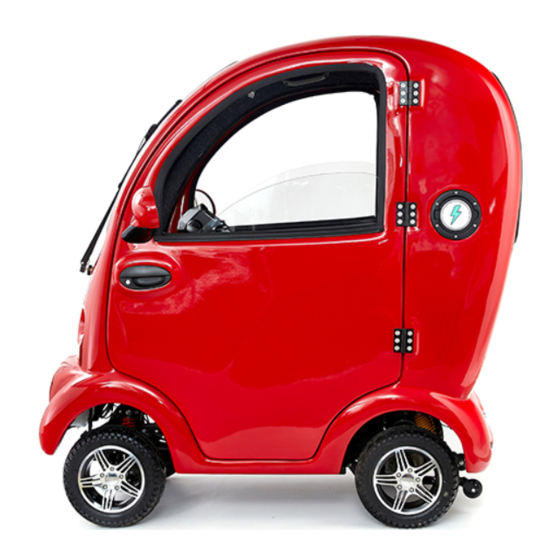
Congratulations on purchasing your Scooterpac Cabin
Car Mk2, the most technically advanced mobility
scooter in Britain. With regular maintenance and proper
operation your Cabin Car will give you many years and
many miles of rewarding experiences. This booklet
contains the information that you and your authorised
Scooterpac service centre will need to keep your Cabin
Car in good working order.
If you have any questions please contact the
Scooterpac retailer that supplied your Cabin Car and
they will be able to help.
This Cabin Car Mk2 was originally supplied by:
Dealership name:
Address:
Phone Number:
________________________
________________________
________________________
________________________
________________________
Scooterpac Cabin Car User Manual
Page | 1
Advertisement
Table of Contents

Summary of Contents for Scooterpac Cabin Car Mk2 2019
-
Page 1: Welcome
Cabin Car will give you many years and many miles of rewarding experiences. This booklet contains the information that you and your authorised Scooterpac service centre will need to keep your Cabin Car in good working order. If you have any questions please contact the Scooterpac retailer that supplied your Cabin Car and they will be able to help. -
Page 2: Table Of Contents
Entering the Vehicle ............12 9.12 Windscreen Washer ............ 24 Seat Adjustments ............13 9.13 USB Chargers ..............25 Tiller Adjustments ............14 9.14 Cup Holder ............... 26 Steering ................15 9.15 Internal Heater ............... 27 Scooterpac Cabin Car User Manual Page | 2... - Page 3 12 CCMK2 Specification .............. 37 12.1 Technical Drive Specs ..........37 10.2 Battery Care ..............32 12.2 Sizes & Weights .............. 38 10.3 Fuses ..................33 13 Servicing Intervals ..............39 10.4 Tyre Pressures ..............34 Scooterpac Cabin Car User Manual Page | 3...
-
Page 4: Legal
3 Legal The Scooterpac Cabin Car is designed to be operated by a single person, in accordance with the legal requirements for operating a Class 3 invalid carriage in the jurisdiction in which it was sold. Operating the vehicle outside of these limitation will invalidate the warranty. -
Page 5: Safety
If the Cabin Car tips and the wheels prevent it from falling, you should cease using the car and take it to a qualified specialist who can ensure that the cars chassis has not been damaged. Scooterpac Cabin Car User Manual Page | 5... -
Page 6: Safe Inclines
It is possible to attempt steeper inclines, but we strongly suggest that you do not try. To reduce the tipping hazard on inclines, lessen the load on back, slide the seat forward as much as possible and lean forward. Scooterpac Cabin Car User Manual Page | 6... -
Page 7: Introduction
All maintenance work should be carried out either by an authorised Scooterpac retailer, or by a certified mechanic. Scooterpac Cabin Car User Manual... -
Page 8: Your Cabin Car
If there is more than 1cm of water standing on the pavement, extra care should be taken as the car may have reduced ability to grip and steer. Under no circumstances should more than one person operate the vehicle at one time. Scooterpac Cabin Car User Manual Page | 8... -
Page 9: Unintentional Movement
If the vehicle is moving the door should be fully closed with the driver inside the vehicle. Do not attempt to operate the vehicle from outside the vehicle. If the vehicle is moving an emergency stop can be performed by firmly pulling the hand-operated brake lever on the right hand side of the tiller. Scooterpac Cabin Car User Manual Page | 9... -
Page 10: Exterior Quick Guide
7 Exterior Quick Guide Scooterpac Cabin Car User Manual Page | 10... -
Page 11: Interior Quick Guide
8 Interior Quick Guide Scooterpac Cabin Car User Manual Page | 11... -
Page 12: Operating Your Cabin Car
It is not recommended that you lock the car when seated inside, as this may delay your escape in an emergency. Scooterpac Cabin Car User Manual Page | 12... -
Page 13: Seat Adjustments
It is suggested that an upright position is most effective, but you should be in a comfortable position to operate the car for a long period of time. Scooterpac Cabin Car User Manual Page | 13... -
Page 14: Tiller Adjustments
Try to find a position that allows a good view of the digital control panel and allows full left and right movement of the handles. Figure 1 - Press black handle to adjust tiller pitch Scooterpac Cabin Car User Manual Page | 14... -
Page 15: Steering
For the most accurate steering the car should be moving forwards or backwards at a controllable speed. Gently push one side of the tiller way from you, allowing the car to begin turning. Make sure that you are continually observing your surroundings during any manoeuvre. Scooterpac Cabin Car User Manual Page | 15... -
Page 16: Acceleration & Braking
Accelerator and Reverse being activated at the same time. To set off, gently squeeze the green lever, and the car will accelerate up to the maximum allowable speed set by the speed controls. Scooterpac Cabin Car User Manual Page | 16... -
Page 17: Freewheel Function
Gently squeeze the red lever, and the car will begin to slowly accelerate backwards. The rear-view camera will come into life after a 1 second delay, and be visible until you release the red handle. Scooterpac Cabin Car User Manual Page | 17... - Page 18 The wing mirrors fitted to the Cabin Car Mk2 are large, giving improved visibility and safety. They can be folded in by gently twisting the housing until the glass is parallel to the door. Scooterpac Cabin Car User Manual Page | 18...
-
Page 19: Locking, Unlocking And Starting
Replace the cover and re- tighten the screws, taking care that all pieces fit together snugly. The batteries required are: Lithium Cell CR2016 V3 batteries. Figure 3 - Key fob components Scooterpac Cabin Car User Manual Page | 19... -
Page 20: Manual Locking
From the outside you can also use the supplied door key to lock both doors by using the nearside door. Using the external lock in the offside door will only lock that specific door. Scooterpac Cabin Car User Manual Page | 20... -
Page 21: Starting The Car
The car will only start when the ignition key is inserted into the housing on the tiller column, and turned clockwise fully. The Cabin Car will be started when the digital dashboard displays visual data. Figure 5 - (A) tiller mounted key slot Figure 6 - Digital dashboard displaying data Scooterpac Cabin Car User Manual Page | 21... -
Page 22: Lights
The indicators are the same bright LEDs as the headlights, in an orange colour that meets EU specifications. To switch them on press the button once before initiating a manoeuvre. Once the turn is complete and it is safe to do so, press the again to turn off the indicator. Scooterpac Cabin Car User Manual Page | 22... -
Page 23: Emergency Lights
Select the faster speed for heavier rainfall. Do not run the windscreen wiper when there is ice or frost on the windscreen as this may crack the rubber and lower it’s effective lifespan. Scooterpac Cabin Car User Manual Page | 23... -
Page 24: Windscreen Washer
It is recommended that you refill the reservoir before it is fully empty. Never run the washer jet without fluid as this may damage the pump. The top tank is a top-up tank only, do not attempt to fill this to the brim as it may cause leaks. Scooterpac Cabin Car User Manual Page | 24... -
Page 25: Usb Chargers
(port 2). The power delivery by each port is: USB 1: 5v – 0.5amp, USB 2: 5v – 2.0amp. USB Port 1 can be identified by the LED light next to it. Figure 4 - (A) USB charge ports Scooterpac Cabin Car User Manual Page | 25... -
Page 26: Cup Holder
For your convenience the Cabin Car is fitted with a bottle/cup holder. It can be opened by pulling down on the upper ring. The lower ring will follow. TIP: The cup holder should never be used to store alcoholic beverages. Figure 5 - Tiller mounted cup holder Scooterpac Cabin Car User Manual Page | 26... -
Page 27: Internal Heater
When the heater is active you may hear the fans, and the button will illuminate to indicate that the heater is on. Scooterpac Cabin Car User Manual Page | 27... -
Page 28: Rear Parcel Shelf
The rear parcel shelf is designed to carry light loads of less than 5lbs. It houses the rear lighting cluster it is important to avoid over-loading it with weight, as this can damage the lighting components. Figure 6 - Rear parcel shelf Scooterpac Cabin Car User Manual Page | 28... -
Page 29: Internal Charge Port
Cabin Car charges compared to the external charge port. TIP: Do not leave the Cabin Car on charge permanently. This will damage the battery and it will require replacement faster. Figure 7 - (A) Tiller mounted charge port Scooterpac Cabin Car User Manual Page | 29... -
Page 30: External Charge Port
Insert the head of the provided connector, making sure that the area is clear of debris. Do not leave the charger in place permanently as this can damage the batteries. Figure 8 - External charge port open with external charge Figure 11 - Closed external charge port lead plugged in Scooterpac Cabin Car User Manual Page | 30... -
Page 31: Window Controls
Always ensure that the windows are closed fully when leaving the car unattended. Figure 9 - Door card with handle and window controls Scooterpac Cabin Car User Manual Page | 31... -
Page 32: Maintenance
LEDs are longer lasting than traditional bulbs, but they will eventually fail. Replacement bulbs can be purchased from the company that supplied your Cabin Car. Replacing bulbs should only be done by a certified Scooterpac retailer, as it involves dismantling units that should be properly resealed. -
Page 33: Fuses
Fuses should only be changed by professionals, as improper work may damage the Cabin Car electrical system. Figure 10 - Fuse box cover Figure 11 - Fuse box located on tiller Scooterpac Cabin Car User Manual Page | 33... -
Page 34: Tyre Pressures
3mm of tread to provide adequate grip on the road surface. If the tyres become worn they should be replaced before the car is used. Front tyre pressure: 25psi Rear tyre pressure: 30psi 25psi 25psi 30psi Scooterpac Cabin Car User Manual Page | 34... -
Page 35: Cleaning
Automotive polish can be applied to the Cabin Car to give a high-shine finish to the paintwork, and is recommended in areas where the car may be exposed to adverse weather conditions. Scooterpac Cabin Car User Manual Page | 35... -
Page 36: Warranty
During the warranty period any part which becomes defective due to faulty workmanship or materials will be repaired by the Scooterpac retailer from which it was purchased. In the event that a repair cannot be completed a replacement part will be fitted. -
Page 37: Ccmk2 Specification
Lighting Headlight: 24v 4w Indicator: 24v 1.7w Rear Light: 24v 1.7w Dashboard Digital dashboard display 4-Button Tiller Max Speed Dial Speed Mode Dial Locking Remote central locking Manual Locking Tyres Pneumatic 13” Scooterpac Cabin Car User Manual Page | 37... -
Page 38: Sizes & Weights
+/-3%. 1400w (4 Pole) motor Brakes Regenerative Electromechanical Battery Dual 12-volt deep cycle 75Ah & 100Ah Options Max Incline 12 degrees Seat Back height 28.75” / 730mm Seat Width 19” / 482mm Scooterpac Cabin Car User Manual Page | 38... -
Page 39: Servicing Intervals
The cabin car should be serviced every 12 months in order to keep it in safe working order. We recommend recording the services dates and locations on the sheets below. Always have your Cabin Car serviced at an authorised Scooterpac retailer, using original Scooterpac parts. - Page 40 Next Year Service Service Due Service Venue Technician Name Date of Service Mileage Notes Signed Next Year Service Service Due Service Venue Technician Name Date of Service Mileage Notes Signed Scooterpac Cabin Car User Manual Page | 40...
- Page 41 Next Year Service Service Due Service Venue Technician Name Date of Service Mileage Notes Signed Next Year Service Service Due Service Venue Technician Name Date of Service Mileage Notes Signed Scooterpac Cabin Car User Manual Page | 41...
- Page 42 Next Year Service Service Due Service Venue Technician Name Date of Service Mileage Notes Signed Next Year Service Service Due Service Venue Technician Name Date of Service Mileage Notes Signed Scooterpac Cabin Car User Manual Page | 42...
Need help?
Do you have a question about the Cabin Car Mk2 2019 and is the answer not in the manual?
Questions and answers
i have low battery light on and battery wil not charge
To fix low battery light and charging issues on the Scooterpac Cabin Car Mk2 2019:
1. Check the Battery – The battery is located under the seat, protected by a plastic shroud. Remove the seat by pulling upwards, then unscrew and lift off the battery cover. Inspect for any visible damage or loose connections.
2. Charge the Battery – Use either the internal charge port (on the tiller column) or the external charge port. Connect the supplied charge cable properly and avoid leaving it on charge permanently, as this can damage the battery.
3. Ensure Proper Charging Conditions – If using the external port, ensure the weatherproof connection is secure, especially in heavy storms.
4. Replace the Battery if Needed – If the battery fails to hold a charge, it may need replacement. Contact a certified Scooterpac retailer for a replacement.
5. Seek Professional Help – If issues persist, consult the Scooterpac retailer that supplied your Cabin Car for further assistance.
This answer is automatically generated